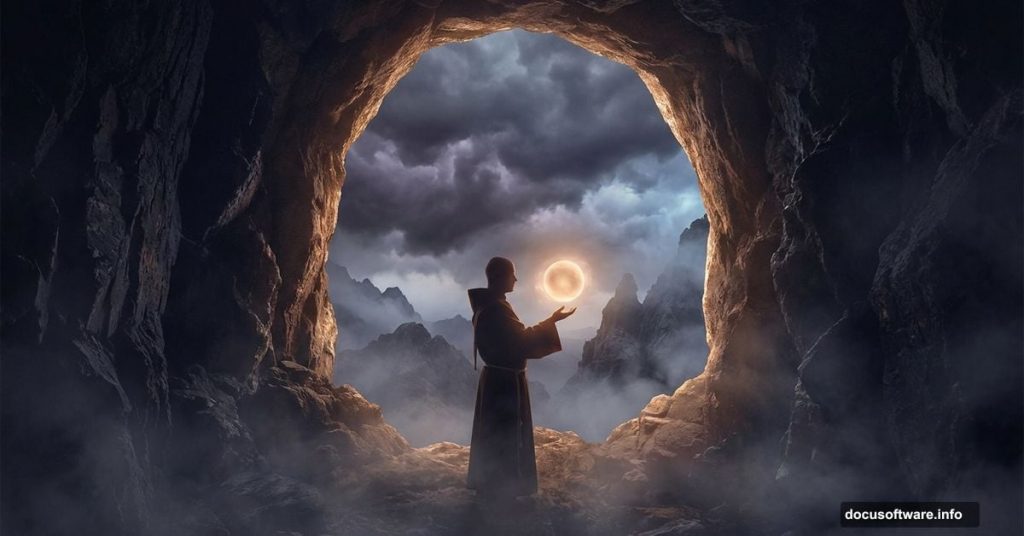
Ever look at a surreal digital painting and wonder, “How on earth did someone make that?” This tutorial breaks down exactly how to create a moody, atmospheric scene featuring a monk, a floating sphere, and a dramatic cave carved from rock.
By the end, you’ll know how to merge rock textures into a convincing cave, build 3D-style ropes using a cube as a reference, and paint a mountain scene rising through dramatic clouds. Whether you’re just getting comfortable with Photoshop or looking to sharpen your compositing skills, this project covers a lot of genuinely useful ground.
Gather Your Stock Images First
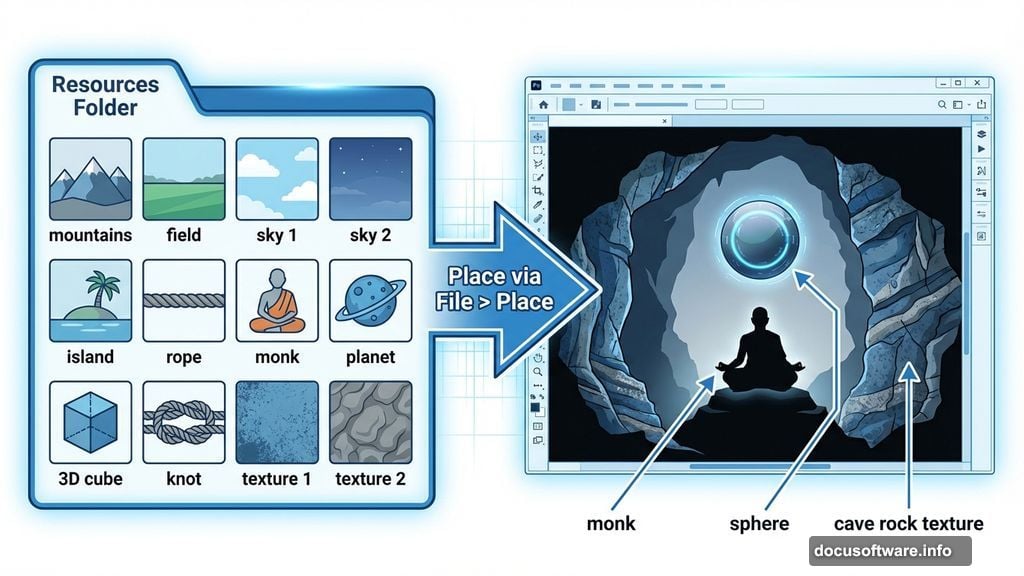
Before touching Photoshop, grab all the source images you’ll need. The full resource list includes mountains, a field, two separate sky photos, a little island, rope, a monk photo, a planet, a 3D cube reference, a knot, and two textures. Having everything downloaded and organized in one folder saves a lot of frustration later.
Good preparation makes the whole process smoother. Plus, knowing what each image is for helps you visualize the final result before you start building it.
Setting Up Your Photoshop File
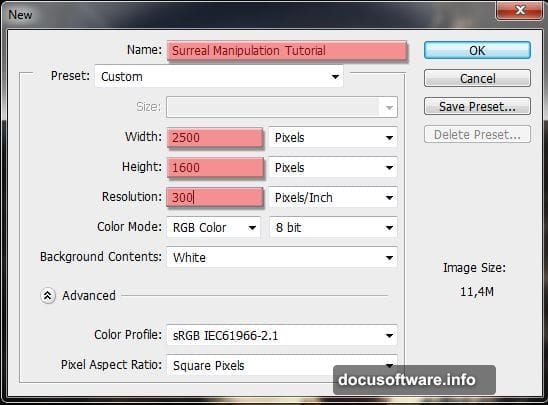
Create a new document with the settings shown in the tutorial preview. Name it whatever makes sense to you — the original file used “Surreal Manipulation Tutorial,” but your filename doesn’t affect anything.
Keep your document organized from the very beginning. Rename each layer as you add it. Double-click any layer name to change it. This habit pays off enormously once you’re 30 layers deep into a complex composite.
Building the Sky and Cloud Layers
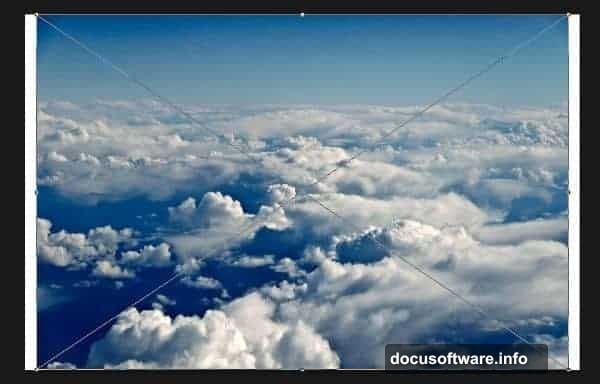
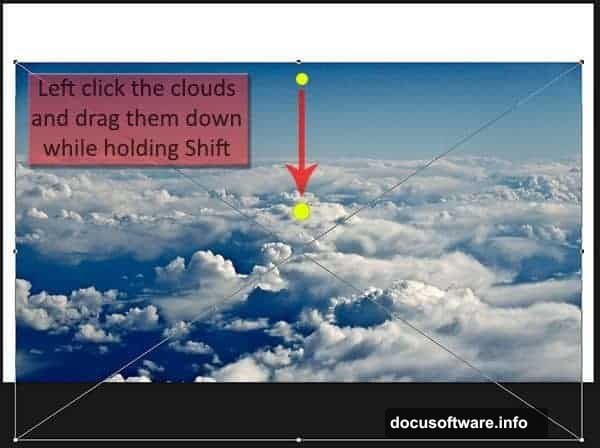
Go to File, then Place, and bring in your first sky image. Once it’s on the canvas, click the image, hold Shift, and drag it downward. Holding Shift keeps your movement locked to a single axis, so nothing goes sideways accidentally. Hit Enter to confirm the placement.
Repeat that process for the second cloud image. Then place the field photo and position it above the canvas top edge for now. You should end up with four layers total: two sky layers, a field layer, and your background.
Next, drag the field layer to the bottom of the layer stack. Delete the default Background layer if you have one — you won’t need it. Your canvas will start looking layered and purposeful, even if it’s still a bit rough at this point.
Blending the Clouds with Layer Masks
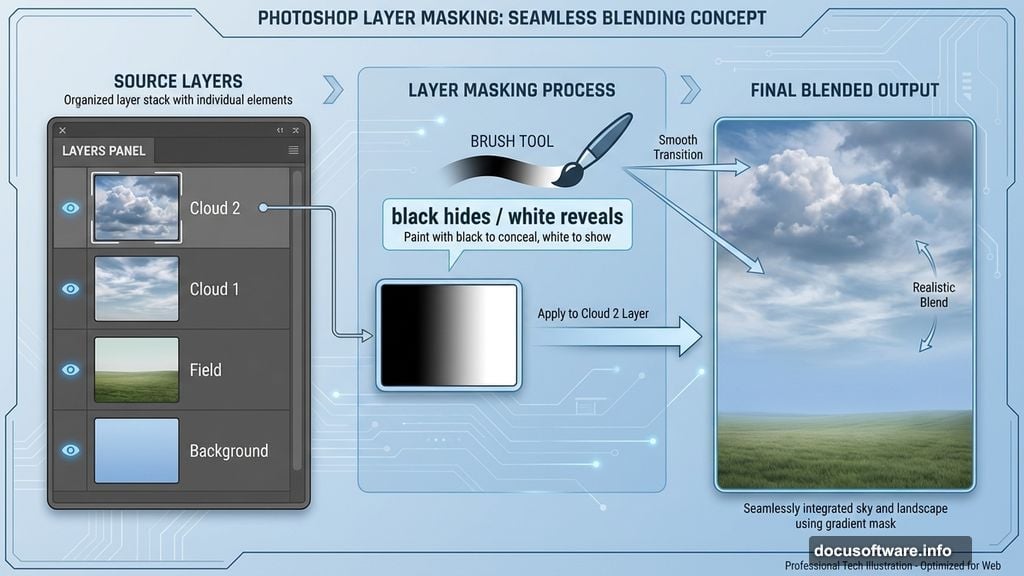
Right now the layers sit on top of each other without blending. That’s where layer masks come in. Click the layer mask button at the bottom of the Layers panel — it looks like a rectangle with a circle inside — while your Cloud 2 layer is selected.
Layer masks let you paint out parts of an image without deleting them permanently. Paint with black to hide areas, white to reveal them. This non-destructive approach means you can always go back and adjust edges later.
This step transforms the stacked sky images into a seamless, atmospheric background. Take your time here. Soft brush edges and gentle opacity settings give you much more control than hard eraser strokes ever would.
Sculpting the Cave from Rock Textures
This is where the tutorial gets genuinely creative. Instead of painting a cave from scratch, you’ll transform and merge different rock photo sections into something that reads convincingly as a cave interior.
The key is selecting irregular shapes from your rock source images and using Free Transform to bend and fit them together. Overlap the pieces, then use layer masks to blend the seams. Look at actual cave photos for reference as you build. Your brain knows what cave edges should look like, so trust your instincts when something feels off.
Group your cave layers into a folder once you’re happy with the shape. This keeps the Layers panel manageable. If you run into issues with clipping masks above group folders — a known quirk in older Photoshop versions like CS4 — merging the cave layers into a single smart object solves the problem while keeping things editable.
Creating Ropes That Form a 3D Cube Shape
This part sounds complicated but the approach is clever. Use a 3D cube reference image as your guide, then lay rope segments along each visible edge of the cube shape.
Place your rope stock image and duplicate it several times. Use Free Transform to rotate and scale each piece until it follows the cube’s perspective lines. The rope knot stock image handles the corner connections. Merge everything once it’s positioned correctly.
The result looks like a cube cage assembled from actual rope. It adds a dreamlike, constructed quality to the scene that fits the surreal mood perfectly.

Adding the Monk and Floating Sphere
Place your monk image and use the Pen tool or Quick Selection tool to cut the figure cleanly from its background. A good cutout here makes or breaks the whole composition.
Position the monk inside your cave, then add the planet or sphere image above him. Scale it so it feels imposing but not overwhelming. The sphere should feel like it belongs in the space — something the monk is contemplating or guarding, not just floating randomly.
Add a soft glow around the sphere using a new layer set to Screen blending mode. Paint with a large, very soft white or pale yellow brush at low opacity. This sells the idea that the sphere actually emits light.
Lighting the Scene for Atmosphere
Lighting is what separates a good composite from a great one. Create a new layer above your cave group and set it to Multiply blending mode for shadows, or Screen for highlights. Clip it to your cave layer so the light only affects the rock.
Paint soft, directional shadows on the cave walls using dark brown or desaturated colors. Then switch to a Screen layer and paint warm light spilling in from the cave opening. The contrast between deep shadow and warm exterior light creates immediate depth.
Apply the same approach to the monk figure. Darken the side facing away from the light source. Brighten the side facing the cave opening. Consistent lighting direction is what makes all the separate elements feel like they exist in the same physical space.
Finishing the Mountain Scene Above the Clouds
Place your mountains image and position it so the peaks emerge from the top of the cloud layer. Use a layer mask to blend the base of the mountains into the clouds. The goal is making it look like the mountains are genuinely rising above a cloud bank, not just sitting on top of it.
Add a Color Balance or Hue/Saturation adjustment layer clipped to the mountains to match their color temperature to the rest of the scene. Mountains photographed in bright daylight will look out of place in a moody, atmospheric composite unless you cool and darken them slightly.
Final Touches That Pull Everything Together
Add a single Color Lookup or Gradient Map adjustment layer at the very top of your layer stack to unify the color palette. Even a subtle adjustment that slightly desaturates and warms the entire image makes all the separate elements look like they belong together.
Then add a subtle vignette. Create a new layer, set it to Multiply, and paint dark edges around the canvas perimeter with a huge soft brush. This draws the eye naturally toward the monk and sphere at the center.
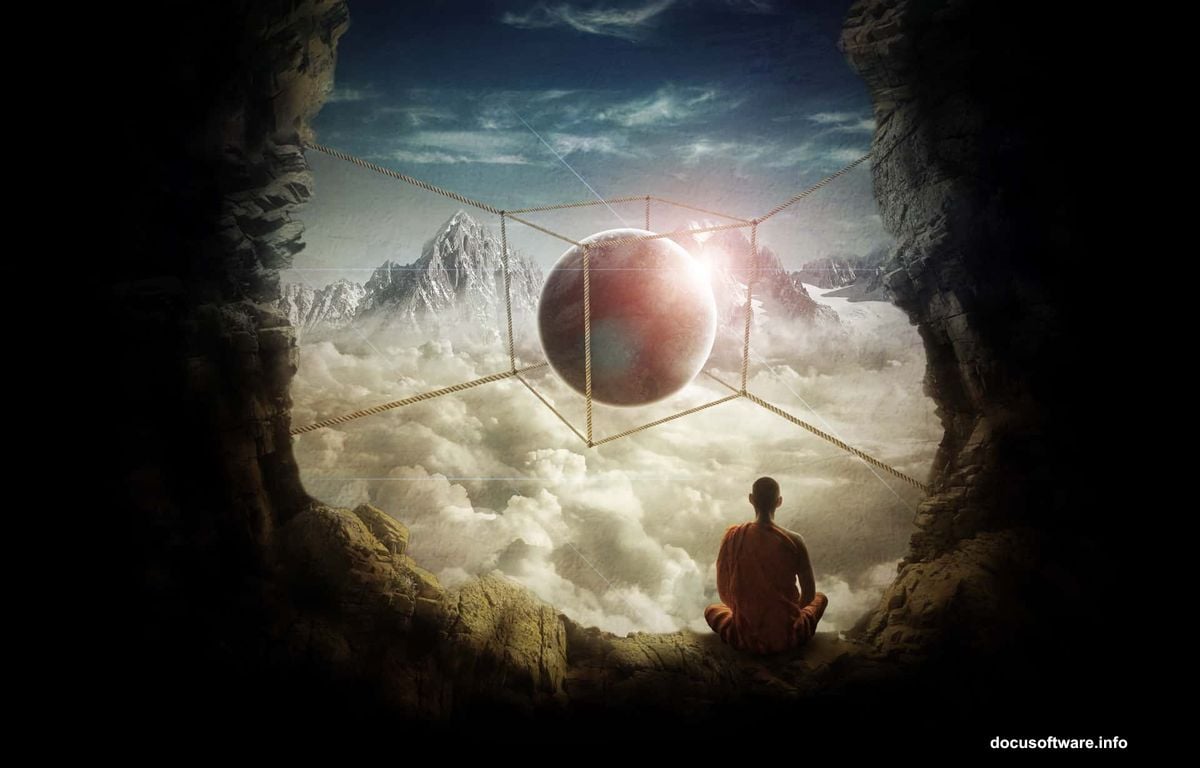
Step back and compare your final result to the preview image. The techniques you’ve worked through here — layer masking, clipping masks, blending modes, and directional lighting — are exactly the skills that show up in nearly every serious compositing project. You’ll carry them into every photo manipulation you build from here.