Ask any cartoonist what they dread most about making comics, and the answer is almost always the same: adding color. It’s slow, repetitive, and honestly kind of painful on larger projects.
But here’s the thing. With a few smart Photoshop tricks, you can color and shade lineart surprisingly fast. This tutorial walks you through the whole process, step by step, using Photoshop CS6. The tools work in earlier versions too.
Here’s a look at what a finished comic strip panel looks like using this method.

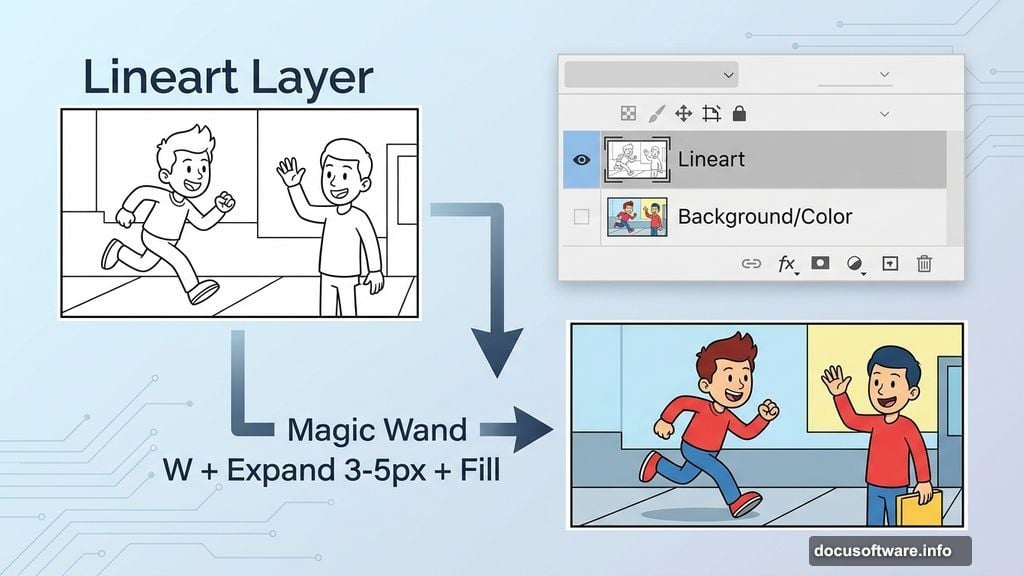
Set Up Your Layers the Right Way
First things first. Open your black and white artwork and make sure your lineart sits on its own separate layer above the background layer. That part is critical.
Why? Because you’ll be adding color to the bottom layer, keeping it cleanly separated from your line art. This method works best with simple comic-style artwork, but you can adapt it to other styles with a bit of patience.
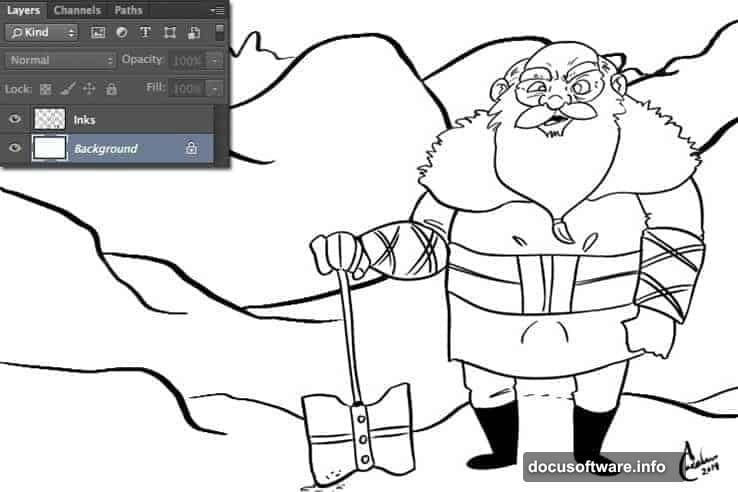
Select your background layer before moving on to the next step.
Magic Wand Tool Does the Heavy Lifting
With your background layer selected, grab the Magic Wand tool by pressing W. Before you click anything, check your settings. Set Tolerance to 0, uncheck Anti-Alias, and make sure both Contiguous and Sample All Layers are checked.
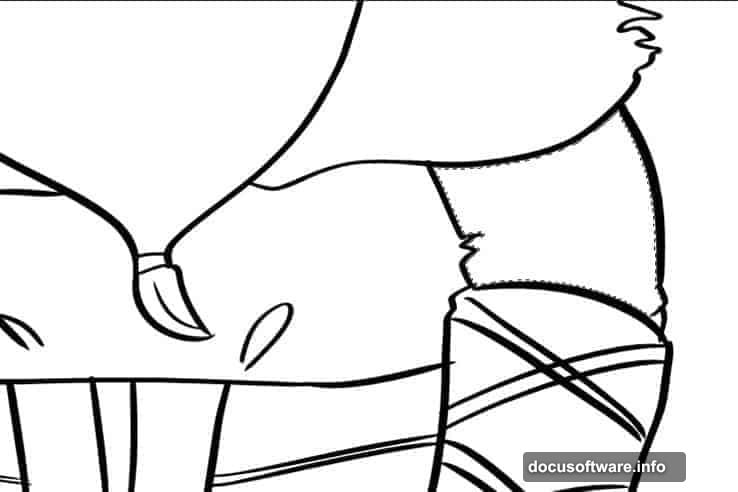
Now click on the area of artwork you want to fill with color. You’ll see the classic “marching ants” selection appear around the edges.
Expand Your Selection First
Here’s a tip most beginners skip, and it makes a big difference. Notice how the marching ants sit just inside the boundary of your lineart? If you fill right now, a thin white gap will show around the edges. Not a good look.
Instead, go to Select, then Modify, then Expand. Choose somewhere between 3 and 5 pixels. This pushes your selection slightly outward so the color fills right up to the lineart boundary with no gaps.
Now you can fill. Use Option + Shift + Delete on Mac, or Alt + Shift + Backspace on Windows. Repeat this process for each section of your artwork until everything is colored in.
Any awkward areas the Magic Wand misses? Just grab the Lasso tool, trace around the problem spot, and fill it manually. Quick fix, no stress.
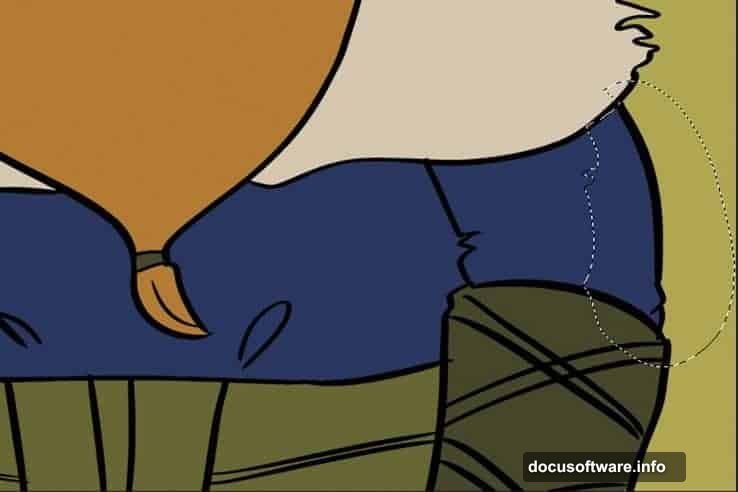
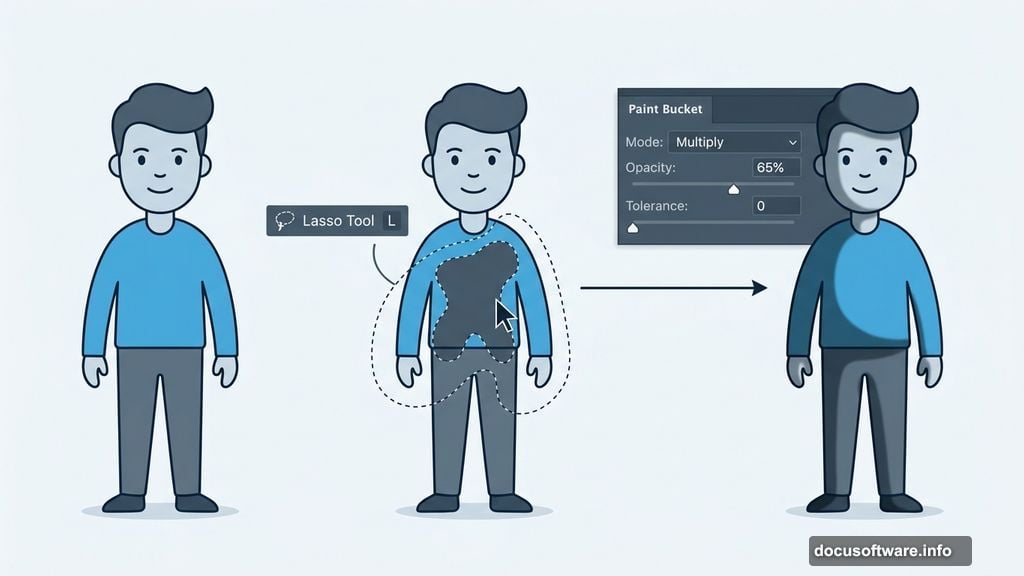
Adding Shading Without the Headache
Once your flat colors are in, it’s time for shading. Pick the Lasso tool by pressing L. Draw a shape over the area where the shadow would naturally fall. Think about the object’s form and light source as you do this. Your selection should suggest actual depth and contour, not just a random blob.
Next, grab the Paint Bucket tool by pressing G. This is where the magic setting comes in. Set the Mode to Multiply, drop Opacity to 65% or even lower if you want a subtler shadow, and set Tolerance to 0 with Contiguous checked. Make sure Anti-Alias and All Layers are both unchecked.
Fill your lasso selection with a color. Multiply mode blends the fill into whatever color sits beneath it, creating a natural-looking shadow every time. Repeat for each shaded area.
Why This Workflow Saves Real Time
The combination of selection expansion, keyboard shortcuts, and Multiply mode shading cuts coloring time dramatically on larger comic projects. Instead of painting carefully around every edge, you’re letting Photoshop handle the precision work.
Plus, because your lineart and color layers stay separate, you can adjust colors or shading later without touching the original lineart. That kind of non-destructive flexibility is worth building into your workflow from the start.
Cartoon coloring doesn’t have to feel like a chore. With these Photoshop tools in your corner, it genuinely isn’t.