
Ask any cartoonist what they hate most about making comics, and the answer is almost always the same: adding color. It’s tedious, time-consuming, and honestly a little soul-crushing when you have pages of lineart waiting to be filled.
But there’s a faster way. This Photoshop tutorial walks you through a quick method for adding cartoon color and shading to lineart, along with a few shortcuts that save serious time on larger projects. The technique works in Photoshop CS6 and older versions too.

Set Up Your Layers First
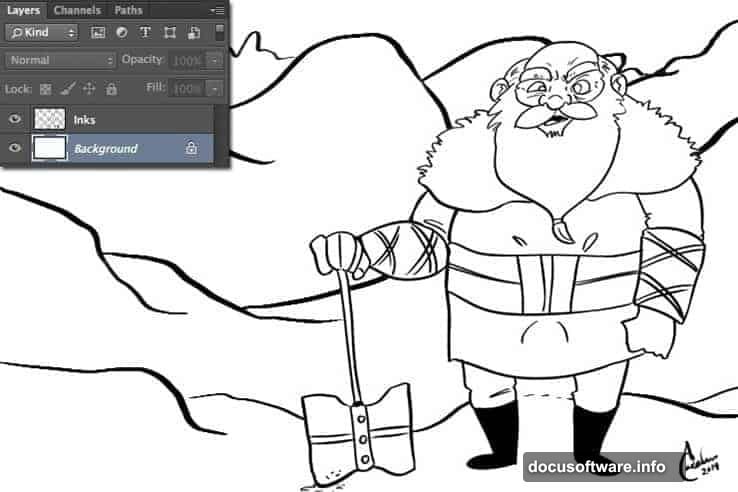
Before anything else, your file needs the right structure. Open your black and white artwork and make sure the lineart sits on a separate layer above the background layer.
This matters because you’ll be adding color to the bottom layer, not the lineart layer. Keep that background layer selected throughout the coloring process. The method works best with simple comic-style artwork, but you can adapt it to other illustration styles too.
Magic Wand Selection Settings
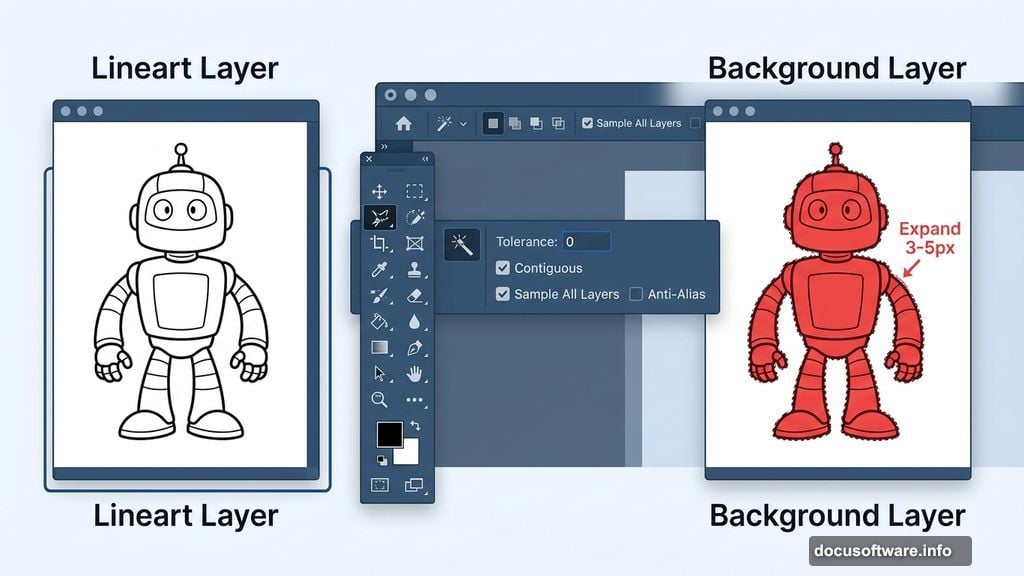
With your background layer selected, grab the Magic Wand tool by pressing W. Your settings need to be exactly right here, so double-check these before clicking anything.
Set Tolerance to 0, uncheck Anti-Alias, and make sure both Contiguous and Sample All Layers are checked. Then click the area of artwork you want to fill with color.
Expand Your Selection to Avoid White Gaps
Here’s where most people make a mistake. Don’t fill the color just yet.
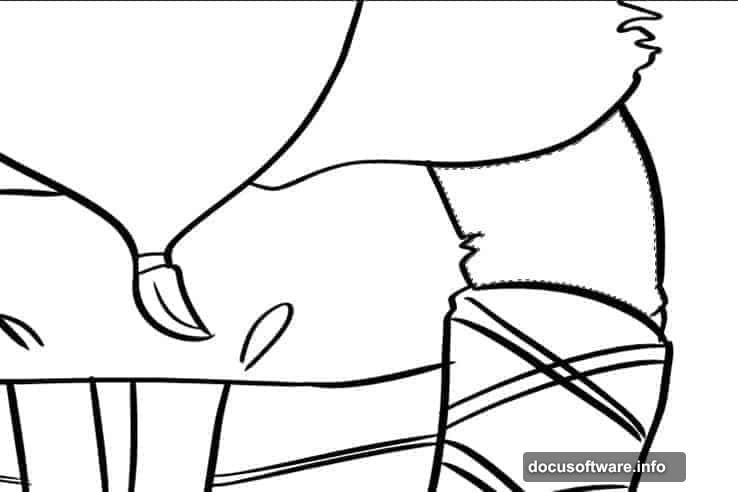
Look at your selection and you’ll notice the marching ants sit just inside the lineart boundaries. If you fill right now, you’ll get a thin white gap between the color and the lines. Instead, go to Select, then Modify, then Expand. Choose somewhere between 3 and 5 pixels. This pushes the selection slightly outward and eliminates those annoying white edges when you fill.
Now fill the area using Opt + Shift + Del on Mac, or Alt + Shift + Backspace on Windows. Repeat this for every section of the artwork until everything is fully colored. For any tricky areas the Magic Wand misses, the Lasso tool handles those quickly.
Adding Shading With the Lasso Tool
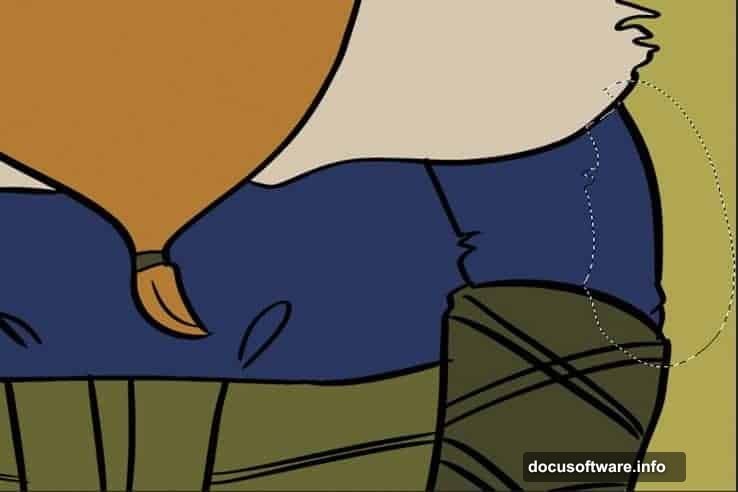
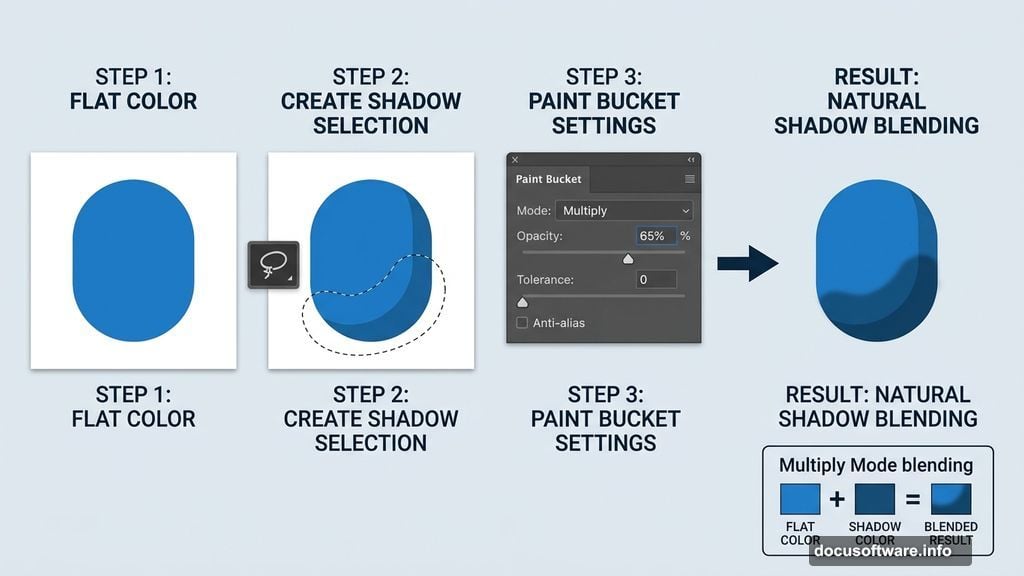
Once your flat colors are done, it’s time for shading. Switch to the Lasso tool by pressing L, then draw a shape over the area where the shadow should fall. Think about how light hits the object and let that guide your selection. The goal is to give the shape real contour and dimension.
Next, grab the Paint Bucket tool by pressing G. This is the key part. Set the Mode to Multiply, drop the Opacity to around 65% or lower, set Tolerance to 0, and check Contiguous. Make sure Anti-Alias and All Layers are both unchecked.
Fill the lasso selection and watch the shadow appear naturally over your flat color. Multiply mode blends the fill with whatever color sits underneath, so your shading always looks clean and intentional rather than muddy.
Why This Method Works So Well
The real magic here is the combination of two things: expanding selections to prevent gaps, and using Multiply mode for shading. Most beginners fill colors directly and then layer flat gray shadows on top. The result looks stiff.
Multiply mode changes everything. It respects the color below it, so a shadow over a red area looks like a darker red, not a gray smudge. Plus it’s completely non-destructive to your lineart layer sitting above.
Once you build muscle memory with these shortcuts, coloring a comic panel goes from a two-hour slog to something you can knock out in minutes. And honestly? That’s the kind of speed that keeps creative projects fun instead of exhausting.