
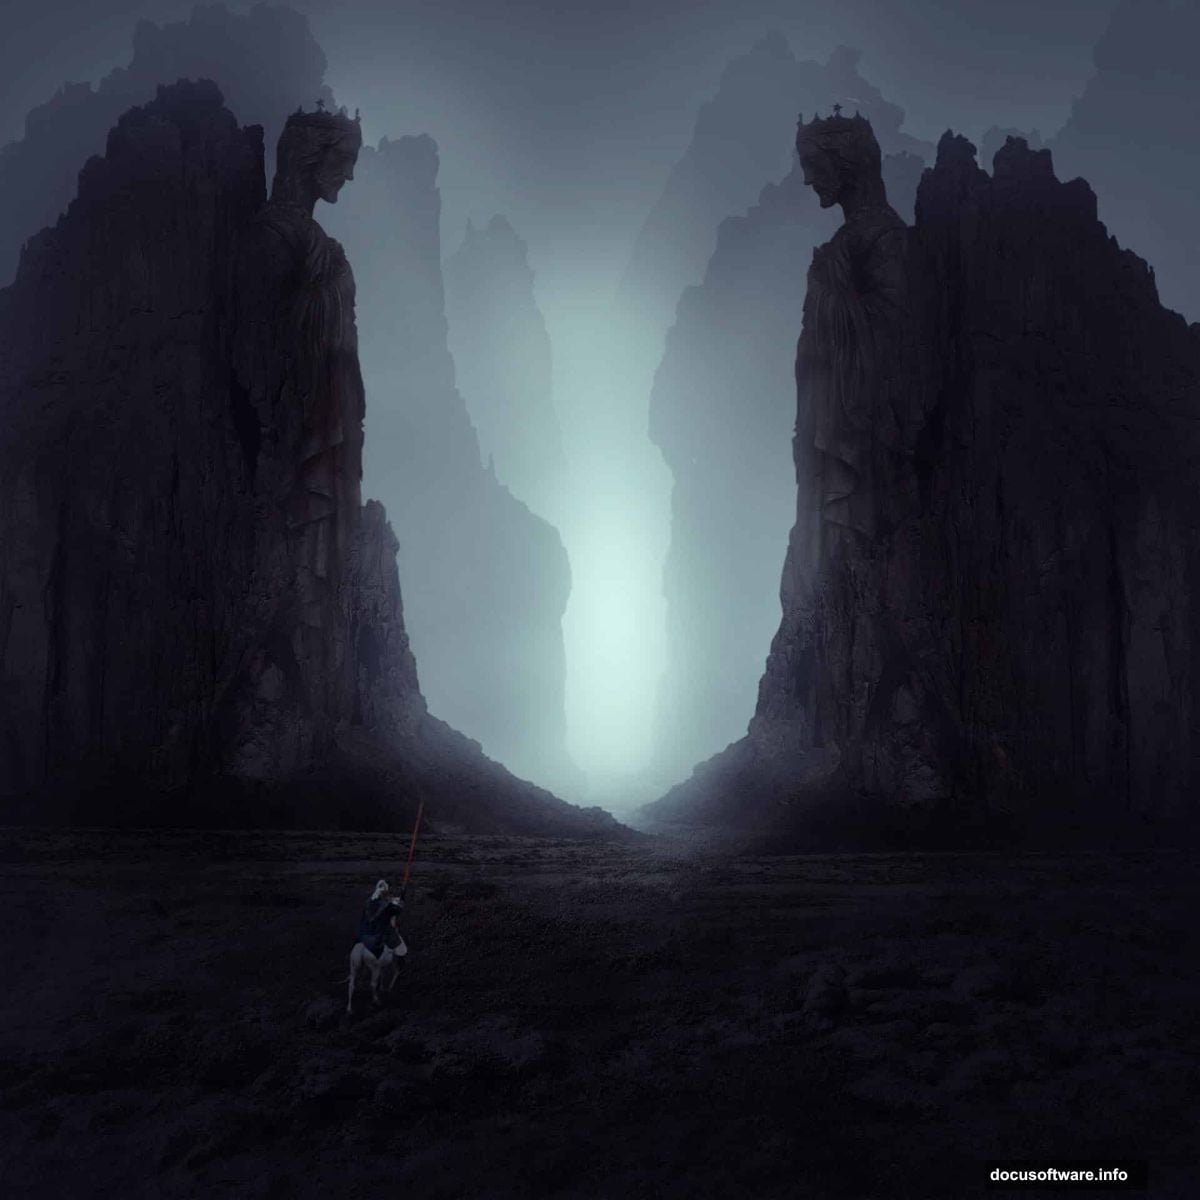
So you want to build a haunting, cinematic landscape from scratch using just a handful of stock photos. Good news: it’s more approachable than it looks, and the results are genuinely stunning.
This tutorial walks you through creating a dark, atmospheric matte painting in Photoshop. You’ll combine multiple images into one seamless scene, layer in moody lighting, and build that signature misty depth that makes fantasy artwork feel alive. Whether you’re a weekend hobbyist or a working designer, these photo manipulation techniques translate directly into real creative projects.
Here’s what you’ll need: Photoshop CS2 or newer, plus a few free stock images. We’ll cover the landscape base, rocky foreground elements, a statue, a knight figure, misty atmosphere, and final color grading. Let’s build something atmospheric.
Setting Up Your Rocky Base Scene
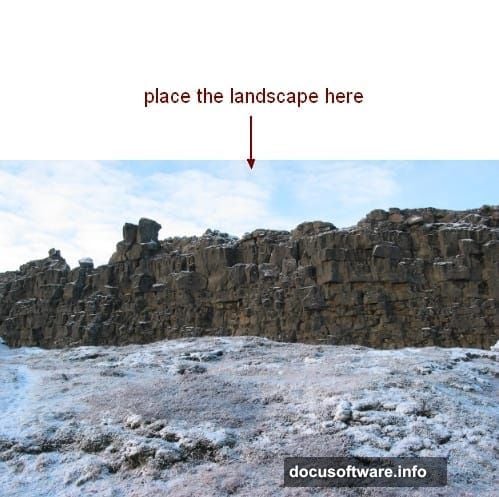
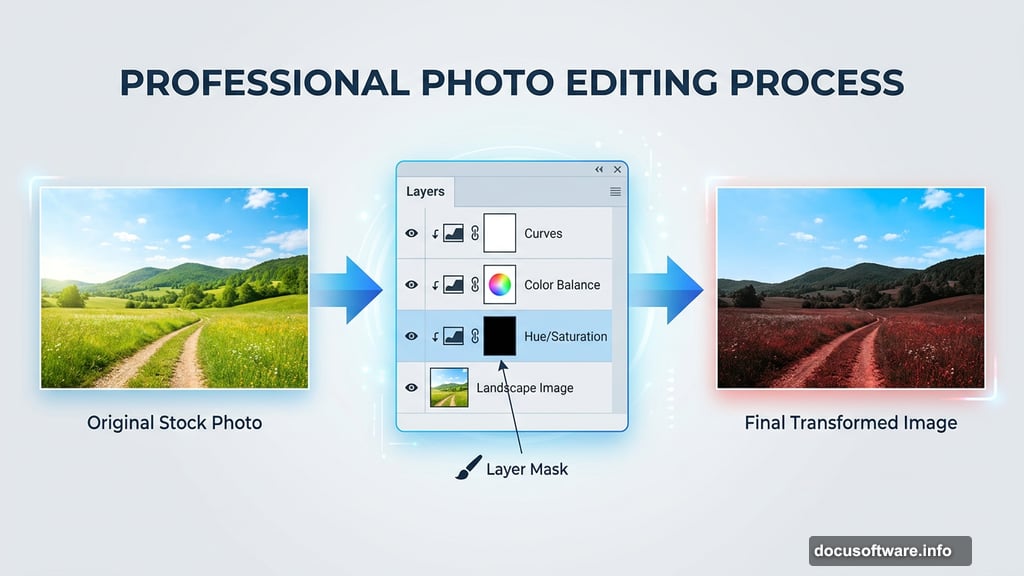
Start by creating a new document in Photoshop with your preferred canvas size. Then open your landscape image and drag it onto the white canvas using the Move Tool (V). Position it so the ground sits naturally in the lower portion of the frame.
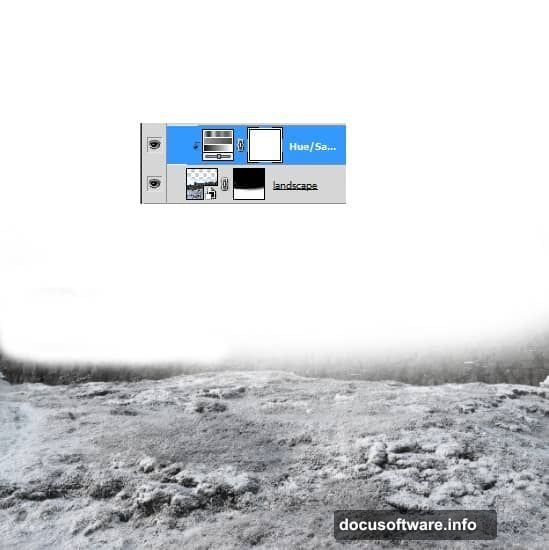
Next, add a layer mask by clicking the second icon at the bottom of the Layers panel. Grab a soft round brush set to black and paint away the sky and any upper rock areas. The goal here is keeping only the ground visible. Clean masking at this stage saves you a lot of headache later.
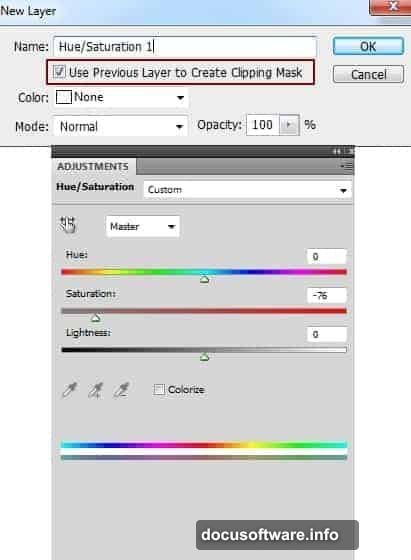
Now add three quick adjustment layers with Clipping Masks to prep the ground:
- Hue/Saturation to pull back the natural color saturation
- Color Balance to push a slight red tone into the ground
- Curves to darken the overall ground brightness
These three tweaks turn a bright, cheerful landscape into something that already feels foreboding. Small adjustments compound into a completely different mood.
Building the Rock Formations
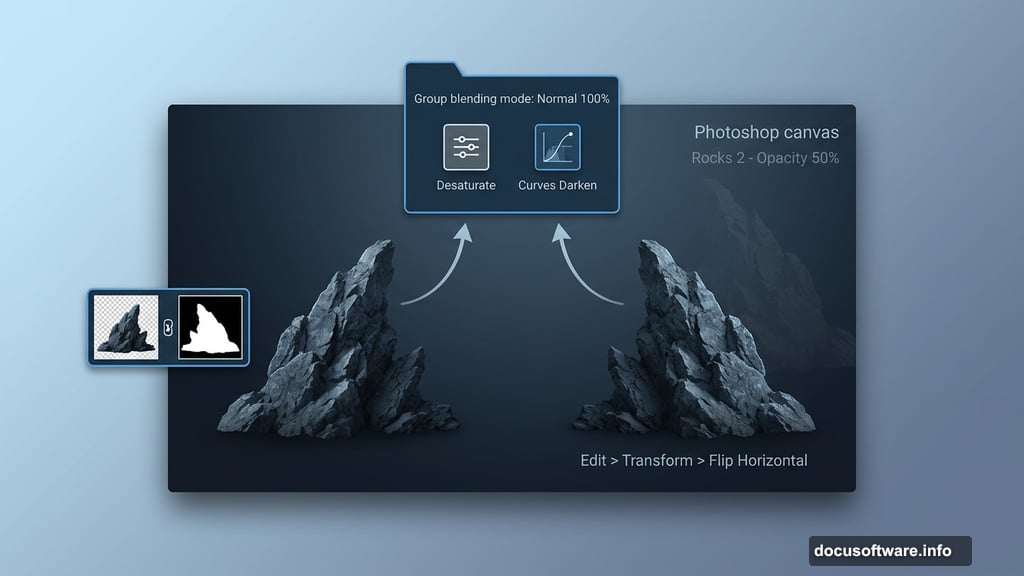
Open your first rock image and move it to the right side of the scene. Remove its background with a layer mask, being careful around jagged edges. Then duplicate that layer, flip it horizontally using Edit > Transform > Flip Horizontal, and position the copy on the left side. Now you have matching rock formations framing your scene.
Select all your rock layers and press Cmd/Ctrl+G to group them. This next part matters: change the group blending mode from Pass Through to Normal at 100%. That keeps your adjustment layers inside the group from affecting anything underneath.
Inside that group, add two more adjustment layers:
- Hue/Saturation set to desaturate the rocks heavily
- Curves to push them darker
Rocks in dark, moody paintings almost never look right at full saturation. Pulling the color out makes them feel ancient and heavy, which is exactly what you want.
Adding Depth With Secondary Rock Layers
Place your rocks 2 image behind the first rock group and drop its opacity down to 50%. Position this layer below the main rock group in the panel. Use a layer mask to soften the hard edges and remove any overlapping elements on the right side.
This lower-opacity layer creates a genuine sense of depth. Objects in the distance naturally fade and lose contrast, so varying opacity between your rock layers mimics how real atmosphere works. It’s a simple trick that makes composite images feel three-dimensional instead of flat.
Blending the Statue and Knight
Adding figures to your scene is where the painting really comes alive. Open your statue image and position it within the rocky frame. Use adjustment layers with Clipping Masks to match its color temperature and brightness to the surrounding scene.
The key technique here is using masking combined with a soft brush to blend the figure’s base into the ground. Hard edges between a figure and its environment immediately break the illusion. Spend extra time here painting away stiff transitions at ground level.
Repeat the same process for the knight figure. Think about light direction before you finalize placement. Your scene has an implied light source, and both figures need shadows and highlights that match it. A Curves adjustment layer with a Clipping Mask lets you selectively darken areas that should fall into shadow.
Creating the Misty Atmosphere
Here’s where the painting jumps from “nice composite” to “genuinely eerie.” Add a solid color fill layer using a muted, cool blue-gray tone. Set its blending mode to something like Screen or Soft Light and lower the opacity until the mist feels natural rather than like a filter slapped on top.
Use a layer mask on this fill layer to control where the mist appears. Paint the mask with a large, soft brush at low opacity. Mist naturally collects near the ground and in mid-distance areas. So concentrate it there rather than applying it uniformly across the whole image.
This atmospheric haze also helps sell your depth of field effect. Distant elements disappear into the mist while foreground rocks stay sharp and detailed. That contrast between near and far is what makes cinematic landscapes feel vast.
Final Color Grading and Lighting
The last phase pulls everything together. Add a Curves adjustment layer at the very top of your layer stack and create a subtle S-curve to boost overall contrast. Then adjust the individual RGB channels to push the image toward a cooler, darker palette.
For lighting enhancement, try painting on a new blank layer set to Soft Light blending mode. Use a large, soft brush with a warm orange or gold tone at very low opacity. Paint gently where you want implied light sources to catch edges, like the top of the statue or the upper edges of the rocks.
Finally, step back and assess the overall composition. Does the eye travel naturally through the scene? Are there any areas that feel too bright or too flat? A few targeted Curves adjustments with masked areas can fix almost any remaining imbalance.
The beauty of building a painting this way is that every element stays editable. You can go back and adjust the rock color, deepen the mist, or shift the overall color grade at any point without starting over. That non-destructive workflow is what separates a polished final piece from a frustrating dead end.
Dark matte painting is genuinely one of the most satisfying things you can build in Photoshop. Every stock photo you pull in gets transformed into something completely new. And once you understand how masking, blending modes, and adjustment layers work together, the creative possibilities feel almost limitless.