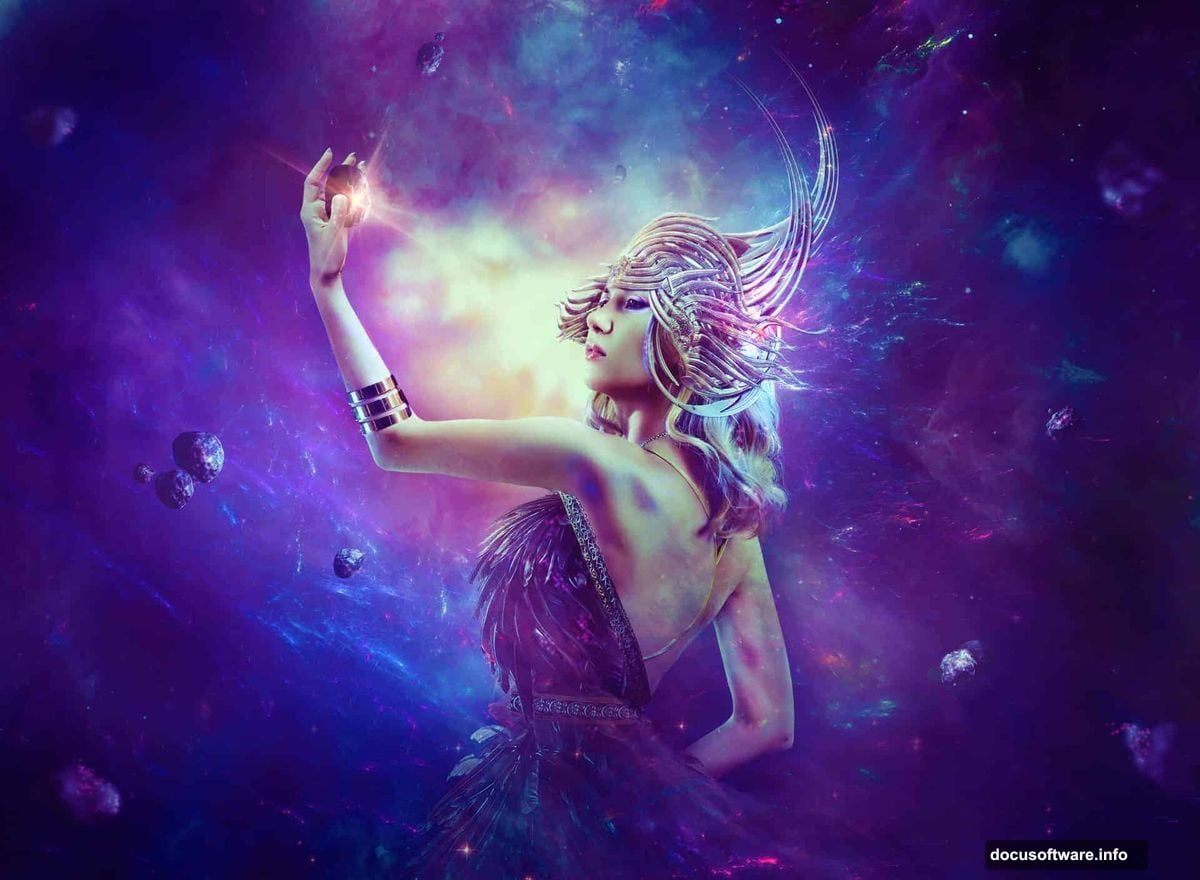
Want to build a stunning fantasy portrait in Photoshop? This tutorial walks you through creating a ethereal woman with wing dress and celestial elements.
You’ll learn essential photo manipulation techniques that work for any fantasy project. Plus, most steps use tools you already know. The magic happens when you combine them strategically.
We’ll start with background setup and model retouching. Then we’ll construct a dramatic wing dress and ornate headpiece. Finally, we’ll layer in nebulas, asteroids, and lighting effects to create that otherworldly atmosphere.
Ready? Let’s build something magical.
Gather Your Resources First
Before diving in, collect these elements:
- Background landscape image
- Model photo (full body works best)
- Wing textures or 3D objects
- Dragon armor details for the headpiece
- Four different nebula images
- Asteroid belt stock photos
- Light overlay textures
Having everything organized saves frustration later. Trust me on this.
Build Your Canvas Foundation
Create a new document at 3000×2200 pixels. Fill it with white for now.
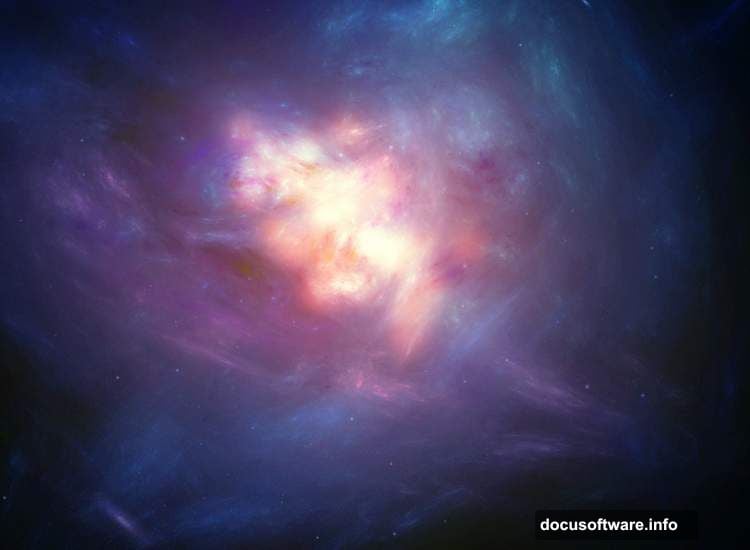
Open your background landscape image. Use the Move Tool (V) to drag it onto your white canvas. Convert this layer to a Smart Object so you can adjust it non-destructively later.
Hit Ctrl+T to activate Free Transform. Scale the background until it fills your entire canvas. Don’t worry about slight quality loss since we’ll blur it anyway.
Now go to Filter > Blur > Gaussian Blur. Set the radius to 8 pixels. This creates depth by keeping focus on your subject instead of the background.
Perfect the Background Atmosphere
Time to adjust the mood. Create a Curves adjustment layer and set it as a Clipping Mask.
Drag the curve upward to increase overall brightness. But here’s the trick: grab a soft black brush and paint on the layer mask. Focus on the middle section and lower left area. This selective darkening adds dimensional lighting that feels natural.
Next, add a Color Balance adjustment layer (also clipped). In the Midtones settings, push the sliders toward warmer tones. This creates that fantasy sunset atmosphere.
Make another Curves adjustment layer to darken edges. On its mask, paint with a soft black brush in the center. Leave the darkness visible on corners and the lower right. This vignette effect draws eyes toward where your subject will stand.
Prepare Your Model
Open your model photo. Extract her from the background using your preferred selection method. I recommend the Select Subject feature for speed, then refine edges manually.
Press Ctrl+J to duplicate the extracted model onto a new layer. This gives you a backup if something goes wrong.
Create a fill layer between your background and model. Pick a neutral tone like #847465. This helps you see extraction issues you might have missed.
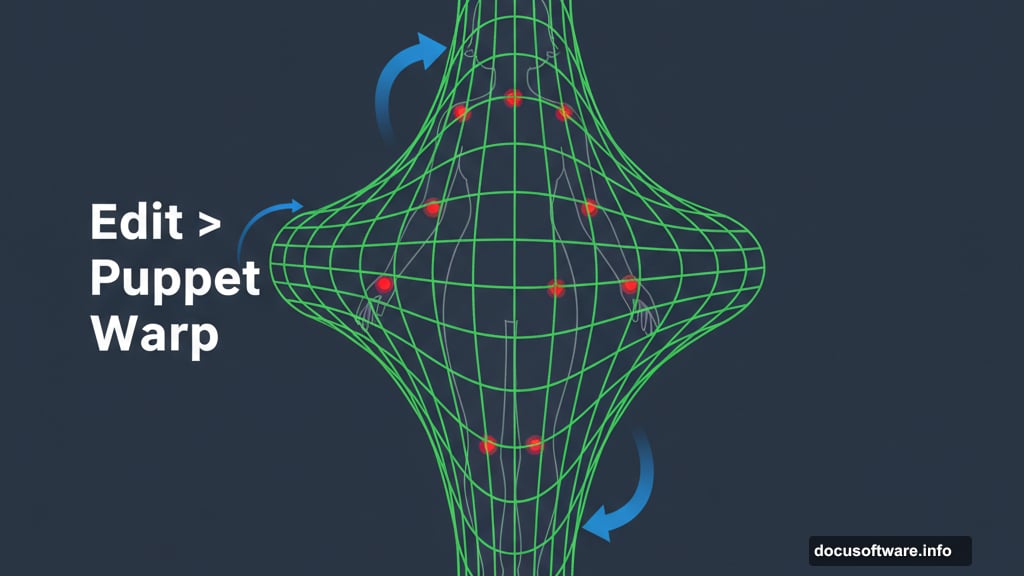
Here comes the fun part. Go to Edit > Puppet Warp. Place pins at key joint points. Adjust her raised arm to a lower position so she appears to be gazing at something in her hand. This small pose change makes the composition more dynamic.
Add Hair Details
Real hair never looks perfect in extractions. So we’ll paint some in.
Create two new layers above your model. Grab a small brush and sample colors from her existing hair. I used #b57d2a for darker strands and #e0c7a9 for highlights.
Paint additional hair strands around her head. Follow the natural flow direction. Vary your brush size and opacity for realistic texture. This takes patience but transforms the final look.
Merge and Position Your Subject
Hide your background and fill layers temporarily. Press Ctrl+Shift+Alt+E to merge all visible layers into one new layer.
Move this merged model layer into your main canvas. Go to Edit > Transform > Flip Horizontal. This creates better visual flow for Western viewers who read left to right.
Position her in the center of your scene. Make sure she’s large enough to be the clear focal point.
Construct the Wing Dress
This step creates the signature fantasy element. Open your wing images or 3D objects.
Extract individual wing sections. Place them around your model’s torso and arms to form a dress-like structure. Use Free Transform (Ctrl+T) and Warp to bend wings around her body’s curves.
Blend each wing section with a layer mask. Paint with a soft black brush where wings should fade into her body. Adjust opacity on wing layers until they feel integrated rather than pasted on.
Add a Hue/Saturation adjustment layer clipped to your wing layers. Match the wing colors to your overall scene palette. I aimed for warm browns and golds.
Build the Ornate Headpiece
Open your dragon armor texture. Extract decorative elements that work for a crown or headpiece.
Arrange these pieces around your model’s head. Use Warp to curve them naturally with skull shape. Scale individual elements so they feel proportional.
Create shadows under the headpiece. Make a new layer set to Multiply blend mode. Paint with a soft brush using dark brown sampled from shadows on her face.
Add highlights on the headpiece using a layer set to Screen mode. Paint with light gold where light would naturally hit raised surfaces.
Layer in Celestial Elements
Open your first nebula image. Drag it into your canvas above all other layers. Set the blend mode to Screen or Lighten. Both remove dark areas while keeping colorful clouds.
Scale and position the nebula where you want cosmic atmosphere. Use layer masks to fade edges so it blends seamlessly.
Repeat this process with your other three nebula images. Vary their sizes, positions, and opacities. Too much looks chaotic, so use restraint.
For each nebula layer, consider adding a Hue/Saturation adjustment (clipped) to shift colors toward your overall palette.
Add Asteroid Details
Open your asteroid belt images. Extract individual asteroids or small groups.
Place these around your scene at varying sizes. Smaller asteroids in background areas. Larger ones in foreground for depth.
Set asteroid layers to blend modes like Multiply or Overlay. This helps them feel embedded in the atmosphere rather than flat.
Add motion blur (Filter > Blur > Motion Blur) to some asteroids. This suggests movement and makes the scene more dynamic.
Create Light and Glow Effects
Make a new layer set to Screen blend mode. Use a soft brush with bright yellow or white. Paint glowing spots around your model and on key elements.
Vary your brush size and opacity. Build up glow gradually rather than one strong paint stroke.
Go to Filter > Blur > Gaussian Blur on this glow layer. Set radius between 10-15 pixels depending on how diffused you want the light.
Create another layer for sharper light dots. Use a small hard brush with white. Click individual dots around the scene like stars or magic particles.
Apply an Outer Glow layer style to this dot layer. Set it to a warm color that matches your palette.
Final Color Adjustments
Create a Curves adjustment layer at the top of your layer stack. Make subtle S-curve to boost contrast. Be gentle here since you’ve already done significant color work.
Add a Color Balance adjustment layer. In Midtones, push slightly toward yellows and reds for warmth. In Highlights, add a touch of cyan or blue for atmospheric perspective.
Make a Vibrance adjustment layer. Increase Vibrance slider between 20-40. This enriches colors without oversaturating skin tones like Saturation would.
Polish and Enhance
Zoom in to 100% and inspect edges around your model. Use a small eraser with reduced hardness to soften any harsh extraction lines.

Check your wing dress blending. Add more mask painting if any areas look pasted on.
Review your lighting consistency. All light should appear to come from the same source direction. Add or remove glow effects to maintain this.
Create a final merged layer (Ctrl+Shift+Alt+E). Go to Filter > Sharpen > Smart Sharpen. Use a low amount (around 50%) with a small radius (0.5-1.0). This adds crispness without artifacts.
Save Your Masterpiece
Save your PSD file with all layers intact. You’ll thank yourself later when you want to adjust something.
Then save a flattened JPG for sharing. Go to File > Export > Export As. Choose JPG at maximum quality.
For web use, resize to around 2000 pixels on the longest side. This maintains quality while keeping file size reasonable.
What Makes This Technique Work
Fantasy photo manipulation succeeds when all elements feel cohesive. That happens through consistent lighting, unified color palette, and careful blending.
The wing dress works because we matched its tones to the scene. The nebulas integrate because we used screen blend modes and selective masking. The model feels grounded because we added proper shadows and highlights.
Every adjustment layer serves a purpose. None exist just because. That intentionality shows in the final image.
Common Mistakes to Avoid
Don’t skip the Smart Object conversion on your background. You’ll want that flexibility.
Avoid harsh edges on extracted elements. Soft, feathered edges blend better than hard cuts.
Watch your light direction. Inconsistent lighting destroys believability faster than anything else.
Don’t oversaturate. Fantasy doesn’t mean neon. Subtle, rich colors work better than eye-searing brightness.
Take breaks. Your eyes get tired and miss issues. Come back fresh and you’ll spot problems immediately.
Take This Further
This technique works for any fantasy portrait. Swap nebulas for forest elements. Replace wings with flowing fabric. Add weapons instead of jewelry.
The core principles remain the same: unified palette, consistent lighting, careful blending, and intentional adjustments.
Experiment with different blend modes. Try various adjustment layer combinations. Build your own toolkit of techniques that work for your style.
Most importantly, have fun. Photo manipulation should feel like play, not work. When you’re enjoying the process, better results follow naturally.