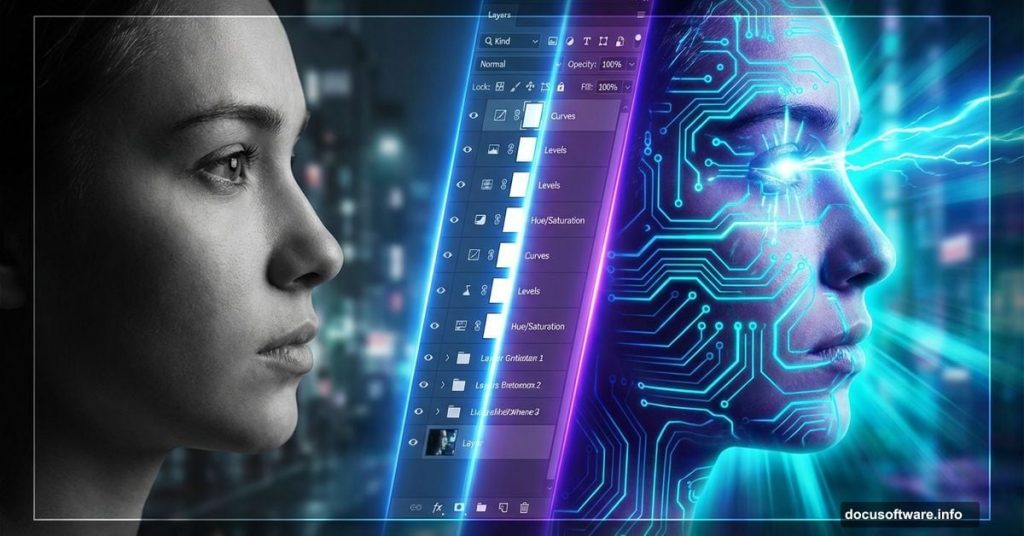
Want to build a futuristic cyborg portrait with glowing neon effects? This tutorial walks through the complete process, from blending urban backgrounds to adding atmospheric lighting.
The technique combines photo manipulation with digital painting. Plus, you’ll learn how to use adjustment layers, blend modes, and Camera Raw filters to achieve a polished sci-fi aesthetic.
Let’s break down each step.
Set Up Your Canvas Properly
Start with the right dimensions. A larger canvas gives you flexibility for printing or high-resolution displays.
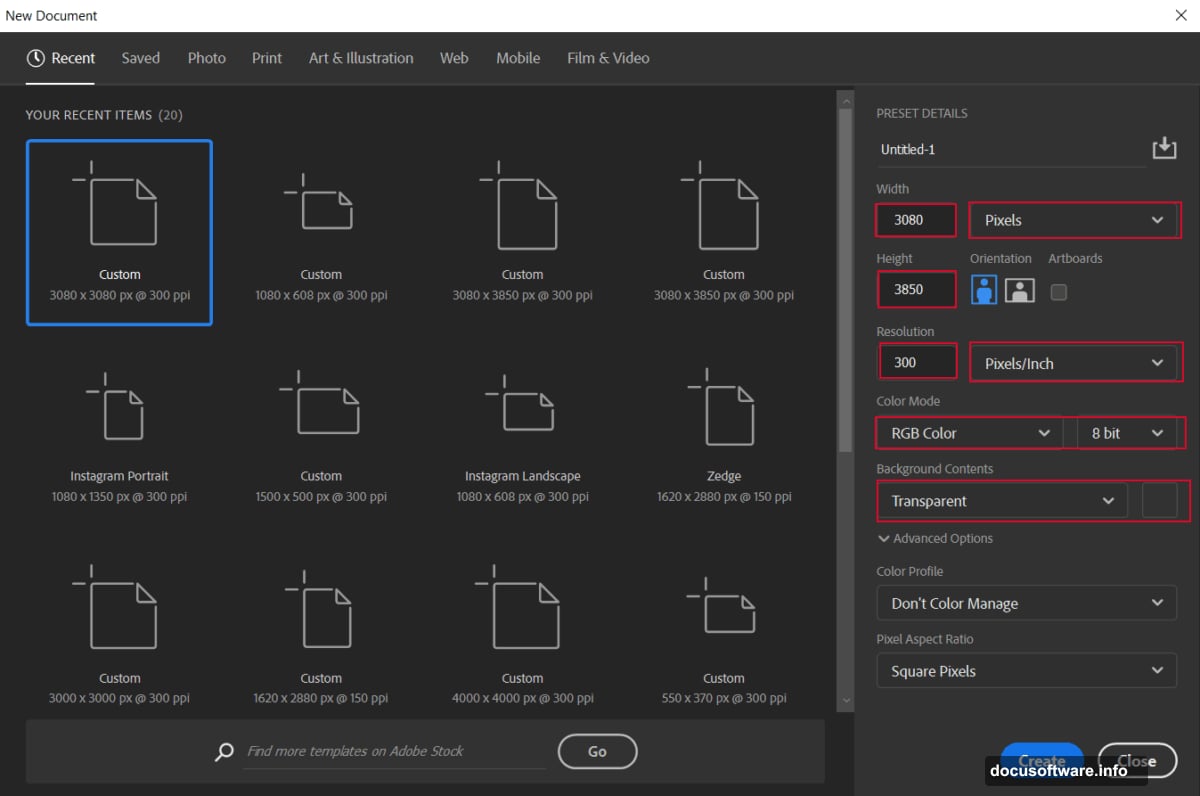
Create a new file with these settings. Go to File > New and input these values:
- Width: 3080px
- Height: 3850px
- Resolution: 300px
- Color Mode: RGB Color 8 bit
- Background: Transparent
These dimensions work well for vertical compositions. However, adjust based on your final use case. Web graphics need less resolution than print projects.
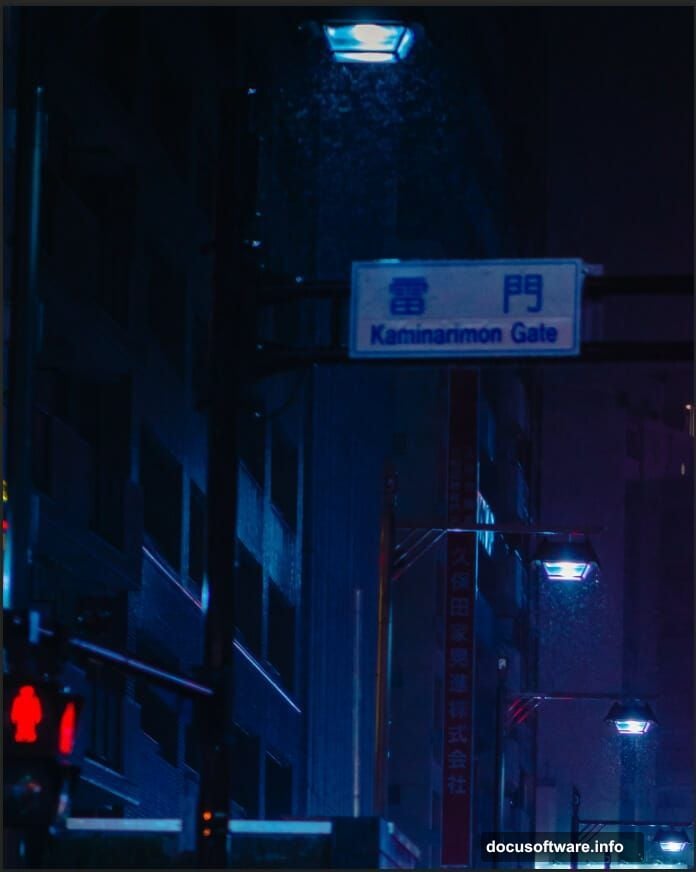
Build the City Background Layer
Place your urban skyline image first. This creates the foundation for your cyborg scene.
Go to File > Place and select your city photo. Position it using the Transform tool (Ctrl/Cmd + T). Hold Alt + Shift while resizing to maintain proportions. In Photoshop CC, just hold Alt.
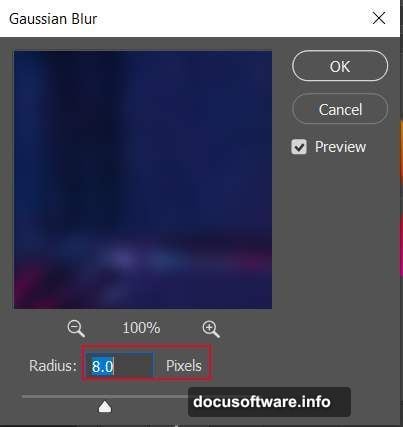
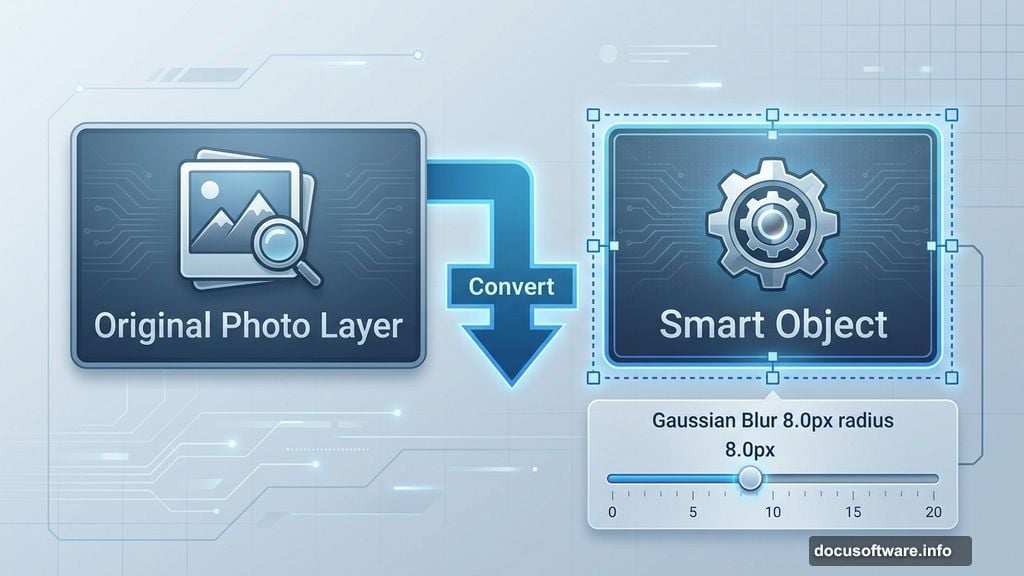
Right-click and convert to Smart Object. This preserves editing flexibility later. Then apply Gaussian Blur at 8.0px radius. The blur adds depth and keeps focus on your main subject.
Smart Objects let you re-edit blur settings without losing quality. So you can fine-tune the background depth later if needed.
Add Selective Lighting with Curves
Curves adjustments give you precise control over highlights and shadows. This step creates dimensional lighting across your city backdrop.
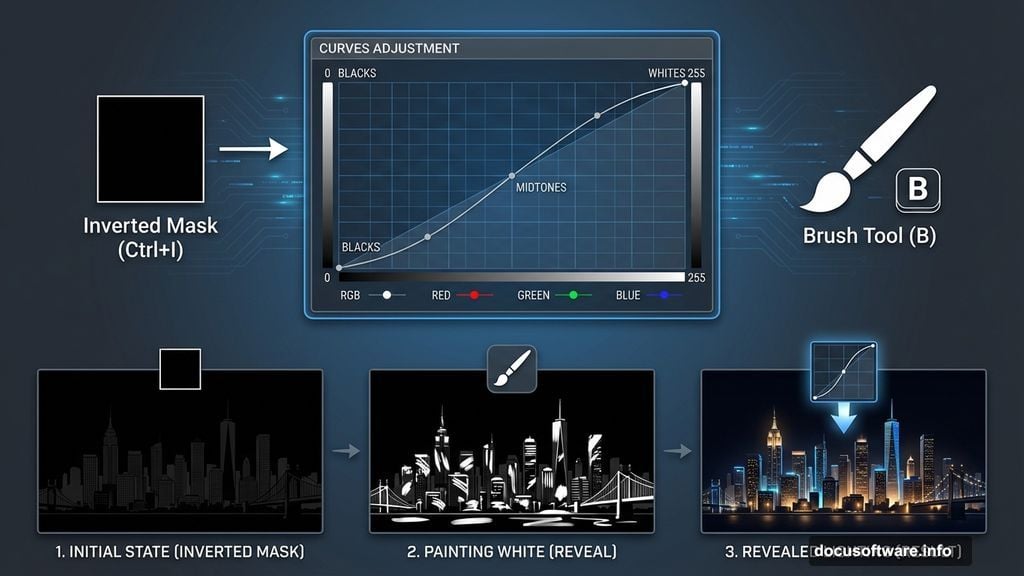
Add a Curves adjustment layer. Press Ctrl/Cmd + I to invert the layer mask to black. Then select the Soft Round Brush Tool (B) with white foreground color.
Paint over areas where light should hit. Focus on buildings, windows, and architectural details. The white brush reveals your curves adjustment only where you paint.
Next, create another Curves layer for shadows. Follow the same process but paint in darker areas. This technique mimics how real light interacts with urban environments.
Balance Overall Brightness
Sometimes your scene needs global adjustments after local tweaks. Brightness/Contrast handles this quickly.
Add a Brightness/Contrast adjustment layer. Increase brightness slightly to lift the overall exposure. But don’t overdo it. You want to maintain contrast between light and dark areas.
Moreover, too much brightness flattens the image. Aim for subtle enhancement rather than dramatic changes.
Paint Glowing Light Rays
Neon effects require custom light sources. This creates that cyberpunk atmosphere.
Create a new layer and change the blend mode to Linear Dodge (Add). Select a blue color (#2367c1) as your foreground. Use a large Soft Round brush with low opacity.
Paint broad strokes where you want light rays. Build up the glow gradually with multiple passes. Linear Dodge intensifies colors and creates that electric neon look.
Vary your brush size and opacity. This adds natural variation to the light sources. Real neon never glows perfectly uniform.
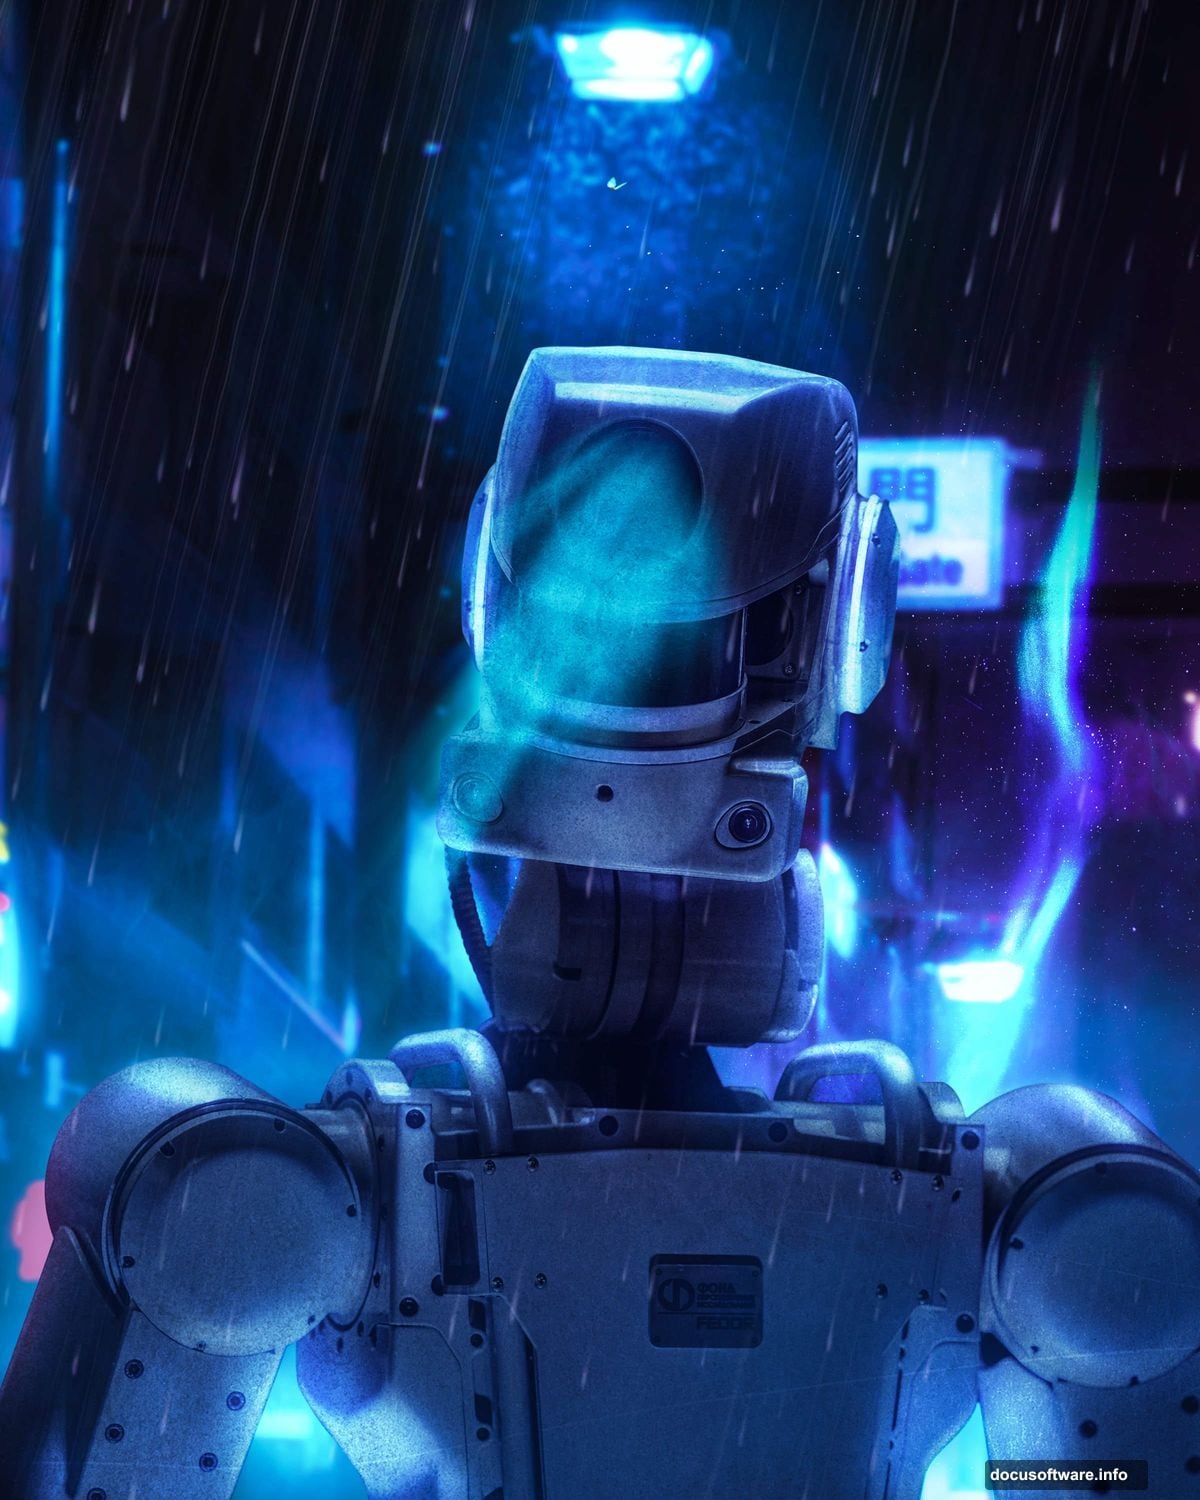
Integrate Your Cyborg Element
Now add the robot or cyborg figure. This becomes your focal point.
Open your butterfly or cyborg image. Use the Lasso Tool (L) to select the subject. Copy (Ctrl/Cmd + C) and paste (Ctrl/Cmd + V) into your main canvas.
Position and scale using Transform (Ctrl/Cmd + T). Hold Alt + Shift while resizing. Then right-click and convert to Smart Object.
Smart Objects protect your original image quality. So you can resize or transform multiple times without degradation.
Match Cyborg Lighting to Scene
Your cyborg needs to match the background lighting. Otherwise it looks pasted on.
Add a Brightness/Contrast adjustment layer clipped to your cyborg layer. Adjust until the cyborg’s exposure matches the city background. Pay attention to shadow density and highlight intensity.
Create additional Curves layers for fine-tuning. Paint highlights where light hits the metallic surfaces. Add shadows where the cyborg blocks light sources.
This integration step makes or breaks photo manipulation. Take time to get it right.
Add Texture Overlays for Grit
Urban sci-fi scenes benefit from textural elements. This adds visual complexity and depth.
Place your first texture (Texture 1) above your city layer. Change the blend mode to Overlay or Soft Light. Adjust opacity between 20-40% depending on the texture intensity.
Add a second texture (Texture 2) near the top. Experiment with different blend modes. Screen works well for light textures. Multiply suits dark, gritty overlays.
Textures shouldn’t overpower your main elements. They should enhance atmosphere subtly.
Paint Custom Light Sources
Beyond the initial rays, add specific light points. Think streetlights, neon signs, and window glows.
Create a new layer set to Linear Dodge (Add). Use small brush sizes with bright colors. Paint individual light sources throughout your scene.
Vary the colors. Mix blues, cyans, magentas, and oranges. This creates visual interest and mimics real urban lighting diversity.
Furthermore, add slight blur to some lights using Gaussian Blur. This softens them and prevents a harsh digital look.
Create Atmospheric Rain Effect
Rain adds motion and atmosphere to static images. Plus it enhances the cyberpunk mood.
Create a new layer above everything else. Fill it with black (Alt + Backspace with black foreground). Go to Filter > Noise > Add Noise. Set Amount to 100%, Distribution to Gaussian, and check Monochromatic.
Then apply Motion Blur. Set Angle to -75 degrees and Distance to around 30 pixels. This creates diagonal rain streaks.
Change the blend mode to Screen. Adjust opacity to taste. Lower values create light drizzle. Higher values produce heavy rain.
Duplicate the layer and apply different Motion Blur angles or distances. This adds depth to the rain effect by creating multiple rain layers.

Use Ray Brushes for Light Beams
Custom ray brushes add professional light beam effects quickly. These create shafts of light cutting through rain and fog.
Load your ray brush set. Create a new layer set to Linear Dodge or Screen. Sample colors from your existing light sources.
Click once with the ray brush at different scales and rotations. Transform (Ctrl/Cmd + T) and rotate each ray to vary the direction. This creates dynamic light shafts rather than repetitive patterns.
Lower the opacity of some rays. This adds depth by suggesting distance fog effects.
Apply Final Color Grading
Camera Raw filter provides powerful color grading tools. This unifies your entire composition.
Flatten your image or create a merged copy (Ctrl/Cmd + Alt + Shift + E). Go to Filter > Camera Raw Filter.
In the Basic tab, adjust Temperature toward blue for a cooler sci-fi look. Increase Clarity to enhance edge definition. Add Vibrance to boost color intensity without oversaturating skin tones.
Switch to the Color Mixer tab. Adjust individual color channels. Shift blues toward cyan for a futuristic teal look. Tweak magentas and purples to enhance neon glow effects.
The Split Toning section adds color to highlights and shadows separately. Try adding blue to shadows and orange to highlights. This creates a popular cinematic color grade.
Sharpen Strategic Areas
Final sharpening brings out details in your main subject. But avoid over-sharpening the entire image.
Create a High Pass sharpening layer. Duplicate your merged layer and go to Filter > Other > High Pass. Set radius between 1-3 pixels.
Change blend mode to Overlay. Add a black layer mask and paint white only over areas needing sharpening. Focus on the cyborg’s edges, facial details, and important architectural elements.
This selective sharpening draws the eye to your focal points without creating noise in smooth areas like sky or blurred backgrounds.
Export for Different Uses
Your final export settings matter. Wrong settings waste all your hard work.
For web use, save as JPEG at quality 80-90. This balances file size and quality. Convert to sRGB color space for consistent display across browsers.
For print, save as TIFF or high-quality JPEG at 300dpi. Keep your color space as Adobe RGB or ProPhoto RGB. These wider color gamuts preserve more color information for professional printing.
Moreover, keep your layered PSD file. You’ll want to make adjustments later. Trust me on this one.
Common Mistakes to Avoid
Several pitfalls trip up beginners with this technique. Watch out for these issues.
Over-blending the cyborg. Your subject should stand out, not disappear into the background. Maintain clear edges and contrast between subject and environment.
Inconsistent light direction. All light sources must make logical sense together. If light comes from the right, shadows fall left. Mixed light directions look amateurish.
Too many textures. More isn’t better with overlay textures. One or two subtle textures beat five obvious ones. When viewers notice the texture rather than the scene, you’ve overdone it.
Ignoring color harmony. Random neon colors create chaos. Stick to a limited palette. Two or three neon colors plus neutrals work best.
Take This Further
Once you master the basic technique, try these variations. Each adds new dimensions to your cyborg scenes.
Add particle effects using custom brushes. Sparks, embers, or digital glitches enhance the technological feel. Create depth by varying particle size and opacity based on distance.
Experiment with different time settings. Dawn or dusk lighting creates warmer tones. Night scenes push the neon effects harder. Each time of day changes the mood completely.
Try multiple cyborg figures. Groups create narrative opportunities. But balance your composition carefully. Too many focal points confuse the viewer.
Finally, study real cyberpunk and sci-fi concept art. Notice how professionals handle lighting, color, and composition. Then adapt those techniques to your style.