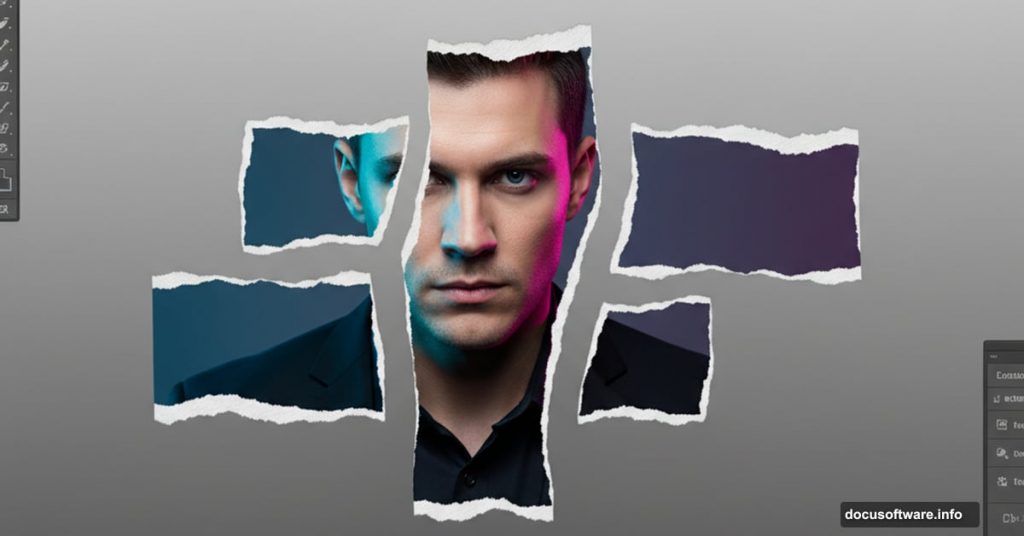
Forget tearing actual photos apart. Photoshop lets you replicate that dramatic torn-photo look without destroying anything real.
Remember those striking torn-apart cast photos from Better Call Saul? You can recreate that effect digitally. Plus, you won’t need photography skills or waste printed photos. This technique works in Photoshop CC 2014 or any newer version.
The secret? Linked Smart Objects, manual painting, and smart warp transformations. These tools combine to create realistic torn edges that fool the eye.
What You’ll Actually Need
Before diving into Photoshop, gather these materials:
Physical prep work:
- One 6×8 inch paper (standard 6R photo size)
- Your hands (seriously, no scissors allowed)
- A smartphone camera
Digital resources:
- Any portrait photo you want to “tear”
- The tutorial uses free stock images from Unsplash
- Photoshop CC 2014 or later
Here’s the trick. You’ll create a real torn paper template first. Then photograph it. That photo becomes your guide for digital work.

The Physical Template Comes First
This step feels weird but trust the process. Physical materials inform digital results.
Create your grid:
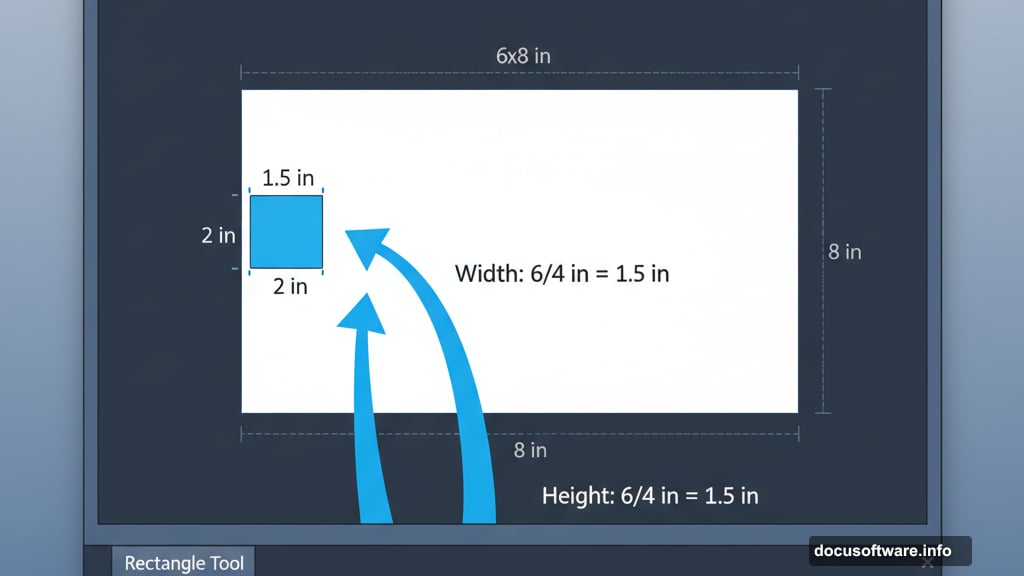
Grab that 6×8 paper. Divide it into 16 equal rectangles using a pencil. Each rectangle should measure 1.5 inches by 2 inches. Number them 1 through 16.
Tear by hand:
Rip each rectangle along the lines you drew. Don’t use rulers or scissors. The irregular edges matter. Real tears create authentic textures that perfectly straight cuts never achieve.
Photograph the results:
Lay the torn pieces on a flat surface. Keep them in numbered order. Take a clear photo from directly above. This becomes your placement guide in Photoshop.
Want to get creative? Scatter some pieces. Suspend others in mid-air and photograph them falling. The tutorial uses a simple flat layout. But your imagination sets the limits.
Build The Digital Foundation
Now the Photoshop work begins. First, you need a canvas matching your physical paper.
Click File > New. Set Width to 6 inches and Height to 8 inches. Resolution should be 300 DPI for print quality. Click Create.
This blank canvas represents your intact photo before tearing.
Draw The Rectangle Grid
Activate the Rectangle Tool from the toolbar. In the Options Bar at the top, set the mode to Shape.
Instead of drawing freehand, click once on the canvas. A dialog box appears asking for exact dimensions.
Here’s where Photoshop shows its cleverness. Type “6/4 in” for width. Photoshop calculates this as 1.5 inches automatically. Type “8/4 in” for height. The software does the math.
Click OK. You just created one perfectly sized rectangle.
Position Your First Rectangle
That rectangle needs to sit in the top-left corner. Activate the Move Tool (V key). Drag the rectangle to align with the canvas edge.
Check the Layers panel. You’ll see a shape layer named “Rectangle 1.” This becomes important for organization later.
Complete The Grid Layout
You need 15 more rectangles to fill the canvas. Instead of creating each from scratch, duplicate the first one.
Select Rectangle 1 in the Layers panel. Press Ctrl+J (Windows) or Cmd+J (Mac) 15 times. This creates 15 copies.
Now comes the tedious part. Use the Move Tool to position each rectangle. They should form a 4×4 grid covering the entire canvas.
Pro tip: Hold Shift while dragging. This constrains movement to straight horizontal or vertical lines. Your grid stays perfectly aligned.
Add Numbers To Each Piece
Create a new layer (Ctrl+Shift+N or Cmd+Shift+N). Name it “Numbers.”
Activate the Text Tool. Click inside the first rectangle. Type “1.” Choose a clear, readable font. Arial Bold at 48pt works well.
Center the number inside its rectangle. Then repeat for rectangles 2 through 16.
Why number them? Because you’ll separate these pieces soon. Numbers help you track which piece goes where.
Import Your Portrait Photo
Time to add the actual photo you want to tear. Click File > Place Embedded. Navigate to your chosen portrait. Click Place.
The photo appears with transform handles. Drag the corners to resize. Hold Shift+Alt (Windows) or Shift+Option (Mac) to scale proportionally from the center.
Position the portrait so the subject’s face centers nicely within the canvas. Press Enter to confirm placement.
Convert To Smart Object
Right-click the photo layer in the Layers panel. Choose Convert to Smart Object.
Smart Objects protect your original image. You can resize, warp, and distort without permanently damaging pixels. Plus, you can edit the original anytime by double-clicking the layer thumbnail.
This becomes crucial when creating torn edges later.
Create The Torn Edge Texture
Here’s where your photographed torn paper comes in. Open that photo in Photoshop.
You’ll use these real torn edges to create authentic texture. Select one torn rectangle from your photo using the Lasso Tool.
Copy it (Ctrl+C or Cmd+C). Switch back to your main document. Paste it (Ctrl+V or Cmd+V) into a new layer.
Apply Torn Edges To Rectangles
This process repeats for each of the 16 rectangles. But the workflow stays consistent.
Select the pasted torn edge layer. Use the Move Tool and Free Transform (Ctrl+T or Cmd+T) to position it over rectangle 1. Scale and rotate until the torn edge aligns with your drawn rectangle boundaries.
Lower the layer opacity to 50%. This lets you see the rectangle underneath while positioning the torn edge.
Once aligned, restore opacity to 100%. Right-click the torn edge layer and choose Create Clipping Mask. This constrains the torn texture to only show within rectangle 1’s boundaries.
Separate The Pieces
Now comes the satisfying part. You’re going to scatter these torn pieces across the canvas.
Select all layers belonging to rectangle 1 (the shape, number, torn edge, and any other effects). Press Ctrl+G (Windows) or Cmd+G (Mac) to group them. Name the group “Piece 1.”
Repeat this grouping for all 16 rectangles. You now have 16 groups named Piece 1 through Piece 16.
Add Realistic Shadows
Torn photos don’t float in space. They cast shadows on whatever surface holds them.
Select Piece 1’s group. Click the fx icon at the bottom of the Layers panel. Choose Drop Shadow.
Set Distance to 15px, Spread to 0%, and Size to 25px. Angle should be 120 degrees. This creates soft, natural-looking shadows.
Copy this layer style. Select all other piece groups. Right-click and choose Paste Layer Style. All pieces now cast consistent shadows.
Scatter And Rotate The Pieces
Reference your photographed torn paper layout. Use the Move Tool and Free Transform to reposition each grouped piece.
Rotate some pieces slightly. Overlap others. Leave small gaps between some. This randomness creates authenticity.

Real torn photos never stay in perfect alignment. Your digital version shouldn’t either.
Add Background Texture
Torn photos usually rest on something. A table. A floor. Concrete. Adding this context sells the illusion.
Download a texture image (the tutorial suggests a wooden pallet photo from Unsplash). Place it below all your torn piece layers.
Use Free Transform to scale the texture until it fills the canvas. Lower its opacity slightly if it feels too busy. The torn photo should remain the focus.
Fine-Tune The Lighting
Not all torn pieces should have identical shadows. Pieces that overlap others need stronger shadows. Pieces touching the background need softer ones.
Double-click a piece group’s fx icon in the Layers panel. This reopens the Drop Shadow settings. Adjust Distance and Size for that specific piece.
Repeat for any pieces that need individual shadow adjustments. This attention to detail separates amateur work from professional results.
Optional: Add Wear And Tear
Real torn photos show age. Coffee stains. Creases. Faded edges.
Create a new layer above your portrait but below the torn edges. Name it “Aging.”
Use the Brush Tool with a soft, low-opacity brown brush. Paint subtle stains along some torn edges. Add a few scratches or scuff marks.
You can also use Filter > Blur > Gaussian Blur on select areas to suggest water damage or fading.
Export Your Final Result
Your torn photo effect is complete. Time to save it properly.
Click File > Export > Export As. Choose JPG format for photos. Set Quality to 90% for a good balance between file size and image quality.
If you need transparency (maybe to place this on a website), export as PNG instead. Just remember PNG files are larger.
Click Export. Choose your save location and filename. Done.
The Physical Reference Makes Everything Work
Here’s why this technique succeeds. You used real torn paper as reference. Photoshop handled the digital manipulation. But authentic texture came from actual materials.
Could you skip the physical tearing? Sure. Photoshop offers torn-edge brushes and filters. But they never look quite right. Real materials photograph better than digital approximations every time.
So embrace the hybrid workflow. Physical creation informs digital execution. Your results will show the difference.
Now grab some paper and start tearing. Your next dramatic photo effect awaits.