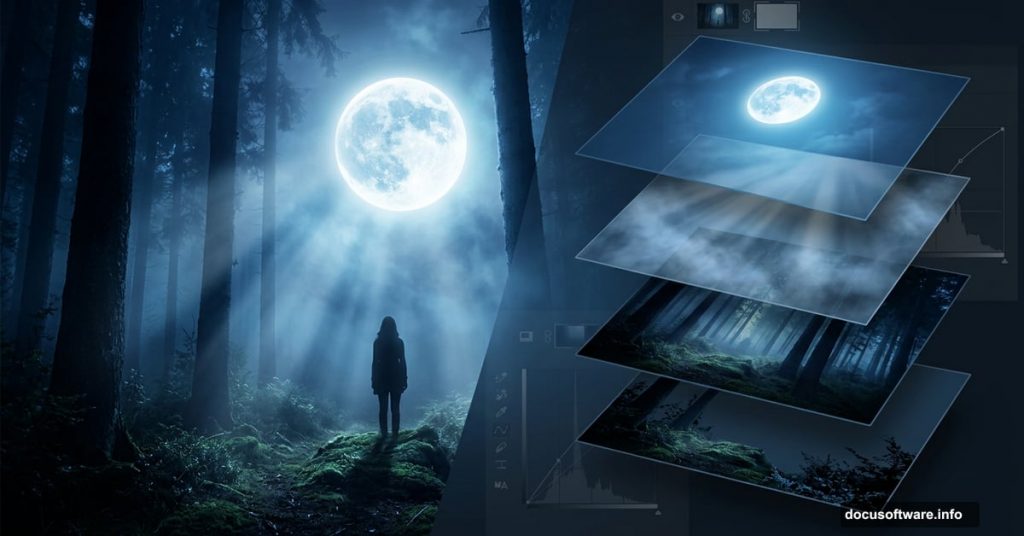
There’s something magical about a well-crafted moonlit scene. That soft glow, the mysterious fog, the sense that something emotional is happening just out of frame. And the best part? You can build one entirely from scratch in Photoshop.
This tutorial walks you through creating a full fantasy moonlight photo manipulation. You’ll combine stock images, sculpt lighting, blend a model into the scene, and finish with adjustment layers that tie everything together beautifully.
What You’ll Need Before Starting
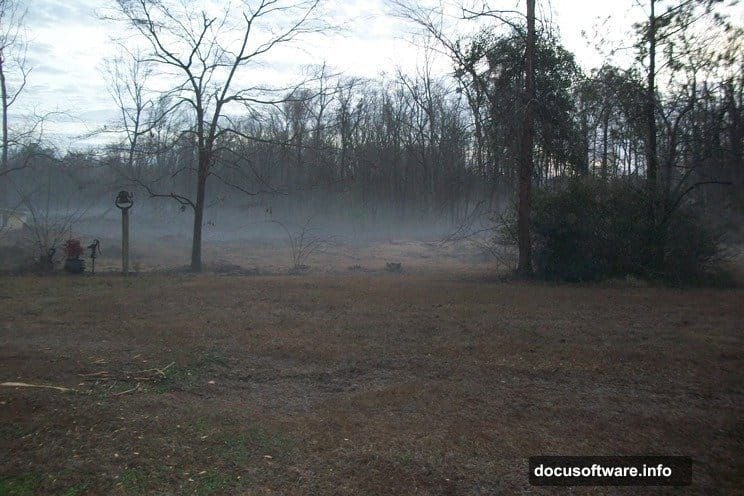
Before anything else, grab your resources. You’ll need four stock images: a foggy morning shot from Pixabay, the Mad Sky 4 image by Salsolastock, a fall forest image by Kuoma-Stock, and a dark forest shot by Miranda-rose stock as an alternative option.
Download everything and drop it into one folder. Staying organized here saves you real time later. You’ll also need Photoshop CS5 or newer to follow along.
Building the Foggy Atmosphere
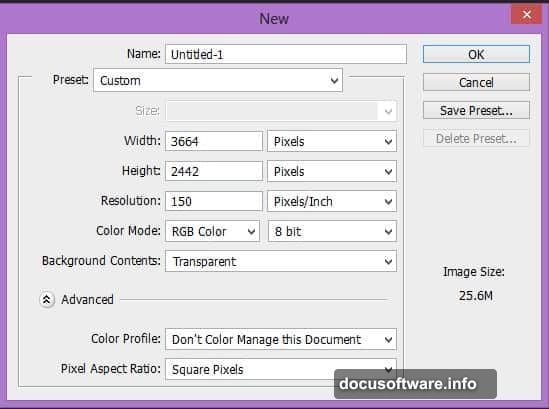
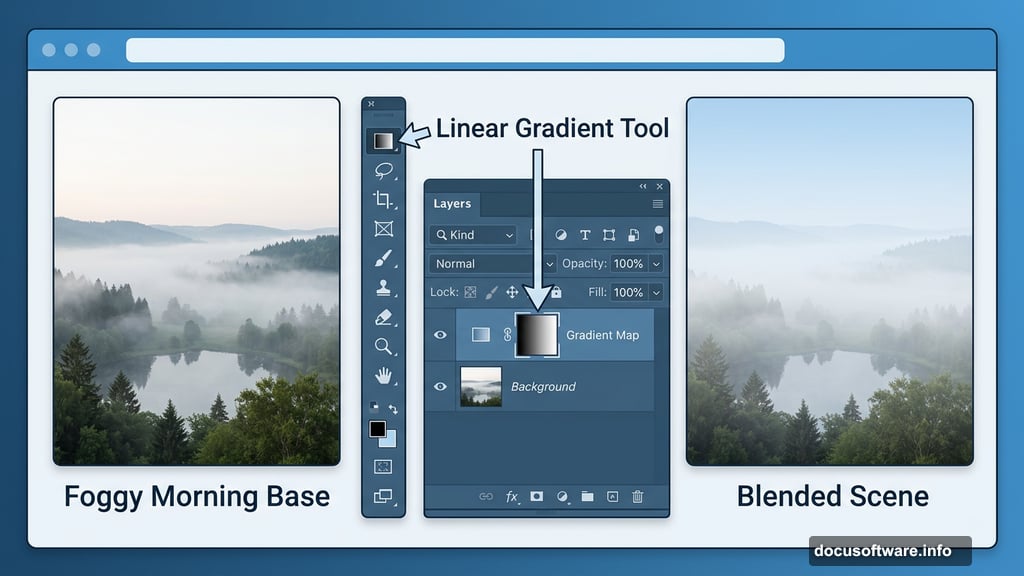
Start by creating a new document in Photoshop. Go to File, then New, and set your dimensions to match the tutorial settings. Alternatively, just open the foggy morning image directly and build from there.
Next, place your foggy morning image into the document using File, then Place. This becomes your base layer, and everything else builds on top of it.
Now add a layer mask. Click the Add Layer Mask icon in the Layers panel. Press G to activate the Gradient tool, set it to Linear mode, and choose a black-to-white gradient. Hold Shift and drag the gradient vertically across the image. This creates a natural fade that blends your foggy layer seamlessly into what comes next.
Adding the Dramatic Sky
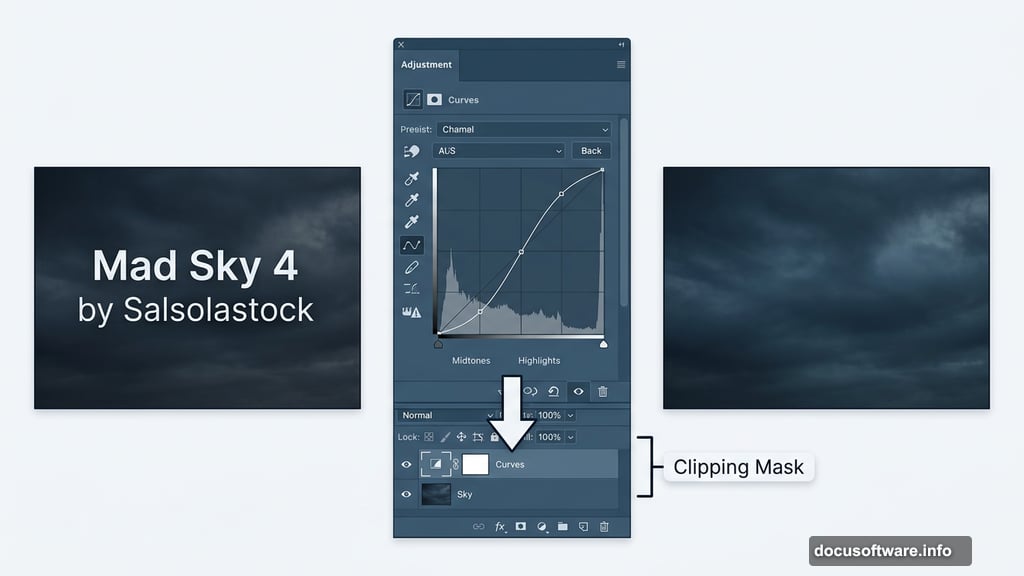
Place the Mad Sky 4 image below your foggy morning layer. Position it so it fills the upper portion of your canvas naturally.
Now comes the blending magic. Click on the foggy morning layer mask and press B to grab the Brush tool. Set both opacity and flow to 40%. Paint gently over the mask to soften the edges and let the sky peek through the fog in a convincing way. Low opacity is your friend here. Build up gradually rather than painting at full strength.
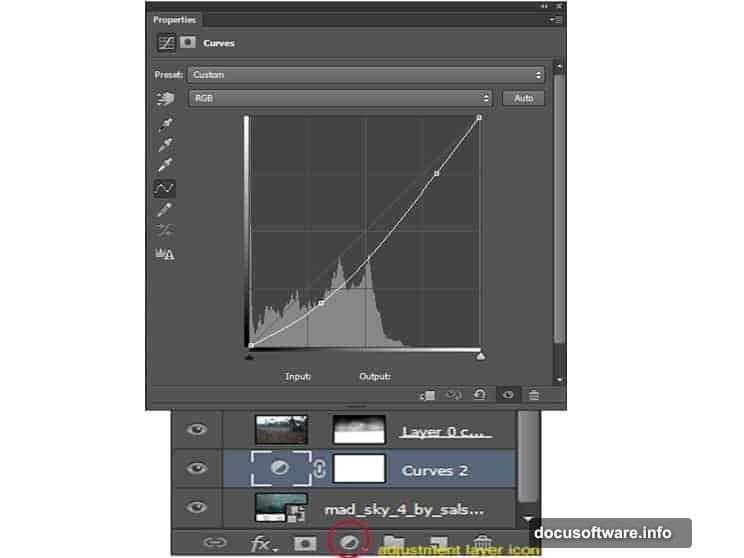
Refining Light With Curves
Select the Mad Sky 4 layer and add a Curves adjustment layer. Click the New Adjustment Layer icon in the Layers panel and choose Curves. Clip it specifically to the Mad Sky layer by creating a clipping mask.
Adjust the curve to darken and deepen the sky tones. This adds atmosphere and makes the scene feel like genuine moonlight rather than a daytime shot with a filter slapped on top. Small curve adjustments make a surprisingly big difference here.
Cleaning Up With Clone Stamp
Create a new empty layer above your current stack. Right-click it and select Create Clipping Mask. Press S to activate the Clone Stamp tool and set the Sample option to Current and Below in the properties bar.
Use this to sample clean areas of ground and paint over distracting elements like stray sticks or messy edges. This step keeps your scene looking polished rather than patched together from obvious stock images.

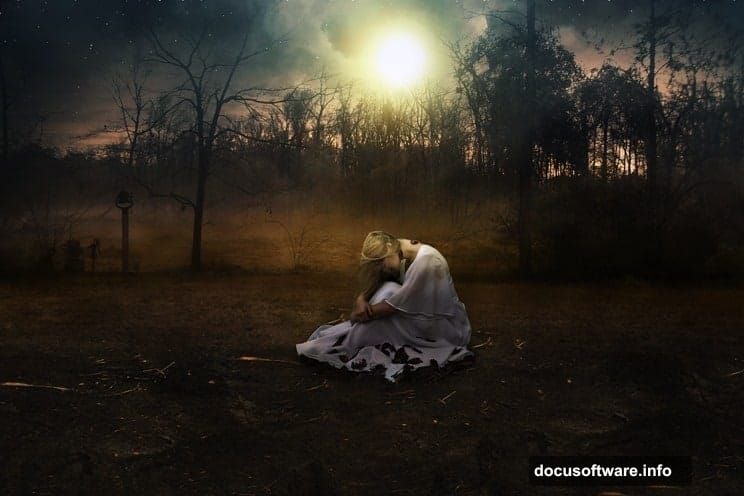
Placing and Blending the Model
With your background scene established, it’s time to bring in the model. Place the figure into your document and position her within the scene. This is where blending options become your most powerful tool.
Use blending options to help the model’s edges interact naturally with the foggy environment. Dodge and Burn are essential here. Dodge brightens areas where moonlight would naturally catch the figure. Burn deepens shadows on the side facing away from your light source.
Creating a believable cast shadow underneath the model grounds her in the scene. Without it, she’ll look like she’s floating. Sample the ground color and paint a subtle, soft shadow using a low-opacity brush. Keep the edges soft and let it fade naturally.
Creating the Moon
Create a new layer and grab a soft, round brush. White paint, full opacity, and a single click gives you the moon’s core glow. Then reduce brush opacity to around 20% and build a wider, softer glow around it in concentric passes.
This technique creates a realistic moonlight halo without any plugins. The key is patience and layering. Five or six passes of low-opacity white builds a much more convincing glow than one heavy-handed stroke.
Final Adjustment Layers
Now pull everything together with global adjustment layers at the top of your stack. A Color Balance layer lets you push the entire scene toward cooler blues and teals, which sells the moonlit mood immediately.
Add a Photo Filter adjustment and choose a cool blue filter at around 15-20% density. This unifies your stock images, which often have slightly different color temperatures, into one cohesive scene.
Finally, add a slight Curves adjustment to boost overall contrast. Lift the midtones slightly for a softer, dreamier look, or pull them down for something more dramatic and moody.
Adding Stars With Filters
For the finishing touch, create a new layer at the top of your stack. Go to Filter, then Render, then Clouds. This creates a noise-like base. Then go to Filter, Image Adjustments, Levels, and drag the left slider sharply right until only small bright specks remain. Change the layer blending mode to Screen and the clouds disappear, leaving only the bright points that look convincingly like stars.
Reduce opacity to taste. Around 40-60% usually feels natural without overpowering the scene.
Putting It All Together
What makes this manipulation work isn’t any single technique. It’s the combination of consistent lighting direction, unified color temperature, and careful edge blending throughout every layer. The Dodge and Burn work especially transforms a flat composite into something with genuine depth and mood.
This scene also translates beautifully to book cover designs, as many people have discovered. The emotional atmosphere and fantasy elements give it a versatile quality that works across creative projects.
Try it yourself, experiment with different model poses or sky images, and see how dramatically the mood shifts with small adjustment layer changes. That flexibility is what makes Photoshop photo manipulation so satisfying to learn.