Want to create mind-bending landscape art that makes viewers do a double-take? This Photoshop technique merges day and night into a single impossible scene.
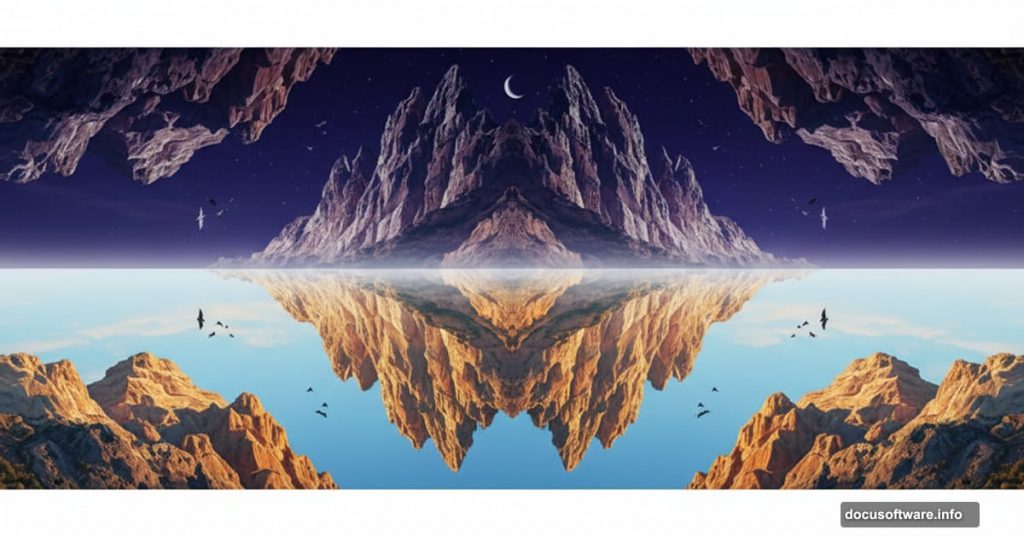
The concept is simple but striking. Take two landscape photos. Flip one upside down. Blend them seamlessly. The result looks like reality folded in half, with mountains hanging from the sky and underground terrain reaching toward an inverted world.
This tutorial walks through the entire process step by step. You’ll learn how to blend multiple sky images, match lighting between different photos, and add surreal elements that sell the illusion. Plus, I’ll show you adjustment layer tricks that make the final image feel cohesive rather than obviously composited.
Gather Your Raw Materials
You’ll need several stock images to pull this off. The magic happens when you combine them thoughtfully.
First, grab two different sky photos. One provides your base atmosphere. The other adds texture and depth. Next, find two landscape images with interesting terrain features. Mountains work great. So do rolling hills or dramatic rock formations.
You’ll also need some detail elements. Underground soil textures add realism to the flipped section. Birds help establish scale and direction. A moon image completes the surreal atmosphere.
Don’t worry about perfect matches initially. Photoshop’s blending tools handle most inconsistencies. But try to choose images with similar color temperatures. That saves adjustment work later.
Build Your Base Sky
Start with a 2000×1500 pixel canvas filled with white. This gives you plenty of resolution for detailed work.
Drag your first sky image onto the canvas using the Move Tool. Position it to show the most interesting cloud formations. The right side often has better lighting, so favor that area when choosing your composition.
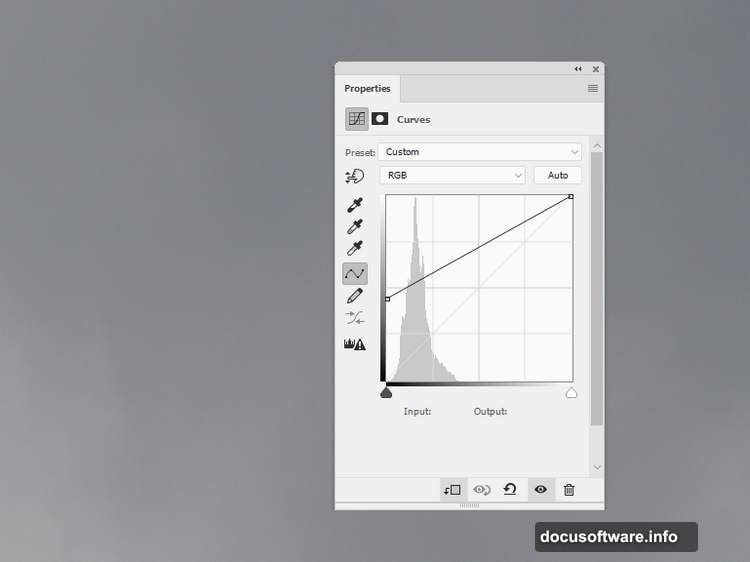
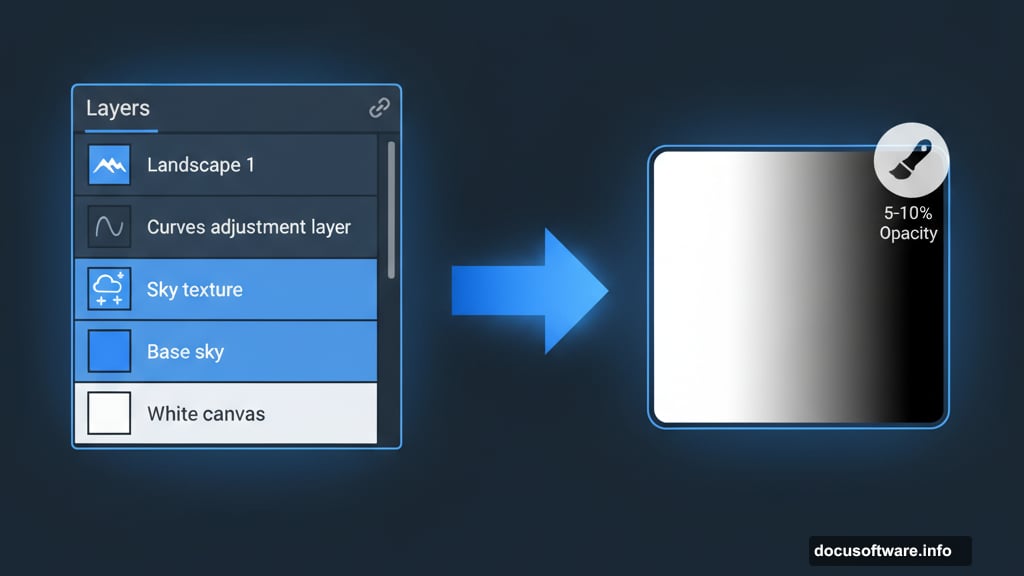
Now comes the first crucial step. Add a Curves adjustment layer. Push the curve upward to brighten the entire sky significantly. This creates that hazy, dreamlike quality that sells surreal landscapes.
However, don’t brighten everything equally. Grab a soft black brush at 5-10% opacity. Paint on the adjustment layer’s mask to gradually darken the bottom left corner. This subtle gradient adds depth and prevents the sky from looking flat.
Layer Your First Landscape
Open your first landscape image. Drag it to the top portion of your canvas. Hit Ctrl+T to activate Free Transform. Resize until the landscape fills your desired area.
Here’s where masking becomes critical. Click the mask icon at the bottom of your Layers panel. Select a medium-soft black brush. Paint away the bottom of the landscape image gradually.
The goal is a natural fade rather than a hard edge. Vary your brush opacity as you work. Use higher opacity for areas you definitely want to remove. Lower opacity creates those crucial soft transitions between images.
This landscape represents your “normal” world. It sits right-side up and feels familiar. Everything that comes next will contrast against this baseline reality.
Flip Reality With Your Second Landscape
Drop your second landscape image into the document. But don’t position it yet. Go to Edit > Transform > Flip Vertical first. This inverts the entire image.
Place this flipped landscape below your first one in the layer stack. Position it in the lower half of your canvas. This creates the core of your surreal effect—mountains hanging from below instead of rising above.
Add a mask to this layer immediately. Grab a soft black brush at 40-50% opacity. Paint over the sky areas in this flipped landscape. You want to reduce that sky’s visibility significantly while keeping the terrain features sharp.
The trees and mountains should blend naturally with your existing sky. If you see hard edges or obvious color differences, keep painting with your low-opacity brush until transitions feel smooth.
Match the Color Mood
Your flipped landscape probably doesn’t match your sky’s color palette yet. That’s where Hue/Saturation adjustments save the day.
Add a Hue/Saturation adjustment layer. Right-click it and choose “Create Clipping Mask.” This makes the adjustment affect only the flipped landscape below it.
Drag the Saturation slider down to -55. This desaturates the landscape considerably, making it feel more like it belongs in your surreal world rather than a separate photo.
Desaturation helps unify disparate images. It removes the specific color identity of the original photo. That makes viewers focus on shapes and composition rather than thinking “that’s clearly two different photos stuck together.”
Control the Lighting
Brightness mismatches kill the illusion fast. Your flipped landscape needs to match the overall scene’s lighting.
Create a Curves adjustment layer. Set it as a Clipping Mask just like the Hue/Saturation layer. Pull the curve downward to darken the landscape.
But don’t darken everything uniformly. Grab that soft black brush again. Paint on the Curves mask to selectively lighten important details. Focus on trees, rock formations, or any elements that should catch light.
This selective dodging creates depth. It makes the flipped landscape feel three-dimensional rather than flat. Plus, it guides the viewer’s eye toward your most interesting compositional elements.
Add Impossible Mountains
Time to reinforce the surreal effect. Open your mountains image and flip it vertically. This gives you more upside-down terrain to play with.
Place these mountains below your second landscape in the layer stack. Position them at the bottom of your composition. They should feel like they’re hanging from the ground above them.
Here’s the trick that makes them feel integrated. Change the blend mode to Hard Light at 100% opacity. This makes the mountains semi-transparent while preserving their detail. They interact with layers beneath them, creating visual cohesion.
Hard Light mode is perfect for surreal compositions. It creates that “ghost image” effect where elements feel present but not quite solid. That ambiguity sells the impossible nature of the scene.
Establish Atmosphere With Birds
Birds serve two critical purposes in surreal landscapes. They establish scale. And they guide the viewer’s eye through the composition.
Add multiple bird images across your scene. Place some in the upper section flying normally. Place others in the lower section flying “upward” into the inverted world.
Vary their sizes to create depth. Larger birds feel closer. Smaller birds recede into the distance. This size variation adds another layer of dimensionality to your flat image.
Don’t just scatter birds randomly. Think about flight patterns. Birds often travel in loose formations. They flow along wind currents. Positioning them thoughtfully makes your surreal world feel like it follows some internal logic, even if that logic defies normal physics.
Add the Moon for Mystery
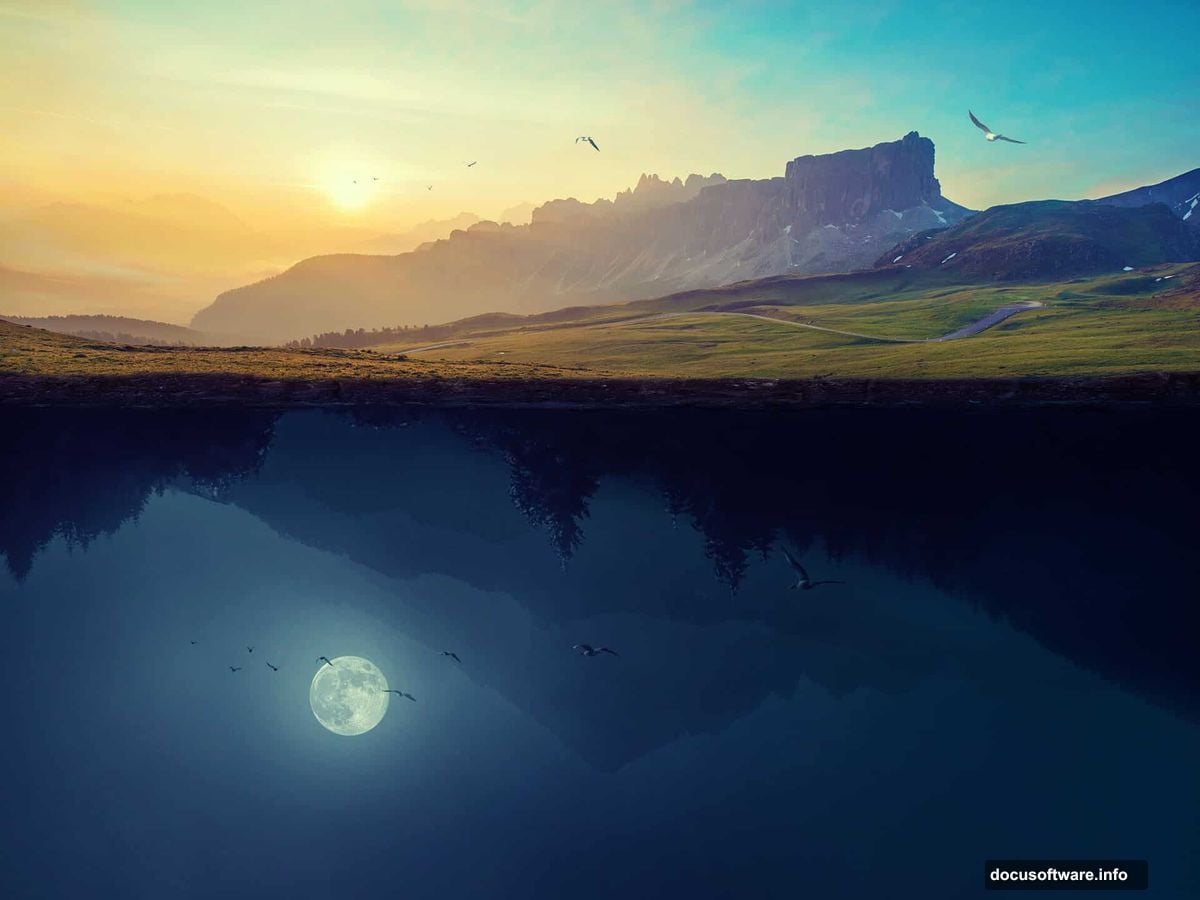
A moon adds immediate drama to surreal landscapes. Place it in the flipped section for maximum impact.
Position the moon near the bottom of your canvas. It should feel like it’s rising from below rather than hanging above. This reinforces the upside-down nature of your composition.
Adjust the moon’s opacity and blend mode if needed. You want it visible but not overwhelming. It should feel like a natural part of the scene’s lighting rather than an obvious addition.
The moon also helps explain your lighting scheme. If viewers wonder why the bottom section has its own light source, the moon provides a visual answer. It’s backwards from reality, but it creates internal consistency within your surreal world.
Refine With Targeted Adjustments
Your composition is nearly complete. Now comes the refinement phase that elevates good composites into great ones.
Add Color Balance adjustment layers to shift the overall mood. Push toward cooler tones for an eerie feel. Or warm it up for something more dreamlike. Small shifts make big differences in emotional impact.
Create additional Curves layers to fine-tune specific areas. Maybe the transition between your two landscapes still feels abrupt. Add a Curves layer with a mask. Paint selectively to balance those problem spots.
Don’t forget about shadows. Surreal doesn’t mean shadowless. Add subtle shadows where the flipped terrain meets the normal world. This grounds impossible elements in quasi-reality.
The Dodge and Burn Pass
Professional compositors always do a dedicated dodge and burn pass. This separates amateur work from polished results.
Create a new layer. Fill it with 50% gray. Set the blend mode to Overlay. This creates a non-destructive dodge and burn layer.
Grab a soft white brush at low opacity. Paint over areas that should catch more light. This is dodging—selectively brightening to create highlights.
Switch to a black brush. Paint over areas that should recede into shadow. This is burning—darkening to enhance depth and dimension.
Work subtly. Build up your effects gradually with multiple low-opacity strokes. Heavy-handed dodge and burn looks obvious and cheap. Subtle work looks professional.
Final Color Grading
The last step ties everything together chromatically. Add a final Curves adjustment layer at the top of your layer stack.
Make subtle adjustments to the RGB curve. Then dive into individual color channels. Tweak the red channel to shift overall warmth. Adjust the blue channel to control coolness. Play with the green channel to refine how natural or unnatural the scene feels.
Color grading is where personal style emerges. There’s no single correct answer. Some artists prefer high contrast with punchy colors. Others favor low contrast with muted tones. Experiment until the mood feels right.
Your surreal upside-down landscape is complete. You’ve taken disparate elements—multiple skies, two landscapes, mountains, birds, a moon—and merged them into a single impossible scene that somehow feels cohesive. That’s the power of thoughtful composition combined with Photoshop’s blending tools.
The technique works for any surreal landscape concept. Once you understand the core principles—masking for seamless blends, adjustment layers for color matching, blend modes for atmospheric effects—you can create any impossible world you imagine. Reality is optional. Creativity is mandatory.