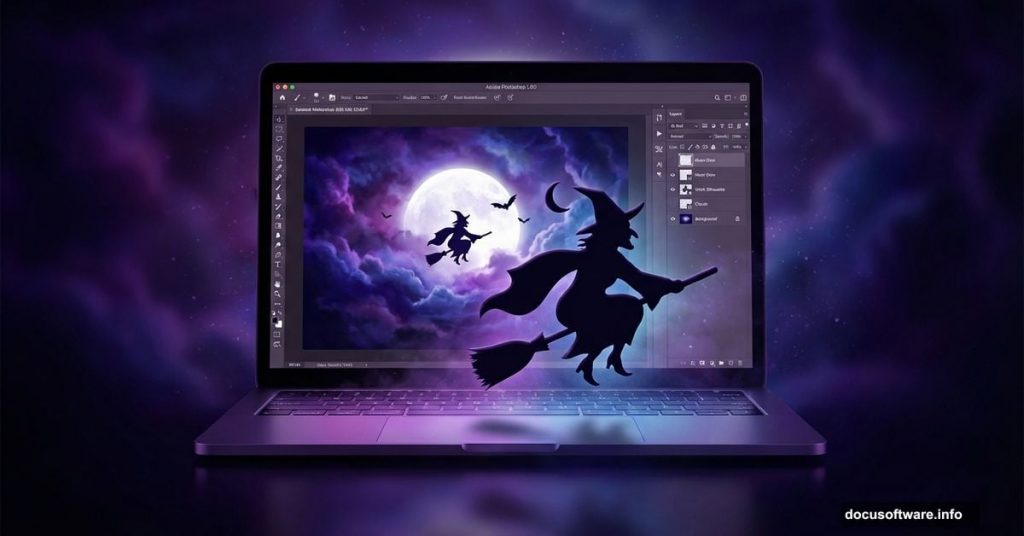
Want to create eerie Halloween artwork that actually looks professional? This Photoshop tutorial walks you through building a complete surreal scene from scratch.
Most Halloween tutorials dump random spooky elements together and call it done. This approach teaches proper photo manipulation techniques. You’ll learn layer management, adjustment layer stacking, and custom brush work that applies to any composite project.
Set Up Your Canvas Right
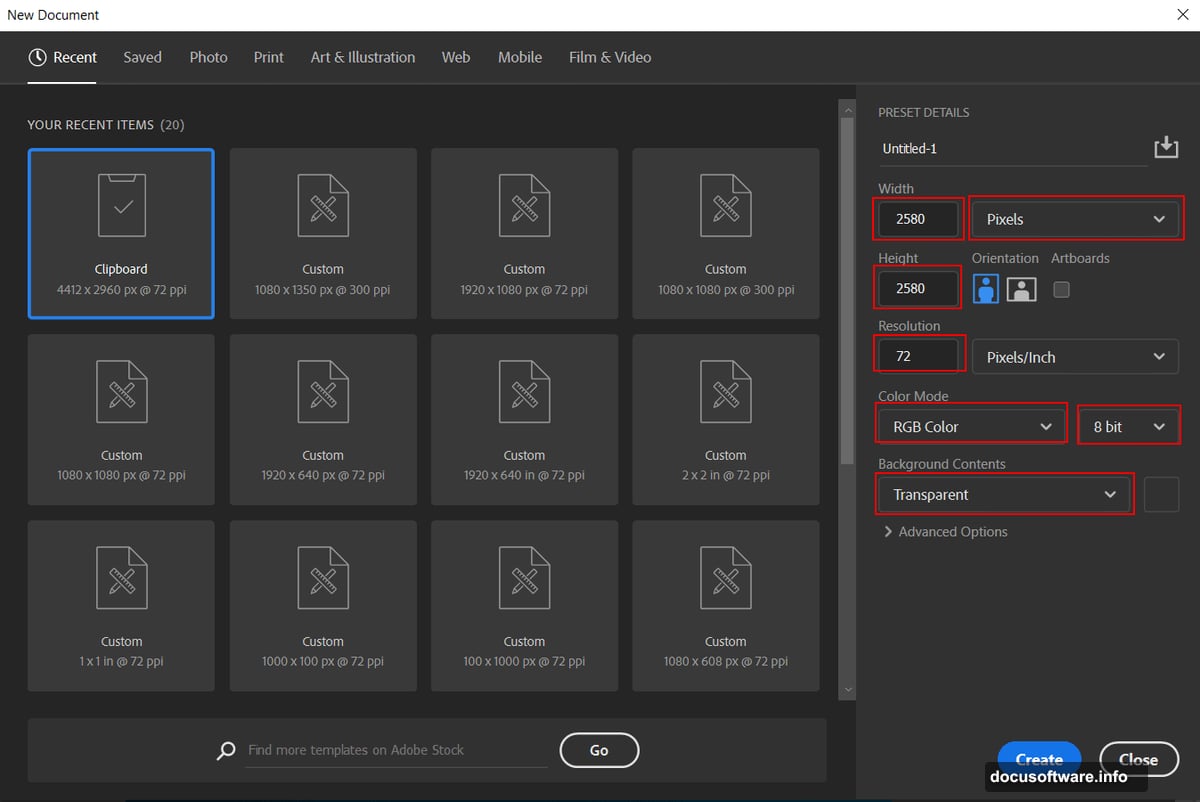
First, create your workspace. Go to File > New and punch in these settings:
Width: 2580px
Height: 2580px
Resolution: 72px
Color Mode: RGB Color 8 bit
Background: Transparent
Why square? Social media loves square formats. Plus, you can always crop later for different aspect ratios. The 72px resolution works great for web display without bloating file size.
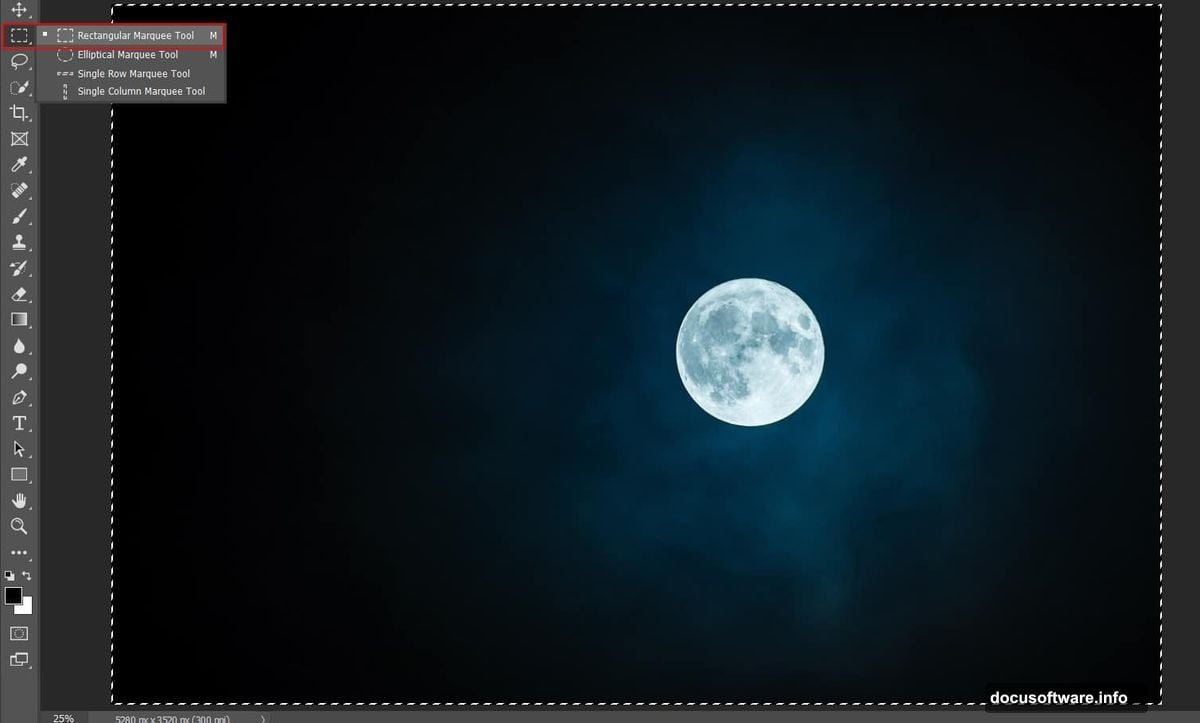
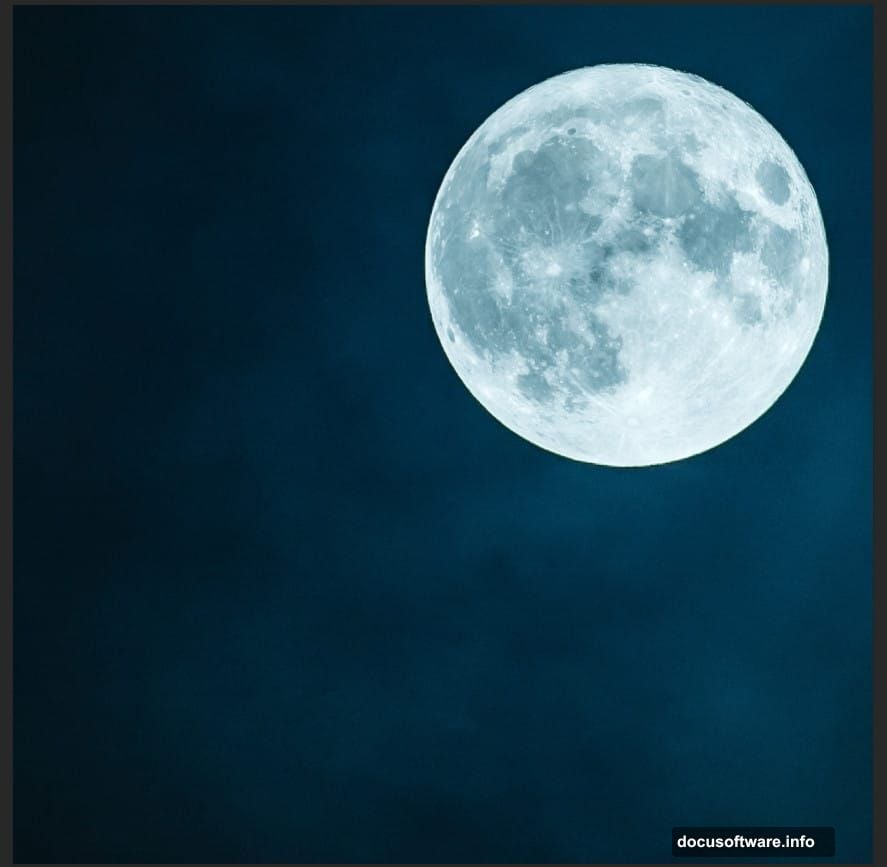
Start With the Moon Base
Open your moon photograph. Grab the Rectangular Marquee Tool (M) and select the moon area you want. Copy it (Ctrl/Cmd + C) and paste into your canvas (Ctrl/Cmd + V).
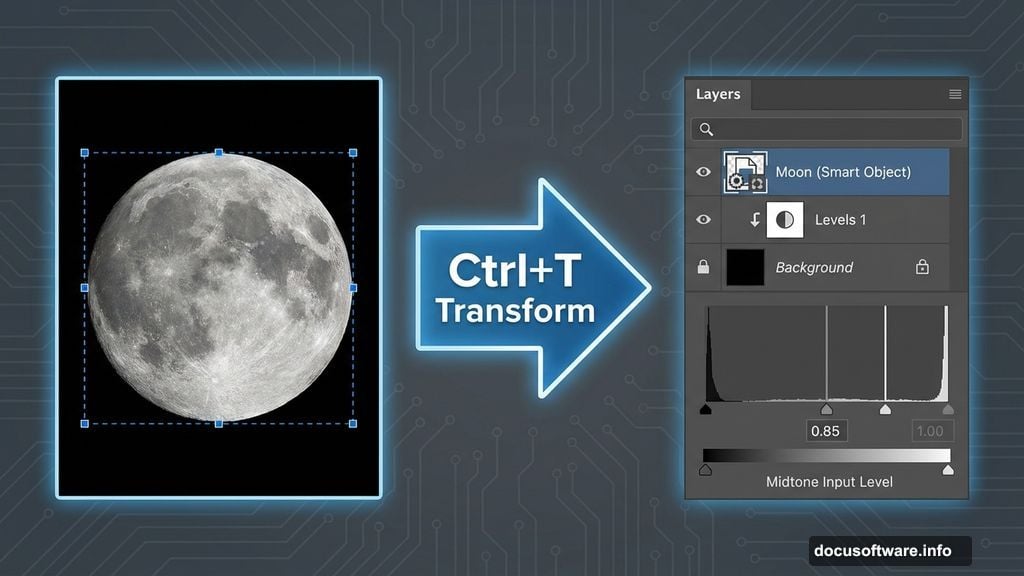
Hit Ctrl/Cmd + T to transform. Hold Alt + Shift while dragging corners to resize proportionally. In Photoshop CC, just Alt alone locks proportions. Right-click and convert to Smart Object. This keeps your original quality intact for future adjustments.
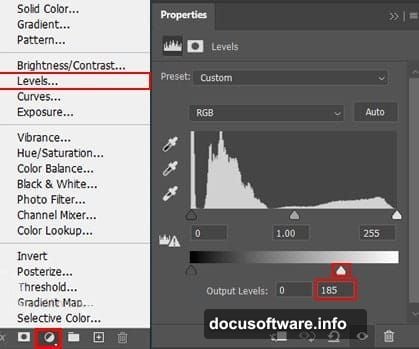
Now add a Levels adjustment layer. Clip it to your moon layer so it only affects that element. Drag the middle slider left slightly to brighten midtones. The moon should pop but not blow out.
Shape Moon Lighting
Add a Curves adjustment layer. Immediately press Ctrl/Cmd + I to invert the mask to black. This hides the entire adjustment.
Grab a Soft Round Brush (B) with white as your foreground color. Paint over the moon in the mask. This selectively brightens just the moon area. The surrounding space stays untouched.
Create another new layer above everything. Paint a large, soft white glow around the moon using a huge brush size. Set this layer to Soft Light blend mode at 64% opacity. This creates atmospheric glow without looking fake.
Import and Paint Clouds
Before painting clouds, import custom brushes. Select the Brush Tool (B) and right-click anywhere. Click the gear icon and choose Import Brushes. Navigate to your downloaded cloud brush pack.
Create a new layer for clouds. Set your foreground color to deep blue (#02557c). Select various cloud brushes from your imported pack. Vary brush size constantly as you paint. Layer multiple cloud shapes with different sizes and opacities.
This step requires feel. Don’t just stamp clouds randomly. Think about how real clouds cluster and thin out. Paint denser clouds near the horizon. Use lighter, wispier brushes higher up. Build depth by overlapping different cloud shapes.
Add Flying Elements
Go to File > Place and select your birds silhouette image. Transform it (Ctrl/Cmd + T) to position and size appropriately. Birds should look distant, so keep them relatively small.
Set the birds layer to Normal blend mode at 65% opacity. This makes them feel atmospheric and part of the scene rather than flatly pasted on top. The slight transparency integrates them with the foggy environment you’re building.
Build the Witch Silhouette
Place your witch photograph into the scene. You’ll need to extract the witch from her original background. Use the Quick Selection Tool (W) or Pen Tool (P) depending on edge complexity.
For clean edges, the Pen Tool wins every time. It takes longer but produces crisp results. Draw a path around the witch outline, then convert to selection. Add a layer mask to hide the original background.
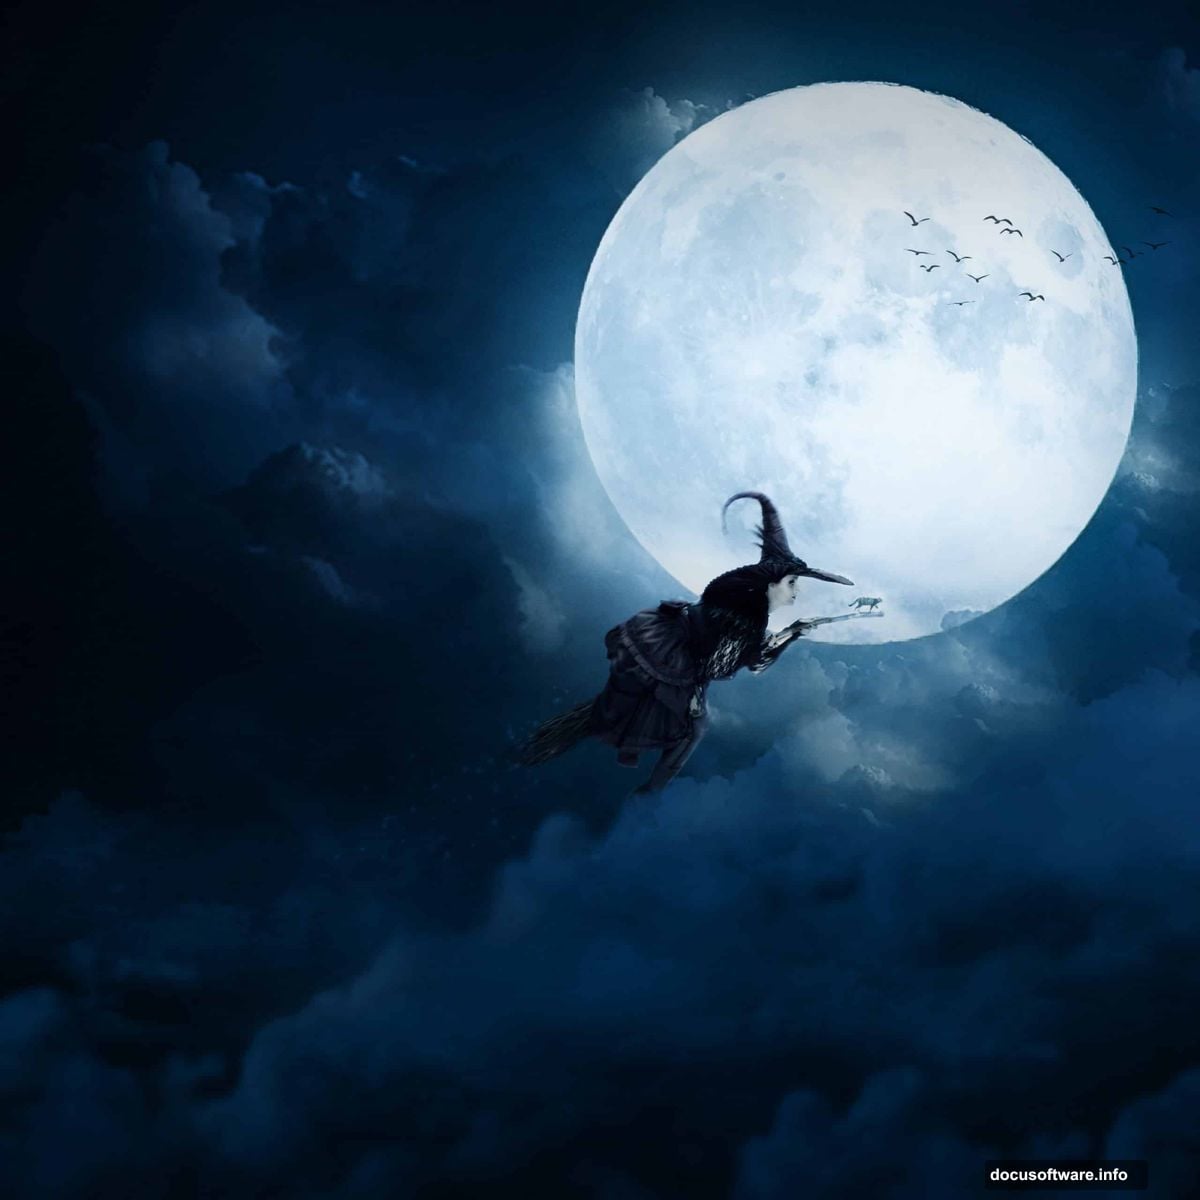
Position the witch silhouette prominently. She should overlap the moon slightly for dramatic effect. Scale her larger than realistic to emphasize the surreal fantasy vibe.
Add the Cat Companion
Every witch needs a cat. Place your cat image and extract it using the same selection techniques. Position the cat near the witch, maybe perched on her shoulder or sitting at her feet.
Match the cat’s scale to the witch. They should feel like they belong in the same physical space. Add a subtle shadow beneath the cat using a soft black brush at low opacity. This grounds the element.
Create Atmospheric Depth
Now the scene exists, but it probably feels flat. Add a Gradient Map adjustment layer above everything. Choose a blue-to-orange gradient. Set the layer to Color blend mode at 30% opacity.
This unifies all your separate elements under a consistent color cast. The blue tones deepen shadows while orange touches add warmth to highlights. Suddenly everything looks like it belongs in the same photograph.
Add another Curves adjustment layer. Lift the RGB curve slightly in highlights. Drop it in shadows. This increases overall contrast and makes the scene more dramatic. The moon should glow brighter while dark areas get richer.
Paint Magical Stars
Import your stars brush pack using the same method as clouds. Create a new layer and set it to Screen or Linear Dodge blend mode. This ensures stars show up bright against the dark sky.
Paint stars with white using various brush sizes from your pack. Concentrate more stars around the moon for a magical focal point. Scatter fewer, dimmer stars throughout the rest of the sky.
Create another stars layer at lower opacity. Use tinier brush sizes to add distant background stars. This depth layering makes the night sky feel vast and dimensional.
Final Color Grading
Go to Filter > Camera Raw Filter. This opens Adobe Camera Raw inside Photoshop. Make these adjustments:
Increase Clarity by +15 to +20. This sharpens midtone contrast without harsh edges.
Push Vibrance up +10 to +15. This saturates muted colors without oversaturating already-vivid areas.
Adjust Temperature slider slightly toward blue (left) for cooler night tones.
Boost Shadows +15 to recover detail in dark areas.
Lower Highlights -10 to prevent moon from clipping.
Polish With Selective Sharpening
Create a merged copy of all visible layers (Ctrl/Cmd + Alt + Shift + E). This gives you a flattened version while keeping original layers intact below.
Go to Filter > Sharpen > Unsharp Mask. Set Amount to 80%, Radius to 1.0 pixels, Threshold to 0. Click OK. This adds crisp detail throughout the image.
Add a layer mask to this sharpened layer. Paint with black in the mask over any areas that look oversharpened, like the moon glow or distant clouds. Selective sharpening keeps important details crisp while maintaining soft atmospheric areas.
Common Problems and Fixes

Edges look too sharp and cut-out? Add a slight Gaussian Blur (0.3 to 0.5 pixels) to your subject masks. This softens selection edges and helps elements blend naturally.
Colors don’t match between elements? Use Color Balance adjustment layers clipped to individual elements. Match their color temperature to your scene’s overall palette.
Scene lacks depth? Add atmospheric perspective. Elements farther away should be less saturated, lighter, and slightly blurred. Adjust distant birds and background clouds accordingly.
Why This Technique Matters
Learning proper layer management and adjustment layer workflows transforms your Photoshop work. These same techniques apply whether you’re creating fantasy scenes, product mockups, or professional composites.
The key insight? Build scenes in layers with non-destructive adjustments. Never paint directly on your original images. Use adjustment layers, blend modes, and masks to maintain flexibility. You can tweak any element later without starting over.
Plus, understanding how to unify disparate photos under consistent lighting and color transforms amateur collages into professional-looking artwork. The gradient map trick alone will level up any composite you create.
Halloween tutorials in July might seem odd. But practicing photo manipulation skills year-round means you’re ready when October actually arrives. The techniques work for any themed scene—Christmas, fantasy landscapes, sci-fi environments, whatever you dream up.