
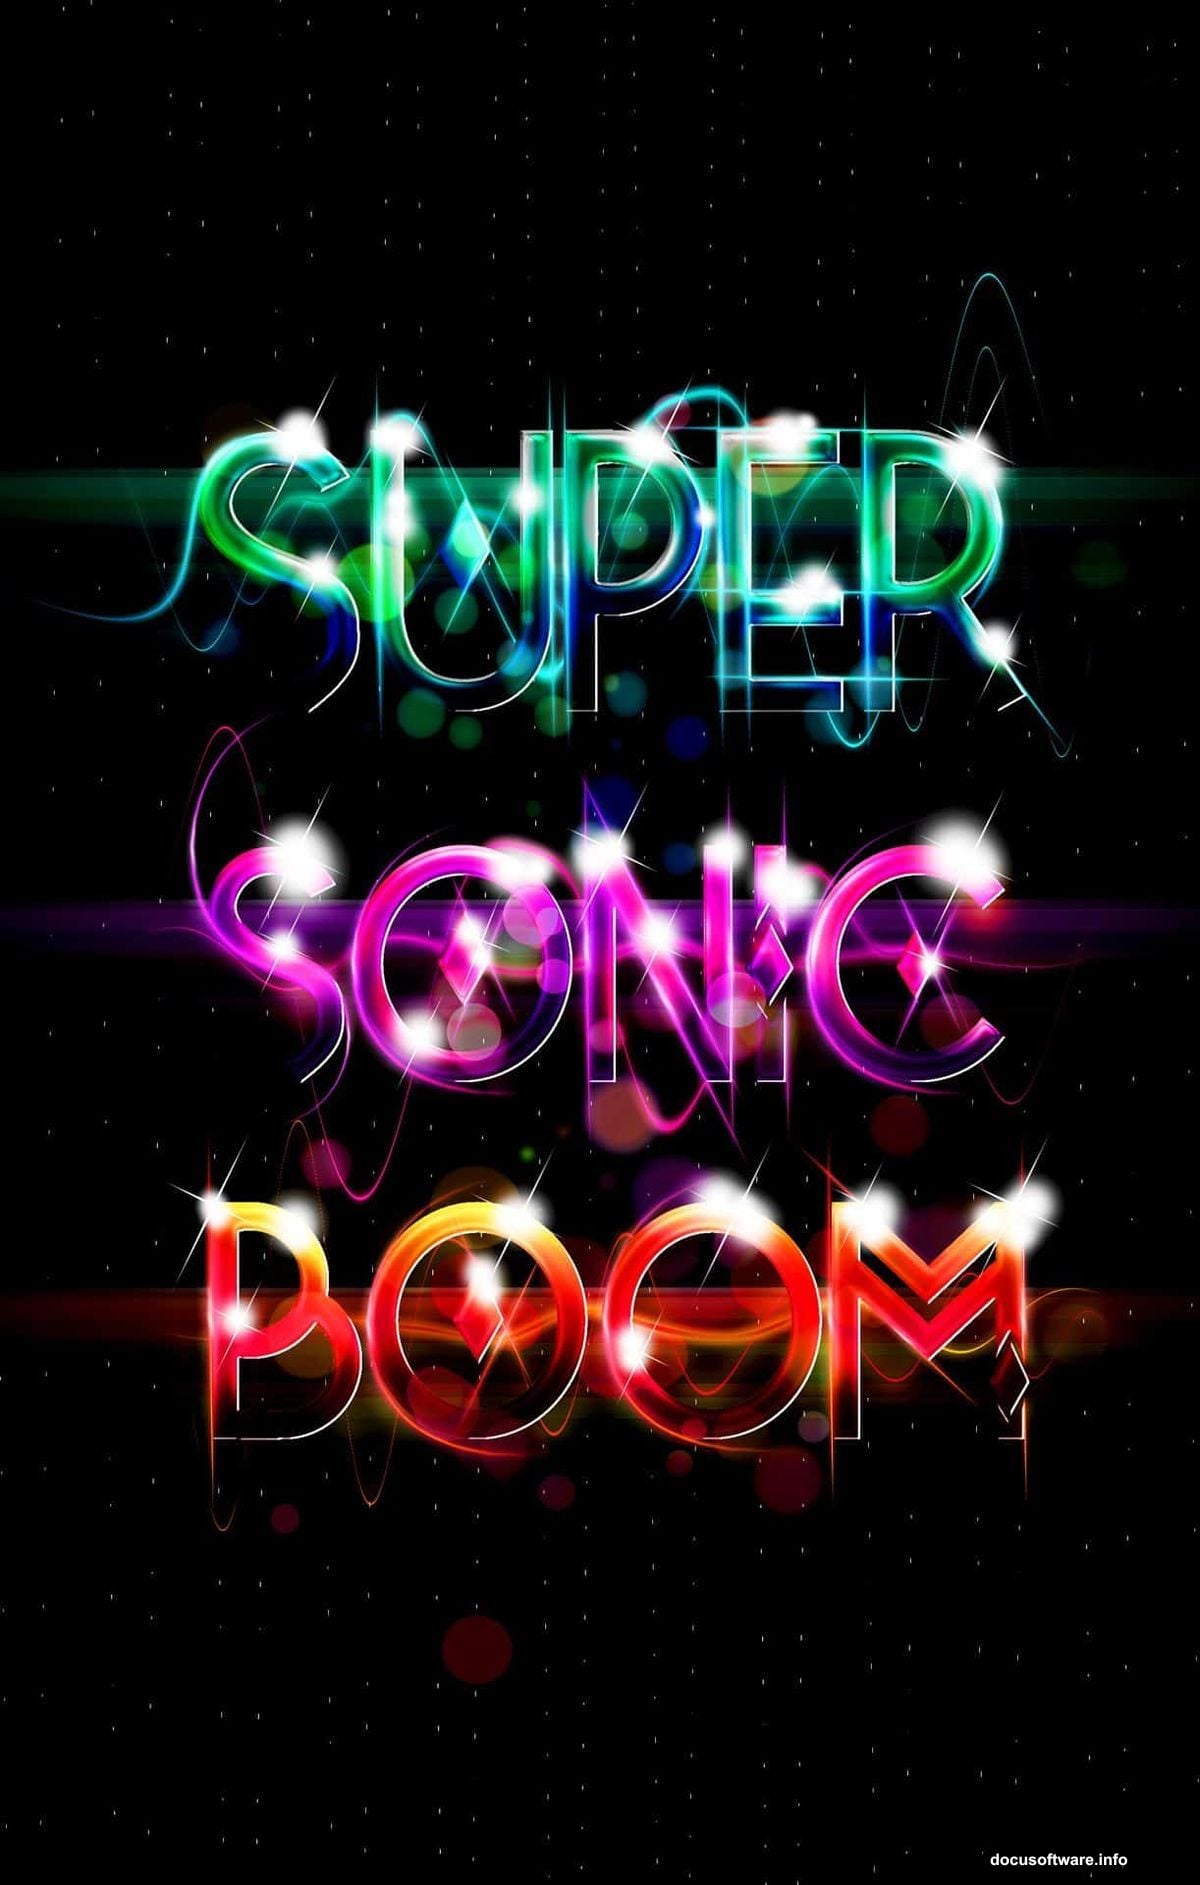
Shiny 80s-style text never goes out of style. Those glowing, gradient-filled letters with colorful highlights? They’re everywhere in modern design.
Creating that look seems complicated. But Photoshop makes it surprisingly straightforward once you know the right techniques. Let’s build some eye-catching chrome text from scratch.
Set Up Your Canvas Right
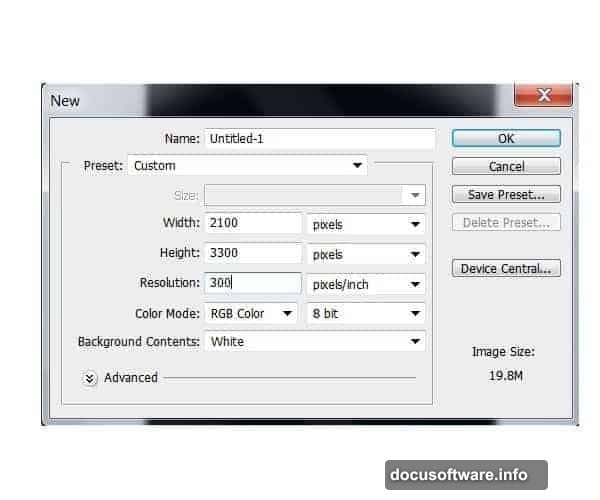
Start with a new Photoshop document at 2100×3300 pixels and 300 dpi resolution. That gives you plenty of room to work and keeps everything crisp for print or web.
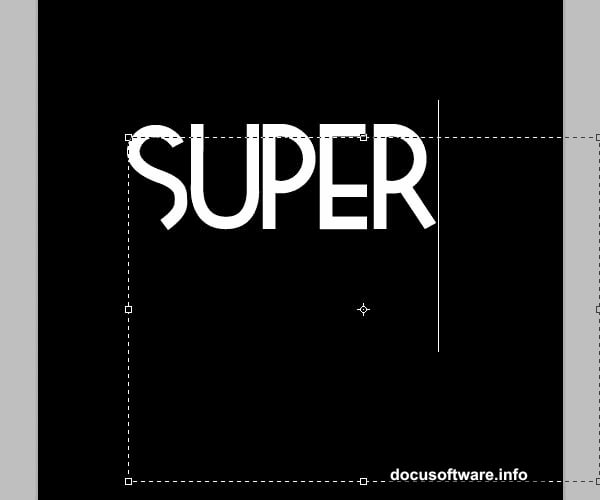
Fill your background layer with solid black using the Paint Bucket Tool (G). The dark background makes bright colors pop harder. Plus, it mimics the classic neon-on-black aesthetic from vintage arcade graphics.
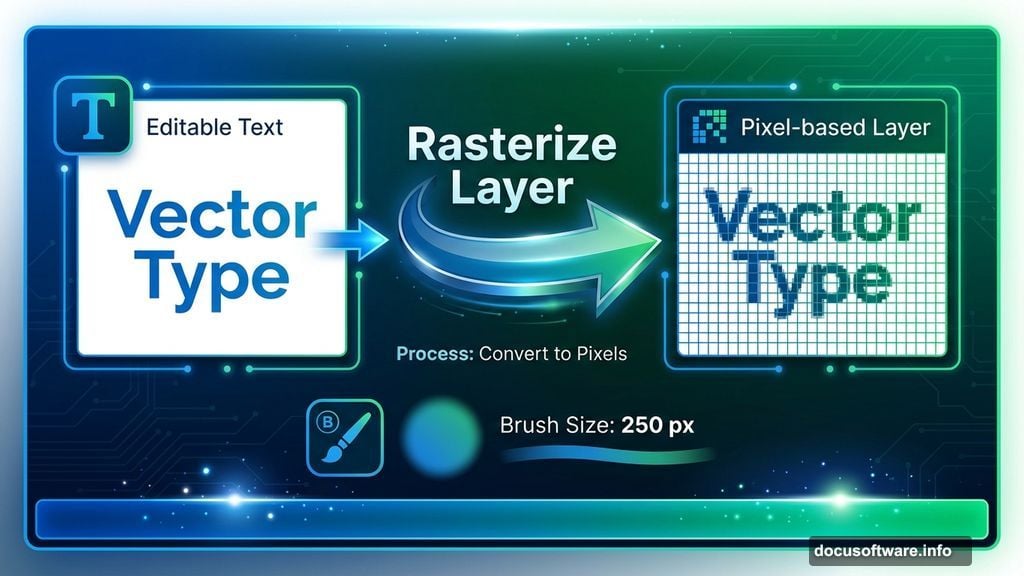
Now grab the Type Tool (T) and pick a bold, geometric font around 250 points. The original tutorial uses Tetra, but any chunky display font works great. Type your word across the top of the canvas.
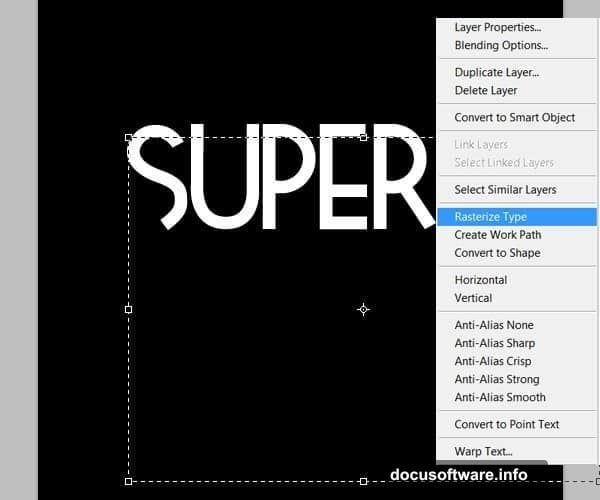
Here’s the key step most people skip. Right-click your text layer and select “Rasterize Layer.” This converts the text from editable type to pixels you can paint and manipulate freely.
Paint Your Color Gradient
Create a fresh layer above your rasterized text. Then Ctrl+click the text layer thumbnail to load its shape as a selection.
Switch to the Brush Tool (B) and set it to soft round with 0% hardness at about 250 pixels wide. This is where the magic happens.
Pick your middle-tone color first. For that classic arcade vibe, try starting with deep blue. Fill your selection completely with that base color.
Now comes the shading. Paint darker blue tones across the bottom sections of each letter. Keep your brush soft and lower the opacity to 40% so colors blend smoothly.
Gradually work your way up through brighter shades. Add dark green over the mid-sections, then brighter greens toward the tops of letters. The trick is leaving hints of the colors underneath visible through your new strokes.
Finally, switch to pure white on a smaller brush and add sharp highlights to the very brightest spots. This creates that chrome-like shine that makes the text feel dimensional.
Adjust the overall punch by going to Image > Adjustments > Brightness/Contrast. Bump both values up slightly until the colors really sing against that black background.
Build Flowing Light Streams
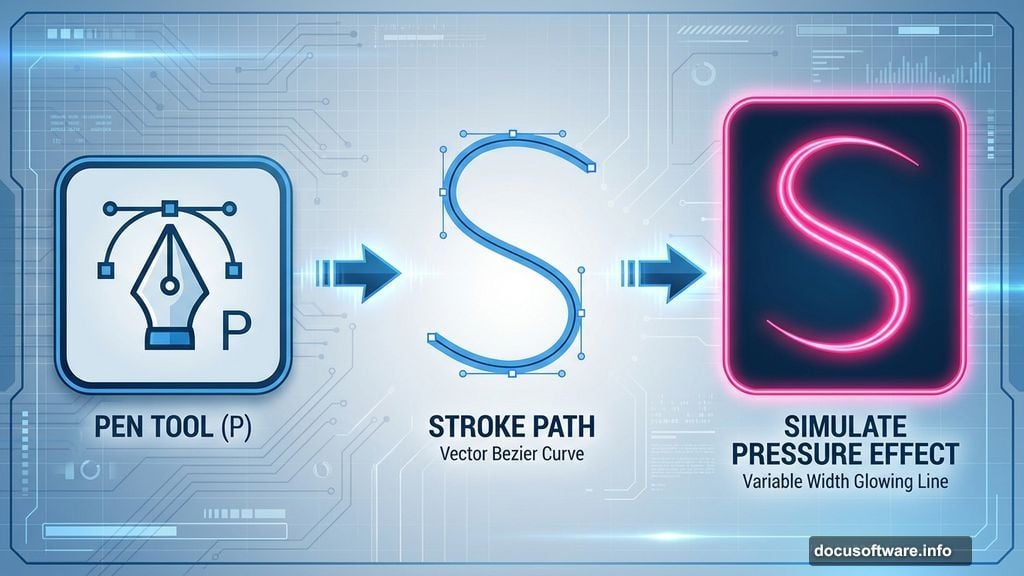
The wavy light trails give retro text its signature movement. Grab the Pen Tool (P) and draw curved paths that flow around and through your letters.
Keep your curves smooth and organic. Sharp angles look wrong here. You want paths that feel like neon tubes bending through space.
Right-click each path and choose “Stroke Path.” Select Brush from the dropdown and check “Simulate Pressure.” This varies the line width automatically, creating that hand-drawn glow effect.
Set your brush to a bright color that complements your text gradient. For blue-green text, try hot pink or electric yellow for maximum contrast.
Here’s where it gets fun. Use the Warp Tool (Edit > Transform > Warp) to bend and twist your light streams around the letter shapes. Make them weave through negative space and wrap around curves naturally.
Add glow by duplicating your light layer and applying a Gaussian Blur of about 8-10 pixels. Set this blurred copy to Screen blend mode. Instant neon glow.
Layer Your Lighting Effects
Real chrome reflects light from multiple sources. So should your text.
Create several new layers and paint soft white spots with a large, low-opacity brush over different areas of your letters. Set these layers to Overlay or Soft Light blend mode.
This simulates ambient light bouncing off the reflective surface. The overlay modes interact with your gradient colors underneath, creating realistic-looking reflections.
Add some lens flares for extra 80s flavor. Go to Filter > Render > Lens Flare and place small flares at your brightest highlight points. Use them sparingly though. One or two strategic flares go further than scattering them everywhere.
Drop in some bokeh texture overlays if you have them. Set them to Screen blend mode at low opacity. This adds atmospheric depth without overwhelming your text.
Polish With Final Details
Zoom way in and look for rough edges where colors meet. Use a small, soft eraser at low opacity to smooth any harsh transitions you find.
Add subtle noise to your entire composition. Create a new layer filled with 50% gray, then go to Filter > Noise > Add Noise. Set it to Gaussian, Monochromatic, about 3-5%. Change the layer to Overlay mode at 20% opacity. This gives everything a slightly textured, printed quality.
Consider adding a subtle vignette. Make a new layer, fill it with black, then use a large soft eraser to clear the center. Set this layer to Multiply at 15-20% opacity. It focuses attention on your text.
Finally, create a merged copy of all visible layers (Ctrl+Alt+Shift+E). Run a High Pass filter on this merged layer at a radius of 0.5-1.0 pixels. Set the layer to Overlay mode. This adds micro-contrast that makes details snap.
Why This Technique Works
The secret to convincing retro chrome isn’t any single effect. It’s layering multiple techniques that all work together.
Your gradient provides the base color and dimension. The light streams add movement and energy. The overlay effects create realistic reflections. The finishing touches tie everything into a cohesive whole.
Each element serves a purpose. Remove any one piece and the effect weakens noticeably.
That’s also why this look translates across so many design styles. The same techniques work whether you’re building 80s synthwave graphics, modern gaming logos, or futuristic UI elements.
Master these fundamentals and you can adapt them endlessly. Change colors for different moods. Adjust lighting for various atmospheres. Modify the intensity for subtle or extreme results.
The Photoshop tools might seem intimidating at first. But break the process into these clear steps and it becomes manageable. Plus, the more you practice, the faster and more intuitive it gets.
Your first attempt might take an hour. After a few tries, you’ll knock out polished chrome text in 15 minutes. That’s when it gets really fun to experiment.