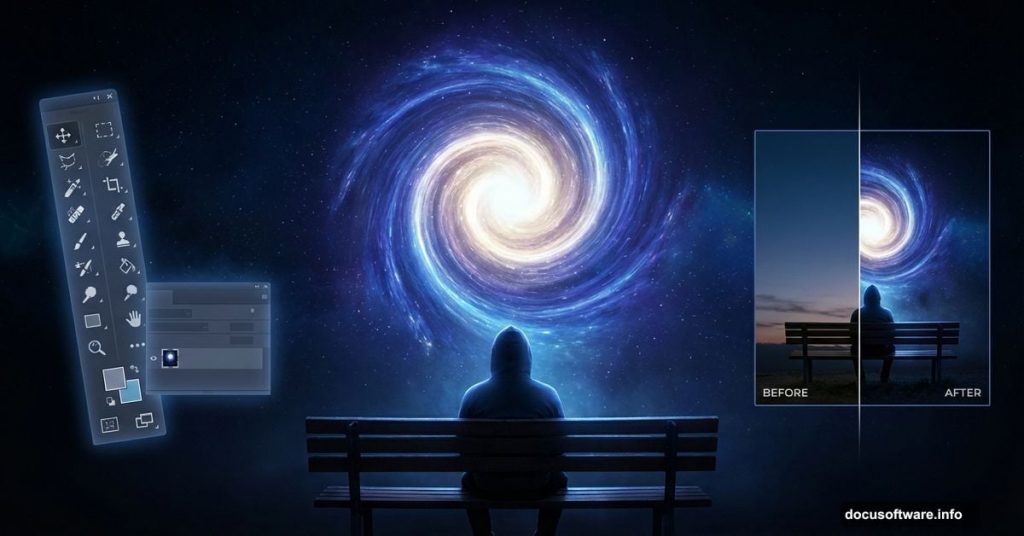
Surreal photo manipulation transforms ordinary photos into impossible scenes. This tutorial shows how to create a man watching what appears to be a magical portal opening in the sky.
You’ll learn the core techniques that make surreal composites work. Plus, the process breaks down into manageable steps that build on each other. Let’s start creating.
What You’re Building
This artwork combines multiple photos into one impossible scene. A person sits on a bench watching otherworldly phenomena unfold above them. The sky becomes a gateway to another dimension.
The techniques work in any Photoshop version. We’re using layer masks to select elements and adjustment layers to blend everything together. These two tools do most of the heavy lifting.
Materials You Need
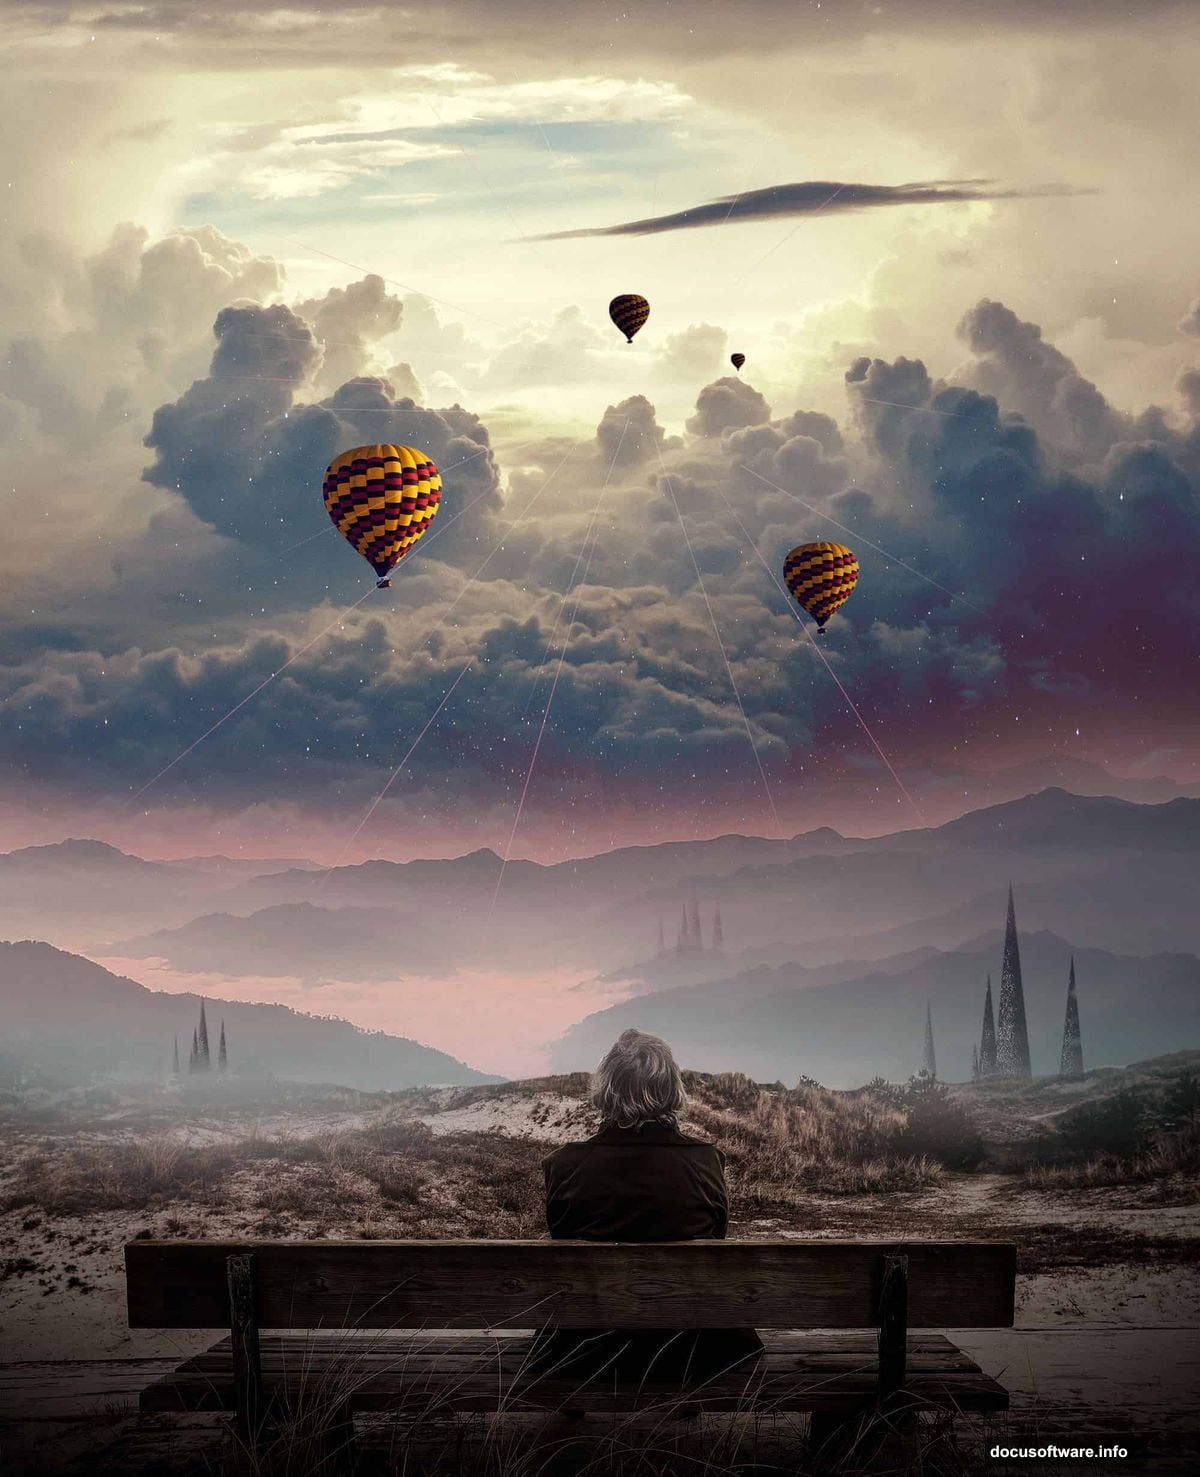
Gather your source images first. You need photos of a person, mountains, sky elements, stars, and atmospheric objects like hot air balloons. Unsplash provides excellent free stock photos for practice projects.
Download high-resolution versions when possible. Larger images give you more flexibility during composition. But don’t worry if resolution varies between sources. Smart blending techniques compensate for quality differences.
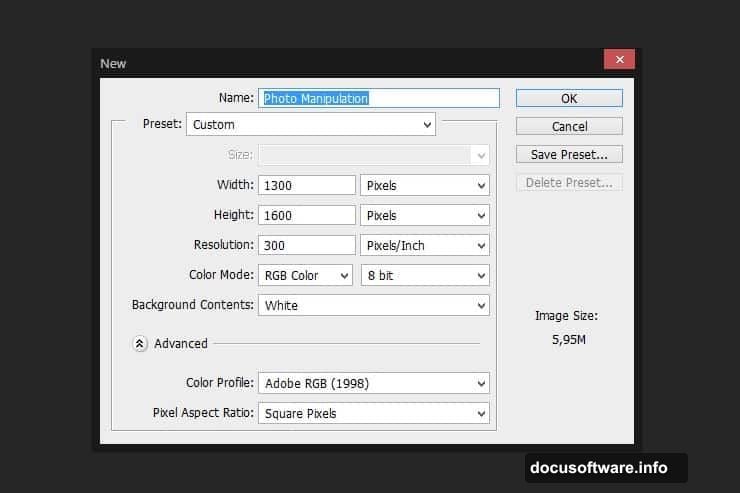
Setting Up Your Canvas
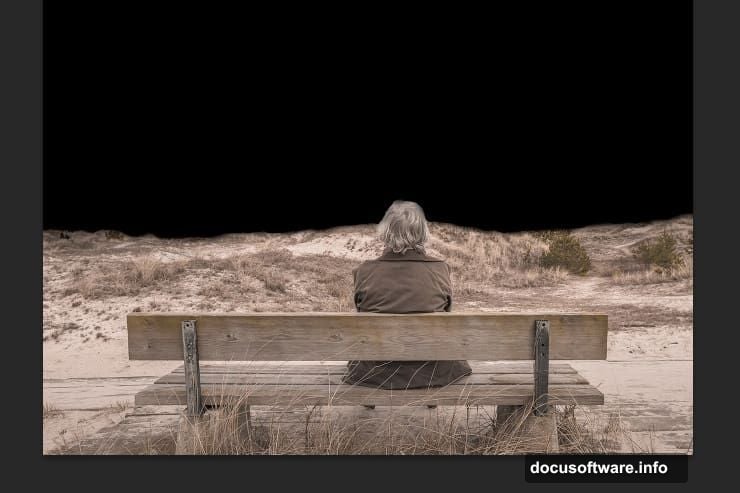
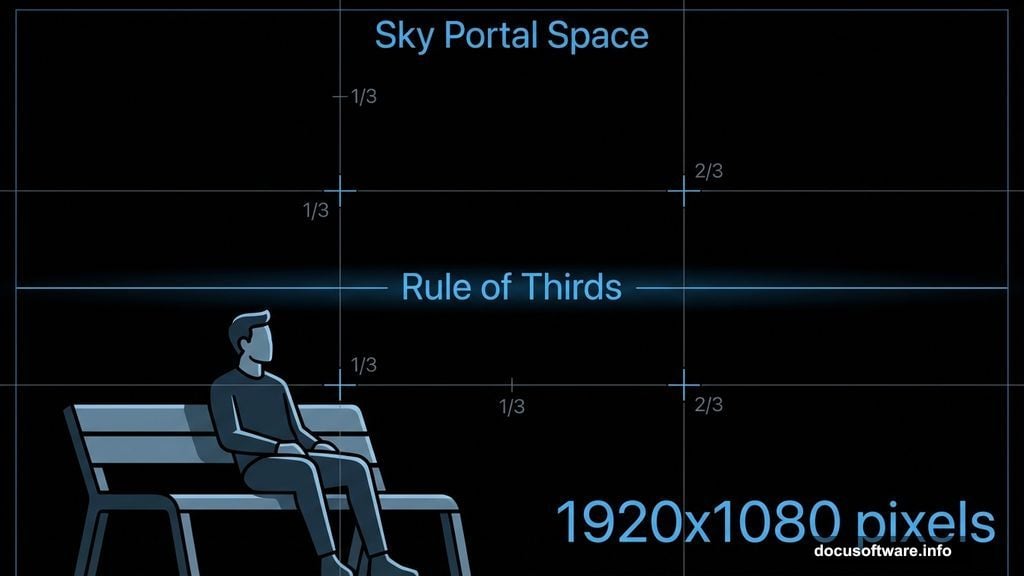
Start with a new document. Use 1920×1080 pixels for standard desktop wallpaper size. Fill the background layer with pure black. This creates the mysterious atmosphere we need.
Black backgrounds make bright elements pop dramatically. Plus, it’s easier to lighten areas later than darken them convincingly. The dark foundation sets the mood immediately.
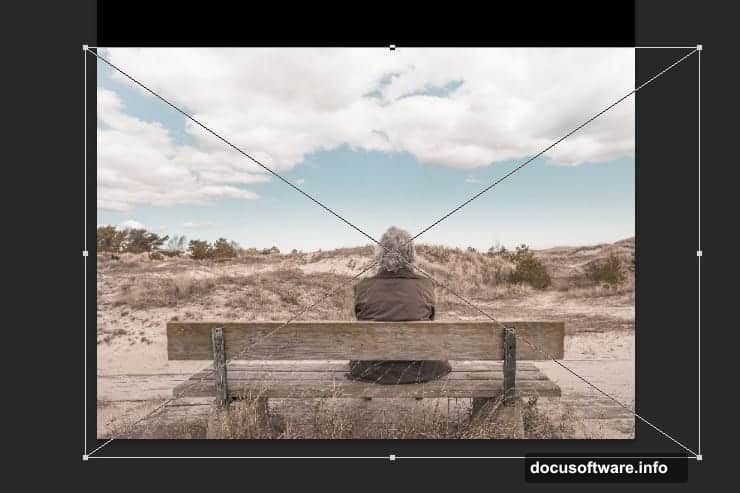
Placing Your Main Subject
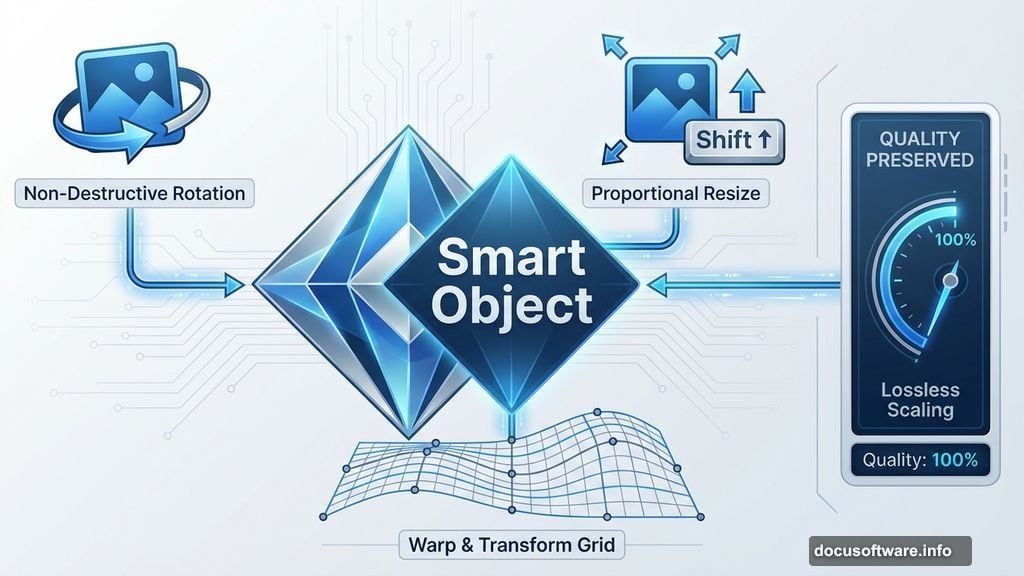
Import your person photo as a Smart Object. Go to File > Place and position it where you want. Hold Shift while resizing to maintain the original proportions.
Smart Objects preserve image quality through transformations. You can resize, rotate, and warp without permanently degrading pixels. This flexibility proves invaluable during composition adjustments.
Position the person in the lower third of the frame. This composition rule creates visual interest and leaves room for the dramatic sky above.
Masking the Original Sky
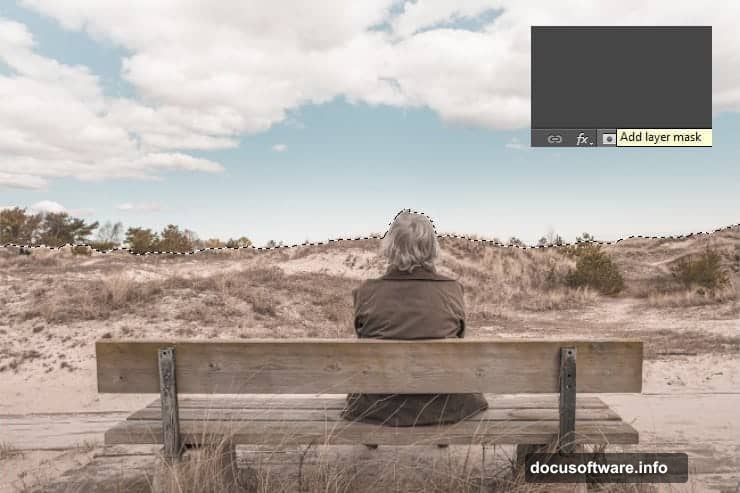
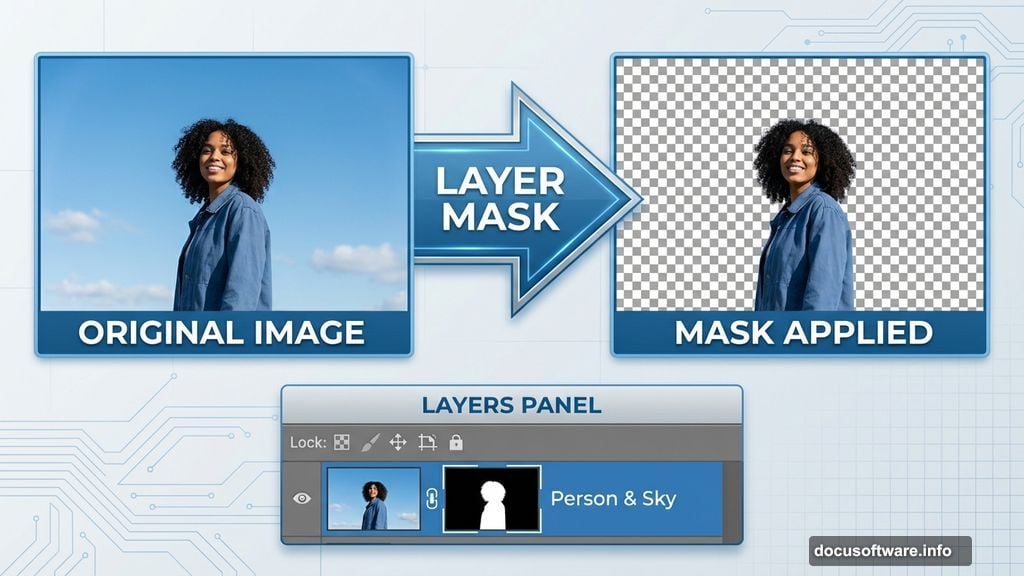
The original sky in your person photo needs to go. Use the Pen Tool or Lasso Tool to select everything you want to keep. Then click the Add Layer Mask button at the bottom of the Layers panel.
This selection method creates a precise mask instantly. The selected area remains visible while everything outside disappears. It’s faster than painting masks from scratch.
Refine the mask edges next. Select a soft brush and paint with black along the horizon line. This softens hard edges and helps the foreground blend naturally with your new background.
Adjusting the Subject’s Colors
Three adjustment layers balance the subject’s colors. Add Hue/Saturation, Curves, and Levels adjustments. Find these options in the Create New Fill or Adjustment Layer menu.
Right-click each adjustment layer and select Create Clipping Mask. This crucial step makes adjustments affect only the person layer. Without clipping masks, changes apply to your entire image.
The Hue/Saturation layer shifts color temperature to match your atmospheric lighting. Curves control contrast and tonal range. Levels set proper black and white points.
These adjustments might seem subtle now. But they become critical when additional elements enter the composition. Color harmony makes or breaks composite realism.
Building the Landscape Foundation
Place your mountain landscape photo next. Move this layer below your person in the Layers panel. This stacking order puts mountains behind the foreground subject.
Mask the top portion of the mountain layer. Choose which peaks appear in your final composition. Vary the mask edge softness to create depth. Sharper edges suggest closer mountains while soft edges imply distance.
The landscape anchors your composition. It provides a realistic foundation that makes the impossible sky elements believable by contrast.
Adding Atmospheric Depth
Layer additional sky elements above your mountains. Stars, nebulae, and color gradients build the magical portal effect. Each element gets its own layer for maximum control.
Blend modes transform how layers interact. Try Screen, Lighten, or Linear Dodge for glowing effects. Overlay and Soft Light work well for subtle color shifts.
Reduce opacity on atmospheric layers. Full-strength effects look fake. Layers at 40-60% opacity blend more naturally while still creating impact.
Creating the Portal Effect
The magical portal forms from overlapping circular gradients and star fields. Use the Elliptical Marquee Tool to create circular selections. Fill with radial gradients that fade from bright centers to transparent edges.
Stack multiple gradient circles at different sizes and rotations. This layering creates depth and complexity. Real magical portals wouldn’t be perfectly symmetrical anyway.
Add lens flare effects sparingly. A single, well-placed flare suggests powerful energy. Too many flares destroy the mystery.
Color Grading for Unity
Color grading ties everything together. Create a Color Lookup adjustment layer at the top of your layer stack. This affects all layers simultaneously.
Choose a lookup table that adds atmospheric haze and color harmony. Teal and orange combinations work well for surreal scenes. They’re complementary colors that feel cinematic.
Fine-tune with a final Curves adjustment. Lift the shadows slightly to prevent crushed blacks. Add subtle color shifts in the highlights. These small tweaks make huge differences in polish.
Lighting Consistency Matters
Light direction must stay consistent across all elements. If your person is lit from the right, your magical sky should emit light from the same direction.
Add subtle rim lighting to your subject. Create a new layer set to Screen blend mode. Paint white along edges facing your light source using a soft brush at low opacity.
This rim lighting separates the subject from the background. It also suggests the magical sky is casting real light into the scene.
Final Details and Polish
Zoom in and check mask edges carefully. Refine any areas where elements don’t blend smoothly. A soft eraser at low opacity fixes most problems.
Add subtle vignetting by creating a levels adjustment with a radial gradient mask. This darkens corners and draws eyes toward the center.
Check your composition at thumbnail size. If the main elements don’t read clearly when small, adjust contrast or positioning. Compelling compositions work at any size.
What Makes This Technique Powerful
Photo manipulation combines photography and digital painting. You’re not just editing photos. You’re building entirely new realities from raw materials.
The process teaches fundamental compositing skills. Master these and you can create any imaginable scene. Product mockups, concept art, or personal projects all use these same techniques.
Practice with different subject combinations. Try replacing the portal with different phenomena. Storm clouds, alien structures, or abstract patterns all work with this foundation.
Moving Forward
Start simple and add complexity gradually. Your first attempts might look rough. That’s normal and expected. Each project teaches techniques that improve the next one.
Study other artists’ surreal composites. Notice how they blend elements and create lighting. But don’t copy directly. Use inspiration to fuel your own unique vision.
The tools matter less than your artistic decisions. Color choices, composition, and storytelling separate good work from great work. Technical skills develop faster than artistic vision.
Keep creating. Every project strengthens your skills and expands what you can imagine. The only limit is how much time you’re willing to invest.