Adobe Illustrator has powerful features hiding in plain sight. Most designers never discover them. That’s a shame because these tools can cut your project time in half.
Let’s explore eight practical techniques that transform how you work in Illustrator. No fluff. Just actionable tips you can use today.
Save Time With The Symbols Panel
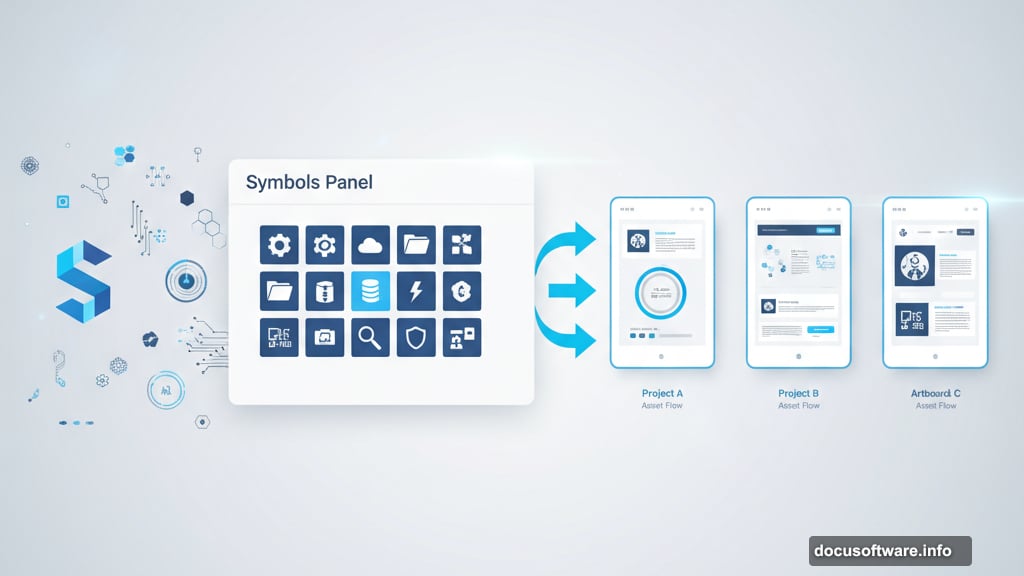
The Symbols panel is criminally underused. Think of it as your personal asset library that follows you across projects.
Here’s how it works. Create a logo, icon, or graphic element you use frequently. Then drag it into the Symbols panel. Now that artwork lives there permanently until you remove it.
Why does this matter? You avoid recreating common elements from scratch. Plus, symbols update globally across your document when you edit the master version. Change it once and watch it update everywhere.
Most designers waste hours rebuilding the same elements repeatedly. Meanwhile, smart designers build their symbol libraries and work three times faster.
Graphic Styles Panel Saves Your Sanity
Ever spent 20 minutes perfecting an appearance combination? Fill color, stroke weight, opacity settings, blend modes. Then needed that exact look later but forgot the settings?
The Graphic Styles panel solves this frustration. It stores complete appearance packages you can apply with one click.
Create your perfect style once. Save it to the panel. Apply it to any object instantly. No more guessing at opacity percentages or hunting through swatches.
Moreover, you can share graphic styles between documents. Build a style library for your brand and maintain perfect consistency across all your work.
Ctrl/Cmd + D Repeats Your Last Move
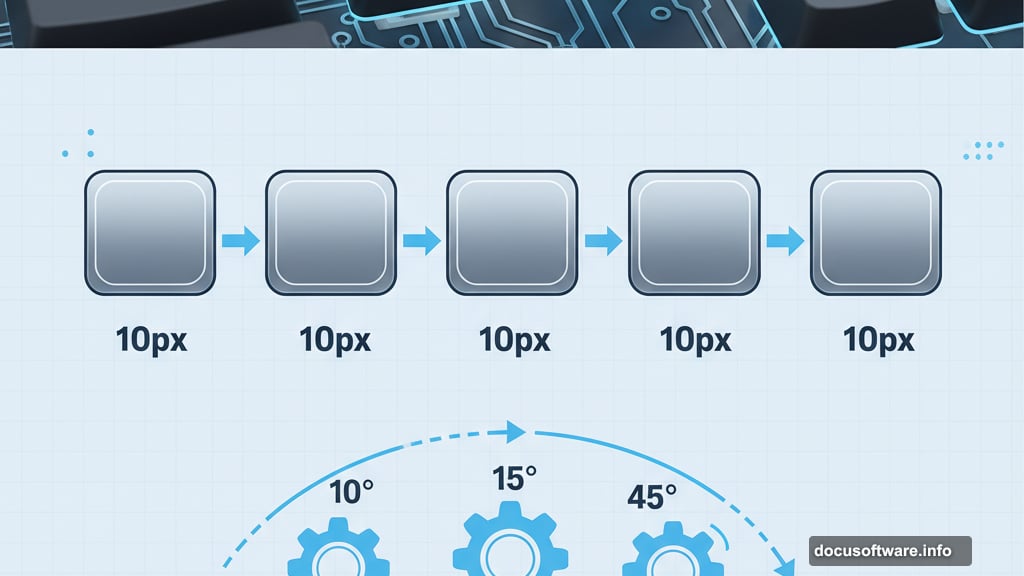
This keyboard shortcut is pure magic. Press Ctrl+D on Windows or Cmd+D on Mac to repeat your last transformation.
Moved an object 10 pixels right? Hit Ctrl/Cmd+D to move it another 10 pixels. Rotated something 15 degrees? The shortcut rotates it another 15 degrees. Scaled an object down 50%? You get the idea.
This works brilliantly for creating patterns and evenly spaced elements. Move one object. Then tap Ctrl/Cmd+D repeatedly to create a perfect row with consistent spacing.
So simple. Yet most designers still manually copy and position objects. That’s like choosing to walk when you own a car.
Use Pathfinder For Complex Shapes Fast
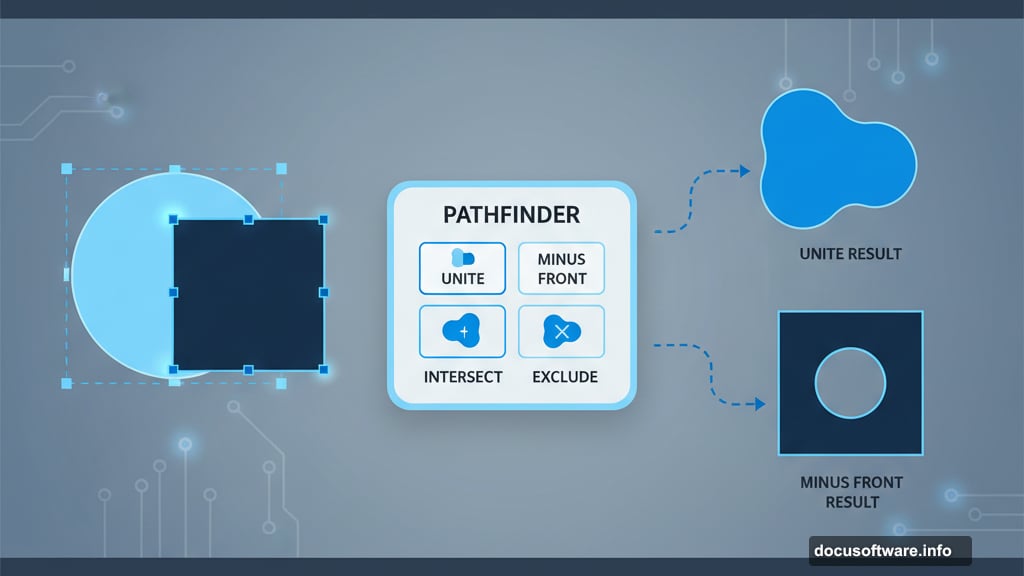
The Pathfinder panel turns multiple simple shapes into complex designs instantly. It’s basically shape math.
Draw a circle and a square. Select both. Click “Unite” in Pathfinder. Now they’re one merged shape. Or click “Minus Front” to cut the circle out of the square.
Here’s why this matters. Creating custom shapes from scratch takes forever. But combining basic shapes? That’s quick work.
Plus, Pathfinder lets you experiment rapidly. Try different combinations until something clicks. Then expand the result when you’re happy with it.
Most professional logo designs start as simple shapes combined through Pathfinder. Learn this tool and your design options explode.
Appearance Panel Controls Everything
The Appearance panel might be Illustrator’s most powerful feature. Yet beginners ignore it completely.
This panel shows every visual property applied to your selection. Multiple fills, multiple strokes, effects, opacity settings. Everything stacks in one place.
But here’s the real power. You can reorder these properties. Put a stroke above a fill. Apply effects to specific fills instead of the whole object. Stack multiple strokes with different colors and weights.
This level of control creates effects impossible through basic panels. And you maintain complete editability. Change your mind later? Just tweak the appearance stack.
Align Panel Beats Manual Positioning
Stop dragging objects around trying to line them up perfectly. The Align panel handles precision positioning instantly.
Select multiple objects. Click “Align Horizontal Center” to stack them perfectly. Or “Distribute Vertical Space” to create even gaps between elements.
The time savings add up quickly. What takes five minutes of manual nudging happens in two clicks. Plus, you get mathematically perfect alignment instead of “close enough.”
Moreover, you can align to the artboard instead of to the selection. This makes centering designs on your canvas trivially easy.
Smart Guides Show You The Way
Smart Guides are those helpful green lines that appear when you move objects. They show alignment with other elements in real-time.
Turn them on from View menu if they’re not already active. Then watch as Illustrator highlights when objects align, snap to centers, or maintain equal spacing.
This feature makes manual positioning actually work. You see alignment opportunities as they happen instead of guessing.
But here’s a pro tip. Smart Guides work better with fewer objects visible. If your canvas is cluttered, lock layers you’re not editing. This reduces visual noise and makes guides more useful.
Learn The Pen Tool Properly
The Pen Tool intimidates new users. But mastering it separates professionals from amateurs.
Click once for straight anchor points. Click and drag for curves. The key? Place fewer anchor points than you think you need. More points create bumpy curves. Fewer points create smooth, flowing lines.
Start by tracing simple shapes. Practice creating smooth curves with just two or three anchor points. Build muscle memory for how far to drag handles.
Then tackle the keyboard modifiers. Hold Alt/Option to convert anchor point types on the fly. This lets you create sharp corners in the middle of curves without breaking your workflow.
The Pen Tool feels awkward at first. That’s normal. But after a few hours of practice, it becomes second nature. Then you can draw anything imaginable.
Put These Tips Into Practice
These eight techniques won’t transform you overnight. But they compound over time.
Start with one or two that solve your biggest frustrations. Master those before moving to the next. Build better habits gradually instead of trying to change everything at once.
Plus, remember that Illustrator rewards exploration. Experiment with panels you’ve never opened. Test features that seem confusing. The more you play, the more tricks you discover.
Your future self will thank you for the time invested now. Every minute spent learning tools saves hours on future projects. That’s the best trade-off in design.