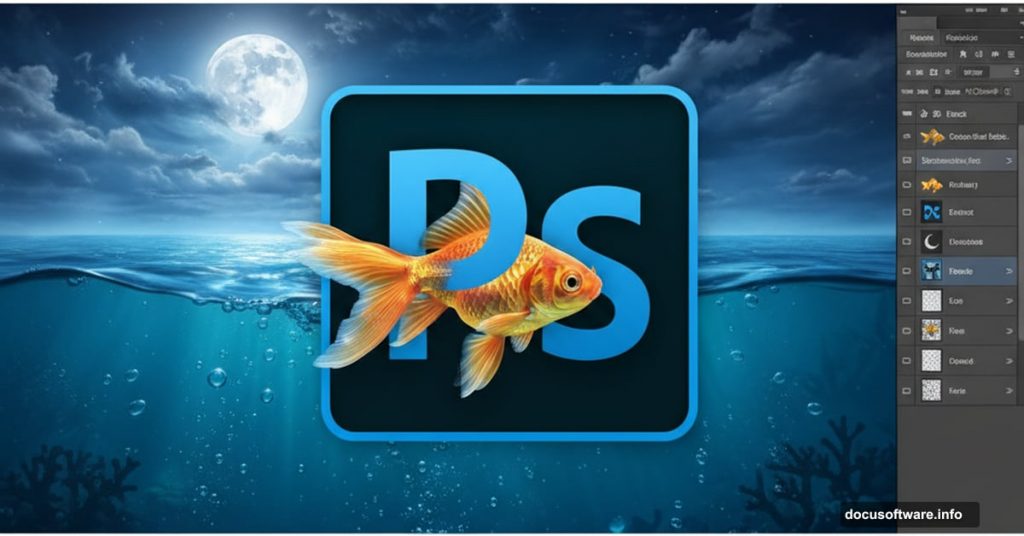
Photoshop transforms ordinary photos into extraordinary digital art. But most tutorials skip the crucial details that separate amateur edits from professional compositions.
This guide walks through creating a dramatic underwater goldfish scene. You’ll learn precise selection techniques, advanced blending modes, and realistic lighting effects. Plus, these skills apply far beyond this single project.
Let’s dive into techniques professional designers actually use.
Gather Your Source Images First
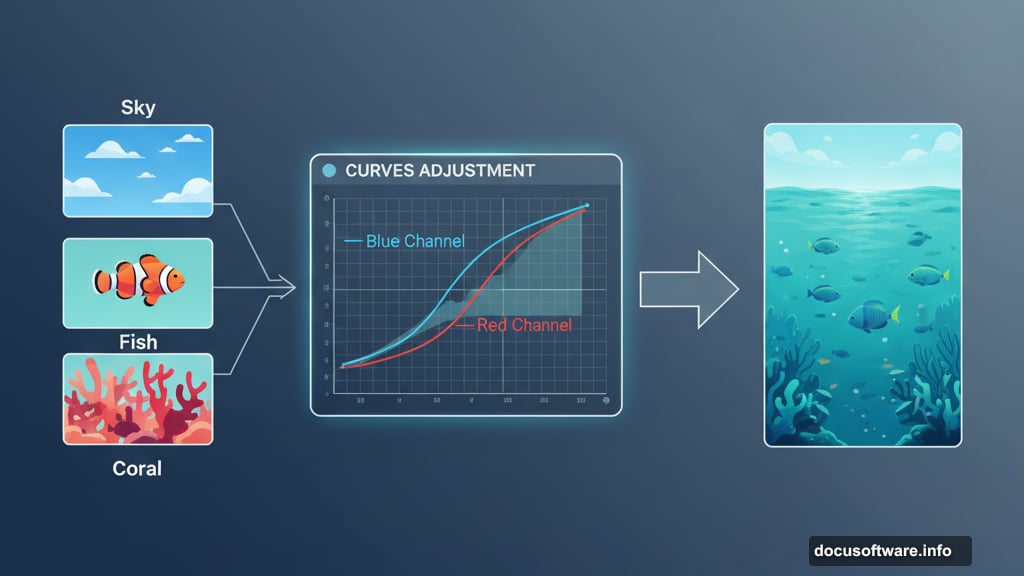
Before opening Photoshop, collect all necessary assets. You’ll need sky photos, underwater textures, fish images, coral elements, and bubble brushes.
Why gather everything first? Interrupting workflow to search for images kills creative momentum. Plus, seeing all assets together helps plan composition before making irreversible edits.
Download high-resolution source files. Low-quality images look acceptable on screen but fail when viewed full-size. Aim for at least 300 DPI if you plan to print.
Build the Foundation With Sky and Moon
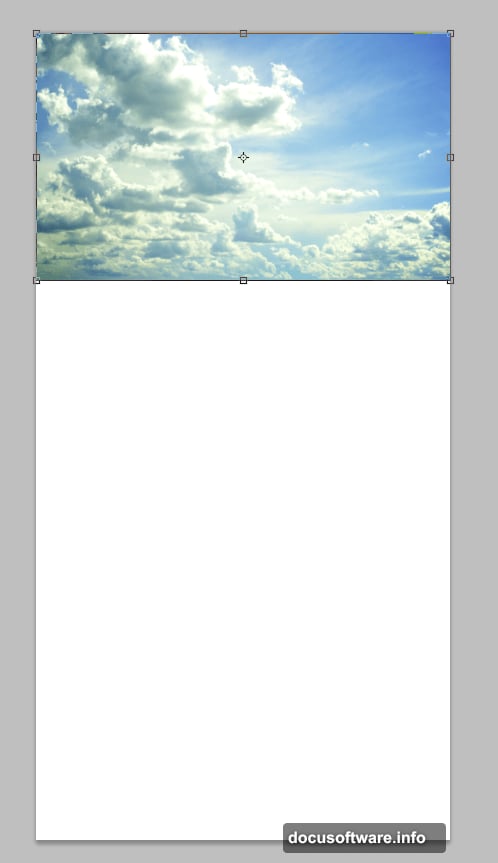
Create a 2150x4187px canvas. This vertical format works perfectly for underwater scenes where depth matters more than width.
Start by placing your sky image. Select all (Ctrl + A), copy (Ctrl + C), and paste into your document (Ctrl + V). Press Ctrl + T to activate Free Transform and scale appropriately.
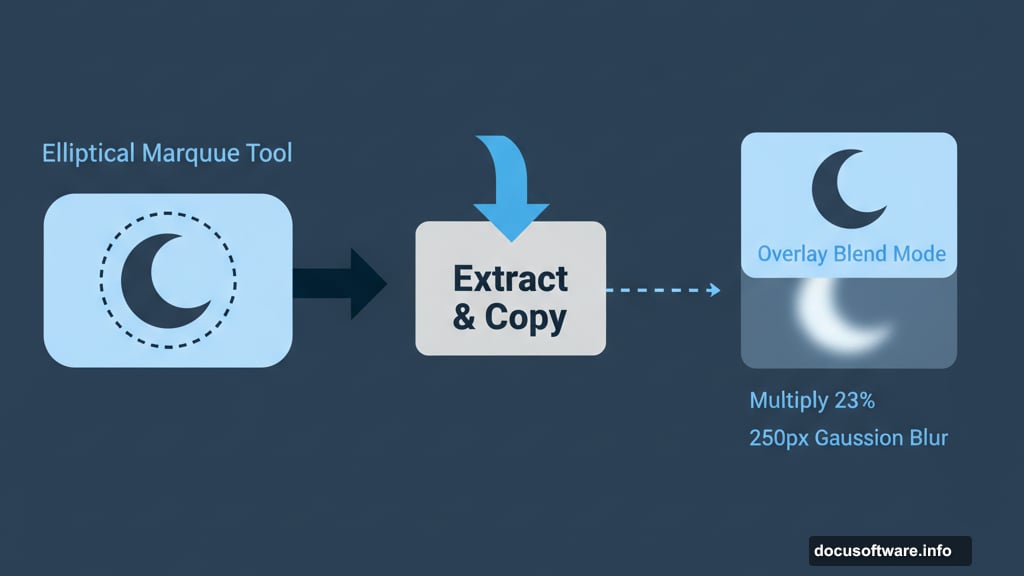
Next, extract the moon using the Elliptical Marquee Tool. Copy and paste it separately. This gives you independent control over moon positioning and effects.
Transform the moon to your desired size. Then change its blend mode to Overlay. This creates a luminous quality rather than a flat paste-job appearance.
Apply Advanced Blending for Realism
Double-click your moon layer to open Layer Style options. Add subtle Inner Glow and Outer Glow effects.
These adjustments make the moon feel integrated into the scene rather than pasted on top. Real celestial bodies emit light that interacts with atmospheric elements.
Now duplicate the moon layer (Ctrl + J). Ctrl-click the duplicate to select it, fill with black, and apply a 250px Gaussian Blur. Change blend mode to Multiply at 23% opacity.
This creates a realistic glow effect around the moon. It mimics how bright objects diffuse light through atmospheric particles.
Add Color Grading With Curves
Insert a Curves Adjustment layer. Adjust the Blue and Red channels specifically.
Pull the blue channel slightly upward. This adds oceanic tones throughout the entire image. Then tweak the red channel to complement without overpowering.
Color grading unifies disparate elements. Without it, pasted images look like a collage rather than a cohesive scene.
Moreover, proper color grading establishes mood. Cool blues evoke underwater depth while warm tones suggest surface proximity.
Create a Realistic Rainbow Effect
Make a new layer and draw a rectangular selection with the Marquee Tool. This defines your rainbow boundaries.
Select the Gradient Tool (G) and open the gradient editor. Add rainbow colors in order: red, orange, yellow, green, blue, indigo, magenta.
Drag the gradient across your selection while holding Shift. This ensures a perfectly horizontal gradient.
Erase the harsh edges with a soft eraser brush. Then apply a 20px Gaussian Blur to soften transitions between colors.
Press Ctrl + T to enter Free Transform. Right-click and select Warp, then choose Arch from the dropdown menu. This curves your rainbow naturally.
Real rainbows never appear perfectly straight. The arching effect makes them believable rather than artificial.
Build Underwater Depth With Layers
Successful underwater scenes require multiple depth layers. Foreground elements appear sharp while background details fade into murky blue.
Start by placing coral and plant elements at different distances. Scale and position them to create perspective.
Apply increasing amounts of Gaussian Blur to elements farther from the viewer. This mimics how water diffuses light over distance.
Additionally, adjust opacity on distant layers. Water absorbs light, making far objects appear faded and less saturated.
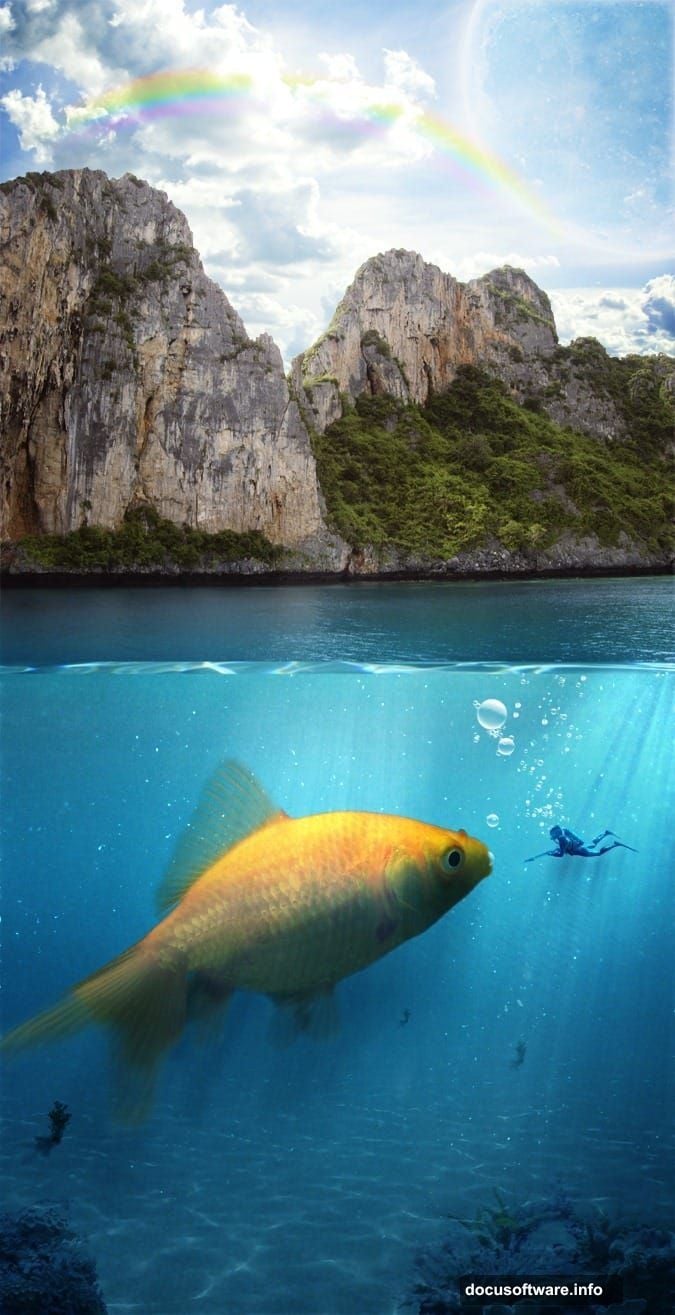
Position Your Giant Goldfish
Place your fish image and scale dramatically large. The oversized proportion creates visual impact and fantasy appeal.
Use the Pen Tool for precise selection around complex edges like fins. Take your time here. Clean selections separate amateur work from professional results.
After selecting, add a layer mask instead of deleting background pixels. Masks allow non-destructive editing if you need adjustments later.
Flip or rotate your fish until the composition feels balanced. Consider the rule of thirds when positioning focal points.
Add Realistic Water Surface Ripples

Create a new layer and fill it with black. Apply the Difference Clouds filter repeatedly until you achieve interesting patterns.
These patterns simulate light refracting through moving water. Real underwater photography always shows these dancing caustic patterns.
Change the blend mode to Screen or Lighten. Adjust opacity until the effect appears subtle rather than overwhelming.
Use a soft brush to paint away ripple effects where they shouldn’t appear. For instance, areas in deep shadow wouldn’t show strong caustics.
Integrate Human Elements for Scale
Add a diver to establish size reference. Without something recognizable, viewers can’t judge the fish’s enormous scale.
Position the diver small in the background. This emphasizes the goldfish’s massive proportions.
Apply the same depth techniques used earlier. Add slight blur and reduce saturation to push the diver into the background optically.
Remember, every element needs to respect the same lighting direction. Inconsistent shadows destroy believability instantly.
Create Volumetric Light Rays
Light rays streaming through water add dramatic atmosphere. Create these using custom brushes or the Polygonal Lasso Tool.
Draw triangular selections extending from the water surface downward. Fill selections with white on a new layer.
Apply significant Gaussian Blur to soften the rays. Then change blend mode to Screen and reduce opacity to taste.
Real underwater light behaves this way due to particles suspended in water. These particles scatter and reveal light beams that would otherwise remain invisible.
Add Final Details With Bubbles
Download bubble brushes or create your own. Paint bubbles rising from the diver, fish, and coral.
Vary bubble sizes and opacity. Real bubbles don’t all look identical.
Add slight motion blur to some bubbles. This suggests they’re moving upward through the water column.
Furthermore, place the tiniest bubbles nearest the water surface. Larger bubbles released deep underwater shrink as they rise due to pressure changes.
Color Correct for Consistency
Add a final Curves or Color Balance adjustment layer. This ensures all elements share the same color temperature and saturation levels.
Underwater scenes typically lean heavily blue-green. Too much warmth looks artificial unless near the surface during golden hour.
Compare your work to reference photos of actual underwater photography. Professional work always studies reality before adding fantasy elements.
Check your composition at different zoom levels. Details that look perfect zoomed in might read poorly at full view.
Export Settings Matter
Save your master file as a PSD with all layers intact. You’ll thank yourself later when clients request revisions.
For web display, export at 72 DPI in JPEG or PNG format. Choose JPEG for complex scenes with gradients. Use PNG when you need transparency.
For print, export at 300 DPI minimum. Check CMYK color mode if printing professionally. RGB colors don’t translate directly to print inks.
Test your final image on multiple displays. Colors shift between monitors, phones, and tablets.
These techniques apply far beyond underwater scenes. Master selections, blend modes, and lighting adjustments to tackle any photo manipulation project confidently.