
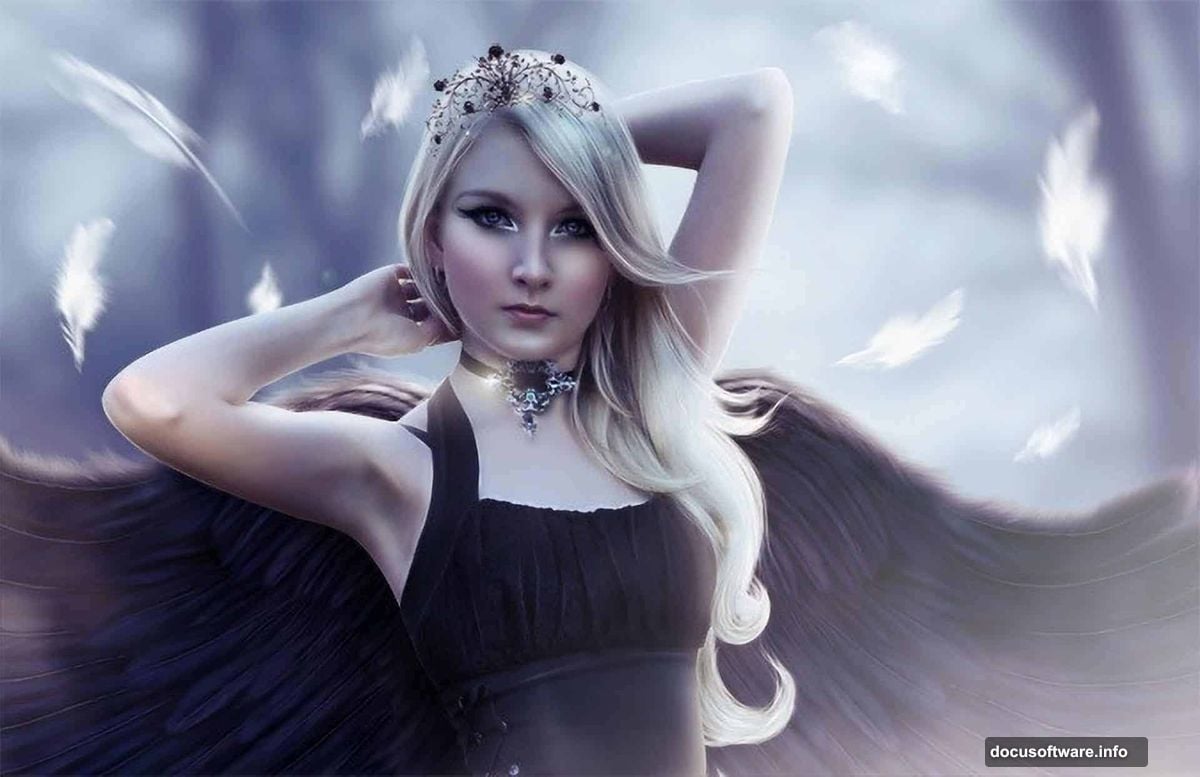
Photoshop photo manipulation transforms ordinary portraits into stunning fantasy artwork. This technique combines multiple images, advanced masking, and creative lighting to build otherworldly scenes.
Creating angel-themed manipulations requires specific skills. You’ll blend human subjects with wings, add atmospheric elements like floating feathers, and craft emotional color tones. Plus, the process teaches fundamental Photoshop techniques useful far beyond this single project.
Let’s break down how to build this ethereal angel composition step by step.
Gather Your Source Images First
Before opening Photoshop, collect all necessary assets. You’ll need a model portrait with good lighting, dramatic wing images, background textures, feather stocks, and decorative elements like crowns or jewelry.
Quality source images make or break photo manipulations. Look for high-resolution files with similar lighting conditions. Mismatched lighting creates obvious composites that scream “fake.”
Stock photo sites offer angel wing images, but finding the right perspective takes time. Wings should match your model’s pose and viewing angle. Moreover, consider the wing’s lighting direction so it matches your scene.
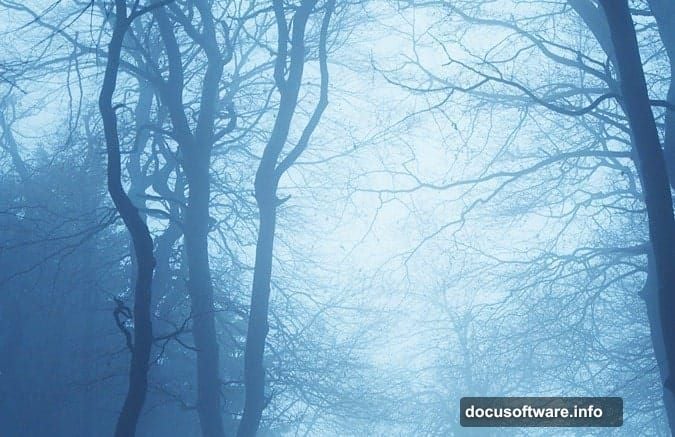
Build Your Background Foundation
Start by placing your background image on a new canvas. Don’t worry about perfect sizing yet. You can adjust composition later as elements come together.
Apply a Gaussian Blur filter to soften the background. This creates depth and draws focus to your main subject. The blur amount depends on your specific image, but start around 5-10 pixels radius.
Now add color adjustments. Use Hue/Saturation to desaturate colors slightly (try -38 saturation). Then apply Color Balance to shift towards cooler blue tones. These adjustments create that ethereal, dreamlike quality essential for fantasy manipulations.
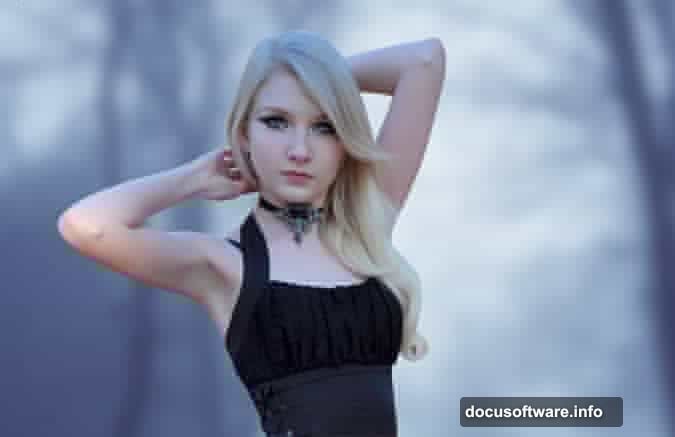
Extract Your Model Cleanly
Place your model image where she’ll appear in the final composition. Then comes the crucial step: clean extraction from the original background.
The Pen Tool delivers the cleanest selections for photo manipulation. Draw a path carefully around your subject’s outline. Take your time here. Sloppy masking ruins otherwise great manipulations.
However, some artists prefer using layer masks with the Eraser tool, especially when working with graphics tablets. This method offers more control for complex hair and fabric edges. Choose whichever technique feels more natural for your workflow.
Smooth and Soften Skin Texture
Professional photo manipulations require refined skin texture. Real skin has pores and texture, but fantasy art often benefits from subtle smoothing.
Convert your model layer to a Smart Object first. This preserves your original image while allowing non-destructive filtering. Right-click the layer and select “Convert to Smart Object.”
Apply Surface Blur with Radius 10 and Threshold 30. But here’s the trick: fill the smart filter mask with black to hide the effect completely. Then paint white only on skin areas where you want smoothing.
This selective approach maintains detail in eyes, lips, and hair while softening skin. Plus, you can always adjust the mask later if you blur too much.
Add Atmospheric Color Grading
Color grading transforms good manipulations into professional artwork. Add adjustment layers clipped to your model layer using Ctrl+Alt+G.
Start with a Curves adjustment to control overall brightness and contrast. Then add Color Balance to shift skin tones towards your chosen color palette. Finally, use Hue/Saturation for fine-tuning specific color ranges.
The adjustment layers should follow this order: Curves, Color Balance, Hue/Saturation. This order gives you maximum control over the final look. Moreover, you can toggle visibility to compare before and after effects.

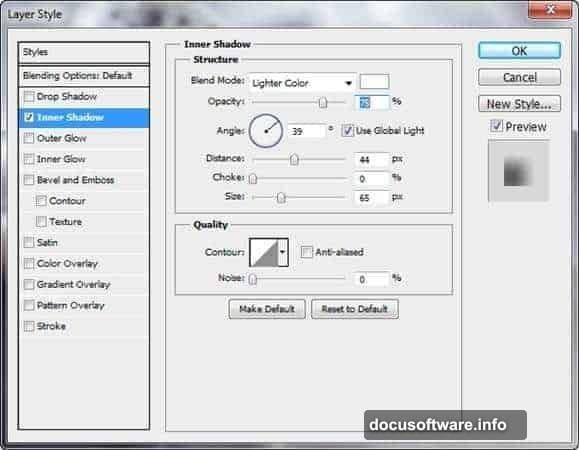
Blend Edges with Layer Styles
Hard edges around extracted subjects look unnatural. Layer styles help soften these transitions and integrate subjects into backgrounds.
Go to Layer > Layer Style > Inner Shadow. Set the blend mode to Normal with low opacity. Adjust the distance and size until edges soften naturally. This creates a subtle halo effect that blends your model into the scene.
Inner Glow works similarly. Experiment with both effects to see which suits your specific image better. Sometimes combining both creates the best results.
Position Wings for Natural Integration
Place wing images behind your model layer. Scale and position them so they appear to emerge from her back naturally. Pay attention to perspective and shoulder anatomy.
Use Transform tools (Ctrl+T) to rotate and adjust wing placement. Wings should follow the natural curve of shoulders and back. If they look pasted on, check the angle and size ratio.
Add the same color adjustments to wings as you applied to the model. This ensures consistent lighting and color temperature across all elements. Mismatched color temperature is the fastest way to spot amateur photo manipulations.
Create Floating Feather Elements
Floating feathers add movement and atmosphere to angel manipulations. Place individual feather stock images throughout your composition.
Vary the feather sizes and rotation angles. Some should appear closer (larger and sharper) while others recede into the background (smaller and blurred). This creates depth and three-dimensional space.
Apply subtle Motion Blur to some feathers. This suggests movement and makes the scene feel more dynamic. However, don’t blur every feather or you’ll lose the effect.
Add Decorative Crown Elements
Crowns or jewelry add fantasy elements that complete the angelic theme. Place crown images and use Free Transform to match perspective with your model’s head angle.
Blend modes help integrate decorative elements. Try Overlay or Soft Light at reduced opacity. These modes allow underlying details to show through, creating a more realistic integration.
Match the crown’s lighting to your scene. If light comes from the right, add highlights on the crown’s right side. Small details like this separate professional work from amateur attempts.
Build Final Atmospheric Effects
Light rays create magical atmosphere in fantasy manipulations. Create a new layer and use the Brush tool with soft, large brushes. Paint white or pale yellow rays coming from behind your subject.
Set this layer to Screen or Linear Dodge blend mode at low opacity. The rays should enhance the scene without overwhelming it. Subtlety wins in photo manipulation.

Add a final Curves adjustment layer on top of all other layers. This gives you global control over the final image’s contrast and tone. Small adjustments here can dramatically improve the overall impact.
Fine-Tune and Export
Step back and evaluate your composition. Check for consistent lighting across all elements. Verify that color temperature matches throughout. Look for any masking errors or hard edges that need softening.
Save your working file as a PSD to preserve all layers. Then flatten and export as a high-quality JPEG for sharing. Keep resolution high for printing or portfolio work.
Photo manipulation improves with practice. Your first attempts won’t match professional work, but each project teaches new techniques. The key is understanding why certain approaches work and building your technical skills progressively.
These techniques extend beyond angel manipulations. You’ll use similar processes for creating any fantasy photo composite, from mythical creatures to sci-fi scenes. Master the fundamentals here and you’ll handle any photo manipulation project confidently.