Photoshop photo manipulation isn’t just about slapping images together. It’s about blending reality with imagination until viewers can’t tell where one ends and the other begins.
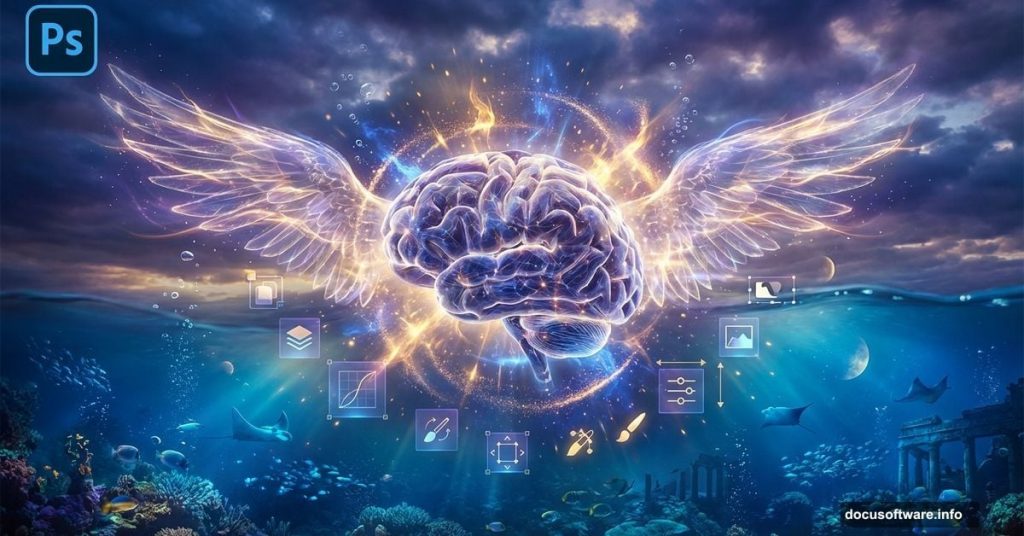
This surreal flying brain tutorial teaches core techniques every digital artist needs. You’ll learn to build custom backgrounds from multiple photos, blend images seamlessly, and apply nondestructive lighting that brings depth to flat compositions. Plus, these skills transfer to any manipulation project you tackle next.
Let’s break down how to create something genuinely eye-catching.
Gather Your Assets First
Before touching Photoshop, collect your resources. This project needs specific stock images and custom brushes.
You’ll want the Hair brush set by TrissteBrushes. Download and install it before starting. The tutorial also requires stock photos of a sea, sky, model, and brain anatomy image. Make sure all images are high resolution for best results.
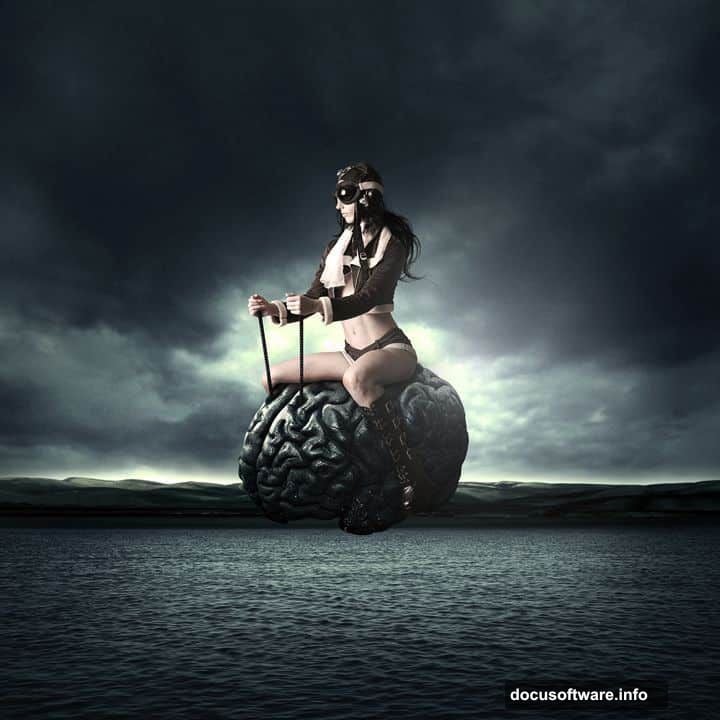
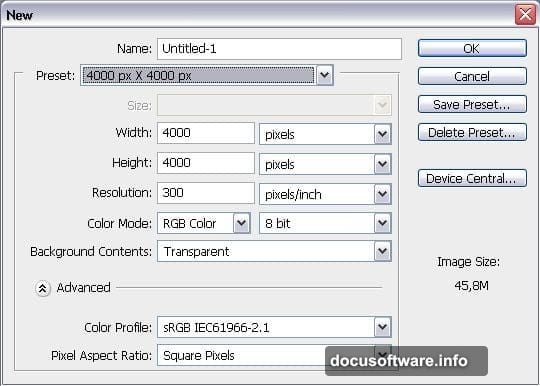
Start with a 4000×4000 pixel canvas. Yes, that’s large. But working big gives you flexibility for cropping and ensures crisp final output.
Build Your Background Layer by Layer
Most beginners paste one background and call it done. That’s why their work looks flat.
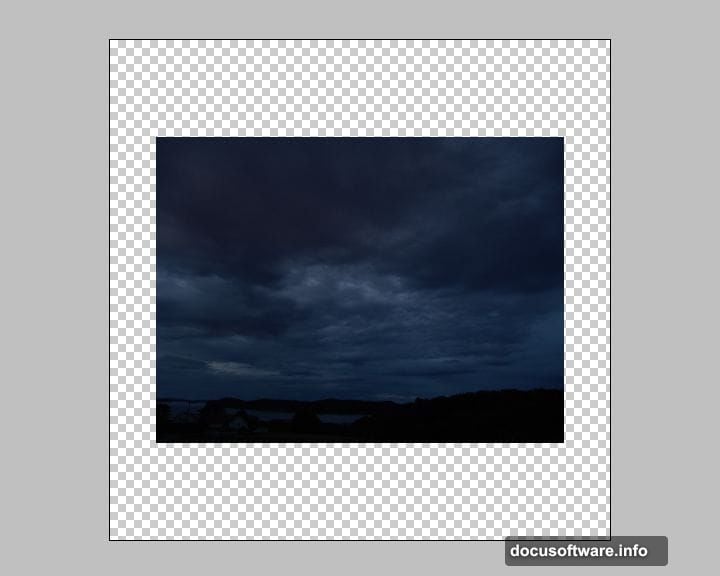
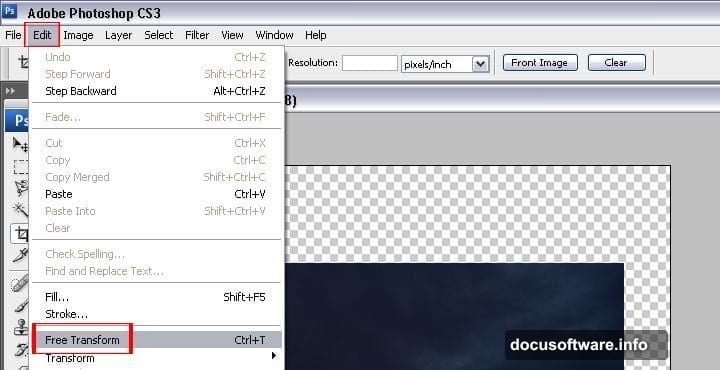
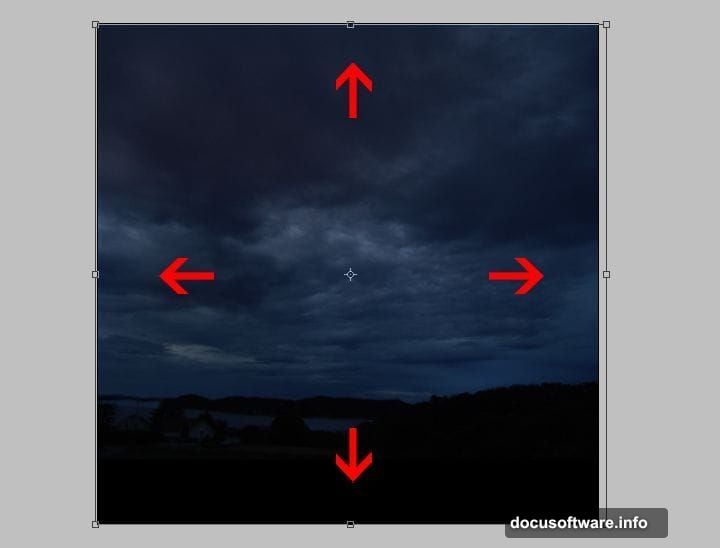
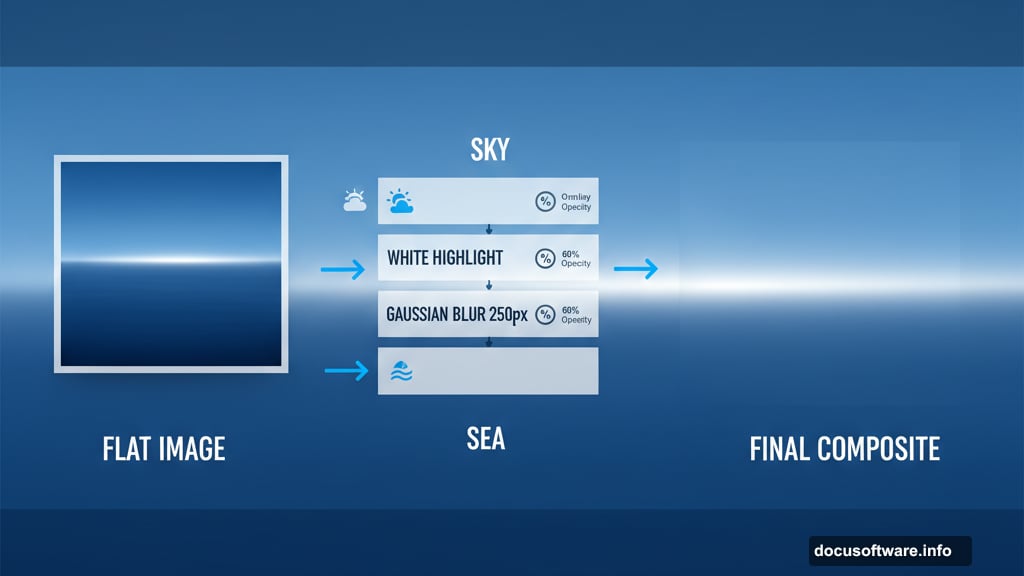
Instead, start with your sky image. Copy it to your canvas then delete the default background layer. Use Free Transform to scale the sky properly. Hold Shift while dragging corners to maintain proportions.
Now create a new layer above the sky. Set your foreground to white and background to black by pressing D then X. Grab a soft 1100px brush and paint a curved highlight across the sky.
Here’s where it gets interesting. Apply a 250-pixel Gaussian Blur to that highlight layer. Set the blending mode to Overlay. Duplicate it and drop the copy’s opacity to 60%.
This technique creates atmospheric depth that makes backgrounds feel three-dimensional. Most tutorials skip this step entirely.
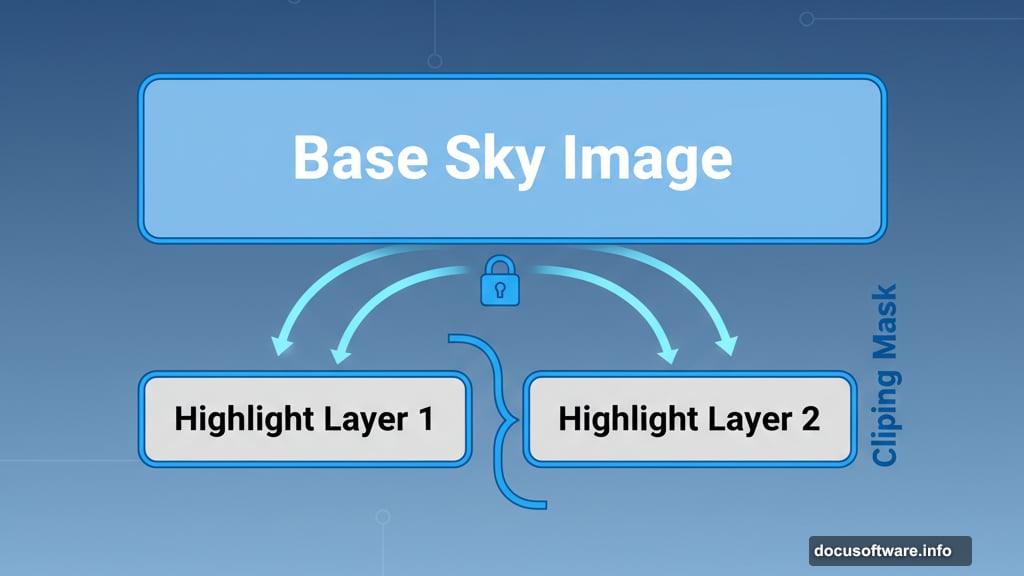
Master the Clipping Mask Technique
Select both highlight layers and right-click to create a clipping mask. This constrains your lighting effects to just the sky layer beneath.
Clipping masks keep your workflow organized and nondestructive. You can adjust or delete effects later without destroying your base images. That matters when clients request revisions or you want to try different lighting approaches.
Now paste in your sea image and position it as the top layer. This becomes your foreground element.
Blend Images Like a Professional
The difference between amateur composites and professional work comes down to blending. Great manipulation hides every seam.
Start by adjusting each layer’s brightness and contrast to match. Images shot in different lighting conditions need color correction before they’ll blend naturally. Use Curves adjustment layers for precise control.
Pay attention to light direction. If your sky shows sunset lighting from the left, your subject needs matching shadows on the right. Inconsistent lighting destroys believability faster than anything else.
Add your model next. Carefully mask around the edges using the Pen Tool for hard edges and a soft brush for hair and soft transitions. Never use the Magic Wand for serious masking work.
Apply Nondestructive Dodging and Burning
Professional retouchers rarely paint directly on image layers. Instead, they use nondestructive techniques that preserve original pixels.
Create a new layer set to Overlay blending mode. Fill it with 50% gray. Now paint with white to dodge (lighten) or black to burn (darken). This layer acts like traditional darkroom dodging and burning but remains fully editable.
Focus on defining form and depth. Lighten areas that face your light source. Darken recessed areas and shadows. Build up the effect gradually with a low-opacity brush rather than painting at full strength.
This technique transforms flat composites into dimensional images. The brain should look like it’s actually floating in that environment, catching real light.
Add Atmospheric Effects
Real scenes have atmosphere between objects. Distant elements look hazier and less saturated than foreground subjects.
Create subtle fog or mist layers using soft brushes with low opacity. Place them between your background and foreground elements. Adjust opacity until they add depth without looking obviously added.
The hair brushes come in handy here. Use them to add wisps and flowing elements that connect your subject to the environment. Hair and cloth should respond to the same wind direction for consistency.
Refine Your Color Grading
Unified color grading pulls disparate elements together. Create a Color Lookup adjustment layer at the top of your layer stack. Experiment with different LUTs until you find one that enhances your mood.
Add selective color adjustments to individual elements if needed. Your brain might need warmer tones while the background stays cool. Contrasting temperatures create visual interest and guide the viewer’s eye.
Fine-tune saturation carefully. Oversaturated images look garish. Slightly desaturated composites often feel more cinematic and professional.
Polish With Final Adjustments
Zoom to 100% and hunt for rough edges. Clean up any halos or artifacts around masked objects. Add subtle glow effects where appropriate but don’t overdo them.
Create a merged copy of all visible layers. Go to Filter > Sharpen > Smart Sharpen and apply moderate sharpening. Too much destroys your work. Aim for crisp detail without obvious sharpening artifacts.
Add a subtle vignette by creating a new layer, filling it with black, then using a large soft eraser to clear the center. Set blending to Soft Light at low opacity. This draws eyes toward your main subject.
Common Mistakes to Avoid
Most failed manipulations share the same problems. Watch for these issues in your own work.
Inconsistent lighting kills believability instantly. Every element needs shadows and highlights that match the scene’s overall lighting direction. Take time to observe how light actually behaves.
Poor masking shows up as harsh edges or color fringing. Invest time in clean masks. Use layer masks rather than erasing pixels so you can refine edges later.
Overprocessing makes images look fake. Apply effects with restraint. If you’re wondering whether an effect is too strong, it probably is.
Take Your Skills Further
This tutorial covers fundamental techniques that apply beyond flying brains. The same blending, lighting, and compositing principles work for any surreal or fantasy composition.
Practice each technique separately before combining them. Master masking before worrying about complex lighting. Build skills incrementally rather than trying to do everything at once.
Study professional work you admire. Analyze how artists achieve specific effects. Photoshop offers countless ways to reach the same result. Find workflows that make sense for your creative process.