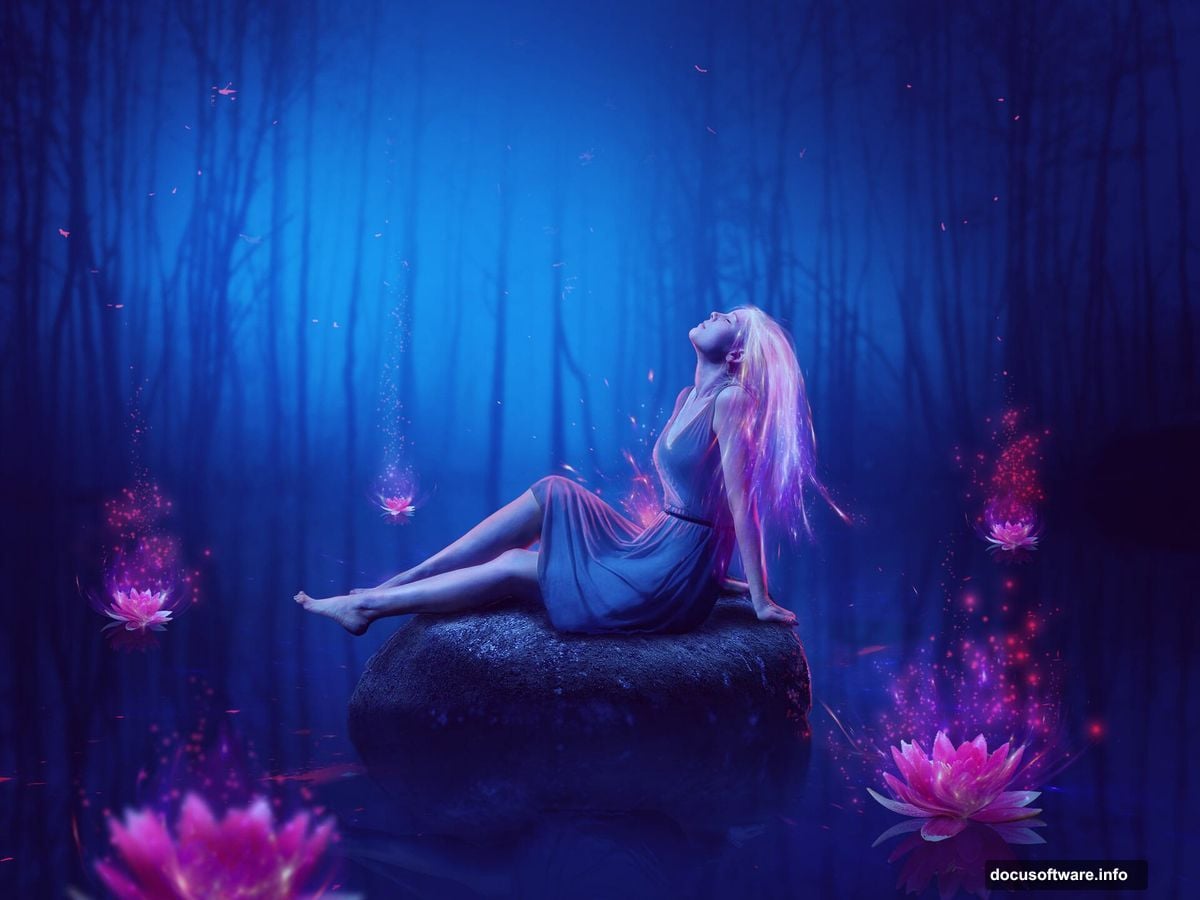
Creating a fantasy lake scene in Photoshop sounds intimidating. But with the right techniques, you can build magical landscapes that look professionally crafted.
This guide breaks down the process into simple, actionable steps. You’ll learn how to blend natural elements, add supernatural lighting, and create that dreamy water effect that makes fantasy scenes captivating. Plus, every technique works for other photo manipulation projects too.
Build Your Base Scene First
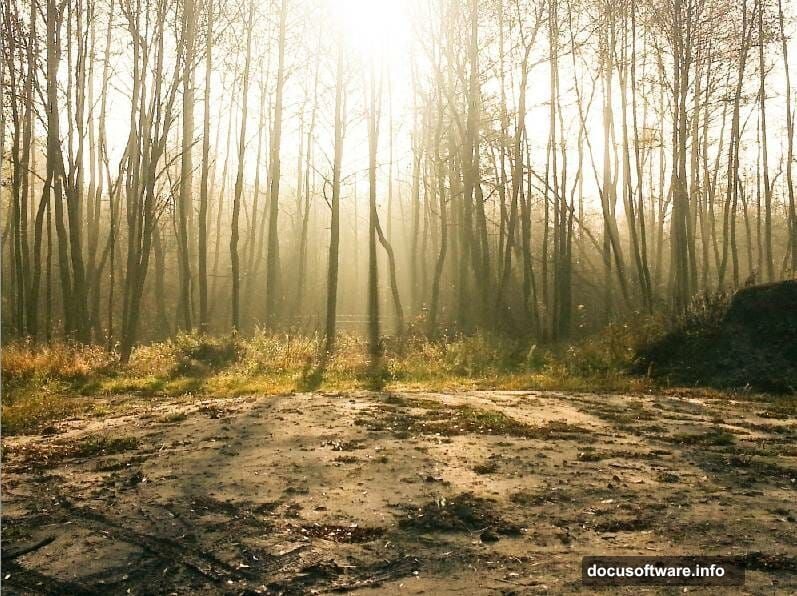
Start with a solid foundation. Open a 2000×1500 px document in Photoshop and fill it with white. This gives you room to work without cramping your composition.
Next, import your forest image. Drag it onto your canvas using the Move Tool (V). Then convert it to a Smart Object. This preserves quality when you make adjustments later.
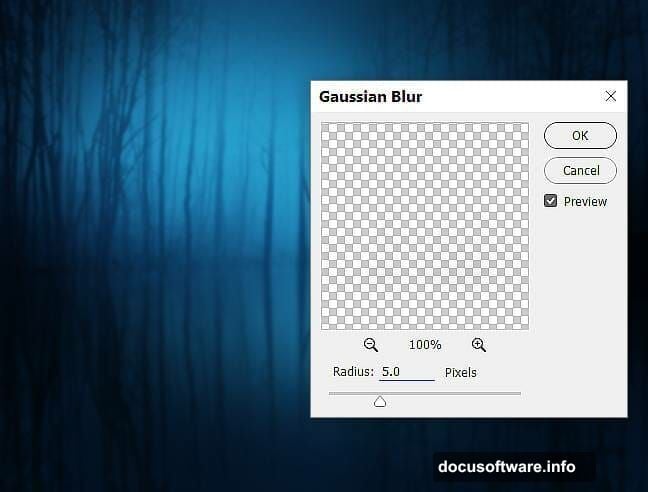
Now apply a Gaussian Blur. Go to Filter > Blur > Gaussian Blur and set the radius to 4 px. This softens the background and creates depth.
Here’s a clever trick: Duplicate that layer (Ctrl+J) and flip it vertically through Edit > Transform > Flip Vertical. Move it down slightly. Suddenly, you’ve got a natural reflection that looks like water.
Create Realistic Water Reflections
Add a layer mask by clicking the second icon at the bottom of your Layers panel. Select a soft round brush with black color. Then paint over the ground area to erase it.
The reflection stays intact. But now it actually looks like a lake surface instead of just a flipped image. This technique works because water naturally reflects what’s above it.
The key is using a soft brush. Hard edges destroy the illusion. Feathered brushstrokes create that subtle transition between water and shore that makes the scene believable.
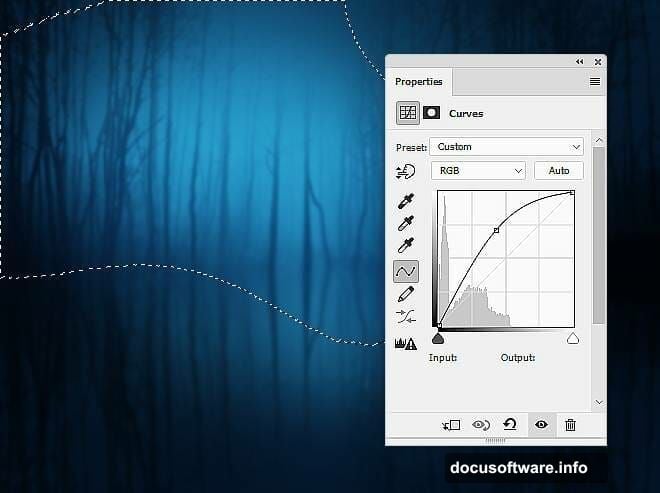
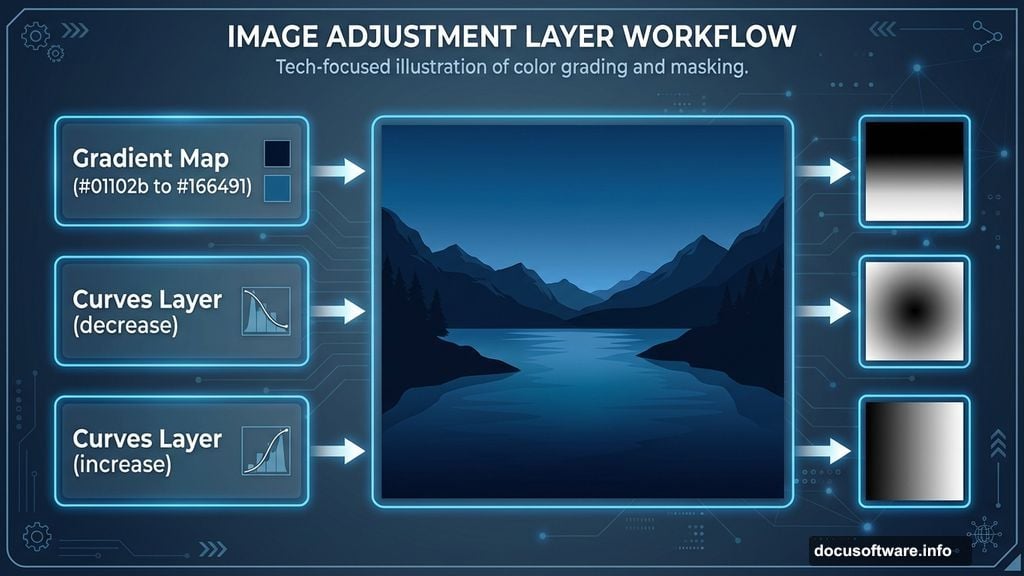
Balance Color and Mood with Adjustment Layers
Go to Layer > New Adjustment Layer > Gradient Map. Pick colors #01102b and #166491. These deep blue tones instantly add that fantasy atmosphere.
Then create a Curves adjustment layer. Decrease the overall lightness. But here’s where it gets interesting: Use a soft black brush on the layer mask to erase the middle section. This creates a natural light source in your scene.
Add another Curves layer. This time, increase lightness specifically for the area near the middle. Use your layer mask to erase everything else. Now you’ve got realistic lighting that draws the eye to your focal point.
Add Background Depth and Detail
Create a new layer above everything else. Use a small brush with color #04070e to paint details behind the trees. Think shadows, depth, mysterious elements lurking in the forest.
Apply a Gaussian Blur of 5 px to this layer. The blur makes those details feel distant and atmospheric. Sharp details would look out of place in the background.
For extra atmosphere, make another new layer. Use a soft brush with color #cadef9 to paint near the middle of your background. Change the blend mode to Overlay at 70% opacity.
Paint Realistic Fantasy Lighting
Add a layer mask to your light layer. Use a soft black brush to reduce the glow in certain areas. This makes the lighting feel more natural and less like a flat overlay.
The secret to fantasy lighting is subtlety. Too much glow looks fake. Instead, build up light gradually with multiple layers at lower opacity. Each layer adds dimension.
Think about where light would naturally fall. The brightest spot should be your focal point. Then let the glow fade realistically as it spreads across the water surface.
Integrate Your Subject Seamlessly
Open your model image and use selection tools to cut her out. The Pen Tool gives the cleanest edges for detailed selections. But the Magic Wand works fine for simpler backgrounds.
Place her in your scene using the Move Tool. Position her carefully near your light source. This makes her feel like part of the environment instead of pasted on top.
Add shadows under her feet. Use a soft black brush on a new layer set to Multiply mode. Paint where her body would block light from hitting the ground. This grounds her in the scene.
Create Magical Water Elements
Import your water lily images. Place them strategically around your subject. Some should be closer to the camera, others further away for depth.
Use layer masks to blend the lily bases into the water. Paint with a soft brush where the stems enter the water surface. This creates that natural transition.
For magical effect, duplicate some lilies and apply a soft glow. Use the Outer Glow layer style with a light blue color. Set it to Screen mode at 40-60% opacity. Now they look supernatural without being over the top.
Add Rocks and Natural Elements
Import your rock image and position it in the water. Use Free Transform (Ctrl+T) to adjust size and perspective. Make sure it looks like it’s actually sitting in the water, not floating.
Add a reflection below the rock. Duplicate the rock layer, flip it vertically, and lower the opacity to about 30%. Use a layer mask to make the reflection fade naturally into the water.
Paint shadows where the rock meets the water. This small detail makes a huge difference. Without it, elements look pasted on. With it, everything feels cohesive.
Enhance with Atmospheric Effects
Create a new layer set to Screen mode. Use a large soft brush with white color at low opacity. Paint gentle highlights across the water surface. This mimics how light scatters on water.
For magical particles, make another new layer. Use a small hard brush to paint white dots of varying sizes. Apply a Gaussian Blur of 1-2 px. Then set the layer to Screen mode at 70% opacity.
Add motion to some particles by using the Motion Blur filter at a slight angle. This makes them feel like they’re floating through the scene.
Fine-Tune with Final Adjustments
Make a Color Balance adjustment layer. Shift the midtones toward cyan and blue. This reinforces the cool, magical atmosphere. But don’t overdo it—subtle changes work best.
Add a final Curves adjustment layer. Increase contrast slightly by making an S-curve. This punches up the overall image and makes colors pop.
Create a Brightness/Contrast layer as your last adjustment. Increase brightness by 5-10 points. This gives the whole scene that ethereal glow fantasy art needs.
Polish Your Composite
Zoom in to 100% and check every edge. Look for harsh selection lines, unblended elements, or inconsistent lighting. Fix these small issues with a soft brush on layer masks.
Add a subtle vignette. Create a new layer filled with black. Use a large soft eraser to clear the middle. Set the layer to Soft Light mode at 20-30% opacity. This draws attention to your focal point.
Finally, sharpen selectively. Use the Sharpen Tool on important details like your subject’s face and the water lilies. Avoid sharpening the blurred background—that would ruin the depth effect.
Remember the Fundamentals
Fantasy scenes work when they follow real-world lighting rules. Even magical elements need consistent light sources. Shadows should fall in logical directions. Reflections should mirror what’s above them.
Blend modes are your best friend. Experiment with Screen, Overlay, Soft Light, and Multiply. Each creates different effects. But use them at reduced opacity—50-70% usually looks more realistic than 100%.
Layer masks give you control. Never erase directly on your image layers. Instead, use masks so you can adjust later. This non-destructive workflow saves countless hours of rework.
Building fantasy scenes takes patience. Work in layers, literally and figuratively. Each element you add should feel like a natural part of the environment. Rush the process and your composite will look obviously fake.
The techniques here apply beyond lake scenes. These same principles work for creating any fantasy composite in Photoshop. Master them once and you’ve got skills for countless creative projects.