
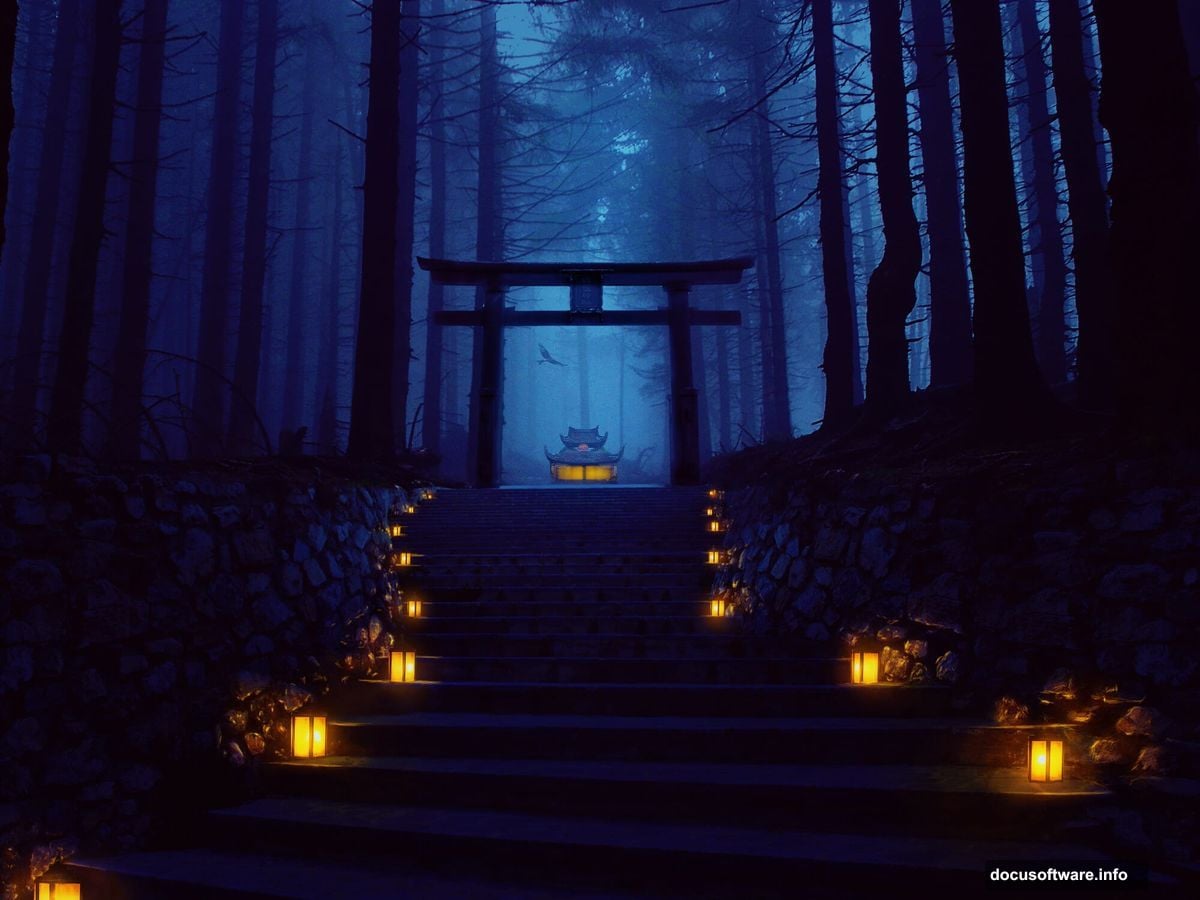
Creating mystical forest scenes in Photoshop separates casual editors from true digital artists. This tutorial reveals the exact process for building atmospheric woodland environments that captivate viewers.
You’ll learn how to construct complex forest scenes from scratch. We’ll combine multiple elements—staircases, pagodas, mysterious lighting—into one cohesive image. Plus, you’ll discover lighting techniques that transform ordinary photos into otherworldly landscapes.
Let’s dive into the process.
Gather Your Raw Materials First
Before touching Photoshop, collect your source images. You need five core elements for this project.
Start with a dense forest photograph. Look for images with natural paths or clearings. These work better than completely overgrown scenes. Next, find architectural elements like stone staircases and Asian-style buildings.
Also grab entrance structures and decorative lamps. Finally, pick a bird silhouette for atmospheric detail. High-resolution images work best since you’ll be manipulating them extensively.
Build Your Foundation Scene
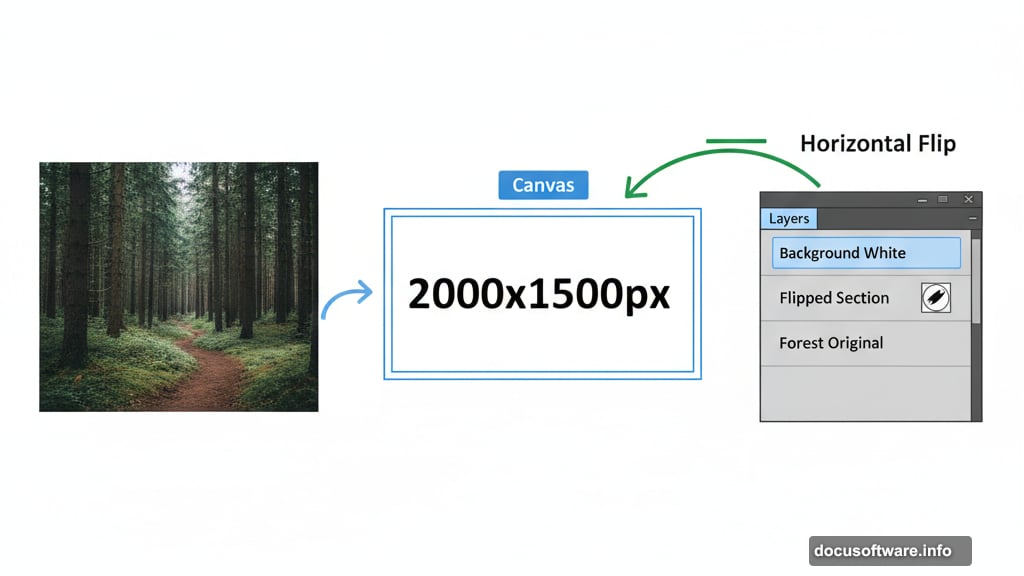
Open a new 2000×1500 pixel document in Photoshop. Fill it with white to create your base canvas.
Now drag your forest image onto this canvas using the Move Tool. This becomes your background layer. Position it to show the natural path clearly.
Next comes the clever part. Use the Polygonal Lasso Tool to select the right side of the forest path. Press Ctrl+J to duplicate this selection onto a new layer. Then flip it horizontally through Edit > Transform > Flip Horizontal.
Move this flipped section to the left side. This creates symmetry and depth in your scene.
Blend the Forest Edges Seamlessly
Raw selections look obviously copied. So we fix that now.
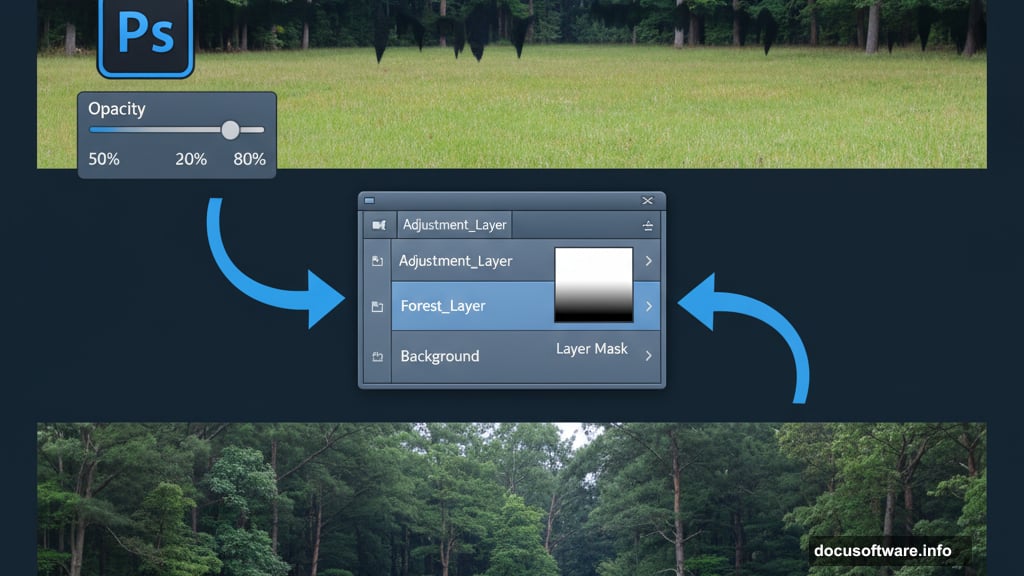
Click the mask icon at the bottom of your Layers panel. This adds a layer mask to your duplicated forest section. Switch to the Brush Tool and select a medium-hard round brush with black color.
Paint along the top edge of your duplicated section. This erases the harsh line and blends it naturally with the original forest. Vary your brush opacity between 50-80% for realistic transitions.
The goal? Make viewers unable to tell where the original ends and the duplicate begins.
Construct the Stone Staircase
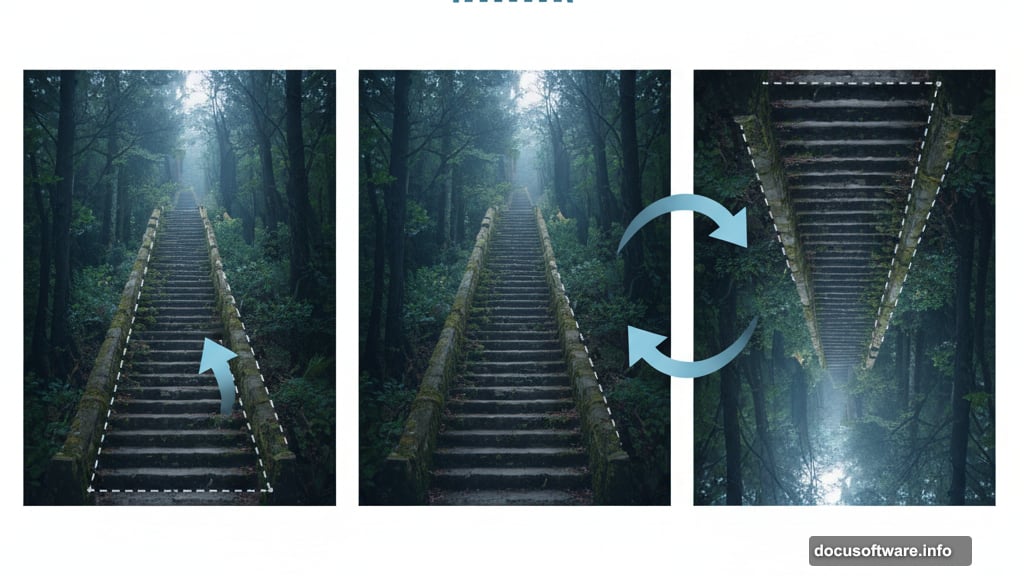
Open your staircase image. Use the Polygonal Lasso Tool to carefully select just the staircase portion. Copy this selection and paste it into the lower section of your main canvas.
Add a layer mask immediately. Grab a soft black brush and erase the wall on the left side. Also blend the right wall with your existing forest ground. This prevents the staircase from looking pasted on.
Here’s the trick most tutorials skip. Duplicate your staircase layer and flip it horizontally again. Position this copy on the right side of the forest path. Use both soft and medium-hard black brushes on the mask to refine edges.
Different brush hardness levels create more natural-looking transitions.
Fill in Missing Wall Sections
Your staircase probably leaves gaps along the forest edges. Fix these with pieces from your original staircase image.
Select a wall section from the source image. Add it to the right edge of your forest scene. Press Ctrl+T to activate Free Transform. Distort this wall piece to match the perspective of your existing walls.
Add a mask and blend thoroughly with soft black brushes. The wall should appear continuous, not patched together.
Remove Unwanted Staircase Details
Create a new layer above your staircase. Select the Clone Stamp Tool by pressing S.
Target distracting plants or debris on individual staircase steps. Clone from clean adjacent areas to paint over these elements. This cleanup work prevents viewer distraction later.
Work systematically from top to bottom on the left staircase section.
Group and Adjust Staircase Lighting
Select all your staircase-related layers. Press Ctrl+G to group them together. Change the group blending mode to Normal at 100%.
Now add a Curves adjustment layer inside this group. Drag the curve downward to decrease overall lightness. This makes the staircase feel integrated with the darker forest.
But here’s the nuance. Add a layer mask to your Curves adjustment. Use a soft black brush to remove the darkening effect from the upper staircase steps. This creates natural light falloff as if sunlight barely reaches the lower sections.
Add Architectural Elements
Time to place your pagoda structure. Open the pagoda image and isolate it from its background. Use your preferred selection method—Quick Selection, Magic Wand, or manual masking.
Position the pagoda deeper in the forest, slightly off-center. This placement creates mystery since viewers wonder what lies within. Scale it appropriately using Free Transform so it doesn’t overpower the scene.
Add an entrance structure near the bottom third of your composition. This guides viewer attention and provides a clear entry point into your mysterious world.
Introduce Living Elements
Import your bird silhouette. Place it perched on a branch or in flight above the scene. Birds add life and scale reference to otherwise static forest scenes.
Keep the bird subtle. You want viewers to notice it on second viewing, not immediately. This rewards closer inspection of your work.
Paint Atmospheric Lighting
Create a new layer set to Screen blending mode. Select a soft yellow-white brush. Paint gentle glows where your lamps will eventually sit.
Build up these lighting effects gradually with multiple low-opacity brush strokes. Real light diffuses softly through forest mist and foliage. Harsh bright spots look artificial.
Focus light sources near architectural elements—around the pagoda entrance and along the staircase path.
Place Physical Lamp Objects
Now add your actual lamp images. Position them where your painted glows already exist. This two-layer approach (painted glow + physical object) creates convincing luminosity.
Lamps should appear as the light source, not just decorative objects. Blend their bases into walls and posts using layer masks.
Unify Colors Across Elements
Your scene probably contains elements from different photos with clashing color temperatures. Fix this with adjustment layers affecting all layers.
Add a Color Balance adjustment layer. Push shadows slightly toward blue-cyan for that mysterious forest coolness. Add a touch of yellow to midtones for subtle warmth from your lamps.
Next, create a Curves adjustment layer. Adjust the overall contrast by creating a slight S-curve. This punches up midtone contrast while preserving shadow and highlight detail.
Enhance Atmospheric Depth
Create a Hue/Saturation adjustment layer. Reduce overall saturation by 10-15%. Overly saturated forest scenes look cartoonish rather than mysterious.
Then add a Levels adjustment layer. Crush the blacks slightly by moving the left input slider right. This deepens shadows and increases the scene’s dramatic impact.
Add Final Light Rays
Make a new layer set to Screen mode. Use a large, very soft white brush at low opacity. Paint subtle light rays filtering through the forest canopy.
These should be barely visible—just hints of light breaking through leaves. Overdo this effect and your scene becomes a fairy tale instead of mysterious.
Refine and Export
Zoom to 100% and inspect every edge where elements meet. Clean up any remaining harsh transitions with appropriate brushes on layer masks.
Add a final Sharpen layer if needed. However, don’t over-sharpen mystical scenes. Slight softness adds to the dreamlike atmosphere.
Flatten your image when satisfied and export at maximum quality. Your mysterious forest scene is complete.
This technique works for any atmospheric scene composition. The key lies in careful blending, appropriate lighting, and unified color grading. Master these fundamentals and you can construct any environment your imagination conjures.
Post Title: Create Mysterious Forest Scenes in Photoshop Fast
Meta Description: Creating mystical forest scenes in [Photoshop](https://www.adobe.com/products/photoshop.html) separates casual editors from true digital artists. This tutorial reveals the exact