Want to build something surreal in Photoshop? This deer manipulation blends fantasy with reality in ways that look impossible.
You’ll learn to combine forest scenes, underwater elements, and creative lighting into one cohesive image. Plus, the techniques work for any photo manipulation project you tackle next.
Best part? Most steps use basic Photoshop tools you already know. So you can focus on the creative decisions instead of fighting the software.
Set Up Your Canvas and Forest Base
Start with a fresh 1830×1311 px document in Photoshop. Fill it with white to give yourself a clean workspace.
Next, drag your forest image onto the canvas using the Move Tool (V). Convert this layer to a Smart Object right away. Smart Objects let you resize and adjust later without losing quality.
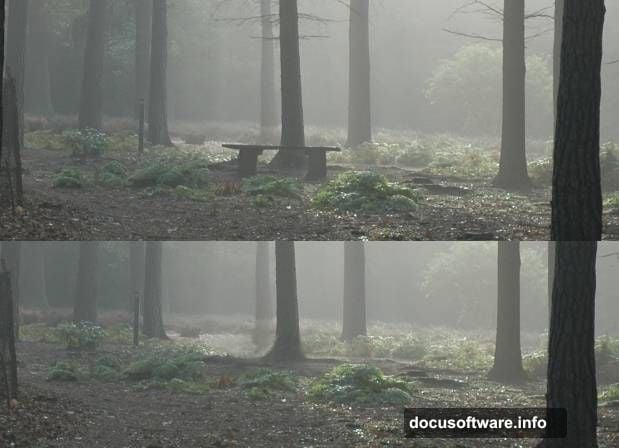
Now clean up the scene. Hit Ctrl+Shift+N to create a new layer. Then grab the Clone Tool (S) and remove that distracting bench near the background tree. This gives you a cleaner forest to work with.
Build Realistic Tree Shadows
Shadows sell the illusion. Without them, everything looks flat and fake.
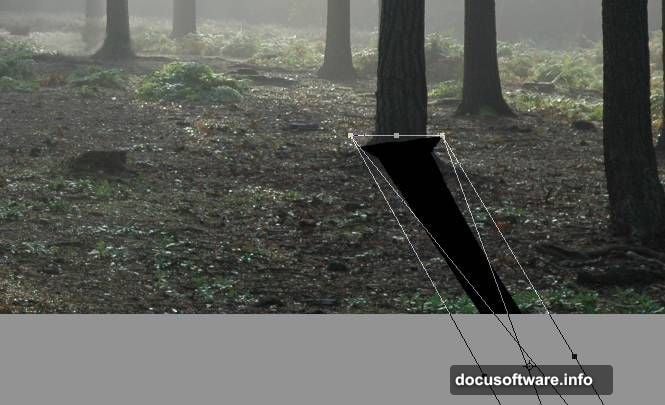
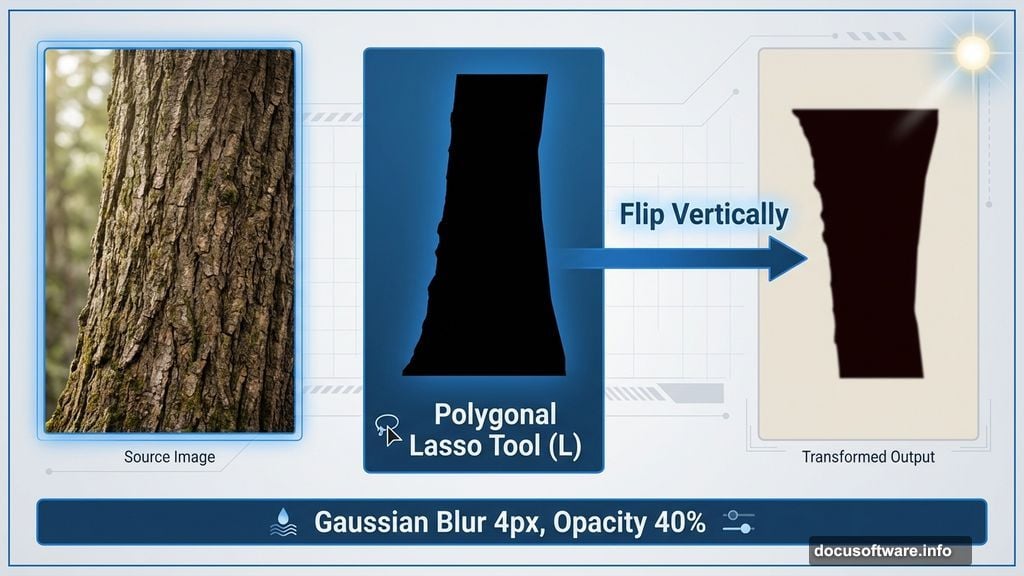
Make a new layer and select the Polygonal Lasso Tool (L). Roughly select the middle-ground tree. Don’t stress about perfect edges here. Fill your selection with color #0f0604 and flip it vertically through Edit > Transform > Flip Vertically.
Convert this shadow to a Smart Object. Move it below the tree layer. Then use Free Transform (Ctrl+T) to distort the shadow so it points toward the light source in the background.
Lower the layer opacity to 40%. This makes the shadow look natural instead of harsh.
Apply Filter > Blur > Gaussian Blur with a 4 px radius. Soft edges make shadows more believable.
Refine Shadow Details With Masks
Add a mask to your shadow layer by clicking the mask icon at the bottom of the Layers panel.
Grab a soft round Brush Tool (B) with black color. Paint over the bottom part of the shadow where it covers the tree. This removes unrealistic overlap and blends everything naturally.
Repeat this shadow process for other trees in your scene. Adjust each shadow’s opacity based on how far the tree sits from the background light. Trees closer to the light need lighter shadows. Trees farther away need darker ones.
Remember to mask each shadow layer to remove unwanted details at the bottom.
Transform Day Into Mysterious Night
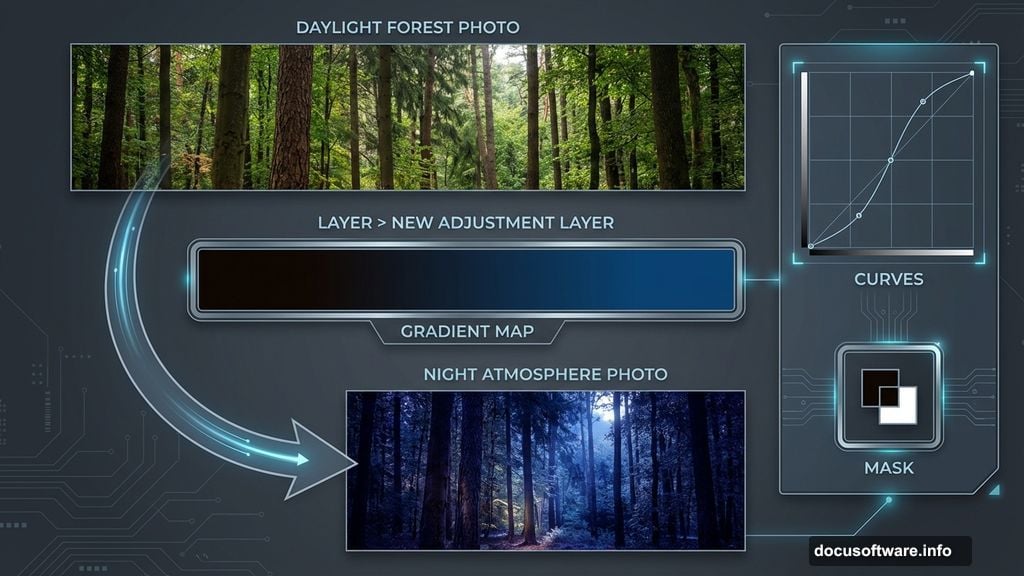
Go to Layer > New Adjustment Layer > Gradient Map. Choose colors #0d0501 and #0a437b. This gradient instantly shifts your forest from day to night.
The darker tones create that mysterious atmosphere surreal scenes need. Plus, it unifies all your elements under consistent lighting.
Create a Curves adjustment layer next. Drag the curve down to decrease overall lightness. But here’s the trick: use the layer mask.
Grab a soft black brush and paint over the middle section of your mask. This keeps the center bright while darkening the edges. The effect draws eyes toward the middle where your deer will go.
Import and Position Your Deer Subject
Open your deer image and drag it into your composition. Place the deer in the center-middle area where the light naturally draws attention.
Convert the deer layer to a Smart Object. This protects your original image quality during adjustments.
Now you’ll need to refine the deer’s edges and blend him into the forest. But the specific retouching steps depend on your deer image’s quality and background. Use adjustment layers, masks, and brushes to match the deer’s lighting and color to your forest scene.
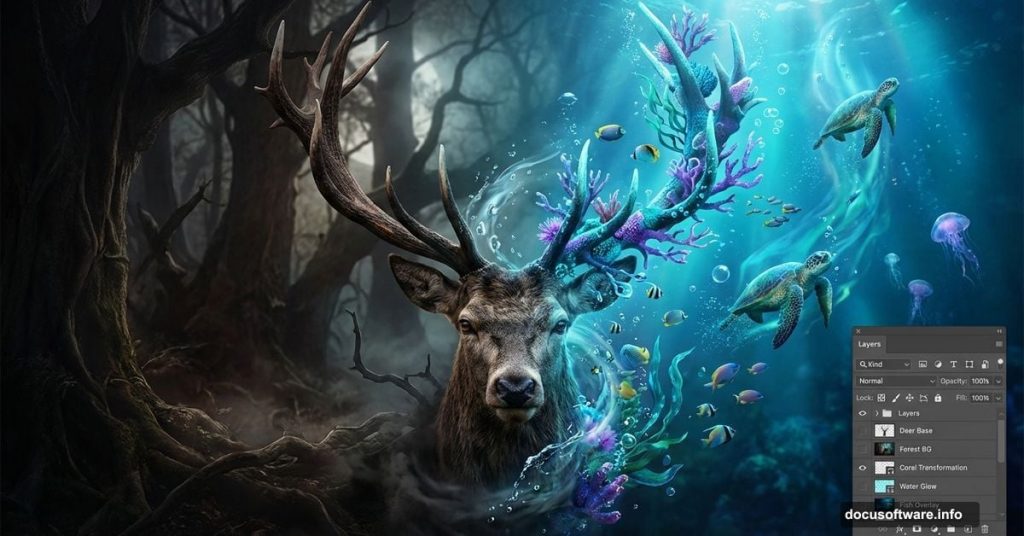
Add the Underwater Horn Elements
This is where things get surreal. Import your underwater scene image and position it where the deer’s horns should be.
Use layer masks and the Pen Tool to carefully blend the underwater elements with the deer’s head. The goal is making it look like the horns contain a whole underwater world.
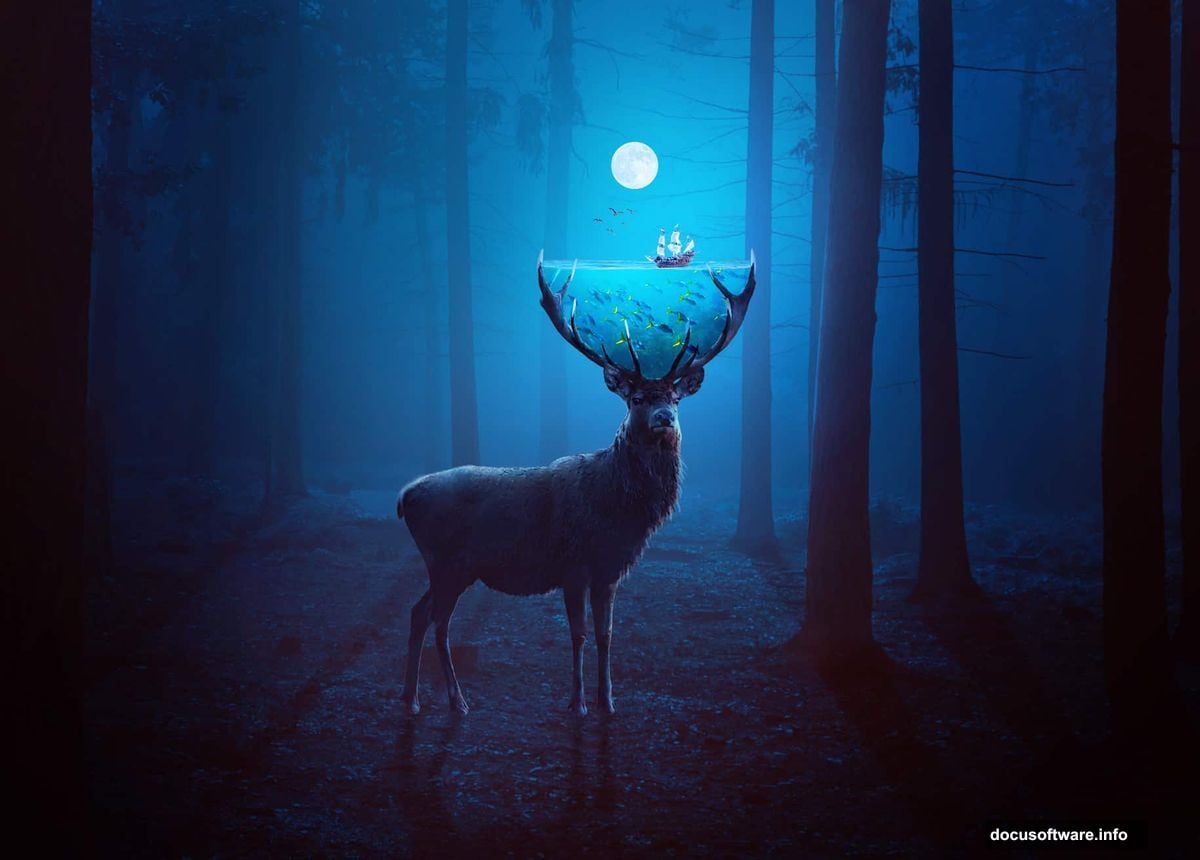
Add your sea image and blend it with the underwater scene. These elements should flow together naturally, creating the illusion that the deer carries an ocean inside his antlers.
Place your boat image within this underwater section. Scale it appropriately so the perspective makes sense. A tiny boat in vast horns tells a better story than one that’s too large.
Bring Birds Into the Sky
Import your birds image and scatter them across the sky portion of your composition. Birds add movement and scale to surreal scenes.
Use Free Transform to resize individual birds if needed. Vary their sizes slightly to create depth. Smaller birds look farther away. Larger ones appear closer.
Adjust each bird’s opacity slightly if they look too prominent. Subtle is better than obvious here.
Unify Everything With Final Adjustments
Create a new Curves adjustment layer. Fine-tune the overall contrast and brightness across your entire composition. This ties all separate elements together under consistent lighting.
Add a Color Balance adjustment layer if any elements look too warm or cool compared to others. Small color shifts make huge differences in believability.
Try a subtle Hue/Saturation adjustment to either boost or reduce color intensity across the whole image. Surreal doesn’t mean oversaturated.
Finally, add a slight vignette using a Curves layer with a radial gradient mask. This darkens the edges and focuses attention on your deer and his magical horns.
Why This Technique Works for Any Manipulation
The methods here apply beyond deer and underwater scenes. You learned fundamental manipulation skills that work everywhere.
Layer masks let you blend anything seamlessly. Adjustment layers give you non-destructive control over color and light. Smart Objects protect your work during edits.
Master these tools and you can combine any images convincingly. The subject matter changes but the techniques stay the same.
So experiment with your own ideas. Swap the deer for a different animal. Replace the underwater scene with fire or galaxies. The creative possibilities are endless once you understand the core workflow.