
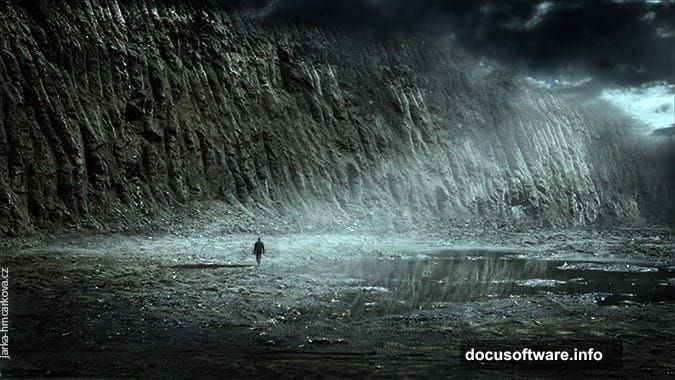
Got a bland landscape photo collecting digital dust? Let’s fix that.
This tutorial walks you through turning ordinary scenery into dramatic moonlit compositions. You’ll learn practical techniques for blending multiple light sources, creating atmospheric depth, and shifting color schemes to build mood. Plus, these skills work for way more than just moon scenes.
No fluff. Just step-by-step Photoshop techniques that actually work.
What You Need Before Starting
Gather these resources first so you’re not scrambling mid-tutorial:
Stock Images:
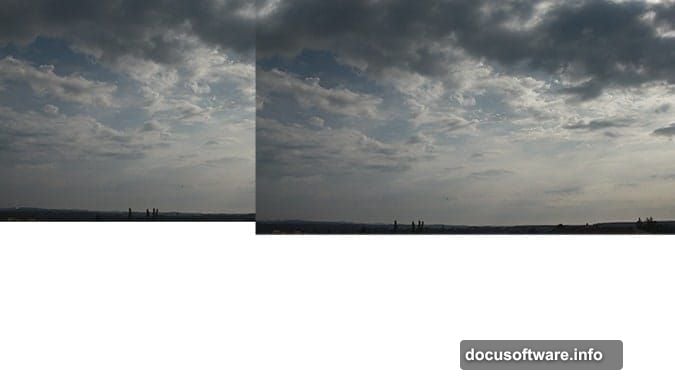
- Two different sky photos (preferably dramatic clouds)
- One ground/landscape base image
- Optional: silhouette figure for scale
- Fog or mist brushes (custom or downloaded)
Photoshop Setup:
Make sure you’re comfortable with basic layer operations. You’ll be using layer masks extensively. If you’ve never touched a layer mask before, practice on a throwaway project first.
Pro tip: Name every single layer as you create it. Sounds tedious? Wait until you’re juggling 50+ layers and can’t find that one adjustment you made an hour ago.
Building Your Sky Foundation
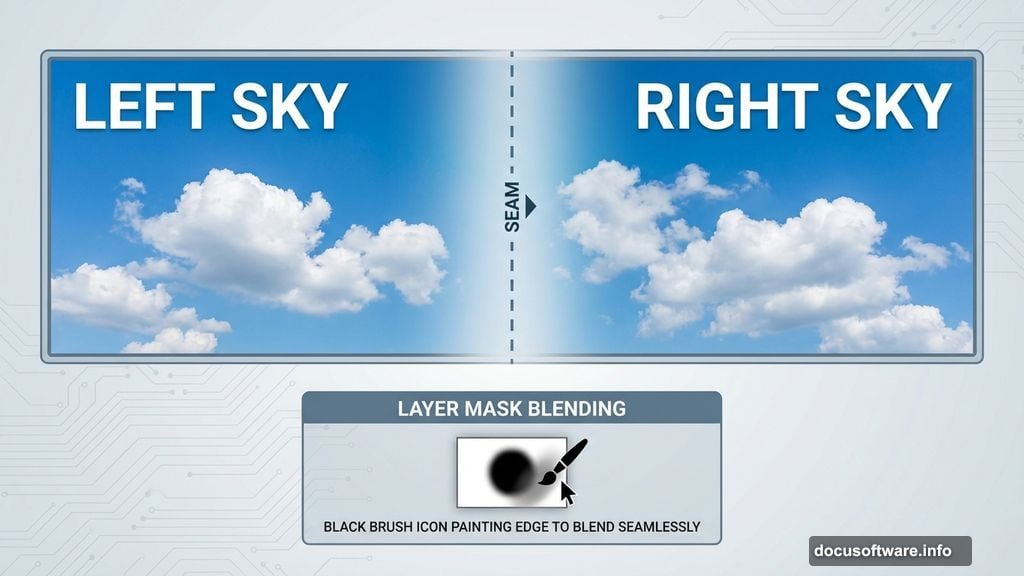
Start by creating your document at whatever resolution matches your base landscape. Drag your first sky photo into the composition and position it in the top left corner. Name this layer LEFT SKY.
Now duplicate that layer. Right-click and select Duplicate Layer, or just press Ctrl+J (Command+J on Mac). Name the duplicate RIGHT SKY and drag it to the top right corner of your canvas.
Here’s where it gets interesting. Those two sky sections need to blend seamlessly. Add a layer mask to RIGHT SKY by clicking the “Add layer mask” button at the bottom of your Layers panel. It looks like a rectangle with a circle inside.
Grab your Brush Tool (press B). Set these parameters:
- Hardness: 0%
- Opacity: 100%
- Foreground color: Black
Click directly on the layer mask thumbnail (the white rectangle next to your layer thumbnail). Then paint along the left edge of RIGHT SKY where it overlaps with LEFT SKY. The black brush hides those areas, creating a natural blend between your two sky sections.
Why layer masks instead of erasing? Because masks are nondestructive. You can adjust, modify, or completely redo your blending without permanently deleting pixels. That flexibility saves hours of frustration later.
Adding Ground Elements With Clean Edges
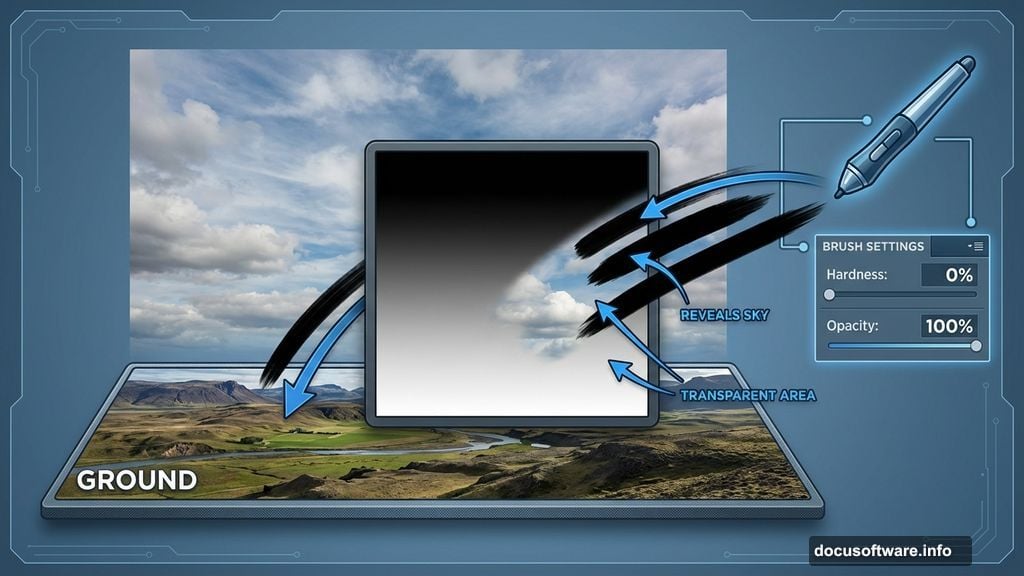
Drag your landscape ground image into the composition. Place it on top of all existing layers and name it GROUND. Resize if needed to cover the bottom portion of your canvas.
Right now your beautiful sky work is completely hidden. Time to reveal it.
Add another layer mask to GROUND using the same button as before. Select your Brush Tool again with the same settings (soft brush, black foreground, 100% opacity).
Paint across the upper portion where sky should show through. Work gradually, building up the effect rather than trying to nail it in one stroke. The transition between ground and sky determines how natural your composite looks.
Common mistake: Rushing this step with hard-edged brushes. Keep that Hardness at 0% for smooth, believable transitions.
Creating Atmospheric Depth With Fog Layers
Atmospheric haze separates good composites from great ones. It adds depth and makes disparate elements feel like they belong together.
Create a new layer above your GROUND layer. Name it FOG BASE. Load your fog brushes (or use soft, low-opacity default brushes if you don’t have custom ones).
Set your brush opacity low—around 20-30%. Pick a dark blue-gray color that matches your moonlit theme. Then paint fog strategically:
- More fog in the distance
- Lighter fog in the foreground
- Concentrate fog around your main focal points
Layer multiple fog applications. Don’t try to build all your atmosphere on one layer. Create FOG BASE, then add FOG MIDGROUND, then FOG HIGHLIGHTS. This layered approach gives you precise control over depth.
Adjust each fog layer’s opacity independently. Sometimes 15% works perfectly. Other times you need 40% to really sell the effect.
Establishing Your Moon as Primary Light Source
Here’s where your composition transforms from “photo montage” to “dramatic moonscape.”
Find or create a moon image. A simple white circle with a soft glow works fine. Place it on a new layer named MOON and position it where you want your primary light source.
But the moon itself isn’t enough. You need to make everything else respond to that light source.
Create a new Curves adjustment layer (Layer > New Adjustment Layer > Curves). Drag the curve upward slightly to brighten your midtones. Then paint on the adjustment layer’s mask with a black brush to hide the brightening effect everywhere EXCEPT where moonlight would actually hit.
This selective brightening creates the illusion that your moon genuinely illuminates the scene. Paint moonlight on:
- The tops of hills or rock formations
- One side of any vertical elements
- Horizontal surfaces facing the moon
- Atmospheric fog (makes it glow beautifully)
Critical detail: Keep your light direction consistent. If moonlight hits the left side of one rock, it should hit the left side of ALL elements. Inconsistent lighting destroys believability faster than anything else.
Color Grading for Maximum Drama
Your composite probably looks decent now. But color grading takes it from decent to dramatic.
Add a Color Balance adjustment layer (Layer > New Adjustment Layer > Color Balance). Push these sliders toward:
- More blue in shadows (creates that classic moonlit feel)
- Slight cyan in midtones (enhances the nocturnal atmosphere)
- Touch of blue in highlights (unifies your color scheme)
Then add a Hue/Saturation adjustment layer. Drop the overall saturation by 20-30%. Moonlit scenes shouldn’t burst with color. Desaturation reinforces the nighttime mood and makes any color you DO keep more impactful.
Advanced technique: Create a separate Hue/Saturation layer set to colorize mode. Choose a deep blue. Set its blend mode to Color and lower opacity to around 15-20%. This applies a subtle color wash that ties everything together.
Adding Your Focal Point Subject
If you want a human figure or other subject for scale, add it now. Place your subject silhouette on a new layer above everything except your final adjustments.
The subject needs the same lighting treatment as everything else. Use Curves or Levels to darken the side facing away from the moon. Then paint a subtle highlight on the moon-facing edge using a soft white brush at low opacity.
Pro move: Add a very faint rim light to your subject. Create a new layer set to Screen blend mode. Paint along the moon-facing edge with a dim blue-white color. This separates your subject from the background and adds professional polish.
Final Adjustments That Make Everything Pop
Almost done. Time for those finishing touches that separate amateur work from portfolio pieces.
Sharpen strategically: Create a merged copy of all visible layers (Ctrl+Alt+Shift+E on Windows, Command+Option+Shift+E on Mac). Apply a Smart Sharpen filter (Filter > Sharpen > Smart Sharpen) with a low amount—around 80-100%. Then add a layer mask and paint away sharpening from your atmospheric fog and sky elements. Keep sharpening on your ground details and subject.
Add vignette: Create a new layer and fill it with black. Use a large, soft eraser to clear the center of the image, leaving darkness around the edges. Lower opacity to 30-40%. This focuses attention on your main composition area.
Crush blacks slightly: Add a final Curves adjustment. Grab the bottom-left point on the curve and drag it slightly to the right. This deepens your shadows and adds punch to the overall image.
Step back. Look at your composition with fresh eyes. Does the lighting feel consistent? Do all elements feel like they belong in the same scene? Are there any telltale signs of compositing that break the illusion?
Make final tweaks as needed. Sometimes small adjustments to layer opacity or mask edges make huge differences.
Why This Technique Matters Beyond Moon Scenes
The skills you just practiced apply to virtually any photo composite. You learned:
- Seamless blending with layer masks
- Building atmospheric depth
- Establishing consistent lighting
- Strategic color grading
- Final polish techniques
Use these same principles for:
- Fantasy landscapes with impossible architecture
- Product photos with dramatic backgrounds
- Surreal conceptual images
- Enhanced real estate photography
- Social media graphics with impact
The moon was just an excuse to practice. The techniques work everywhere.
So grab those boring landscape photos sitting in your archive. Transform them into something people actually want to look at. The tools are right there in Photoshop. Now you know how to use them.