Creating realistic composite landscapes sounds complicated. But Photoshop‘s channel masking technique makes it surprisingly straightforward.
This tutorial breaks down the exact process for blending multiple landscape photos into seamless custom backgrounds. You’ll learn professional masking methods that work faster than manual selection tools. Plus, the color grading steps that make everything look cohesive.
Gather Your Source Images First
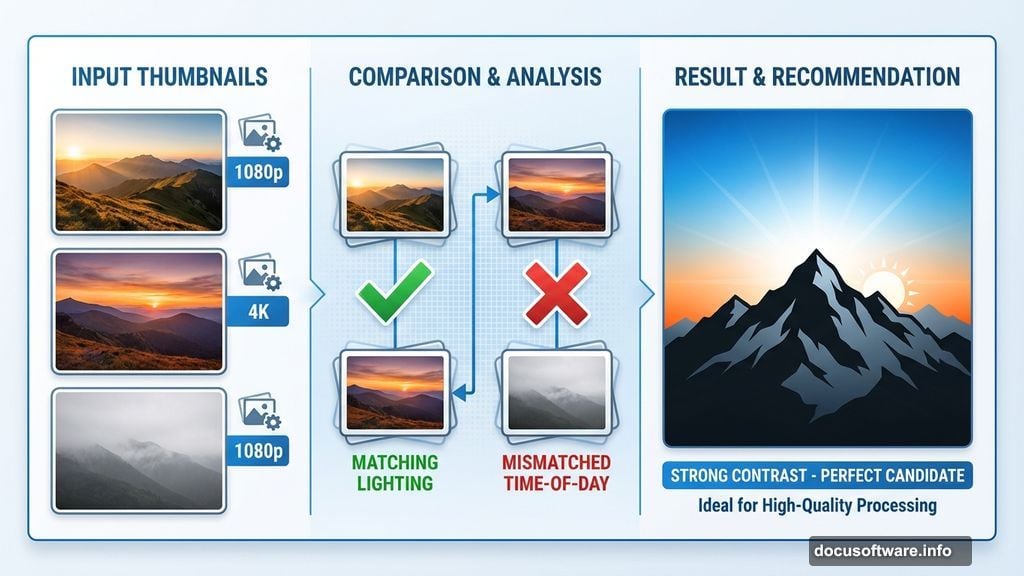
You need at least three landscape photos with similar lighting conditions. Different times of day create blending headaches later.
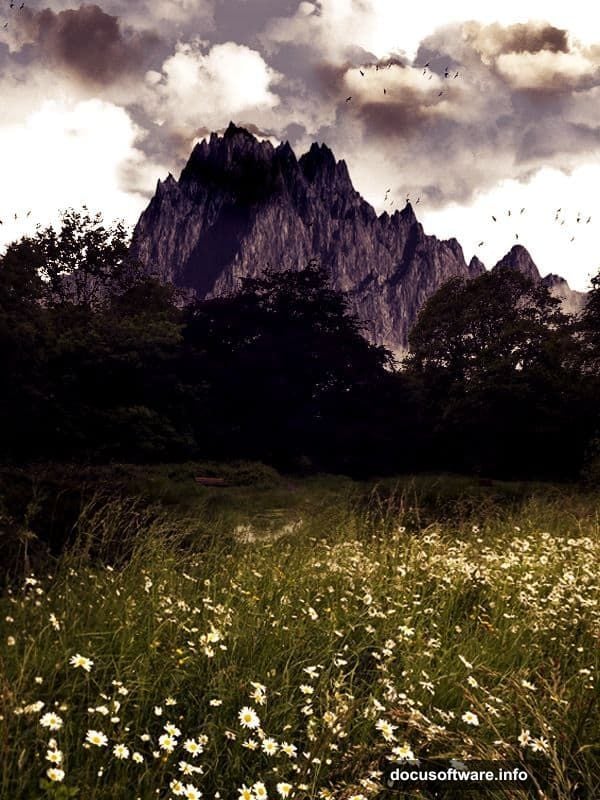
Look for images where foreground and sky have strong contrast. That makes channel-based masking work much better. Mountain silhouettes against bright skies are perfect candidates.
Free stock photo sites like Public Domain Pictures work great for practice. Just make sure image resolutions match closely. Mixing 1080p with 4K creates scaling problems.
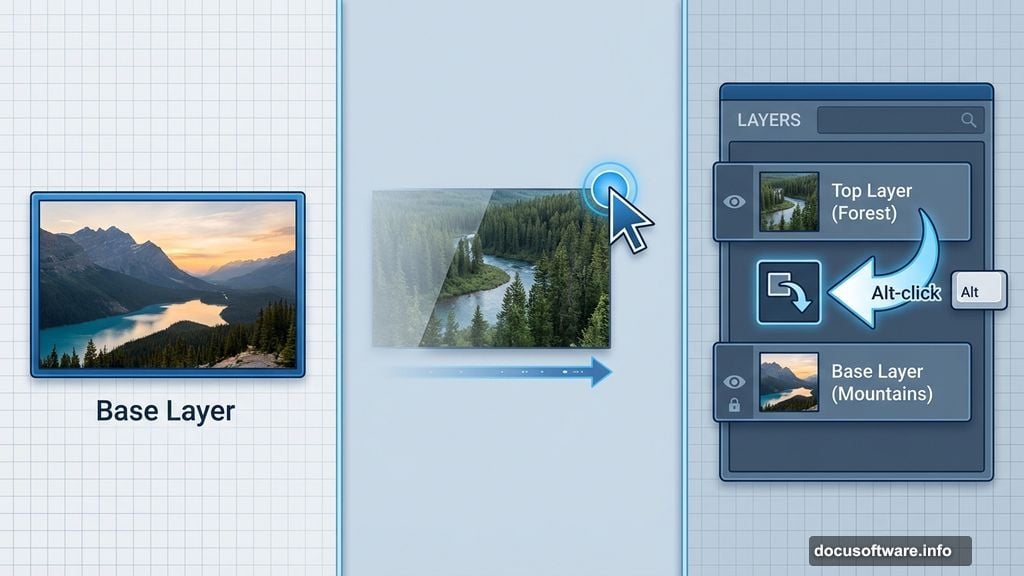
Build Your Base Landscape Layer
Open your primary landscape image in Photoshop. This becomes your foundation layer.
Drag your second landscape onto the canvas. It automatically creates a new layer above the base. Position it where you want the two images to merge.
Now comes the key part. Hold Alt (Option on Mac) and hover between the two layers. Click when you see the clipping mask icon appear. This constrains the top layer to the shape of the bottom layer.
Blend Images With Soft Brush Masking
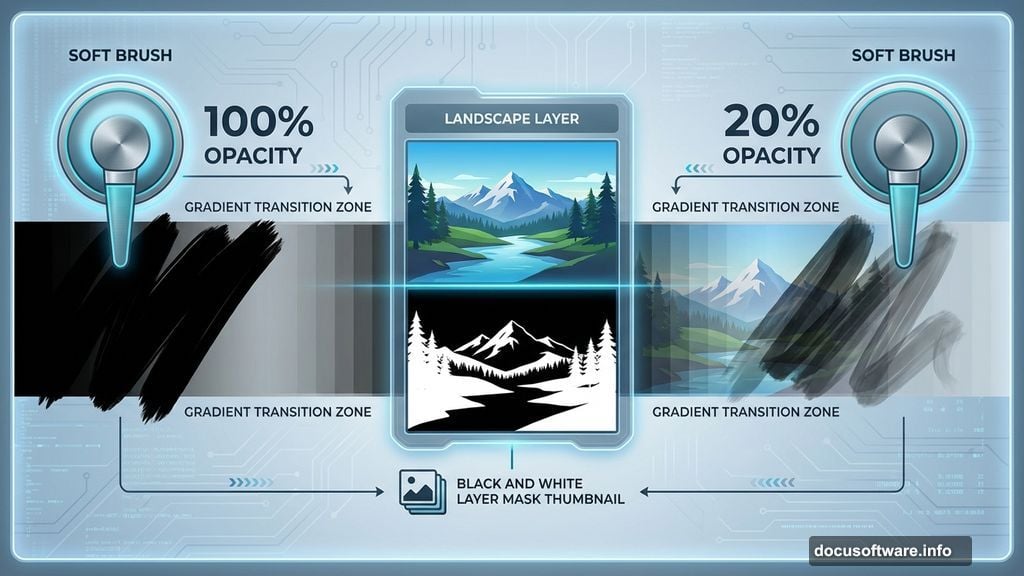
Add a layer mask to your top landscape layer. Select a large soft brush with 100% opacity.
Paint with black on the mask to hide unwanted parts of the top image. The underlying landscape shows through wherever you paint black. Use smooth, flowing strokes to avoid harsh edges.
Switch your brush to 20% opacity when approaching the blend zone. Multiple light passes create smoother transitions than one heavy stroke. Build up the effect gradually until both landscapes merge naturally.
Fix Exposure Mismatches With Curves
Landscapes shot at different times rarely match perfectly. The lighting looks off even when blending succeeds.
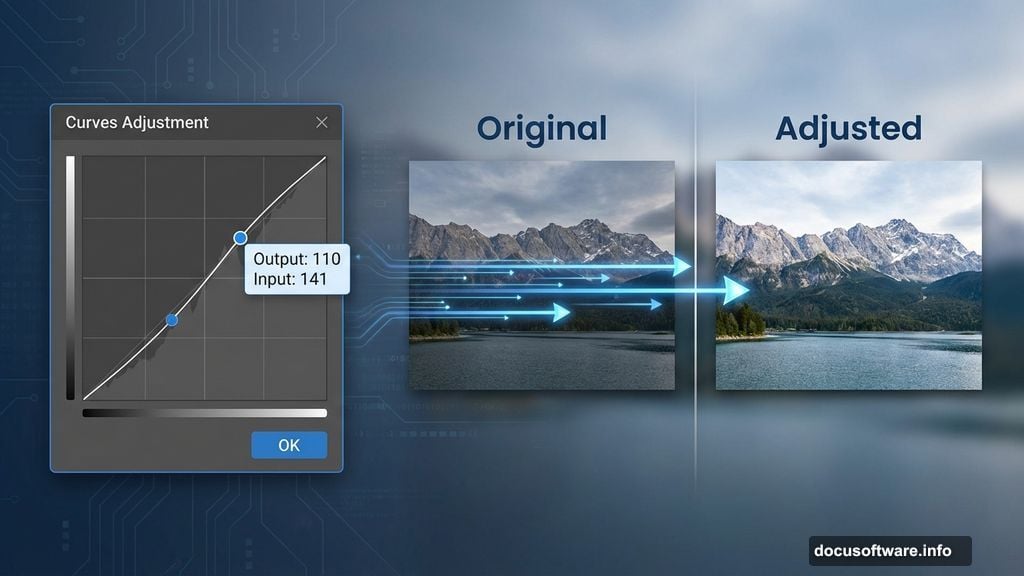
Create a Curves adjustment layer clipped only to your second landscape. Drag the curve upward to brighten, downward to darken. Small adjustments make huge differences.
For this example, setting Output to 110 and Input to 141 balanced the field brightness with the base image. Your numbers will vary based on your source photos.
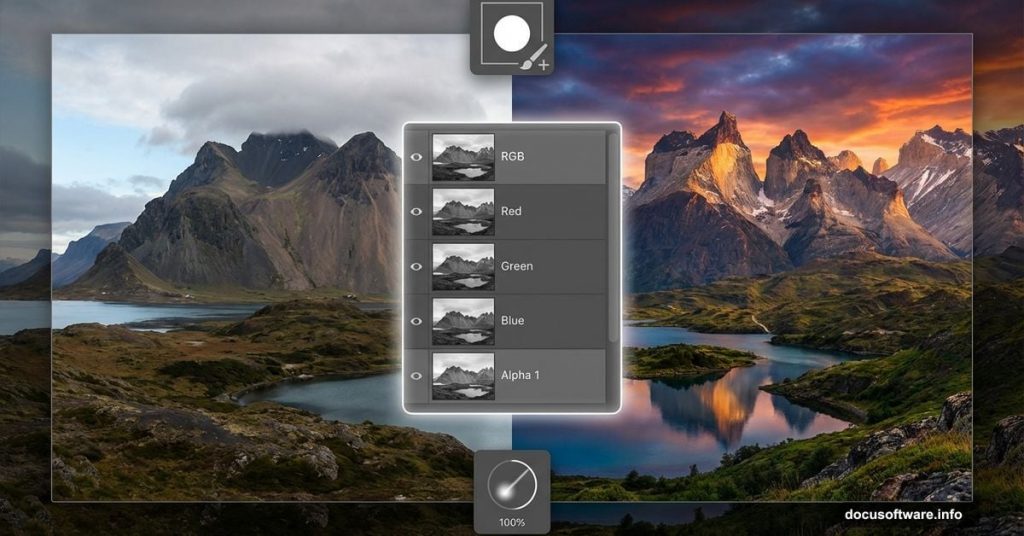
Add Mountains Using Channel Selection Magic
Open your mountain image and place it above all other layers. Now we need to separate the sky from the mountains precisely.
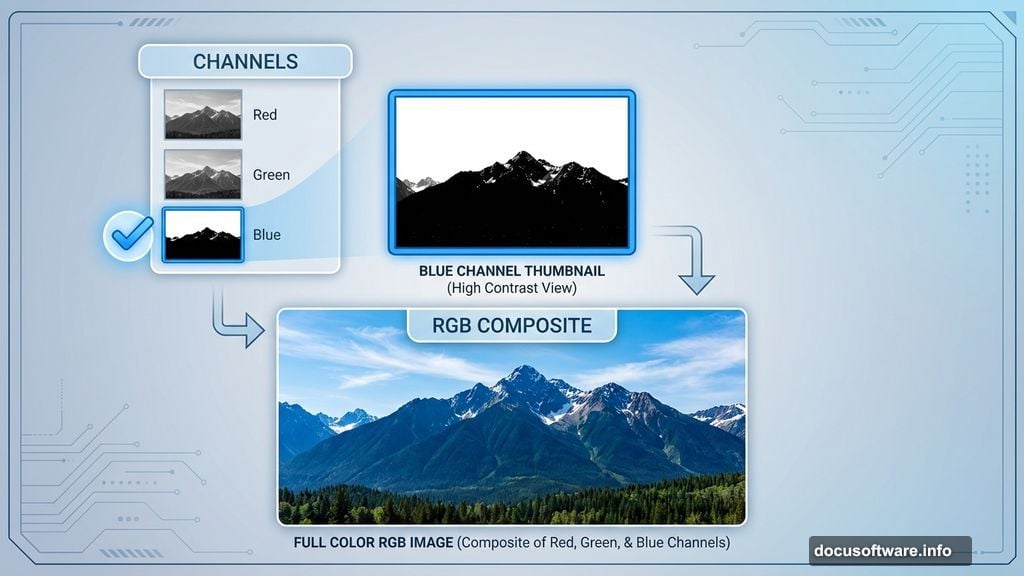
Make only this mountain layer visible by clicking the eye icons on other layers. Then switch to the Channels panel.
Click through Red, Green, and Blue channels individually. Look for the channel with the strongest contrast between land and sky. Usually that’s the Blue channel.
Duplicate and Enhance the Best Channel
Right-click your highest-contrast channel and choose Duplicate Channel. A popup appears asking to duplicate. Click Yes.
This creates a standalone channel copy. Activate only this duplicated channel. Your image turns black and white temporarily. That’s normal.
Go to Image > Adjustments > Levels. Drag the left slider right to deepen blacks. Drag the right slider left to brighten whites. Push the contrast until mountains appear solid black and sky appears pure white.
Paint Out Remaining Gray Areas
Some sections might still show gray instead of solid black. Just select a hard brush and paint over those areas with black.
The goal is pure black mountains against pure white sky. This creates a perfect selection boundary. Take your time getting it right. Sloppy masking shows up immediately in your final composite.
Load the Channel as a Selection
Hold Ctrl (Cmd on Mac) and click the thumbnail of your duplicated Blue channel. You’ll see marching ants appear around the white sky area.
Now delete the duplicated channel. You don’t need it anymore. Click the RGB channel at the top to restore full color. Switch back to the Layers panel.
Your selection is still active. But it’s selecting the sky instead of the mountains.
Invert Selection to Target Mountains
Go to Select > Inverse. This flips the selection to target mountains instead of sky.
Add a layer mask to your mountains layer. Photoshop automatically creates a mask based on your active selection. The sky vanishes, leaving only mountains with perfectly clean edges.
No manual tracing required. No painstaking pen tool work. The channel contrast did all the heavy lifting. This technique works on any image with strong luminosity differences.
Balance Mountain Layer Exposure
Your mountains probably look too dark or bright compared to the base landscape. Create a new Curves adjustment layer clipped to the mountains.
Adjust the curve until the mountain exposure matches your base image lighting. Pay attention to shadow density and highlight brightness. They should feel like part of the same photograph.
Add Hue and Saturation Adjustments
Create a Hue/Saturation adjustment layer clipped to your base landscape. Shift the Hue slider slightly to warm or cool the overall tone.
Increase Saturation by 10-15 points for more vibrant colors. But don’t push it too far. Oversaturated landscapes look fake immediately.
Add a layer mask to this adjustment. Paint with black on areas you want to preserve at original saturation levels. This gives you selective color enhancement instead of blanket changes.
Create Depth With Gradient Color Grading
Add a Gradient Map adjustment layer at the very top of your layer stack. Choose a subtle two-color gradient. Dark blue to warm orange works well for natural landscapes.
Set the blend mode to Soft Light or Overlay. Reduce opacity to 20-30%. This adds atmospheric depth that makes your composite feel cohesive.
The gradient should enhance existing colors, not overwhelm them. If your image looks heavily color-graded, pull back the opacity until it feels subtle.
Fine-Tune Transitions Between Elements
Zoom in to 100% and inspect blend zones carefully. Look for hard edges, color shifts, or exposure jumps.
Select the appropriate layer mask. Use a soft brush at low opacity to smooth out any visible transitions. Build up multiple light passes instead of trying to fix everything in one stroke.
Pay special attention to the horizon line where mountains meet your base landscape. That’s where viewers’ eyes naturally go first. Make sure that transition feels completely natural.
Why Channel Masking Beats Manual Selection
Traditional selection tools force you to trace edges pixel by pixel. That takes forever and rarely looks clean.
Channel-based selection leverages existing contrast in your image. The computer does the heavy lifting while you just enhance the separation. It’s 10x faster for high-contrast subjects like mountains, trees, or buildings against sky.
Plus, channel masks capture fine details like tree branches that would take hours to select manually. The technique scales perfectly whether you’re selecting simple shapes or complex silhouettes.
Channel masking isn’t magic. It only works well when contrast exists. But most landscape compositions have that contrast naturally. You just need to know which channel amplifies it best.
Practice this workflow a few times and it becomes second nature. Soon you’ll be creating custom landscapes faster than you thought possible.