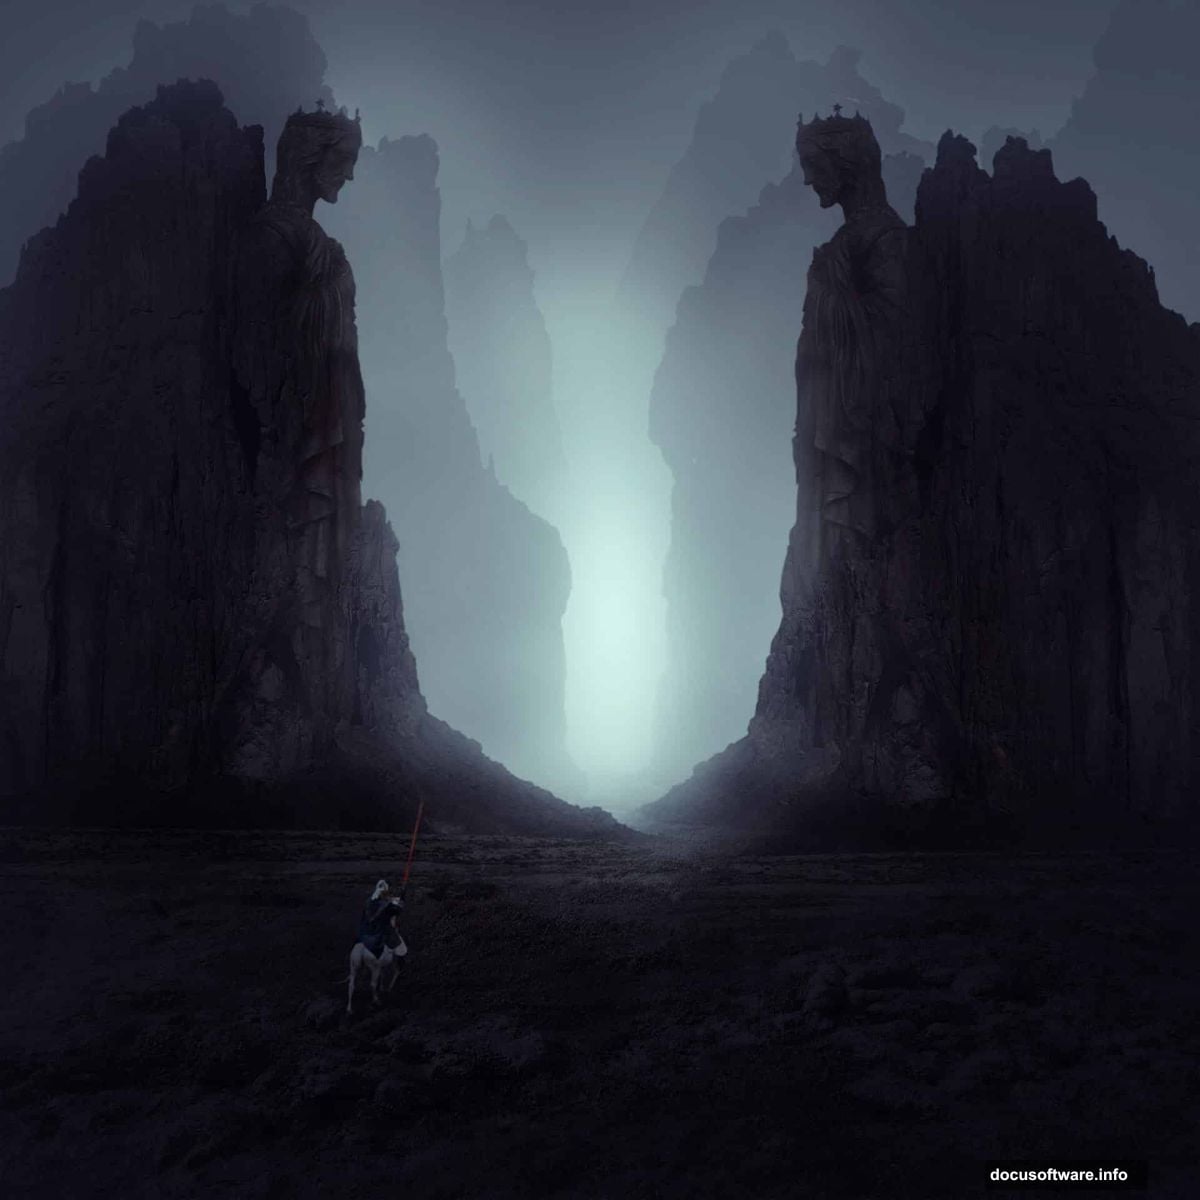
Creating moody, atmospheric landscapes in Photoshop transforms ordinary photos into cinematic scenes. This tutorial walks you through building a mysterious rocky landscape with misty depth and dramatic lighting.
You’ll combine multiple stock images into one cohesive scene. Plus, you’ll learn adjustment layer techniques that professional digital artists use daily. The best part? These skills work for any matte painting project.
What You’ll Actually Create
This isn’t just another basic composite. You’re building a complete atmospheric scene from scratch.
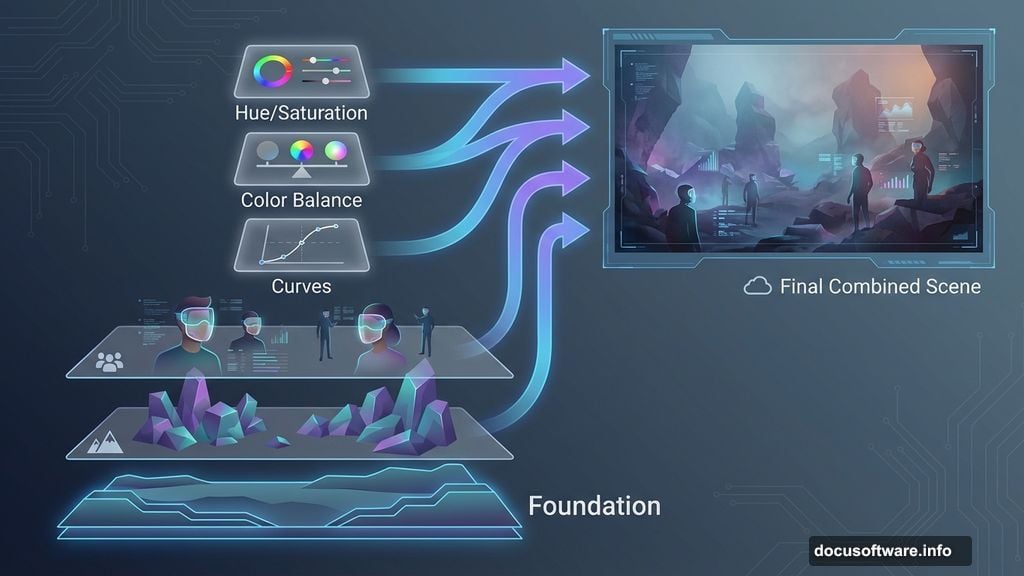
The project combines landscape photos with rock formations to create depth. Then you’ll add figures and blend them naturally using masks and adjustment layers. Finally, color grading and lighting effects tie everything together into a professional result.
What you need: Photoshop CS2 or newer. Any recent version works fine.
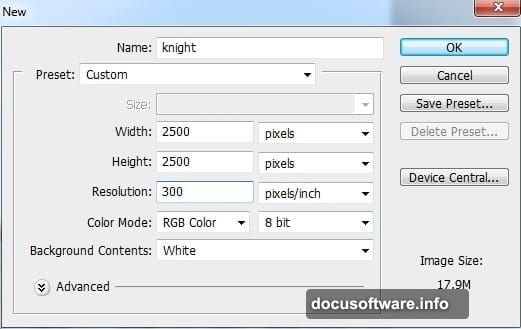
Setting Up Your Canvas
Start with proper dimensions from the beginning. Create a new document with these settings for optimal results.
The canvas size matters more than you might think. Too small and you lose detail. Too large and your computer struggles with performance. A balanced starting point makes everything easier later.
Build Your Base Landscape
Open your main landscape image and drag it onto your canvas using the Move Tool (V). Position it to fill the lower portion of your composition.
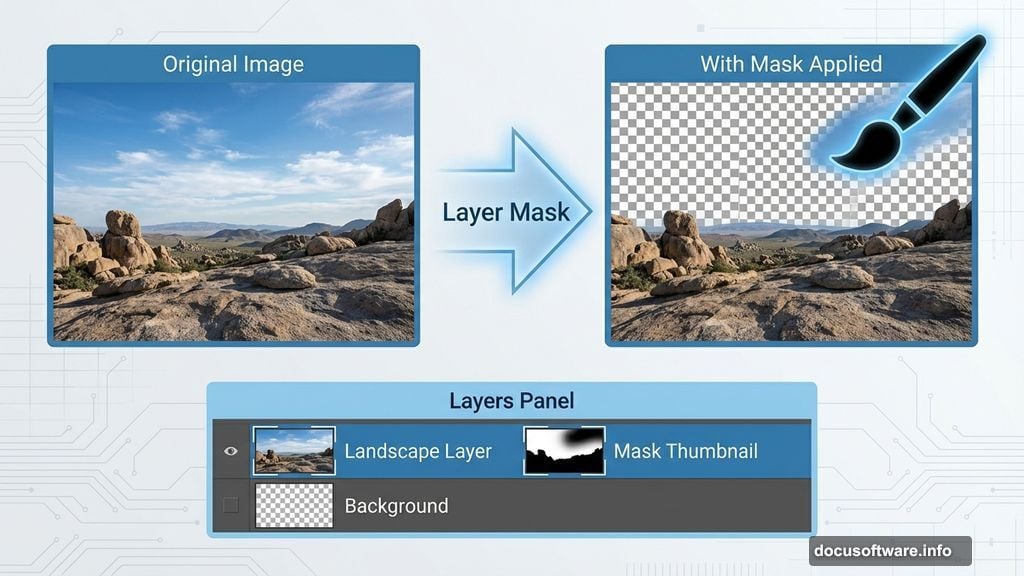
Now comes the important part. Add a layer mask by clicking the mask icon at the bottom of your Layers panel. Use a soft black brush to paint away the sky and rocky areas. Leave only the ground visible.
This selective masking creates your foundation. The technique lets you preserve exactly what you need while removing distractions.
Desaturate for Mood
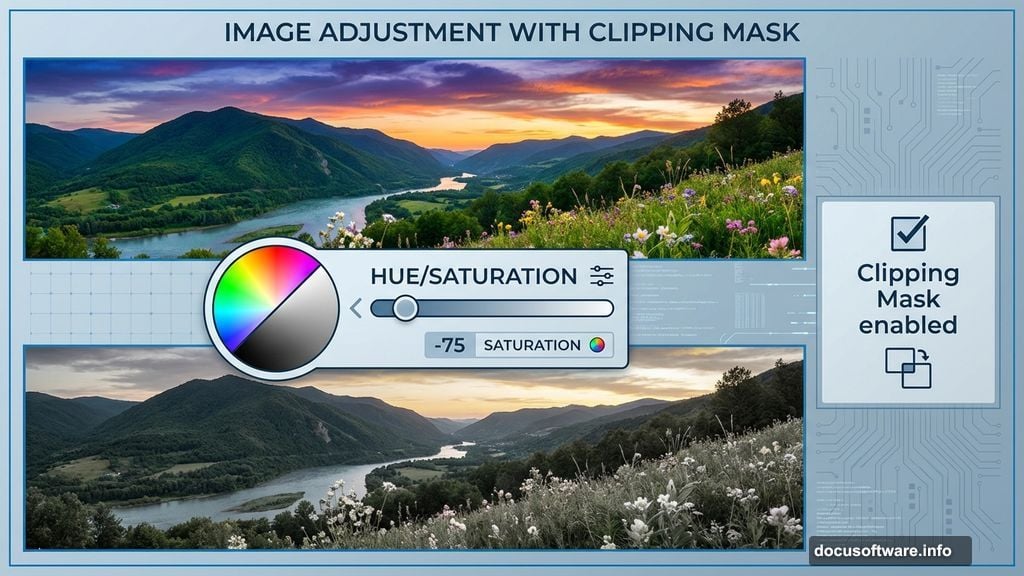
Too much color kills the mysterious atmosphere you’re building. Go to Layer > New Adjustment Layer > Hue/Saturation with Clipping Mask enabled.
Drag the saturation slider left to reduce color intensity in the ground. This creates that desaturated, moody look common in dark fantasy scenes. However, don’t go completely grayscale. Keep subtle color information for realism.
The Clipping Mask ensures your adjustment only affects the layer directly below. That precision control becomes crucial as your layer stack grows.
Add Strategic Color Shifts
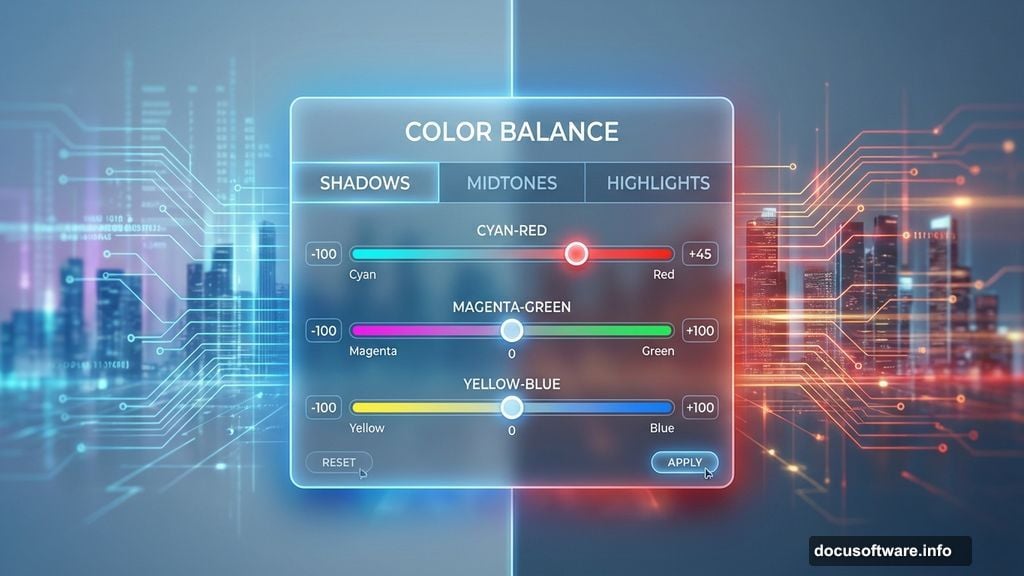
Create a Color Balance adjustment layer next. Push the sliders toward red tones in the midtones and shadows.
Why red? It creates warmth that contrasts beautifully with the cool, dark atmosphere you’re building. Plus, red undertones make shadows feel richer instead of flat and muddy.
Small color shifts make huge differences in final mood. Even subtle adjustments change how viewers emotionally respond to your image.
Darken Your Foundation
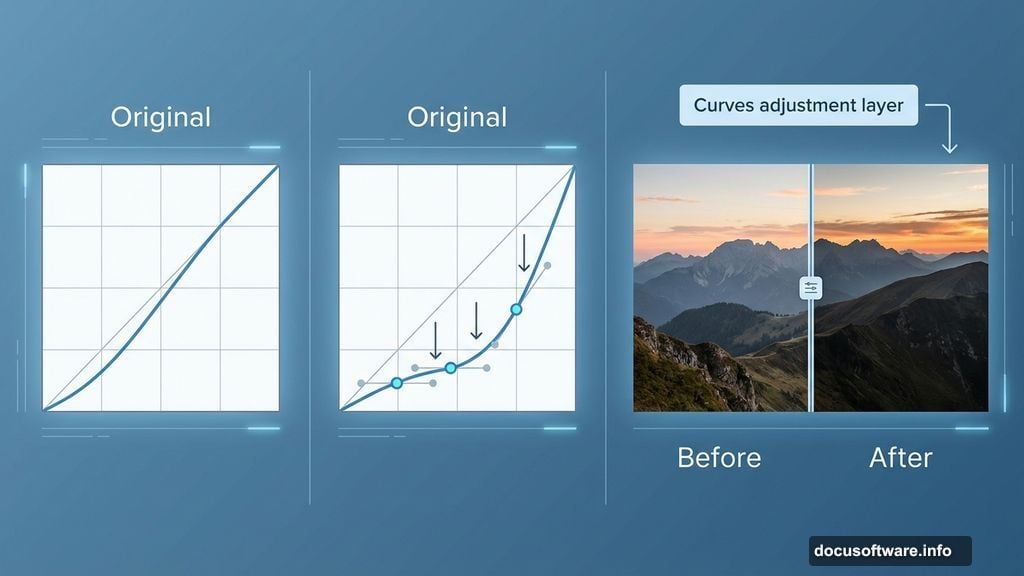
Now use a Curves adjustment layer to darken the ground substantially. Pull the curve down in the midtones and shadows.
Dark foundations make brighter elements pop later. This creates natural contrast without forcing it. Moreover, darker bases make lighting effects more dramatic when you add them.
Remember, you can always lighten areas selectively with masks. Starting dark gives you more control.
Position Your Rock Formations
Move your first rock image to the right side using the Move Tool. Add a layer mask and paint away the background completely.
Here’s a time-saving trick. Duplicate this rock layer and flip it horizontally using Edit > Transform > Flip Horizontal. Move the flipped copy to the left side. Instant symmetry without finding another rock image.
This duplication technique works for any landscape element. Just vary the positioning and masking so the duplication isn’t obvious.
Group and Adjust Rocks Together
Select all your rock layers and press Cmd/Ctrl+G to create a group. Change the group blending mode from Pass Through to Normal 100%.
Why change the blend mode? It lets adjustment layers inside the group affect only those layers. Otherwise adjustments might leak onto other parts of your composition.
Add a Hue/Saturation adjustment layer at the top of the group. Desaturate the rocks to match your moody landscape base. Consistent desaturation across elements creates visual cohesion.
Deepen Rock Shadows
Create another Curves adjustment layer inside your rocks group. Darken the rocks significantly to match the overall scene lighting.
Pay attention to how dark you go. The rocks should feel three-dimensional but still visible. If you lose all detail in shadows, pull back slightly.
Adjustment layers stack their effects. So combining subtle Hue/Saturation changes with Curves creates more natural results than one extreme adjustment.
Create Atmospheric Depth
Place a second rock image behind your main rock group. Lower its opacity to 50% immediately.
This creates atmospheric perspective. Objects farther away appear lighter and less saturated due to atmospheric haze. The opacity reduction simulates that effect instantly.
Use a layer mask to remove hard edges and unwanted sections. Soft transitions between visible and masked areas enhance the depth illusion.
Add Your Main Subjects
Now you’ll integrate the statue and knight figures into your scene. Position them carefully before blending.
Each figure needs its own adjustment layers to match the scene lighting. Use Clipping Masks so adjustments only affect specific figures. This precision prevents adjustments from bleeding across your entire composition.
Masks and brushes blend the figures into the ground. Paint shadows beneath figures using dark brushes on new layers. Shadows anchor subjects into scenes convincingly.
Build the Misty Atmosphere
Create a new Color Fill layer above everything. Choose a desaturated blue-gray tone. Change the blend mode to Lighten or Screen at reduced opacity.
The Color Fill layer simulates atmospheric haze throughout your scene. Adjust the opacity until you achieve subtle haziness without washing out detail. This effect unifies all elements under one atmospheric condition.
Mist creates mystery and depth simultaneously. It obscures distant elements while maintaining focus on your main subjects.
Final Color Grading
Add a Color Balance adjustment layer at the top of your layer stack. Push shadows slightly toward blue. Push highlights toward warm yellows or reds.
This split-tone color grading creates visual interest. Cool shadows against warm highlights guide viewer attention naturally. Moreover, this technique mimics cinematic color grading that feels professionally polished.
Test different color combinations. Sometimes unexpected shifts create the most striking results.
Refine Overall Contrast
Create one final Curves adjustment layer at the very top. Make subtle S-curve adjustments to enhance overall contrast.
Pull highlights up slightly and shadows down slightly. But keep adjustments minimal. Heavy-handed curves destroy the subtle atmosphere you’ve built.
The S-curve technique increases contrast without crushing blacks or blowing out highlights. It’s the professional approach to final contrast refinement.
Enhance Lighting Drama
Add a new layer set to Screen or Linear Dodge blend mode. Use a large, soft white brush at low opacity. Paint light sources where you want emphasis.
These painted highlights create rim lighting on rocks and figures. They simulate light breaking through atmospheric haze. Plus, strategic lighting directs viewer attention to important compositional elements.
Build lighting gradually. Multiple soft brush strokes at low opacity create more natural lighting than one heavy stroke.
Technical Tips That Actually Matter
Layer organization prevents headaches. Name your layers descriptively. Group related elements together. This organization saves hours when you need to make changes later.
Save multiple versions as you work. Before major changes, duplicate your entire document. Version control lets you experiment fearlessly.
Work with adjustment layers instead of direct image edits whenever possible. Adjustment layers remain editable indefinitely. Direct edits are permanent and limit flexibility.
Common Mistakes to Avoid
Don’t over-saturate your color adjustments. Subtle desaturation creates mood. Too much color makes scenes feel artificial and cartoonish.
Avoid perfectly symmetrical compositions. The rock duplication trick works because you vary positioning and masking. Perfect symmetry feels static and unnatural.
Don’t forget atmospheric perspective. Distant elements should appear lighter, less saturated, and softer than foreground elements. Ignoring this breaks the depth illusion immediately.
Why This Approach Works
These techniques combine traditional matte painting principles with digital efficiency. You’re not just clicking random adjustments. Each step builds on previous ones systematically.
Professional digital artists use these exact methods for film and game production. The skills transfer directly to any matte painting or photo manipulation project.
Master these fundamentals and you’ll create atmospheric scenes that feel cinematic and polished. The mystery and mood come from technical control, not luck.