Digital painting transforms blank canvases into stunning artwork. But most tutorials skip the fundamentals that separate amateur work from professional results.
This guide walks you through creating a complete Incredible Hulk illustration from scratch. You’ll learn proven techniques for lighting, shadows, and color blending that work for any character painting. Plus, we’ll tackle the common mistakes that make digital art look flat or unfinished.
Three Critical Concepts Before You Start
Digital painting succeeds or fails based on fundamentals. Master these three elements first.
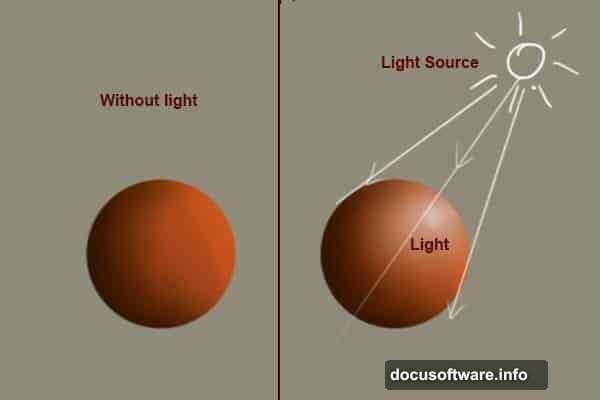
Light source placement determines everything else in your scene. Choose your light direction before adding detail. Otherwise, you’ll waste hours fixing shadows and highlights that don’t match. Most beginners skip this step and regret it later.
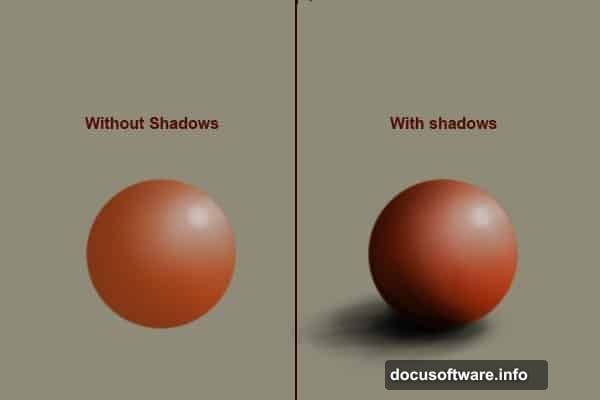
Shadow accuracy gives objects weight and realism. Poor shadows make characters float in empty space. Study how shadows form in real life. Notice how they darken, soften, and spread based on light distance and object shape.
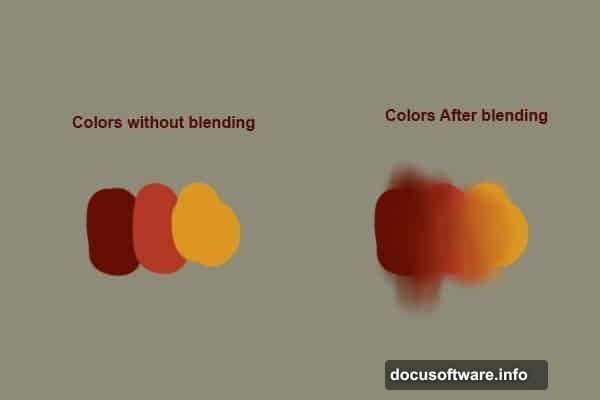
Color blending separates professional work from rough sketches. Harsh brush strokes distract viewers from your subject. Use soft brushes with color picker tools to blend smoothly. Or try dedicated blending tools for tricky areas.
Setting Up Your Canvas and Brushes
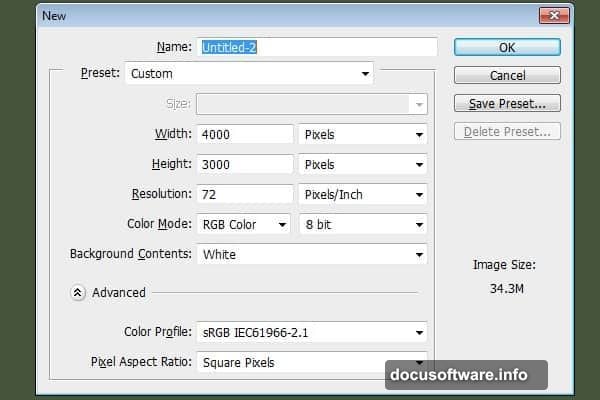
Start with a 3000 x 4000 pixel document. Large dimensions let you print your work later without recreating everything.
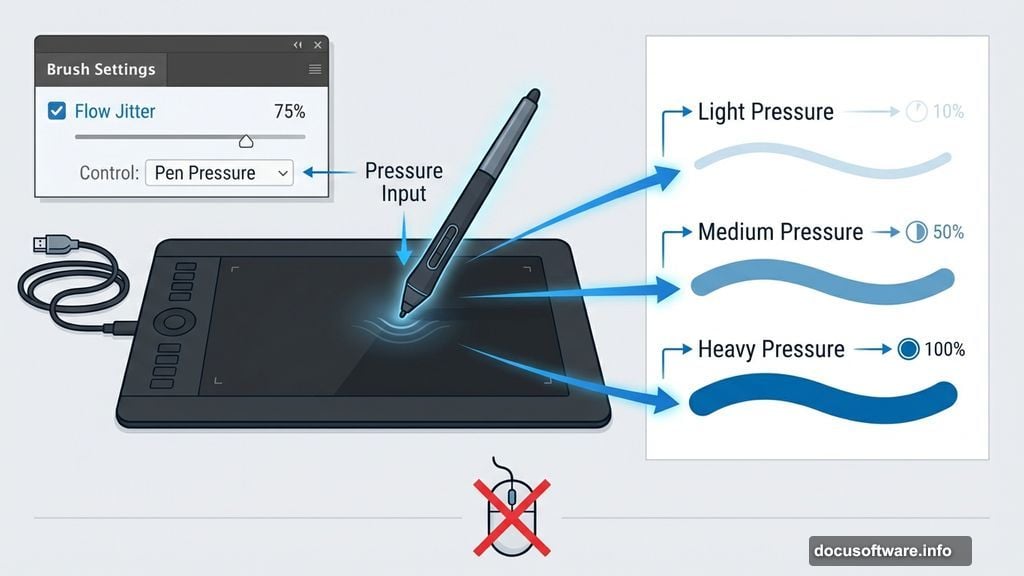
Next, configure your brush for tablet pressure sensitivity. Press “B” to select the brush tool. Then hit F5 to open the brush panel. Set ‘Flow Jitter’ to pen pressure and enable ‘smoothing.’ These settings make brush strokes respond naturally to your tablet.
One critical note: This technique requires a graphics tablet. Mouse users won’t get pen pressure controls. You’ll need to adjust brush opacity manually instead.
Sketching The Character Foundation
Set your brush to 4 pixels with hard round edges. Now sketch rough character outlines without worrying about perfection.
This initial sketch just establishes proportions and pose. Don’t spend excessive time making every stroke perfect. Quick, confident lines work better than hesitant, overworked strokes.
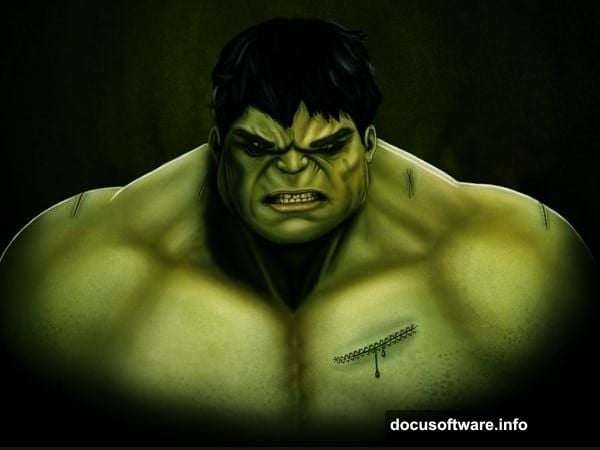
Focus on capturing the Hulk’s massive build and aggressive stance. His proportions should feel exaggerated and powerful. Shoulders wider than normal. Arms thicker than legs. Head slightly smaller to emphasize his bulk.
Building Form Through Value Blocking
Switch to a larger brush around 50-100 pixels. Start blocking in basic values to establish form.
Identify your light source first. For this illustration, light comes from the upper left. That means the Hulk’s left side gets highlights while his right side falls into shadow.
Block broad areas with mid-tone green initially. Don’t add details yet. Just establish where light hits and where shadows fall. This stage defines the character’s three-dimensional form.
Remember: squinting at your work helps you see values clearly. Details disappear when you squint, revealing whether your light and dark areas work together properly.
Refining Muscle Structure and Anatomy
The Hulk’s defining feature? Exaggerated musculature that looks powerful yet anatomically plausible.
Study real muscle anatomy references before painting. Notice how muscles bunch, stretch, and overlap. The Hulk amplifies normal proportions but follows the same basic structure.
Use a smaller brush around 20-30 pixels to define individual muscle groups. Add darker green in crevices between muscles. Lighter green on muscle peaks that catch light. This contrast creates the illusion of depth.
Pay special attention to tension areas. Where muscles flex, they compress and bulge. Where they relax, they soften. Vary your edge quality to show this. Hard edges where muscles press together. Soft edges where they transition smoothly.
Adding Skin Texture and Surface Detail
Real skin has pores, wrinkles, and subtle color variations. Digital skin needs these details too.
Create a new layer set to Overlay blend mode. Use a textured brush with low opacity around 10-20%. Add subtle darker spots across the skin surface. These suggest pores without being too obvious.
For damaged areas, add scratches and scrapes with a smaller brush. The Hulk takes damage constantly. His skin should show wear. However, don’t overdo battle damage. Too many scratches look messy and distract from the overall form.
Also vary skin color slightly. Add warmer tones where blood flows near the surface (cheeks, knuckles, scars). Cooler tones in shadowed areas. These subtle shifts make skin look alive rather than plastic.
Painting Eyes That Convey Emotion
Eyes bring characters to life. The Hulk’s eyes should show rage and intensity.
Start with the basic eye socket shape in shadow. Then add the eyeball as a lighter sphere sitting in that socket. Remember: eyeballs are spheres, not flat circles. They catch light on top and shadow underneath.
For the Hulk’s signature look, make eyes slightly bloodshot with thin red veins. Use a tiny brush around 2-3 pixels for these details. Add a bright highlight in each eye to show moisture and focus. Place highlights consistently based on your light source.
The eyebrow area needs special attention. Heavy, furrowed brows create his angry expression. Use dark shadows above the eyes and strong highlights on the brow ridge.
Creating Realistic Hair and Texture
Hair adds another dimension of realism. Even the Hulk’s wild hair follows basic rules.
Paint hair in layers starting with the darkest values. Use a textured brush to suggest hair clumps rather than individual strands. Hair grows in sections, not as separate pieces.
Add mid-tone highlights where light hits hair surfaces. Then use a fine brush to add a few individual strands that catch light. These accent strands suggest detail without painting every hair.
For the Hulk, keep hair messy and unkempt. Let strands break away from the main mass. This reinforces his wild, uncontrolled nature.
Final Polish and Atmospheric Effects
The finishing touches separate good paintings from great ones.

Add atmospheric haze using a soft brush with low opacity. Paint subtle fog or dust in the background. This creates depth by making distant elements fade slightly.
Next, add rim lighting along the character’s edges. This separates him from the background and adds drama. Use a bright, saturated green on edges facing your light source.
Finally, create a new layer set to Screen blend mode. Add small bright spots where light hits most intensely. These could be on sweat drops, muscle peaks, or eye highlights. Don’t overdo these accents. A few strategic bright spots work better than covering everything.
Tools That Make The Process Easier
Quality brushes speed up digital painting significantly. Blur’s Good Brush 4.0 Pro by Yang Xueguo includes versatile brush presets for painting and blending. These brushes handle everything from rough sketching to fine detail work.
A pressure-sensitive tablet is essential. Wacom, Huion, and XP-Pen all make reliable options. Tablet pressure control lets you vary stroke thickness and opacity naturally, just like traditional painting.
Start with basic tools if you’re new to digital painting. You don’t need expensive software or hardware to learn fundamentals. Master lighting, shadows, and blending first. Then upgrade tools as your skills improve.
Common Mistakes That Kill Digital Paintings
Several errors plague beginner digital paintings. Avoid these pitfalls.
Flat lighting makes everything look fake. Add contrast between light and shadow areas. Don’t be afraid of dark shadows or bright highlights. Contrast creates drama and depth.
Overworking details too early wastes time. Block in large shapes first. Add details only after overall composition works. Many artists spend hours on eyes before establishing basic form.
Ignoring edges makes paintings look unfinished. Some edges should be hard and defined. Others should be soft and blended. Vary edge quality based on how objects interact. Where surfaces meet sharply, use hard edges. Where surfaces curve away, soften edges.
Poor color harmony makes paintings look garish. Limit your palette. The Hulk uses primarily greens with strategic accent colors. Too many competing colors create visual chaos.
Start simple. Focus on fundamentals. Build skills gradually. Digital painting rewards patience and practice more than expensive tools or complex techniques.