
Masking in Adobe Illustrator feels complicated at first. Most tutorials throw every feature at you without explaining when to use what.
Let’s fix that. This guide breaks down three masking methods in Illustrator and shows you exactly when each one makes sense. Plus, you’ll learn the shortcuts that save hours of clicking through menus.
Why Masking Matters for Design Work
Think of masking as controlled visibility. You’re deciding which parts of your artwork show and which parts hide. But unlike deleting pixels, masking keeps everything intact so you can adjust later.
That flexibility becomes crucial when clients change their minds. Or when you need to try different compositions quickly. Instead of recreating artwork, you just adjust the mask.
Clipping Masks: The Workhorse Technique
Clipping masks crop artwork into shapes. This is the method you’ll use most often for logo design and illustrations.
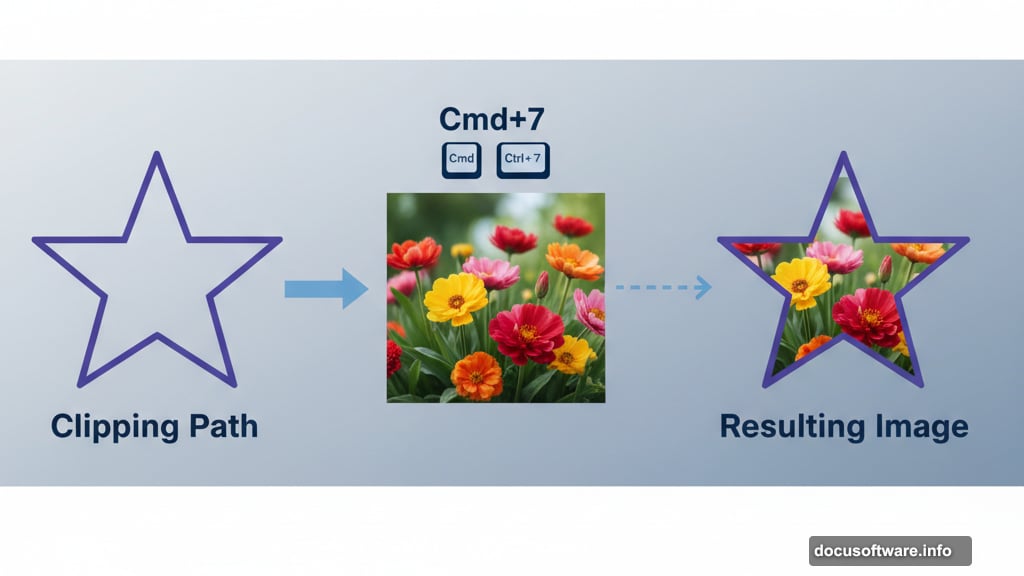
Here’s how it works. Place your shape on top of the artwork you want to crop. Select both items. Then hit Cmd+7 on Mac or Ctrl+7 on Windows. Done.
The shape becomes your clipping path. Everything outside that shape disappears from view. But it’s still there in your file, just hidden.
Three ways to create clipping masks:
- Keyboard shortcut: Cmd/Ctrl + 7
- Properties panel: Click the “Make Clipping Mask” button
- Menu path: Object > Clipping Mask > Make
All three do the same thing. The keyboard shortcut is fastest once you memorize it.
Moving artwork inside the mask requires selecting just the clipped object, not the mask itself. Click into the Layers panel and select the artwork directly. Now you can reposition or recolor it without moving the mask shape.
Want to move the mask instead? Select the clipping path in the Layers panel. Transform it however you need and the visible artwork adjusts accordingly.
Masking with Multiple Shapes Gets Tricky
Single shapes work perfectly for clipping masks. Multiple shapes need extra steps.
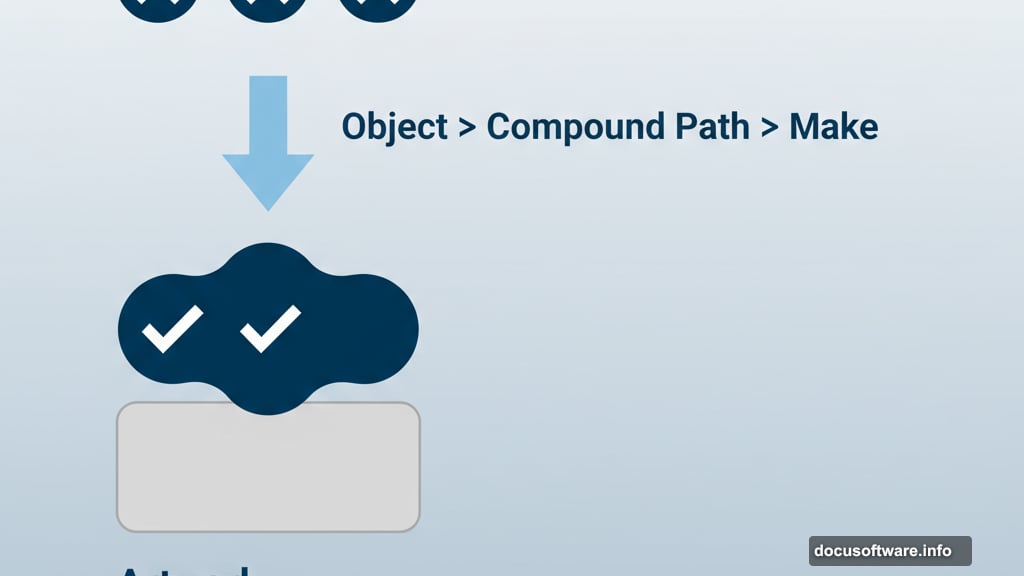
Let’s say you want to mask artwork into three circles. If you try creating a clipping mask with all three circles selected, Illustrator throws an error.
Solution: Convert to compound path first. Select all your shapes. Go to Object > Compound Path > Make. This turns multiple shapes into one unified path. Then create your clipping mask normally.
This trick works with text too. Keep your text editable by using it as a clipping mask. The text remains live type while cropping your artwork into letter shapes.
Stacking Order Matters More Than You Think
Illustrator requires the clipping shape on top of your artwork. Wrong order? The mask won’t work.
Fix stacking problems in the Arrange menu. Select your clipping shape and go to Object > Arrange > Bring to Front. Now it sits above the artwork and the mask will function properly.
This trips up beginners constantly. Remember: Mask shape on top, artwork underneath.
Releasing Clipping Masks Reverses Everything
Changed your mind about a mask? Release it to restore full visibility.
Three release methods:
- Keyboard: Cmd/Ctrl + Alt/Opt + 7
- Menu: Object > Clipping Mask > Release
- Properties panel: “Release Clipping Mask” button
Your artwork reappears completely. The mask shape remains as a regular path you can delete or repurpose.
Nested Masks Create Advanced Compositions
You can mask within a mask for complex projects. This helps when clipped artwork extends beyond your artboard.
Create your first clipping mask normally. Then draw a rectangle matching your artboard size. Place it on top and create a second clipping mask. Now everything stays within artboard bounds.
This technique keeps exported files clean without manually trimming elements.
Draw Inside Mode: The Hidden Shortcut
Draw Inside mode acts like an automatic clipping mask for brush work and drawing tools.
Find it at the bottom of the Tools panel. Three small icons control drawing modes. Click the rightmost icon to activate Draw Inside.
Now select any shape. Everything you draw goes inside that shape automatically. No manual clipping required.
This works beautifully for adding texture or details to existing shapes. Just select your shape, enable Draw Inside, and start painting. Illustrator handles the masking for you.
Toggling Draw Inside becomes second nature. Use it whenever you’re adding multiple elements to a single shape. Much faster than creating individual clipping masks.
Clipping Layers Speed Up Complex Projects
Convert an entire layer to a clipping layer for maximum efficiency. This helps when building illustrations with dozens of masked elements.
Here’s the setup. Create a layer with your mask shape on top. Select the layer in the Layers panel and click the Make Clipping Mask button.
The top shape becomes the master mask. Everything you add to this layer gets clipped automatically. No more selecting objects and hitting Cmd+7 repeatedly.
Add artwork, import images, draw shapes – they all respect the layer mask instantly. This workflow shines for projects like adding textures to backgrounds or building complex logos.
Transparency Masks: Photoshop Rules in Illustrator
Transparency masks work differently than clipping masks. They use grayscale values to control visibility gradually.
Black hides completely. White reveals fully. Shades of gray create partial transparency. This mimics Photoshop layer masks exactly.
Create a transparency mask by selecting your artwork and mask shape together. Open the Transparency panel and click “Make Mask.” Your shape becomes a grayscale mask controlling visibility.
Double-click the mask thumbnail to edit it directly. You can paste new shapes, paint with brushes, or add gradients. All those grayscale values affect transparency in real time.
Fading Objects with Gradient Masks
Transparency masks excel at creating fades and reflections. Something clipping masks can’t do.
Draw a gradient-filled rectangle. Make it a transparency mask. Now your artwork fades from fully visible to invisible following the gradient.
This technique creates realistic reflections below objects. Or makes artwork fade into backgrounds smoothly. Adjust the gradient stops to control exactly where the fade happens.
The Clip checkbox changes behavior. Enable it to start with everything hidden except masked areas. Disable it to keep everything visible and only fade specific regions.
When to Use Each Masking Type
Clipping masks: Sharp edges, cropping artwork into shapes, logo work, most everyday tasks
Draw Inside: Quick texture addition, brush work within shapes, single-object details
Clipping layers: Complex illustrations, multiple masked elements, organized file structure
Transparency masks: Gradual fades, reflections, soft edges, advanced blending
Choose the simplest method that achieves your goal. Clipping masks handle 80% of situations. Save transparency masks for effects requiring gradual transitions.
Common Masking Mistakes to Avoid
Wrong stacking order causes most mask failures. Always check that your mask shape sits above the artwork in the Layers panel.
Creating masks with grouped objects often fails. Ungroup first or convert to compound paths before masking.
Forgetting to release masks makes files messy. If you’re done with a mask, release it rather than leaving unnecessary clipping groups in your document.
Not using layers strategically wastes time. Group related masked elements on dedicated layers instead of scattering them throughout your file.
Practice These Techniques Right Now
Open a blank Illustrator document. Import a photo and draw some shapes over it. Practice each masking method until the steps feel automatic.
Try masking text with images inside letter shapes. Experiment with transparency mask fades. Break things and figure out how to fix them.
Masking becomes intuitive through repetition. The first few times require checking these steps. After a dozen projects, your hands will know the shortcuts without thinking.