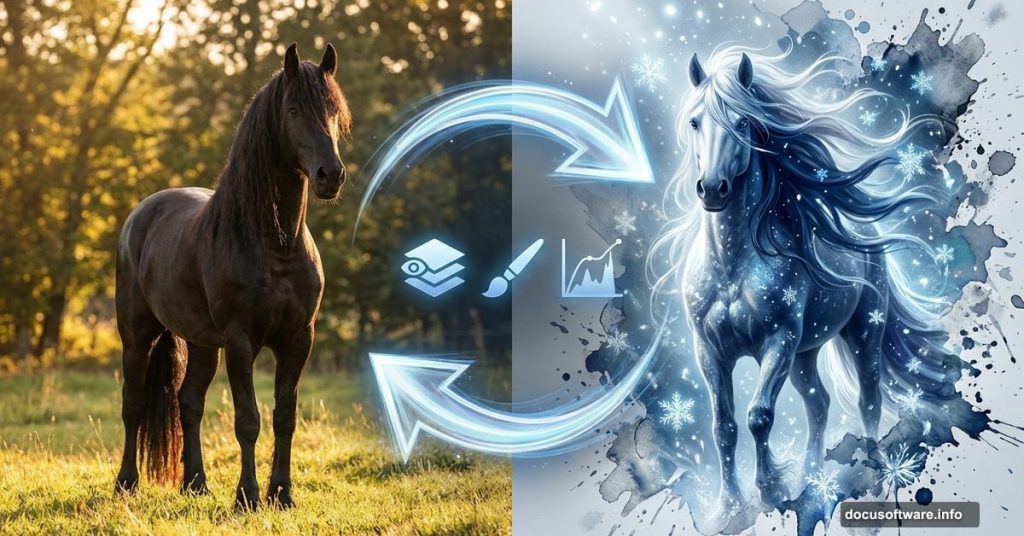
Want to create stunning photo manipulations that look like they belong in an art gallery? This tutorial breaks down the exact process for turning an ordinary horse photo into a breathtaking winter illustration.
You’ll learn custom brush creation from ink splatters, advanced blending techniques, and layer masking tricks that professional designers use. Plus, you get all the raw materials to practice with.
Fair warning: This isn’t a beginner tutorial. But if you’ve got basic Photoshop skills, you can absolutely follow along.
Build Custom Ink Splatter Brushes From Scratch
Most designers buy brush packs. That’s fine. But creating your own brushes gives you complete control over texture and style.
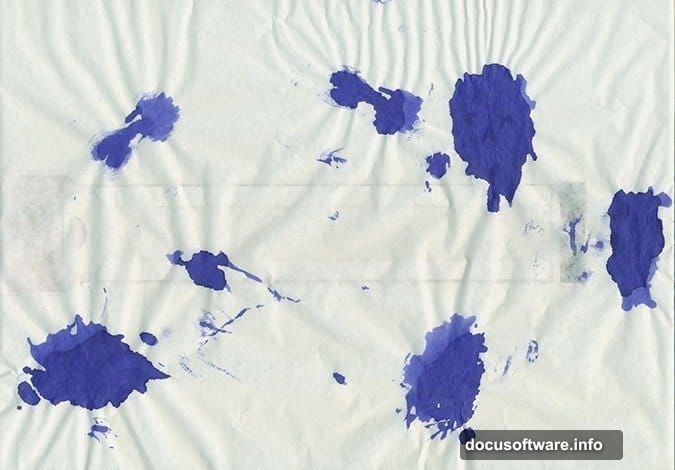
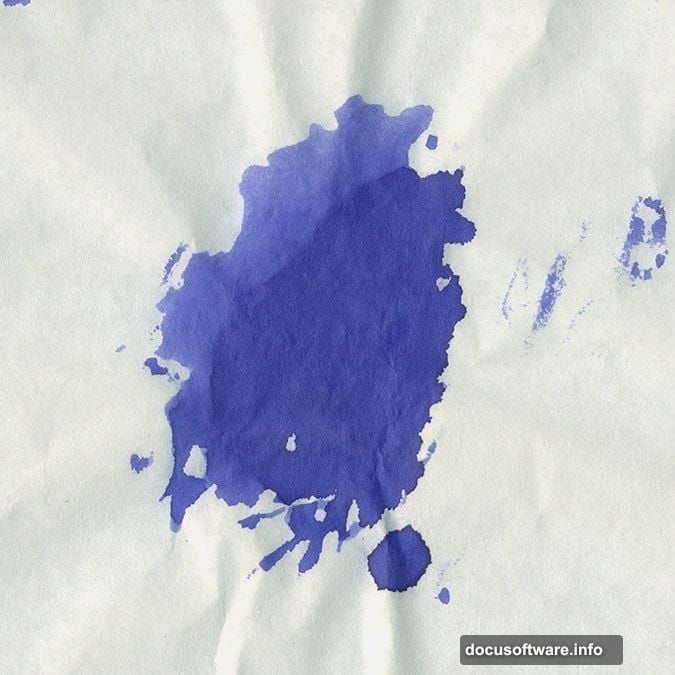
Start with real ink splatters. Scan them or photograph them against white paper. The physical texture beats digital effects every time.
Open your splatter image in Photoshop. Use the Crop Tool (C) and hold Shift to select a perfect square. This keeps your brush symmetrical.
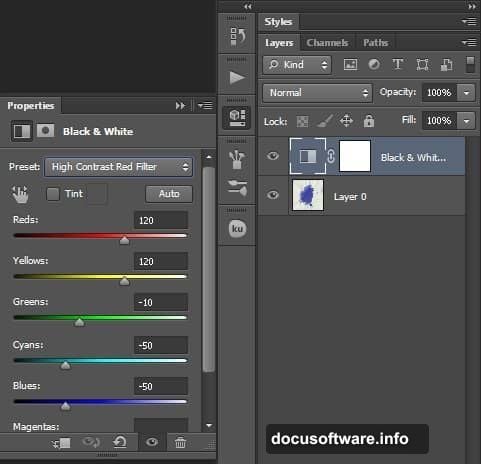
Now convert it to pure black and white. Add a Black & White Adjustment Layer (Layer > New Adjustment Layer > Black & White). Choose the “High Contrast Red Filter” preset. This creates the strong contrast you need.
Extract the Perfect Splatter Shape
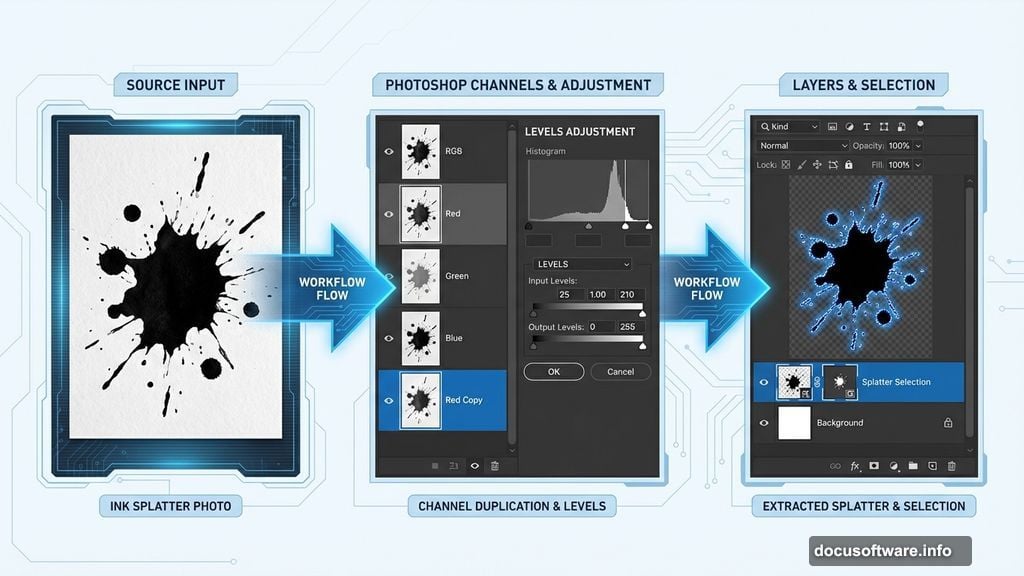
Here’s where it gets technical. Open your Channels panel. Duplicate the Red Channel by right-clicking and selecting Duplicate Channel.
Go to Image > Adjustments > Levels. Move the sliders until your splatter is solid black and the background is pure white. No gray areas allowed.
Load the selection by holding Ctrl and clicking the Red channel thumbnail. Then invert it (Shift+Ctrl+I). Switch back to RGB channel before moving forward.
Jump back to Layers panel. Select your splatter layer and press Ctrl+J to cut out just the selection. Clean up any messy edges with the Eraser tool (E).
For stubborn areas, try Color Range or the Magic Wand Tool. Both work great for fine-tuning your selection.
Turn Your Splatter Into a Reusable Brush
Create a new 2500x2500px canvas at 300dpi. This resolution ensures your brush stays sharp at any size.
Go to Edit > Define Brush Preset. Name your brush something memorable.
Now adjust the brush settings. Enable Shape Dynamics for size variation. Add Scattering to randomize placement. Turn on Transfer to vary opacity. These settings make your brush feel organic instead of stamped.
Transform the Horse With Smart Gradient Mapping
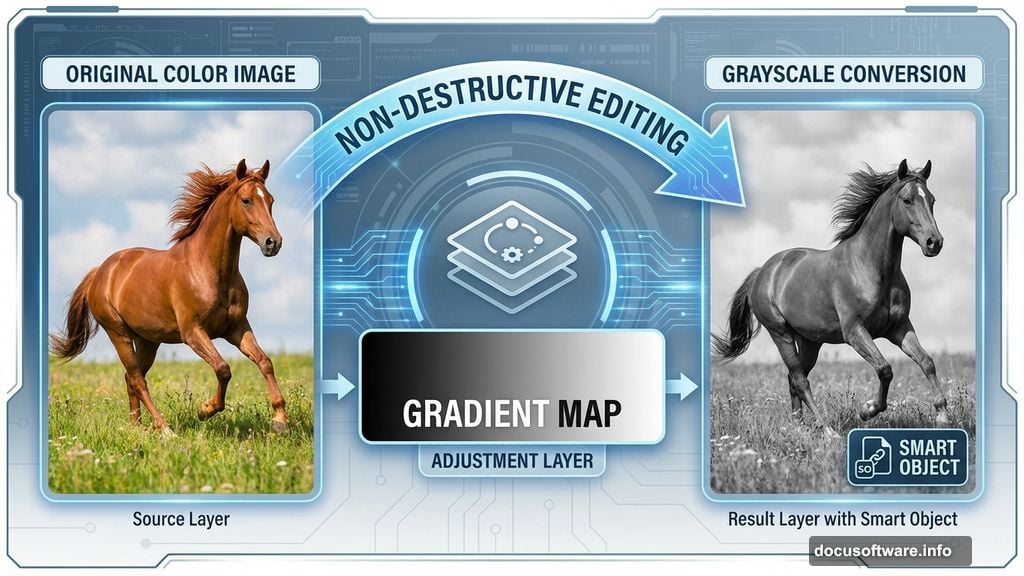
Open your main canvas and add the horse photo. Before doing anything else, add a black to white Gradient Map (Layer > New Adjustment Layer > Gradient Map).
Right-click the layer and choose “Convert to Smart Object.” This lets you edit settings non-destructively later.
Apply Shadow/Highlights adjustments (Image > Adjustments > Shadow/Highlights). This brings out detail in dark areas while preserving highlights.
Click the “Add layer mask” icon at the bottom of your Layers palette. Select a soft brush at 50% opacity. Paint with black on areas where you want the original color to show through.
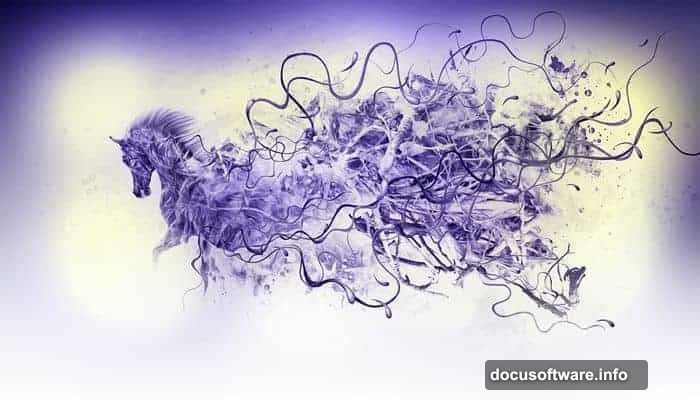
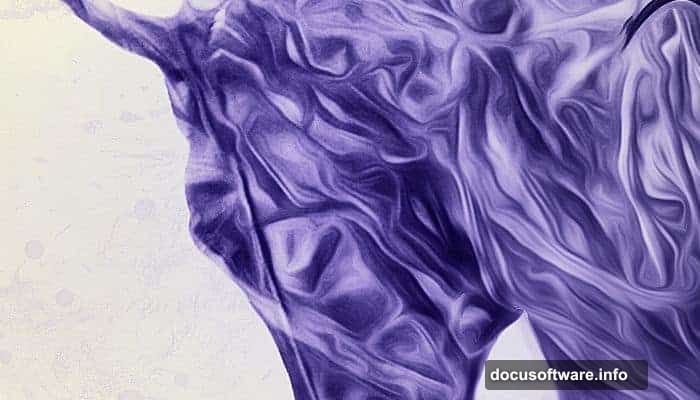
Blend Root Textures Into the Horse Body
This step creates the magical forest-meets-animal effect. Add your roots photo layer.
Hold Ctrl/Cmd and hover your cursor above the dividing line between layers. You’ll see a special icon appear. Click it to create a clipping mask.
The roots now only appear within the horse’s silhouette. Adjust the blend mode to Multiply or Overlay. Lower the opacity until it looks natural, usually around 40-60%.
Use a layer mask to control where roots appear strongest. Paint with black to hide them in areas like the eyes and muzzle. Paint with white to strengthen them in the mane and body.
Add Winter Atmosphere With Custom Brushes
Now use those ink splatter brushes you created earlier. Select white for snow particles. Vary your brush size from tiny to large.
Paint scattered white splatters around the horse. Lower the opacity on some layers to create depth. Particles in the foreground should be larger and brighter.
Add a new layer set to Screen blend mode. Paint soft white glow around the horse’s edges. This separates it from the background and adds magical lighting.
Create another layer for blue-tinted shadows. Use a soft brush with low opacity. Paint subtle blue tones in shadowed areas to enhance the winter feeling.
Fine-Tune Everything With Layer Adjustments
The final polish makes or breaks the illustration. Add a Curves adjustment layer. Lift the highlights slightly and deepen the shadows. This adds drama.
Create a Color Balance adjustment layer. Push blues into the shadows and warm yellows into the highlights. This creates that classic winter color palette.
Add a final Levels adjustment to fine-tune the overall brightness. Don’t go overboard—subtle adjustments work best.
Flatten your image and apply a slight Sharpen filter (Filter > Sharpen > Smart Sharpen). Use a small radius, around 0.5 pixels. This brings back the crisp details that layers sometimes soften.
Practice Makes Perfect Manipulation
Your first attempt won’t look like the example. That’s completely normal. Photo manipulation requires experimenting with blend modes, opacity levels, and layer orders.
Save your PSD with all layers intact. You’ll want to revisit and adjust things as you learn. Most professional manipulations go through multiple revision rounds.
The techniques here work for any animal or object. Try creating a fire-themed lion or a water-themed dolphin. The process stays the same—just change your textures and color schemes.
Keep building your custom brush library. Every new texture you create expands your creative options. Soon you’ll have a collection that makes complex manipulations faster and easier.