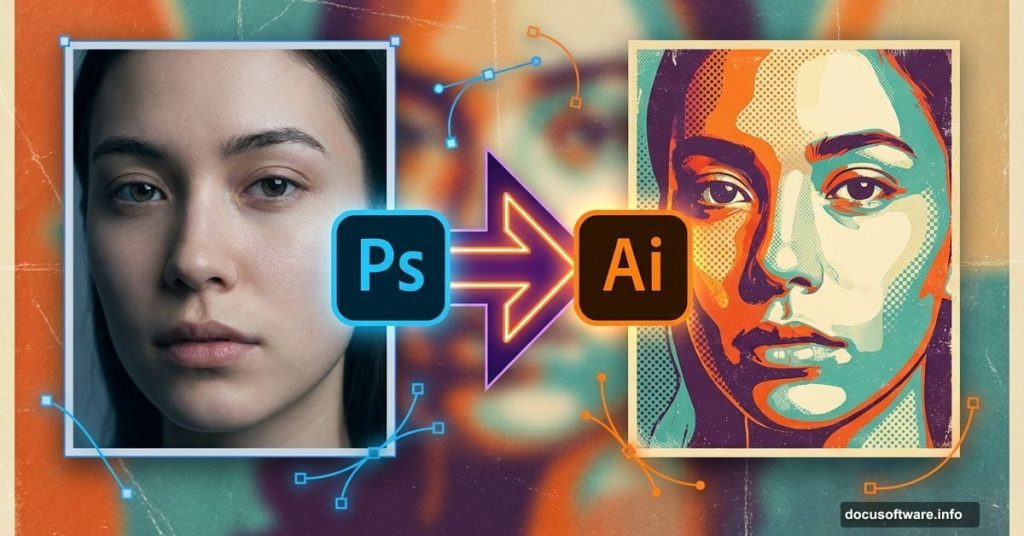
Want to transform an ordinary photo into eye-catching retro artwork? This technique combines Photoshop’s editing power with Illustrator’s vector magic to create vintage-style posters that pop.
You’ll learn professional techniques that work across multiple projects. Plus, this tutorial works with minimal stock images. So you can create impressive results without hunting for perfect photos.
Let’s dive into the step-by-step process.
What You’ll Need Before Starting
First, gather your tools and resources. You’ll need both Adobe Photoshop and Illustrator installed on your computer. Some basic experience with Illustrator helps, but beginners can follow along.
For stock images, you’ll want a model photo with soft lighting and minimal shadows. The tutorial uses specific stock photos, but you can substitute similar images. Look for portraits with plain backgrounds and neutral tones.
Here’s why these requirements matter. Soft lighting makes color selection easier. Plain backgrounds simplify the extraction process. And neutral tones give you more creative freedom when adding retro effects.
Setting Up Your Canvas
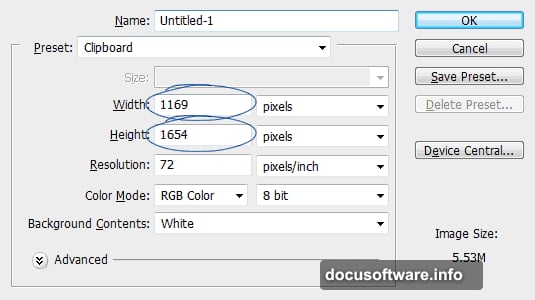
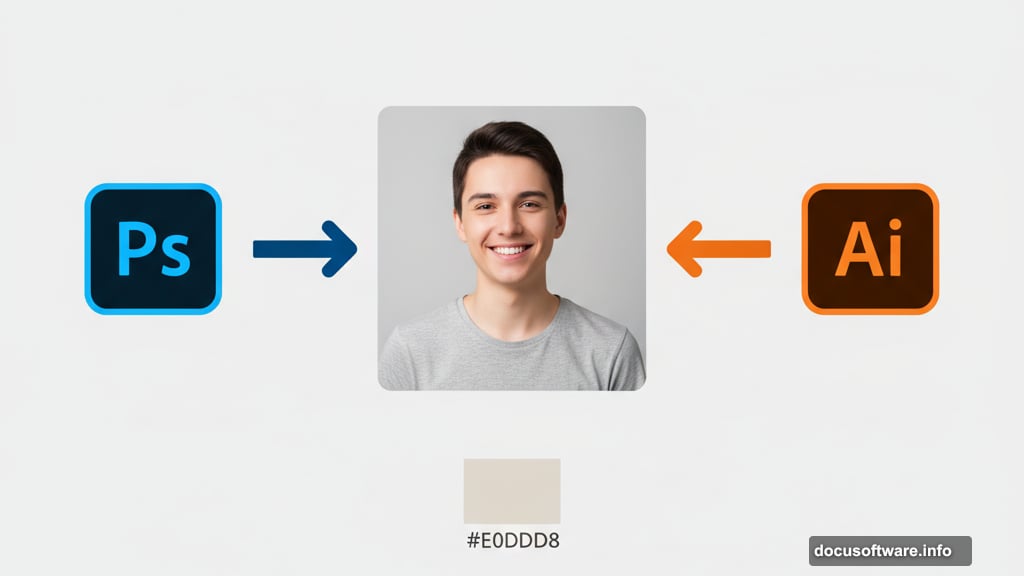
Start with the right canvas size. The finished design measures 1169×1654 pixels. However, you can adjust dimensions to fit your needs. Just maintain similar proportions while following along.
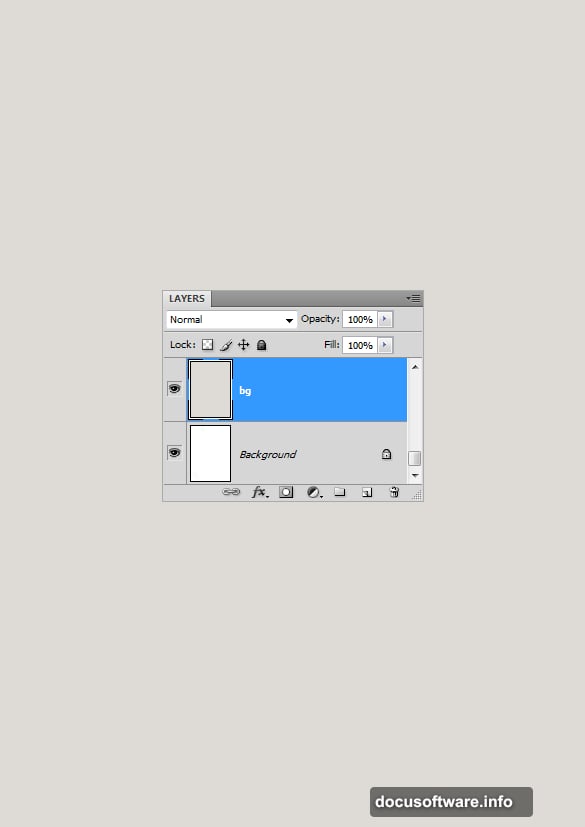
Next, replace that stark white background. Create a new layer above the background layer. Then fill it with a neutral color like #e0ddd8. This warm, off-white tone provides a better working backdrop than pure white.
Why does background color matter? It helps you judge colors and contrast more accurately as you build your design.
Isolating Your Subject Like a Pro
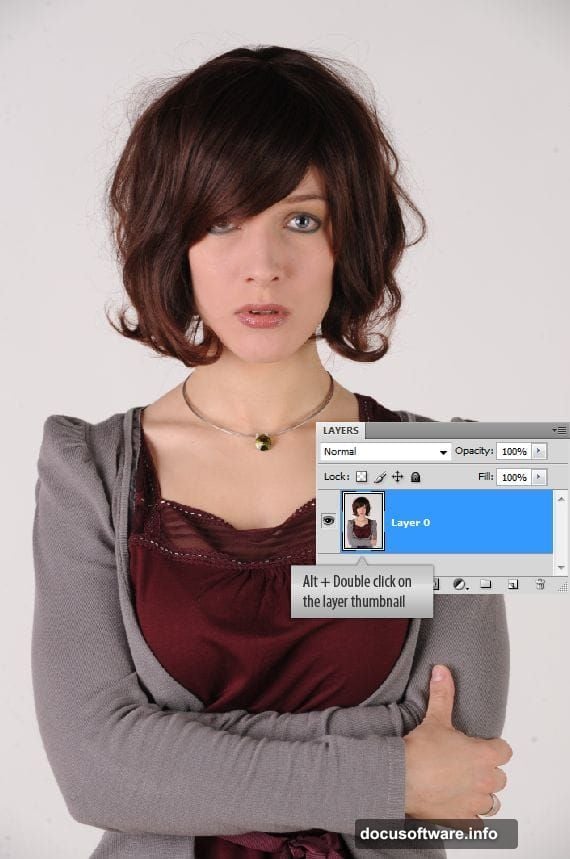
Now comes the crucial part. You need to separate your model from the background cleanly. Photoshop offers several selection tools, but Color Range works best for plain backgrounds.
Open the Color Range command from the Select menu. Use the color picker to sample the background color. Watch the thumbnail preview inside the Color Range box. White areas show what gets selected. Grey areas indicate partial selection.
Don’t worry if the selection isn’t perfect yet. We’ll refine it in the next step.
Refining Your Selection for Clean Edges
Invert your selection using Ctrl + Shift + I. This switches the selection from background to model. Now you’re ready to fine-tune.
Launch the Refine Edge command by pressing Ctrl + Alt + R. This powerful tool lets you smooth edges, feather selections, and contract or expand boundaries. Switch the preview to “On Black” so you can see exactly what you’re selecting.
Slightly smooth the selection to remove jaggedness. Then contract it a bit to eliminate background fringe. These small adjustments make a huge difference in your final result.
Building the Retro Color Palette
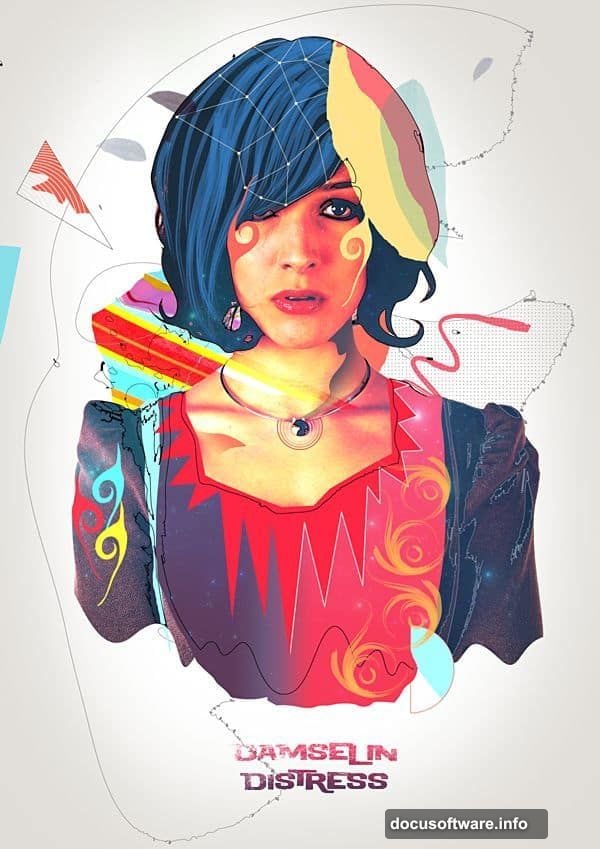
Once your subject is isolated, start building that retro aesthetic. Vintage posters typically feature bold, saturated colors with high contrast. Think oranges, teals, and warm yellows.
Adjust color balance and saturation to push your image toward that retro vibe. Don’t be afraid to exaggerate. Retro posters celebrate bold color choices. So crank up those saturation sliders and experiment with color overlays.
Remember, you can always dial it back if you go too far.
Adding Vector Elements in Illustrator
Here’s where Illustrator enters the picture. Switch over to create clean, geometric shapes that complement your photo. Vector elements add that authentic vintage poster feel.
Use the Live Trace feature to convert parts of your image into vector artwork. This creates those characteristic poster outlines and simplified shapes. Play with the trace settings until you get the look you want.
Then copy your vector elements and paste them back into Photoshop. They’ll maintain their crisp edges at any size.
Layering Textures for Authenticity
Real vintage posters show age through texture. Add grain, paper texture, or subtle scratches to sell the retro effect. Overlay these textures using blend modes like Multiply or Overlay.
Keep textures subtle. Too much grunge overwhelms your design. The goal is suggesting age, not burying your artwork under distressed effects.
Also, vary texture opacity across different elements. This creates depth and makes your poster feel more organic.
Creating Dynamic Lighting Effects
Retro posters often feature dramatic lighting. Add glows, halos, or light rays to create that vintage drama. Use gradient overlays and adjustment layers to build atmospheric lighting.
Focus light on your subject while keeping backgrounds slightly darker. This draws the eye exactly where you want it. Plus, it mimics the lighting style of classic poster designs.
Experiment with different blend modes for your lighting layers. Screen and Linear Dodge work great for bright effects.
Typography and Final Touches
Typography completes your retro poster. Choose fonts that match your era. Bold, geometric typefaces work well for 1970s vibes. Script fonts suit 1950s aesthetics.
Integrate text naturally into your design. Don’t just slap words on top. Instead, work them into the composition. Let text interact with your subject and background elements.
Finally, step back and evaluate your overall composition. Adjust colors, move elements, and refine details until everything clicks.
Common Challenges and Solutions
The hair selection often trips people up. Hair strands require extra attention when refining selections. Use the Refine Edge brush to carefully paint along hair boundaries. This captures fine details that automatic selection misses.
If Illustrator’s Live Trace produces weird results, adjust your source image first. Increase contrast or convert to grayscale before tracing. This gives Illustrator cleaner edges to work with.

Color matching between Photoshop and Illustrator can be tricky. Work in the same color space and use the Eyedropper tool to sample exact colors when moving between programs.
Taking This Technique Further
These skills extend beyond retro posters. You can apply the same selection techniques to product photography or digital collages. The Illustrator vector elements work beautifully in logo design and branding projects.
Experiment with different eras and styles. Try 1980s neon aesthetics or 1920s art deco approaches. The core techniques remain the same while the visual results vary dramatically.
Also, consider building a library of textures and vector elements. This speeds up future projects and maintains consistency across your portfolio.
This workflow might feel challenging at first. But once you understand the selection refinement process and vector integration, you’ll create stunning retro artwork quickly. The key is practice and experimentation. So grab a photo and start creating.