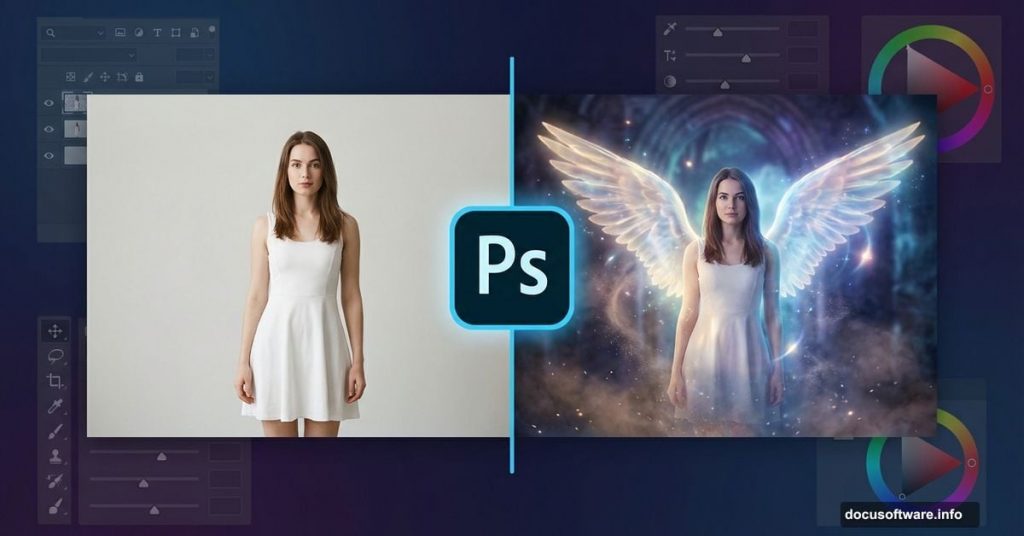
Want to create stunning angel photo manipulations that look professionally crafted? This comprehensive Photoshop tutorial walks you through building an emotional fantasy scene from scratch.
You’ll combine multiple stock images into a cohesive composition. Then add realistic lighting, shadows, and atmospheric effects that sell the illusion. By the end, you’ll have a portfolio-worthy angel manipulation and new skills for future projects.
This tutorial requires Photoshop CS6 or newer. So let’s dive into the techniques that transform ordinary photos into fantasy art.
Gather Your Stock Images First
Before opening Photoshop, collect all the stock images you’ll need. This tutorial uses eight different elements to build the final scene.
You’ll need a sand beach background, dramatic sky, nebula texture for atmosphere, and rain overlay for mood. Plus a model photo, separate hair stock for wind effect, angel wings, falling leaves, and debris brushes for particles.
Having everything ready beforehand keeps your workflow smooth. No hunting for assets mid-project. Just pure creative focus on building your vision.
Build Your Base Scene Canvas
Start by creating a new Photoshop document. Go to File > New and set your canvas to 2000×3000 pixels at 300 DPI. This gives you plenty of resolution for print-quality output.
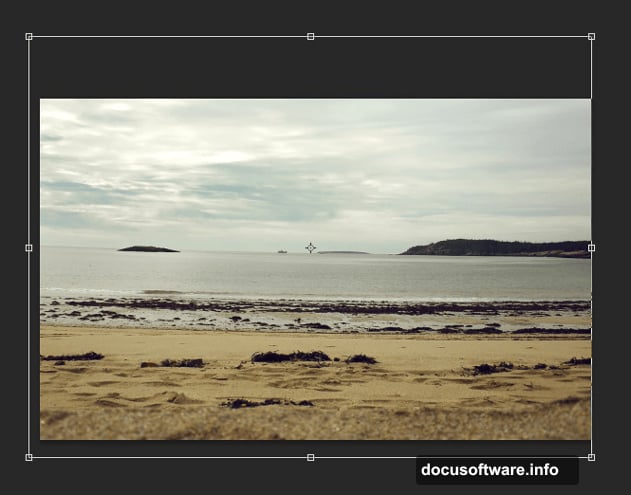
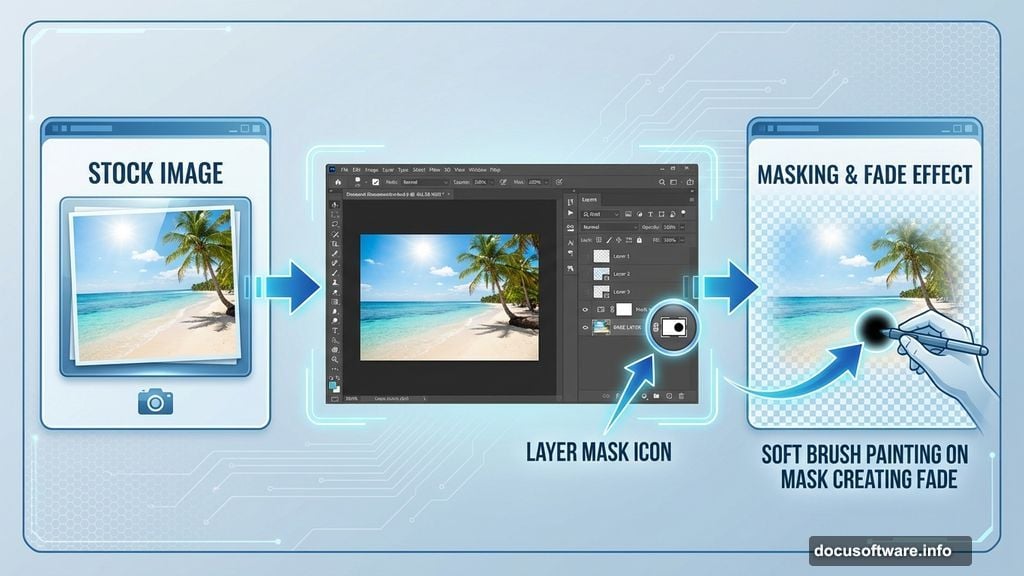
Next, place your sand beach image onto the canvas. Use File > Place instead of dragging the file. This automatically converts it to a smart object, which preserves image quality for future edits.
Name this layer “base” to keep your project organized. Trust me, clear layer naming saves hours when projects get complex.
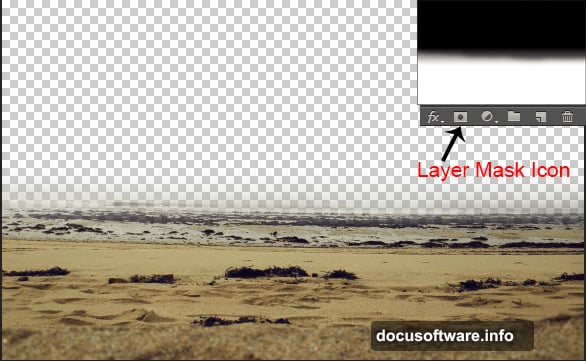
Blend the Beach Seamlessly
Now add a layer mask to your base image. Click the second button on the layer panel or go to Layer > Layer Mask > Reveal All.
Grab the Brush Tool by pressing B. Select a soft round brush with black as your foreground color. Then gently paint along the edges of the beach image on the layer mask.
This creates a natural fade effect. The beach blends smoothly into whatever sky you add next. No harsh edges or obvious composite lines.
Color Correct the Beach Layer
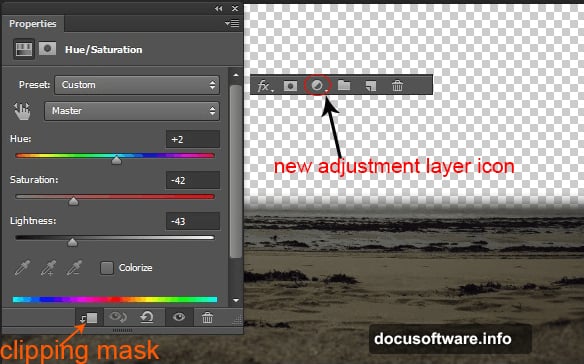
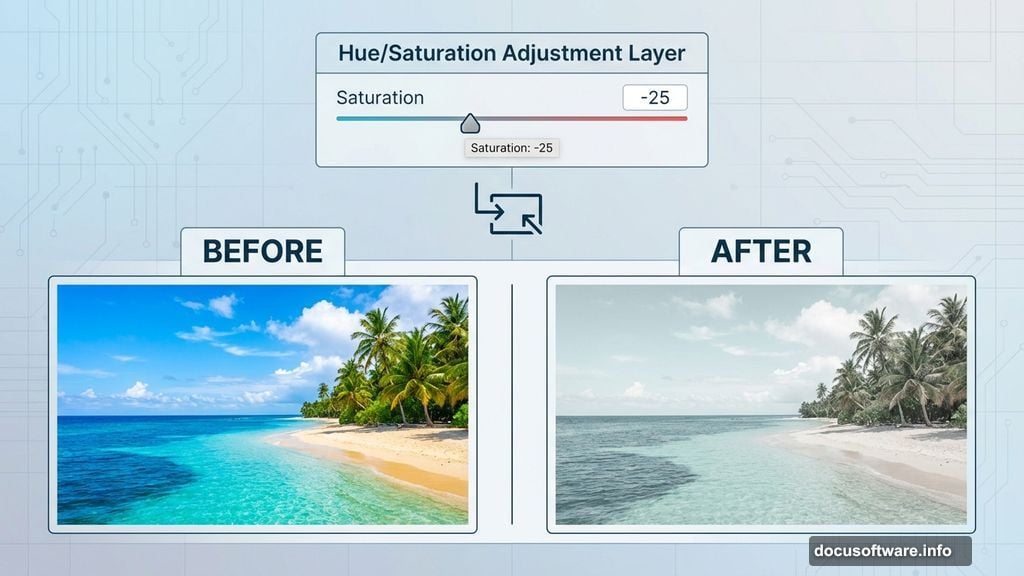
Add a Hue/Saturation adjustment layer above your base. Go to Layer > New Adjustment Layer > Hue/Saturation. Then click the clipping mask icon at the bottom of the Properties panel.
The clipping mask ensures this adjustment only affects the beach layer. Not your entire composition. This gives you surgical control over individual elements.
Adjust the Saturation slider to around -25. This desaturates the beach slightly, creating a more muted, ethereal mood. Plus it makes color matching other elements easier later.
Add Your Dramatic Sky
Place the sky stock image below your base layer in the layer stack. This puts it behind the beach, creating depth in your scene.
The sky should peek through where you masked the beach edges. If it doesn’t show properly, adjust your beach layer mask until both elements blend naturally.
Position the sky so the most dramatic clouds frame where your angel will eventually stand. Composition matters even in the early stages.
Balance Sky Lighting and Tone
Add a Curves adjustment layer above the sky. Clip it to the sky layer using the same clipping mask technique from earlier.
Drag the curve line slightly downward in the midtones. This darkens the sky and creates more contrast. Your scene should feel moody and atmospheric, not bright and cheerful.
Then add a Brightness/Contrast adjustment layer. Reduce brightness by about 15 and increase contrast by 20. These subtle adjustments make the sky more dramatic without looking overdone.
The sky and beach should now feel like they belong in the same photograph. Matching tones between elements sells the illusion of a unified scene.
Layer Your Atmospheric Textures
Place the nebula texture over your entire composition. Set the blend mode to Screen and reduce opacity to around 30-40%. This adds ethereal, otherworldly atmosphere.
Screen blend mode brightens the image based on the texture’s luminosity. Dark areas of the texture become transparent, while light areas glow. Perfect for adding mystical energy to fantasy scenes.
Next, add the rain texture above everything. Set it to Screen mode at 20% opacity. Subtle rain creates movement and emotion without overwhelming your composition.
These texture layers transform a static scene into something alive and atmospheric. Small details like this separate amateur work from professional manipulation.
Position and Prepare Your Model
Now place your model stock photo into the scene. This is your angel, so position her where the composition feels balanced. Usually slightly off-center works better than dead-center placement.
Use the Transform tool (Ctrl/Cmd + T) to scale her appropriately. She should feel integrated into the environment, not pasted on top. Pay attention to perspective and relative size.
Add a layer mask and carefully mask out the background from your model photo. Zoom in and use a small, hard brush for crisp edges around the body. Switch to a larger, softer brush for hair to maintain natural softness.
Take your time here. Clean masking makes or breaks photo manipulation. Sloppy edges immediately reveal the composite as fake.
Match Model Colors to Scene
Create a Hue/Saturation adjustment layer clipped to your model. Shift the Hue slider slightly toward the blue-green range to match your atmospheric scene lighting.
Then add a Curves adjustment. Darken the midtones slightly so your model doesn’t look too bright compared to the moody background. She should feel lit by the same light source as everything else.
Finally, add a Color Balance adjustment layer. Push the shadows toward blue and cyan. This mimics environmental lighting reflecting off the cloudy sky onto your subject.
Color matching is crucial in photo manipulation. Even perfectly masked elements look fake if their colors don’t match the scene’s lighting conditions.
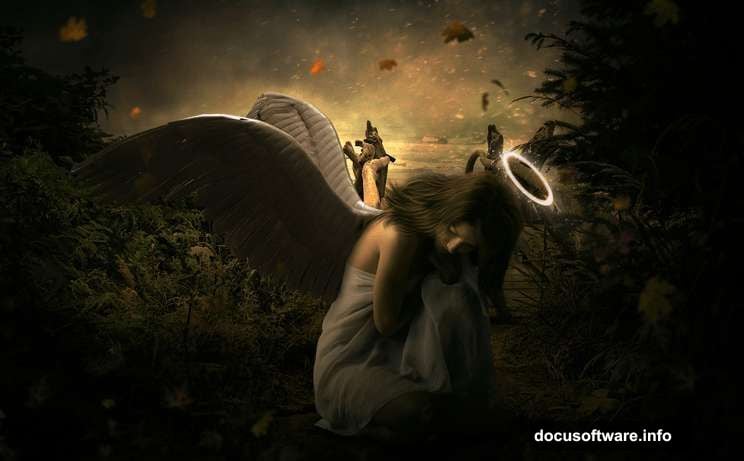
Paint Realistic Shadows
Create a new layer below your model layer. Name it “shadow.” Use a soft round brush with black at 30% opacity to paint shadows where the model touches the ground.
Shadows anchor subjects to their environment. Without them, your angel floats unnaturally even though her feet touch the sand. The shadow proves she exists in this space.
Paint the shadow darker directly under her feet. Then fade it out as it extends away from her body. Real shadows have gradual falloff, not hard edges everywhere.
Set the shadow layer to Multiply blend mode at 40-50% opacity. This makes it interact naturally with the sand texture beneath. Adjust opacity until it looks believable, not too dark or too light.
Add Dramatic Hair Movement
Place the hair stock images around your model’s head. These add wind-blown movement that enhances the emotional, dramatic feel of your angel scene.
Transform each hair layer to match the angle and flow direction you want. Use layer masks to blend where the stock hair connects to your model’s actual hair. Zoom in close for seamless transitions.
Adjust each hair layer’s color using Hue/Saturation to match your model’s hair tone. Then use Curves to match the lighting. Hair catching different amounts of light needs individual adjustment.
Set some hair layers to different blend modes. Try Lighten or Screen for highlights, or Multiply for shadows. This creates depth and realism in the flowing hair effect.
Wind-blown hair adds energy and movement. It suggests your angel just descended from the heavens, making the scene feel more dynamic and alive.
Attach Majestic Angel Wings
Place the wing stock image behind your model layer. This puts the wings behind her body, which looks more natural than wings appearing in front of her torso.
Use Free Transform to position, scale, and rotate the wings. They should look proportional to your model’s body size. Overly large wings can work for stylized art, but maintain believability.
Add a layer mask and carefully mask away any parts of the wings that would be hidden behind the model’s body. This sells the illusion that wings genuinely attach to her back.
Create a Hue/Saturation adjustment clipped to the wings. Match the wing color and brightness to your scene’s lighting. Wings should feel illuminated by the same light source as everything else.
Finally, paint soft shadows on the wings themselves using a new layer set to Multiply. Real wings have dimensionality, with shadows in the crevices between feathers. These details matter.
Integrate Wings with Lighting
Add a new layer above your wings set to Overlay blend mode. Use a soft brush with white paint at 30% opacity to paint highlights on the top edges of the wings.
Light comes from your sky, so the brightest parts of the wings should face that light source. This creates form and makes the wings feel three-dimensional rather than flat cutouts.
Then create another layer set to Multiply. Paint subtle shadows with a dark brown color where the wings connect to the model’s back. This grounds them to her body.
Proper lighting integration is what separates amateur composites from professional work. Light and shadow must be consistent across all elements, or the illusion breaks immediately.
Add Falling Leaves for Movement
Place the leaf stock images scattered throughout your composition. Rotate each leaf differently so they don’t all face the same direction. Random variation looks natural.
Use Motion Blur on some leaves (Filter > Blur > Motion Blur) to suggest they’re falling quickly. Set the angle to match downward motion and adjust the distance for more or less blur.
Vary the opacity of different leaves. Leaves closer to the camera stay at 100% opacity. Leaves farther away drop to 40-60% opacity. This creates depth through atmospheric perspective.
Add some leaves near the foreground and make them slightly out of focus using Gaussian Blur. Real cameras can’t keep everything sharp. Selective focus makes your manipulation feel more like an actual photograph.
Falling leaves reinforce the emotional, melancholic mood. They suggest autumn, endings, and transformation—perfect symbolism for an angel scene.
Paint Glowing Light Particles
Create a new layer above everything. Use a soft round brush with warm yellow-white color. Paint small dots of various sizes throughout the composition at 100% opacity.
Then apply Gaussian Blur (Filter > Blur > Gaussian Blur) with a radius of 3-5 pixels. This softens the painted dots into glowing light particles. Adjust blur amount based on desired softness.
Set this layer to Screen blend mode. The particles now glow beautifully against your darker background. Add more particles in areas where light would naturally concentrate.
For variation, create another particle layer with cooler blue-white tones. Mix warm and cool light particles for visual interest. Real atmospheric light has color variation, not uniform temperature.
Light particles add magic and emphasize the supernatural nature of your angel. They catch the eye and guide viewer attention through the composition.
Apply Final Color Grading
Add a Color Lookup adjustment layer at the top of your layer stack. Try different presets until you find one that enhances your mood. “Moonlight” or “Late Sunset” often work well for fantasy scenes.
Then add a final Curves adjustment layer. Make subtle tweaks to the overall contrast and color balance. Push shadows darker and highlights brighter for more dramatic contrast.
Create a Selective Color adjustment layer. Tweak individual color channels to refine the mood. Often reducing yellows in shadows and adding cyan to highlights creates a cinematic look.
Finally, add a subtle vignette. Create a new layer, fill it with black, and use a large soft eraser to clear the center. Set to Soft Light at 30% opacity. This darkens edges and focuses attention on your angel.
Color grading unifies all your elements into one cohesive vision. It’s the final polish that transforms a good manipulation into a stunning one.
Create the Angel’s Glowing Halo
Create a new layer above your angel. Select the Ellipse Tool and set it to Shape mode with no fill and white stroke. Draw a perfect circle around the angel’s head by holding Shift while dragging.
Right-click the shape layer and choose “Rasterize Layer.” Then apply Gaussian Blur with a radius of 20-30 pixels. This creates a soft, glowing ring effect.
Set the layer to Screen blend mode and reduce opacity to 60-70%. The halo should glow subtly, not overpower the composition. Less is more with supernatural light effects.
For extra polish, duplicate the halo layer and apply a second Gaussian Blur with an even larger radius. Set this version to 20-30% opacity. This creates a larger, softer glow around the primary halo ring.
The halo immediately identifies your subject as divine or angelic. It’s the finishing touch that completes the fantasy transformation.
Save and Export Your Final Image
Before exporting, save a master PSD file with all layers intact. This lets you make future adjustments without starting over. Always keep your working files.
For web sharing, flatten your image (Layer > Flatten Image) and save as high-quality JPG. Set quality to 10-12 for minimal compression artifacts. This balances file size with image quality.
For print, save as TIFF or high-resolution JPG at 300 DPI. Ensure your final dimensions work for your intended print size. Check that no critical details fall into the bleed area.
Consider creating variations at different aspect ratios. Square crops work better for Instagram, while 16:9 fits YouTube thumbnails. Your manipulation can serve multiple platforms with smart cropping.
You’ve now created a complete angel photo manipulation using professional techniques. These same methods apply to countless other fantasy composites and creative projects.