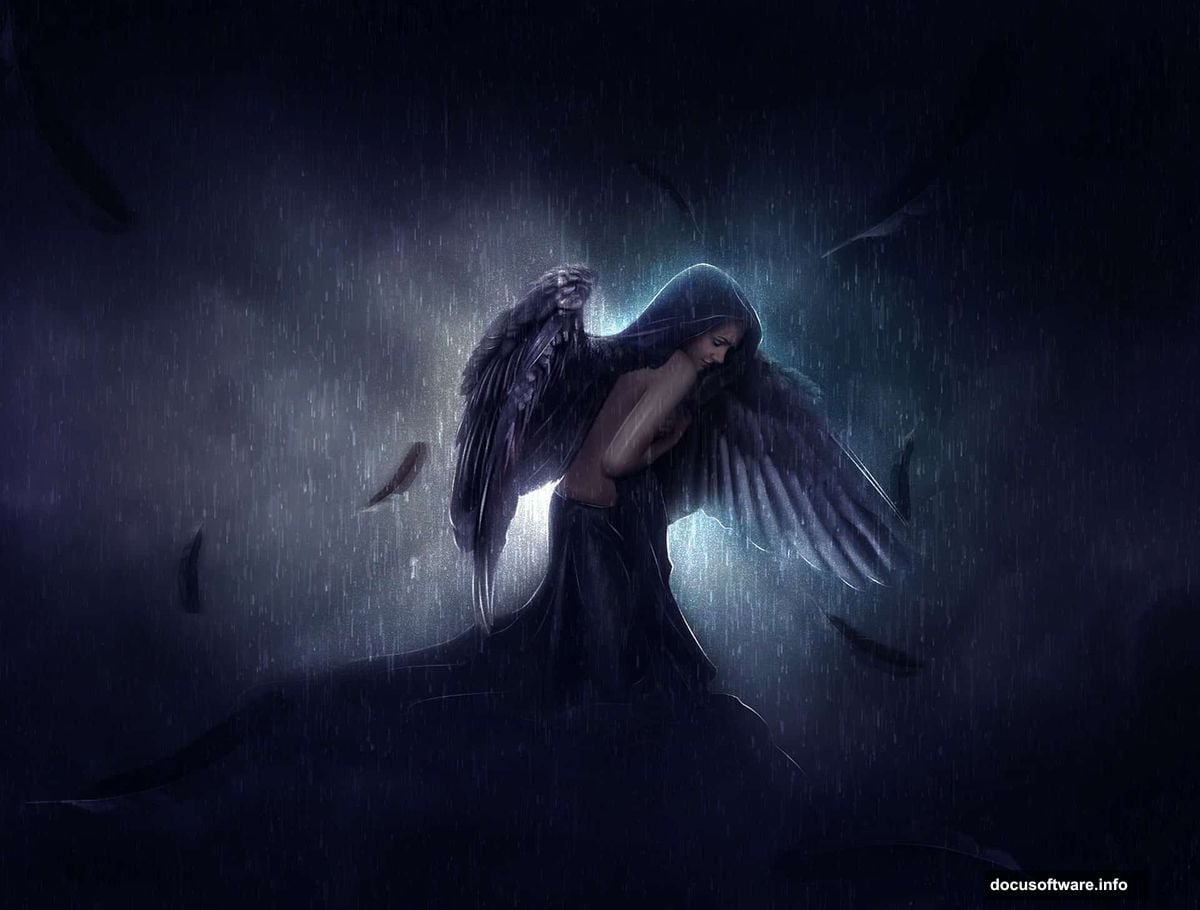
Want to build haunting fantasy scenes in Photoshop? This angel manipulation tutorial shows you exactly how to blend stock photos into emotional dreamscapes.
You’ll transform ordinary images into something extraordinary. Plus, you’ll learn masking, lighting, and atmospheric effects that work for any photo manipulation project. Let’s dive in.
What You’ll Actually Learn
This isn’t just about making angel wings. Instead, you’ll master techniques that apply to any fantasy photo manipulation.
First, you’ll cut subjects cleanly from backgrounds using pen tools. Then you’ll blend disparate elements seamlessly with layer masks. Finally, you’ll add atmospheric effects like rain and dramatic lighting that sell the entire scene.
Most tutorials skip the crucial details. This one walks through every step, from basic cutouts to advanced color grading. So even beginners can follow along and create professional results.
Essential Tools and Stock Images
Before starting, gather your materials. You’ll need Photoshop CC for full compatibility. Some filters used here won’t work in older CS versions.
Stock photos required:
- Female subject photo (Pixabay works great)
- Black bird wings for angel wings
- Dramatic cloudy sky background
- Rain texture overlay
- Feather texture for detail work
Pro tip: Choose high-resolution images. Low-quality stock photos create blurry final results that scream amateur work.
Building Your Angel Figure
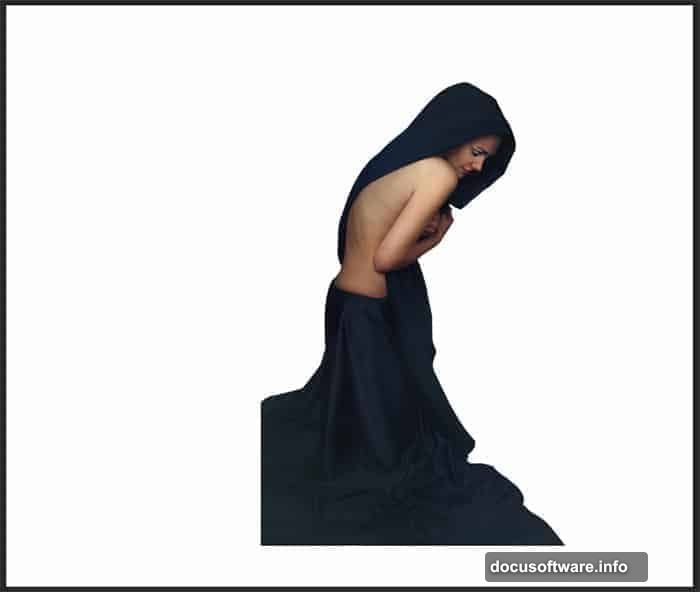
Start by opening your subject photo in Photoshop. Take the Pen Tool (P) and carefully trace around your subject. This creates a precise path for cutting her from the background.
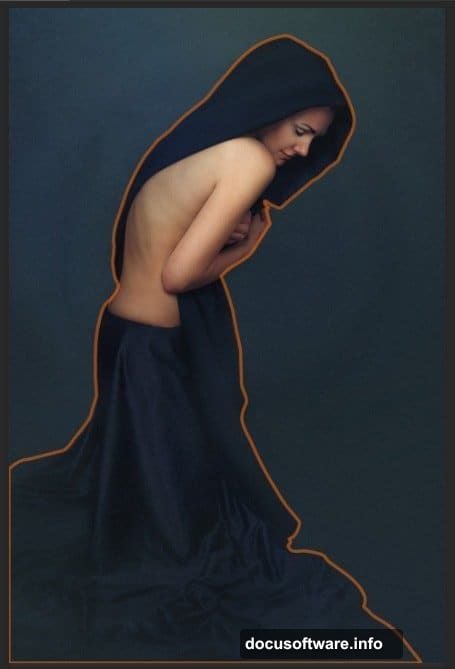
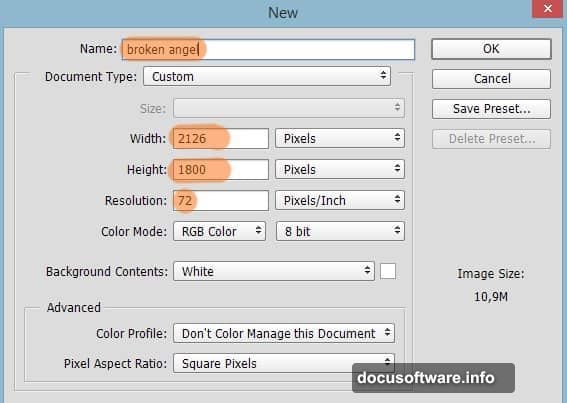
Next, create a new document named “broken angel” or whatever inspires you. Add your cutout subject here. Use Free Transform (Ctrl+T) to scale her properly within the canvas.
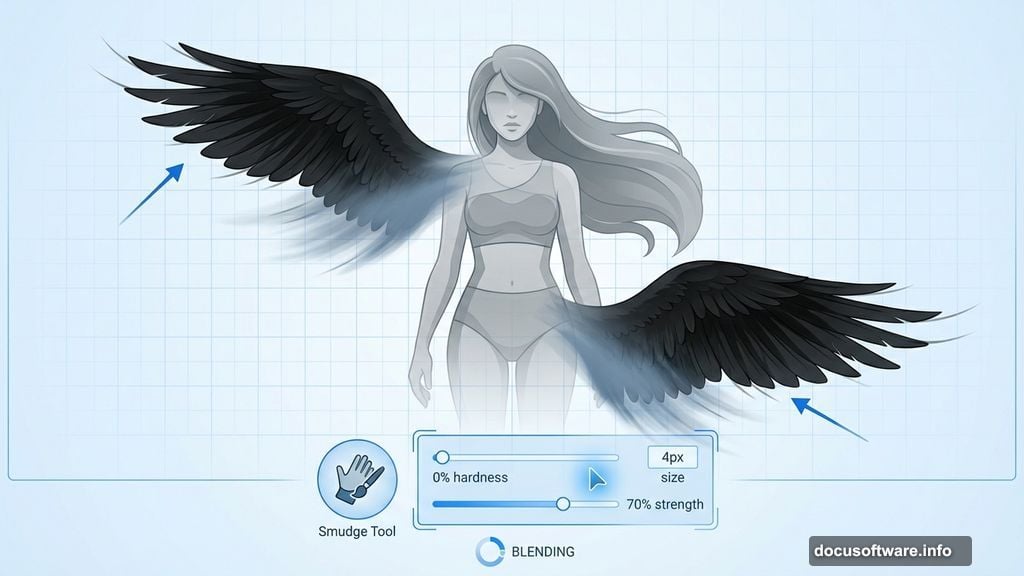
Now comes the magical part. Open your bird wing image and cut out both wings using the Pen Tool again. Place one wing above your subject layer and one below. This creates depth that makes the wings feel attached to her body.
However, the edges look harsh at first. Take the Smudge Tool with a soft round brush (0% hardness, 4px size, 70% strength). Gently blend the wing edges so they feel organic instead of pasted on.
Creating Flowing Fabric
Real angels need dramatic flowing robes. So create a new layer and use the Pen Tool to draw the robe shape you envision. Fill this shape with a color that matches your lighting scheme.
Here’s where beginners struggle. The robe needs to interact with your subject’s body naturally. Use layer masks to cut away sections where the robe should tuck behind her figure. Blend the edges carefully with a soft brush.
Moreover, add shadows under fabric folds. Create a new layer set to Multiply blend mode. Paint subtle shadows with a low-opacity brush where fabric would naturally cast darkness. This single step transforms flat shapes into three-dimensional cloth.
Atmospheric Background Magic
Your dramatic sky background sets the entire mood. Add your cloudy sky image as the bottom layer. But don’t stop there.
Use Levels adjustment (Ctrl+L) to darken the sky considerably. Gloomy scenes need dark, threatening clouds. Aim for a color temperature that feels cold and hostile.
Then add your feather texture as an overlay. Set the layer to Soft Light or Overlay blend mode at reduced opacity (around 30-40%). This creates subtle texture that adds visual interest without overwhelming your composition.
Plus, consider adding a subtle vignette. Create a new layer, fill it black, then mask away the center with a large soft brush. Set to Multiply mode at low opacity. This draws viewer attention toward your angel figure.
Lighting That Tells a Story
Lighting makes or breaks photo manipulations. Most amateur work fails here because lighting directions don’t match between composited elements.
First, identify your main light source direction. In this sad angel scene, dim overhead light works best. Create a new layer set to Screen or Overlay mode. Paint soft white highlights on the tops of wings, shoulders, and wherever light would naturally hit.
Next, add corresponding shadows. Create another layer set to Multiply mode. Paint dark shadows opposite your highlights. This reinforces your chosen light direction across all elements.
However, don’t forget reflected light. Even in gloomy scenes, some light bounces from surfaces. Add subtle cool-toned highlights in shadow areas. This creates realism that sells your fantasy scene.
Rain Effects That Feel Real
Rain completes the sorrowful atmosphere. But fake-looking rain ruins otherwise great manipulations.
Add your rain texture as a new top layer. Set blend mode to Screen so only white rain shows through. Then use Motion Blur (Filter > Blur > Motion Blur) to create streaking rain. Angle should match your lighting direction.
Moreover, create multiple rain layers at different opacities and blur amounts. This creates depth where some rain appears closer and some farther away. Real rain isn’t uniform, so neither should yours be.
Finally, add subtle rain splashes near the ground. Create small white dots with a scatter brush, then blur them slightly. This grounds your rain effect in physical reality.
Color Grading for Emotion
Your color palette communicates emotion before viewers consciously register your subject. Sad, desperate scenes need specific color treatment.
Add a Color Balance adjustment layer. Push shadows toward blue and cyan for a cold, hopeless feeling. Pull highlights slightly toward yellow for contrast. But keep adjustments subtle—overdoing color grades screams beginner.
Then add a Curves adjustment layer. Create a gentle S-curve to increase contrast. Lower the curve slightly in highlights to maintain the gloomy mood. This prevents your scene from feeling too punchy or energetic.
Plus, consider adding a photo filter adjustment. A cooling filter (82) at low opacity reinforces that cold, rainy atmosphere. Stack these subtle adjustments to build your desired mood.
Final Texture and Detail Work
Great photo manipulations succeed through accumulated small details. So don’t rush these finishing touches.

Add another feather texture overlay at very low opacity (10-20%). This creates subtle visual complexity that holds viewer attention longer. However, too much texture looks amateurish, so exercise restraint.
Next, sharpen your angel figure slightly. Create a stamped copy of all layers (Ctrl+Alt+Shift+E). Apply Unsharp Mask (Filter > Sharpen > Unsharp Mask) at low intensity. Then mask away everything except your main subject.
Finally, add a subtle light rays effect. Create a new layer, fill with black. Use Render > Lens Flare to create a subtle light source. Set layer to Screen mode and position carefully. Reduce opacity until rays feel believable, not theatrical.
Common Mistakes to Avoid
Even following tutorials, certain pitfalls trap beginners repeatedly.
Harsh selection edges ruin composites instantly. Always refine edge selections with Select and Mask (Alt+Ctrl+R). Shift the edge inward slightly and add edge feathering. This creates natural-looking boundaries between elements.
Inconsistent lighting directions break believability. Before adding any element, identify your main light source. Then ensure highlights and shadows on every object match that direction. This sounds obvious but gets overlooked constantly.
Over-processing makes images look artificial. Each adjustment should be subtle. Stack multiple gentle adjustments rather than making extreme changes in one step. This maintains natural-looking results.
Moreover, ignoring color temperature creates jarring compositions. If your sky is cool-toned, your subject needs cool-toned shadows. Warm elements in cool scenes (or vice versa) feel wrong even when viewers can’t articulate why.
Taking This Further
This angel manipulation demonstrates core techniques that apply everywhere. So experiment with different subjects and moods.
Try creating joyful angel scenes with warm lighting and bright skies. The same masking and blending techniques work, but color grading changes everything. Or build dark fallen angel scenes with red-toned lighting and aggressive shadows.
Plus, these skills transfer beyond fantasy work. Product photography, portrait enhancement, and creative advertising all use identical compositing techniques. Master these fundamentals and doors open across commercial and artistic photography.
Remember that photo manipulation is like any craft. Your first attempts won’t match professional work. But each project teaches lessons that compound over time. So keep practicing, studying light, and pushing your creative boundaries.
The angel awaits your creation. Open Photoshop and start building something that moves viewers emotionally through pure visual storytelling.