Want to create breathtaking fantasy landscapes in Photoshop? This technique works wonders. You’ll combine multiple photos, add dramatic lighting, and transform ordinary mountain shots into something magical.
This tutorial breaks down every step. No confusing jargon or skipped details. Plus, you’ll learn techniques you can reuse for countless other projects.
Let’s build something incredible.
Set Up Your Canvas
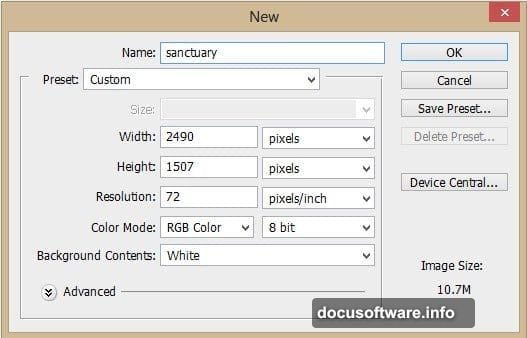
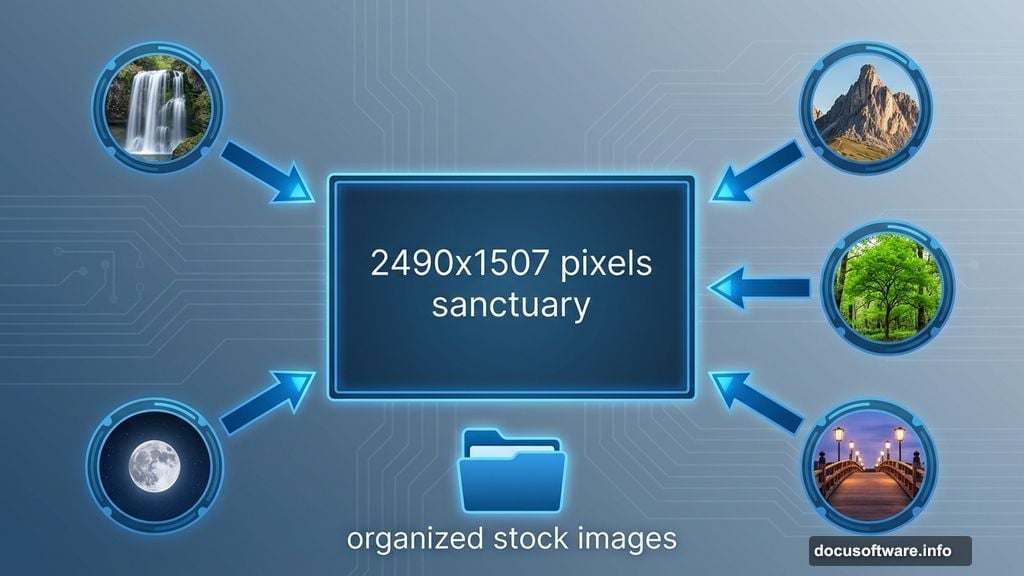
Start with a new document. Hit Ctrl+N to open the new document dialog. Set the width to 2490 pixels and height to 1507 pixels. Name it whatever you want—I called mine “sanctuary.”
Why these dimensions? They give you plenty of room to work while keeping file sizes manageable. You can always scale down later for web use.
Gather Your Materials First
Before diving in, download all the stock images you’ll need. Save them in one folder on your computer. This saves time later when you’re hunting for files.
You’ll need several waterfall images, rocky mountain photos, trees, a bridge with lanterns, and a moon. The tutorial includes links to free stock resources. Most come from sites like Pixabay and DeviantArt.
Pro tip: Organize your files before starting. Trust me, it matters.
Build Custom Rocky Mountains
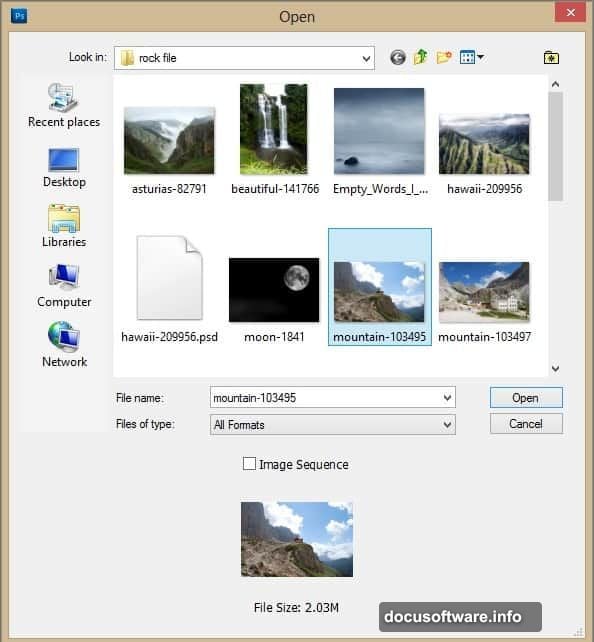
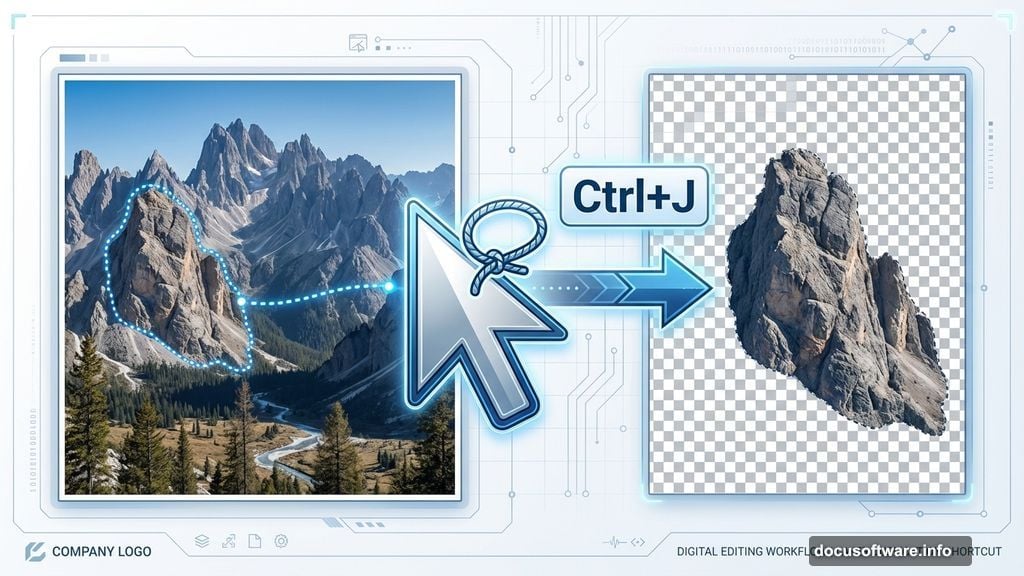
Here’s where things get interesting. Open your first mountain stock image in Photoshop with Ctrl+O. You won’t use the whole image—just specific parts.
Grab the Lasso Tool from the toolbar. This tool lets you trace around the exact section you want. Click and drag around the rocky area you need. You’ll see a dotted line following your cursor.
Once you’ve traced the outline, the section gets selected. Those blinking dotted lines confirm it. Hit Ctrl+J to duplicate just that selection onto a new layer.
Now you have a clean cut-out of the mountain section. No messy backgrounds or unwanted elements. Just the rocks you need.
Combine Your Mountain Pieces
Copy your cut-out mountain section. Switch back to your main canvas and paste it with Ctrl+V. This creates a new layer automatically.
Here’s a crucial tip: Name your layers immediately. Call this one “rock” or something descriptive. When you’re working with 20+ layers later, you’ll thank yourself.
The pasted image will probably be huge. Hit Ctrl+T to activate Free Transform. Hold Shift while dragging a corner handle inward. This scales the image proportionally without distorting it.
Position the rock where you want it in your composition. Think about your overall scene layout before committing.
Layer Multiple Rock Elements
One rock section won’t create a convincing mountain. Repeat the cutting and pasting process with different mountain stock images. Each piece adds depth and realism.
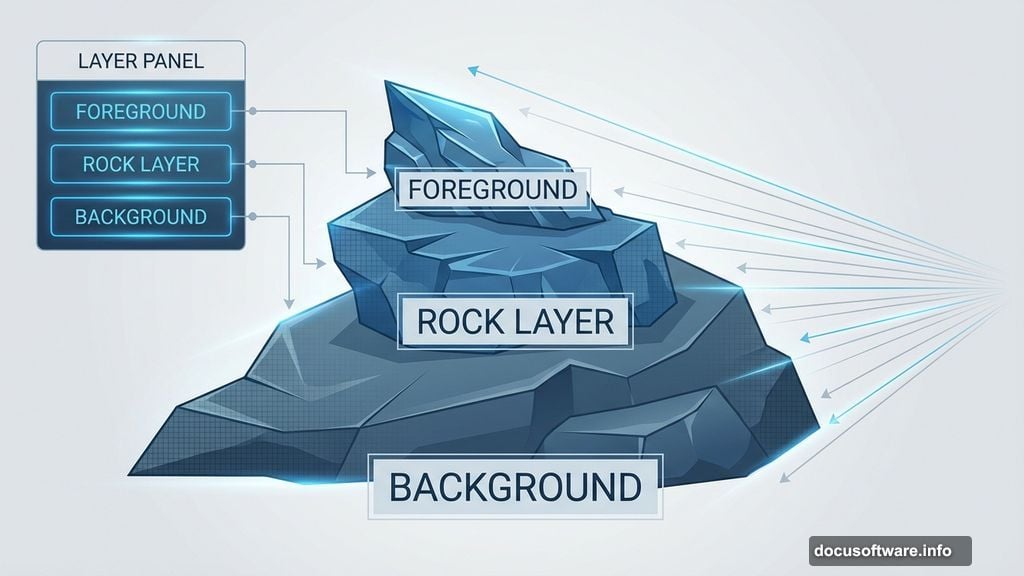
Stack your rock layers carefully. Place larger formations in the background and smaller details in the foreground. This creates natural perspective.
Don’t worry about perfect edges yet. We’ll blend everything together later with masking and color adjustments.
Add Atmospheric Waterfalls
Waterfalls bring life and movement to static landscapes. Open your waterfall stock images and cut out the sections you need. Use the same Lasso Tool technique from earlier.

Paste the waterfall elements onto your canvas. Position them cascading down your rocky formations. Scale them appropriately—waterfalls closer to the viewer should appear larger.
Here’s the trick: Waterfalls need to look like they’re actually flowing from somewhere. Make sure the top connects logically to a rock formation or cliff edge.
Blend Elements with Layer Masks
Raw cut-outs look obvious and fake. Layer masks fix this instantly. Click the layer mask icon at the bottom of your Layers panel. This adds a white rectangle next to your layer thumbnail.
Grab a soft black brush. Paint on the mask where you want to hide parts of the layer. This creates seamless transitions between different elements.
For rock formations, mask the edges where they meet other rocks. For waterfalls, soften the edges where water meets rock. Black hides, white reveals—that’s the mask mantra.
Practice makes perfect here. Don’t worry about mistakes. Switching your brush to white lets you paint back anything you accidentally removed.
Create Nighttime Atmosphere
Daytime stock photos won’t cut it for a night scene. You need to shift everything toward cool, dark tones. Select a layer and go to Image > Adjustments > Hue/Saturation.
Drag the Lightness slider toward -100. This darkens your layer significantly. Then adjust the Hue slider slightly to add blue or purple tones.
Repeat this process for each major layer. Your bright daytime mountains transform into mysterious nighttime formations.
Some layers might turn completely black. That’s okay. We’ll add targeted lighting later to bring back details where needed.
Add Dramatic Lighting Sources
Night landscapes need light sources to feel real. This tutorial uses lanterns on a bridge as the primary light. Open your bridge stock image and extract it using the techniques you’ve practiced.
Position the bridge in your mid-ground area. Make sure it connects two rock formations logically. Scale it to match your perspective.
Now comes the fun part. Create a new layer above your bridge. Set the blend mode to Screen or Linear Dodge (Add). Paint soft yellow-orange glows around each lantern with a soft brush.
These glowing areas will illuminate nearby rocks and water. Vary the intensity—lanterns closer to the viewer should glow brighter.
Illuminate Your Waterfalls
Waterfalls should catch some of that lantern light. Create another new layer above your waterfall layers. Set it to Screen blend mode again.
Paint subtle highlights where water would catch the light. Use a soft brush with low opacity. Build up the brightness gradually with multiple strokes.
The falling water should appear brighter near the light sources and darker as it moves away. This sells the three-dimensional space.
Add Mystical Moonlight
Every good night landscape needs a moon. Open your moon stock image and cut it out. Paste it into your upper canvas area.
The moon provides secondary lighting from above. Create a new layer and paint soft blue-white highlights on the tops of rocks and tree branches.
This moonlight should be cooler in color than your warm lantern light. The contrast between warm and cool light sources adds visual interest.
Enhance with Strategic Dodge and Burn
Dodging brightens specific areas. Burning darkens them. Together, they add dimension and guide the viewer’s eye.
Create a new layer and fill it with 50% gray. Set the blend mode to Overlay. Now paint with white to dodge (brighten) or black to burn (darken).
Focus on enhancing the form of your rock formations. Brighten edges that catch light. Darken crevices and shadows. This technique brings out three-dimensional structure.
Use a soft brush at low opacity. Build up your effects gradually. Subtle beats obvious every time.
Integrate Trees for Scale
Trees help viewers understand the size of your landscape. Open your tree stock images or use tree brushes if you have them.
Place larger trees in the foreground. Smaller trees go on distant rocks. This reinforces the sense of depth and scale.
Trees near lanterns should show warm light on one side. Trees farther away remain darker and cooler in tone.
Balance Your Colors
Your composition might look unbalanced at this point. Some areas feel too warm, others too cool. Time for color correction.
Create a Color Balance adjustment layer. Drag the sliders toward blue and cyan for shadows. Add yellow and red to midtones for warmth.
This step ties all your disparate elements together into a cohesive color scheme. Don’t go too extreme—subtle shifts work best.
Add Atmospheric Haze
Distance creates atmospheric haze. Objects farther away appear lighter and less saturated. Create a new layer above your background rocks.
Fill this layer with a dark blue-gray color. Lower the opacity to around 20-30%. This adds depth by pushing background elements back visually.
You can paint this effect selectively with a large soft brush instead of using a full layer. Focus on distant rock formations and the horizon line.
Fine-Tune with Final Adjustments
Almost done. Create a Curves adjustment layer to fine-tune your overall contrast. Lift the shadows slightly to reveal hidden detail. Pull down the highlights if anything feels blown out.
Add a slight S-curve to increase overall contrast. This makes your image pop without looking overdone.
Finally, create a merged copy of all visible layers by pressing Ctrl+Shift+Alt+E. This gives you a single layer to apply final sharpening if needed.
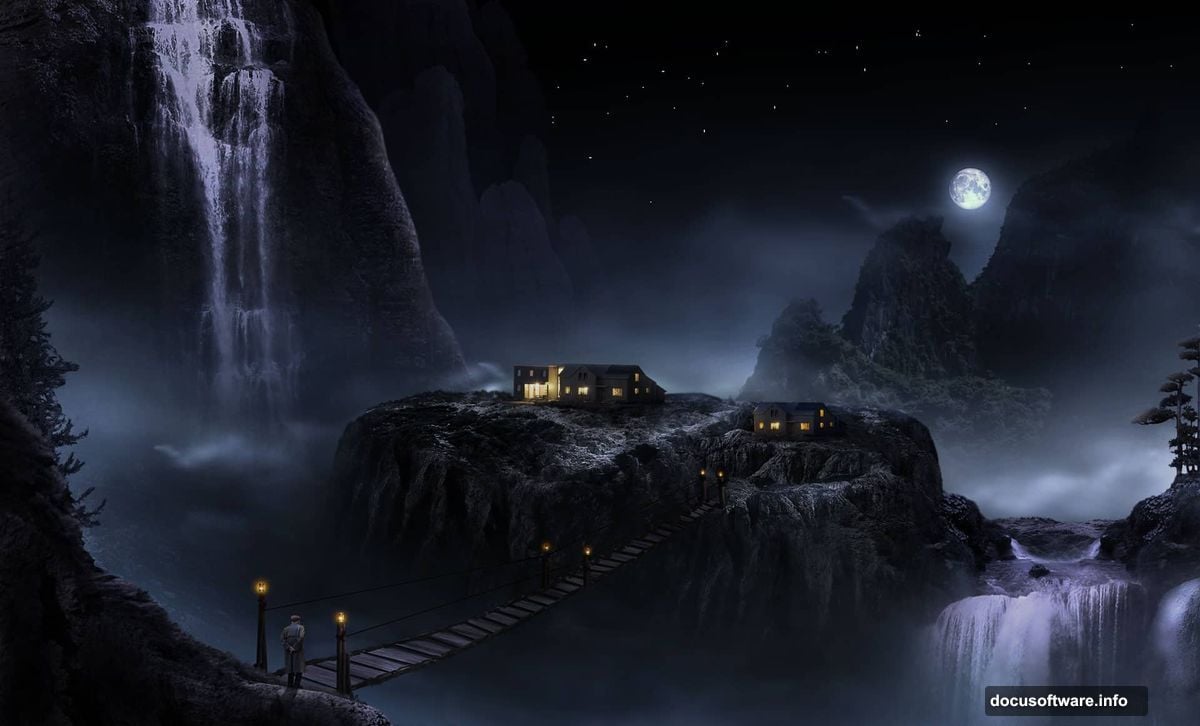
The Real Magic Happens in Details
This technique works because you’re building complexity through layers. Each element—rocks, water, light, atmosphere—contributes to the whole.
Don’t rush the process. Take time to refine your masks. Adjust your colors. Add subtle lighting variations. These details separate amateur work from professional results.
The PSD file included with this tutorial shows every layer. Study how elements stack and interact. Then apply these principles to your own fantasy landscapes.
Start simple. Master the basics of cutting, masking, and blending. Add complexity gradually as your skills improve. Before long, you’ll create landscapes that look impossible—but you’ll know exactly how you built them.