Want to create dramatic destroyed city scenes in Photoshop? This tutorial walks you through compositing multiple images and retouching characters with professional techniques.
You’ll learn how to blend urban ruins, add atmospheric effects, and enhance character details like hair extensions. Plus, these techniques work for any composite project beyond post-apocalyptic themes.
Let’s build something cinematic.
Gather Your Source Images First
Before opening Photoshop, collect these essential elements:
Core Images:
- Base background photo
- Destroyed city or urban scene
- Character model (isolated or ready to extract)
- Sky and cloud images for atmosphere
- Optional: Wildlife elements like wolves or birds
Textures and Brushes:
- Crack brushes for decay effects
- Fur brushes for hair details
- Sea or water textures
- Snow or debris overlays
Most stock sites offer these assets. Alternatively, shoot your own base photos and download free brush sets online.
Set Your Canvas Dimensions
Start with a landscape canvas sized 2000px wide by 1282px tall. This resolution provides enough detail for print while remaining manageable for editing.
However, adjust dimensions based on your final output needs. Social media posts work fine at smaller sizes. Print projects demand higher resolution.

Build Your Background Foundation
Place your base image first. This establishes your lighting and perspective for everything else.
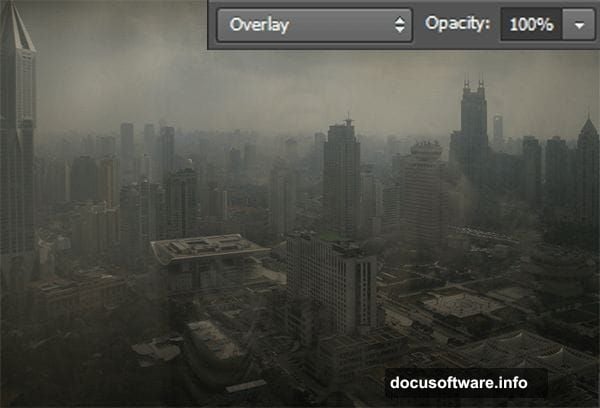
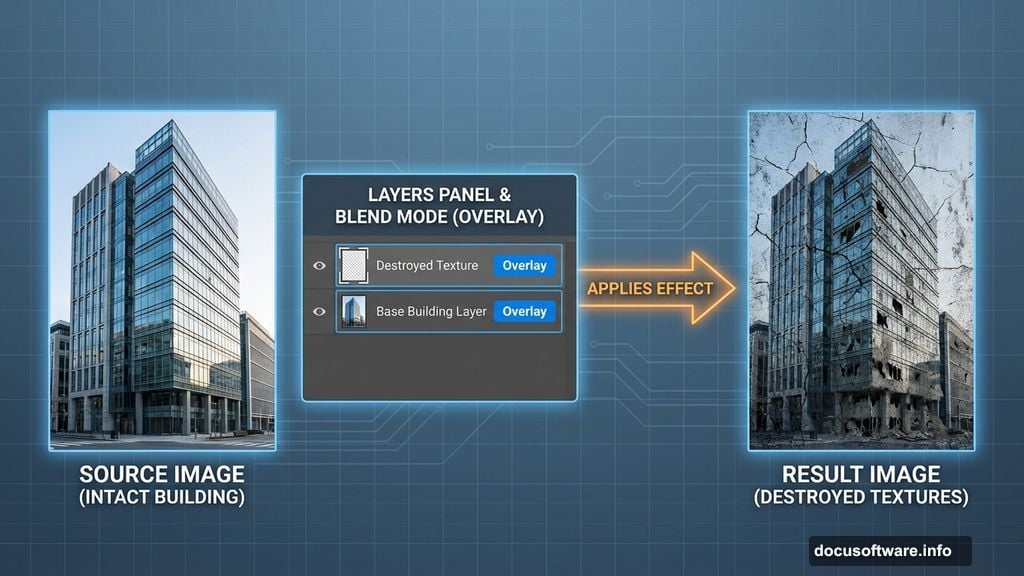
Next, add the destroyed city image above it. Change the blend mode to Overlay. This merges urban destruction with your background seamlessly.
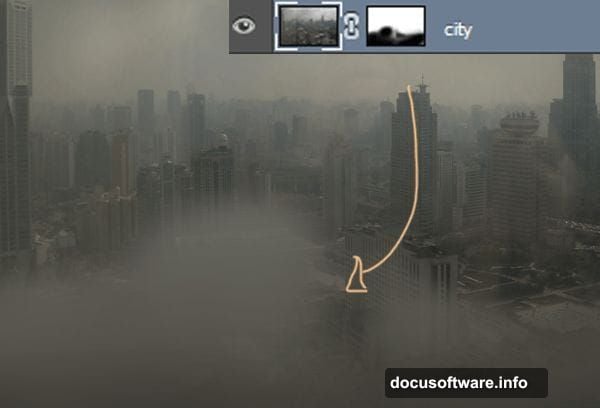
Then attach a layer mask to the city layer. Use a soft black brush to hide sections that don’t blend naturally. Focus on edges and transition zones where images meet.
Add Atmospheric Depth with Sky Elements
Sky images transform flat composites into dimensional scenes. Place your first sky image above existing layers.
Change its blend mode to Soft Light. This prevents the sky from overpowering other elements while adding atmosphere.
Now add another sky layer. Desaturate it completely using Hue/Saturation (set Saturation to -100). Gray skies enhance post-apocalyptic mood better than vibrant blues.
Apply a layer mask and paint along borders with a soft black brush. Blend the sky gradually into buildings and existing elements. Hide any clouds covering important architectural features.
Paint Decay and Destruction Details
Create a new layer in Soft Light mode. Use crack brushes to paint damage on buildings and surfaces.
Vary brush size and opacity for realistic deterioration. Large cracks show major structural damage. Smaller fractures add subtle weathering.
Remember, decay follows physics. Cracks spread from stress points like corners and weight-bearing sections. Random placement looks artificial.
Extract and Place Your Character Model
Select your character using the Lasso tool. Make rough selections first since you’ll refine edges next.
Add a layer mask to the character layer. The background automatically disappears while preserving the subject.
Switch to a small black brush and clean up edges manually. Zoom in close and paint along hair, clothing details, and any transparent areas. This manual refinement beats automatic selections every time.
Adjust Character Skin Tones
Select visible skin areas with the Lasso tool. Duplicate this selection to a new layer (Ctrl+J).
Open Hue/Saturation (Ctrl+U) and reduce Saturation to -25. This removes excess warmth and matches the moody environment.
Then duplicate the skin layer again. Change blend mode to Screen and reduce opacity to 40%. This adds subtle luminosity that mimics reflected light from the sky.
Add Realistic Hair Extensions
Hair makes or breaks character composites. Create a new layer for hair strands.
Select a soft round brush at 1-2px in white. Paint individual hair strands along the hairline and around the head.
Make strands wavy to suggest movement and natural flow. Vary thickness slightly. Hair at the root appears thicker than tips.
Fine strands at the top and bottom of the head look most realistic. Avoid perfectly straight lines which scream “digital.”
Enhance Facial Features with Makeup
Create another new layer (Shift+Ctrl+N). Use the Eyedropper tool to sample the character’s eyebrow color.
Paint over existing eyebrows with a small brush to strengthen their appearance. Stronger brows anchor the face in dramatic lighting.
Add a thin white highlight below each eyebrow. This lifts the brow bone and adds dimension.
Finally, place a small white dot in each eye as a catch light. Eyes without highlights look lifeless regardless of other details.
Blend Everything with Final Adjustments
Step back and evaluate the overall composition. Layers should interact naturally without obvious seams.
Add adjustment layers for unified color grading. Curves adjustments help match tones across different source images.
Consider adding subtle vignetting to draw attention toward your character. Darken edges slightly without making the effect obvious.
Common Mistakes to Avoid

Don’t over-sharpen your character compared to the background. Sharpness mismatches reveal composites instantly.
Avoid placing your subject in perfectly even lighting when the environment shows dramatic shadows. Light should affect everything consistently.
Skip excessive saturation in any single element. Vibrant colors draw attention but break immersion in moody scenes.
Practice Makes These Techniques Natural
Your first composite won’t match professional work immediately. That’s normal and expected.
Each project teaches new blending techniques and reveals problem areas to address. Save your work at multiple stages so you can compare approaches.
Study movie posters and concept art for inspiration. Notice how professionals handle lighting, atmosphere, and character integration.
Most importantly, experiment beyond tutorials. Apply these techniques to different themes and subjects until they become instinctive.