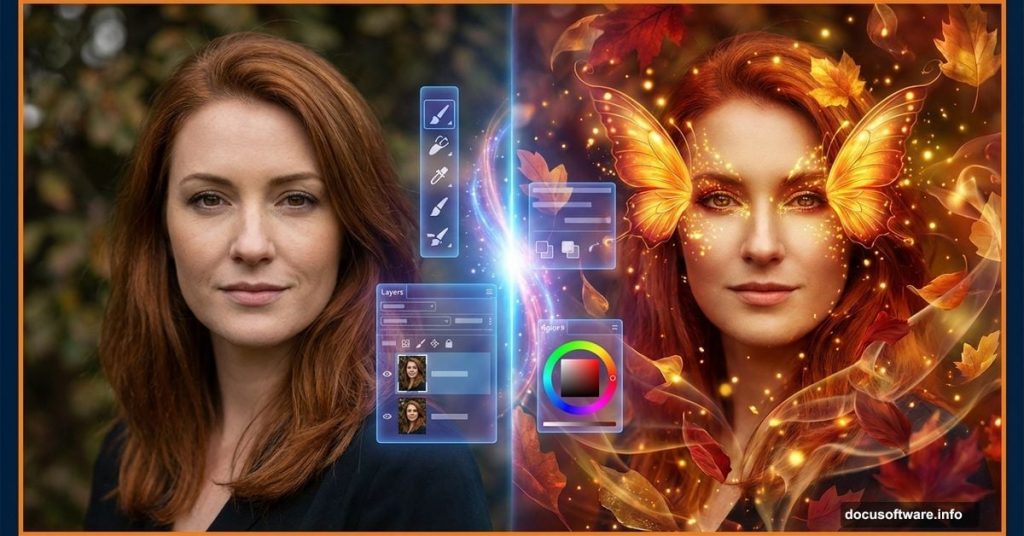
Want to create stunning fantasy photo manipulations? This step-by-step guide shows you how to transform a simple portrait into a magical autumn fairy scene.
You’ll learn professional techniques for adding wings, creating ethereal makeup, and applying lighting effects that bring your fantasy art to life. Plus, these skills work for any photo manipulation project.
Let’s dive in.
Gather Your Source Images First
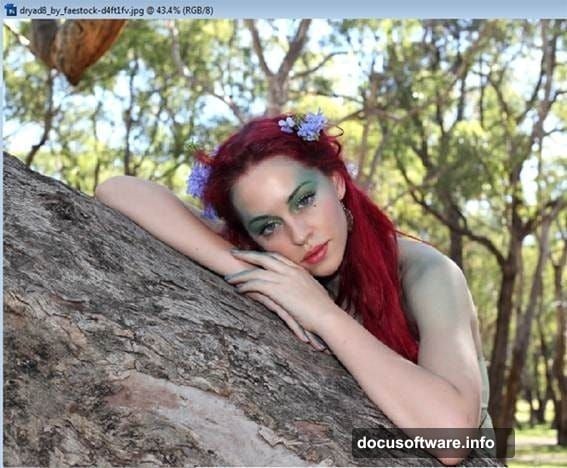
Before opening Photoshop, you need the right stock images. For this autumn fairy manipulation, grab these elements:
Essential components:
- Portrait photo of a model (preferably with clean background)
- Forest or woodland background image
- Fairy wings stock image
- Autumn texture overlays
- Tree bark or wood textures
- Fall leaf brushes or images
- Hair stock images for extensions
Most stock sites like DeviantART offer free resources. Just search for “fairy wings stock” or “autumn forest background” to find options.
Make sure your images have similar lighting conditions. That saves hours of blending work later.
Extract Your Model Cleanly
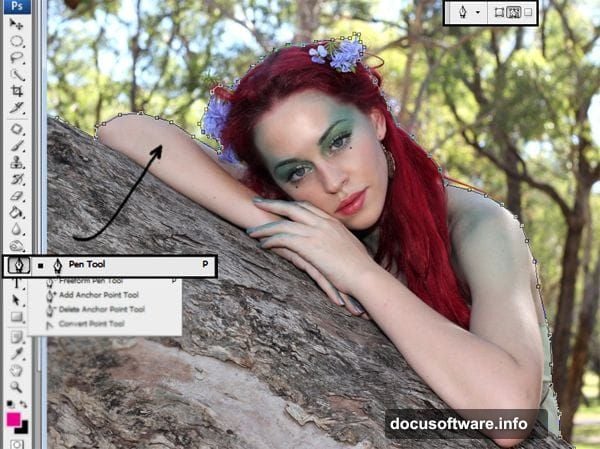
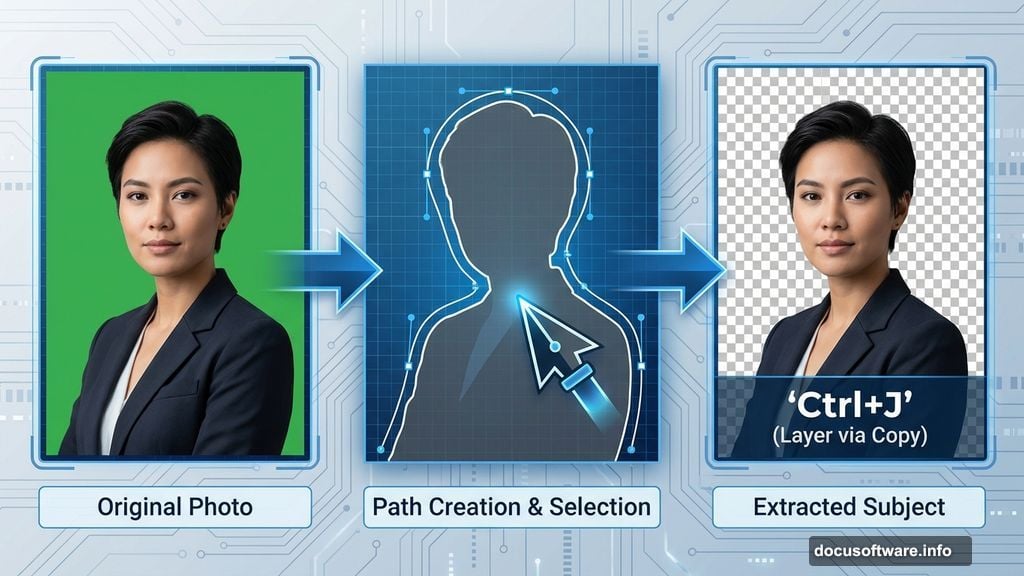
Start by isolating your model from the background. The Pen Tool gives the cleanest results.
Select the Pen Tool and set it to “Paths” mode in the top toolbar. Then carefully trace around your model’s outline. Take your time on complex areas like hair—precision here prevents problems later.
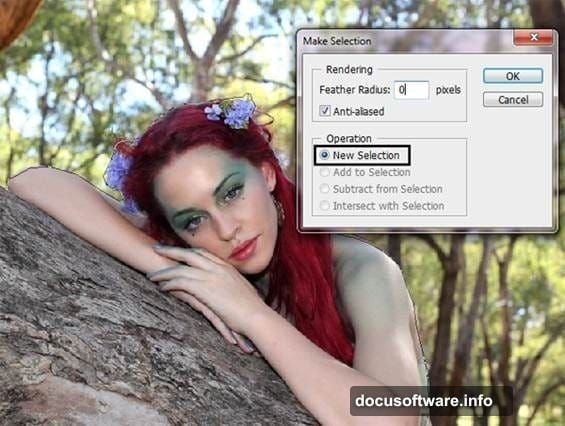
Once you complete the path, right-click inside the selection. Choose “Make Selection” from the menu. Keep the settings at “New Selection” and hit OK.
Now press Ctrl+J (Command+J on Mac) to duplicate just the selected area onto a new layer. Your model now exists separately from the background.
Set Up Your Canvas
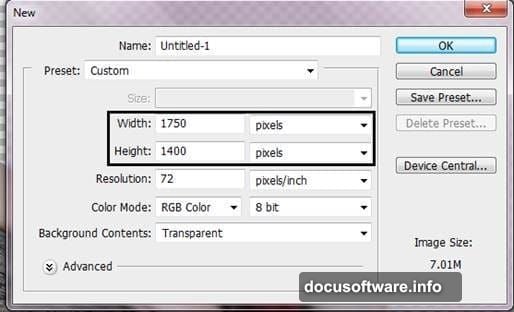
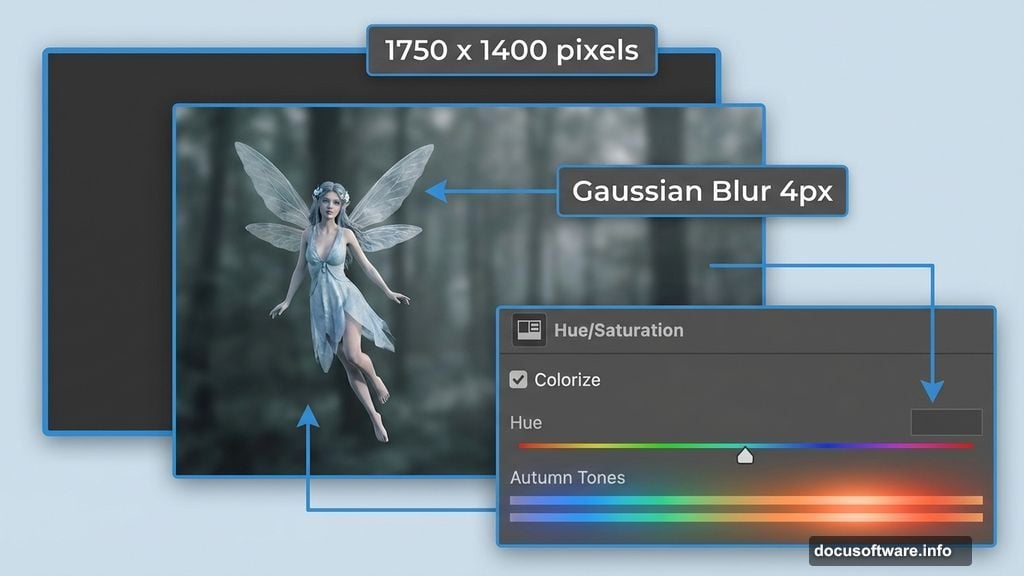
Create a new document by pressing Ctrl+N. Set the dimensions to 1750 x 1400 pixels for this project. That size works well for social media and prints.
Drag your extracted model into this new canvas. Press Ctrl+T to activate Free Transform. Hold Shift while resizing to maintain proportions. Position your model where you want them in the final composition.
Most fantasy portraits place the subject slightly off-center. This creates more dynamic, interesting compositions than dead-center placement.
Add Your Forest Background
Import your woodland background image. Place it behind your model layer in the layer stack.
The background shouldn’t compete with your subject. So apply a subtle blur by going to Filter > Blur > Gaussian Blur. Set the radius to about 4 pixels.
This technique mimics how cameras naturally blur backgrounds. It makes your subject pop while keeping the forest visible enough to establish the scene.
Create Autumn Color Mood
Duplicate your background layer with Ctrl+J. Then adjust the colors to match autumn vibes.
Go to Image > Adjustments > Hue/Saturation (or press Ctrl+U). Check the “Colorize” box. This converts the image to a single color tone.
Play with the Hue slider until you find warm autumn colors—reds, oranges, and golden yellows around 20-40 on the slider. Set Saturation to taste, usually around 25-35.
Change this layer’s blend mode to Soft Light. That overlays the autumn color without obliterating the background detail. Reduce opacity to 80% if it looks too intense.
Finally, merge these background layers together. Right-click the top layer and choose “Merge Down.” This keeps your layers organized.
Perfect Your Model’s Skin Tone
Your model’s skin probably doesn’t match the warm autumn lighting yet. Fix that now.
Use the Lasso Tool to select all visible skin areas—face, neck, arms, hands. Don’t worry about being super precise. Press Ctrl+J to duplicate this selection onto a new layer.
Go to Hue/Saturation (Ctrl+U) and reduce Saturation by about -35. This desaturates the skin slightly, preventing it from looking too pink against the autumn tones.
Duplicate this skin layer again with Ctrl+J. Change the blend mode to Soft Light and set opacity to 50%. This adds subtle contrast that makes the skin look more three-dimensional.
Merge the skin layers down to keep things tidy.
Add Warm Autumn Glow to Skin
Now colorize the skin to match the autumn environment lighting. Duplicate the skin layer one more time.
Open Hue/Saturation and check “Colorize” again. Set Hue to around 22 (peachy orange tone) and Saturation to 20. This adds that warm, golden-hour glow to the skin.
Adjust the layer opacity until it looks natural—usually 60-80% works well. Too much looks fake and orange. Too little won’t show the autumn warmth.
The skin should now harmonize with the warm background colors instead of clashing.
Design Ethereal Fairy Makeup
Fantasy characters need otherworldly makeup. Start with the eyes.
Create a new layer and select a soft brush. Choose colors from your autumn palette—golds, coppers, deep reds, and browns. Paint eyeshadow around the eyes, building up intensity gradually.
Set this layer to Overlay or Soft Light blend mode. That lets the skin texture show through while adding vibrant color.
Add eyeliner by creating another layer. Use a small, hard brush with black or dark brown. Paint along the lash line and extend it into a subtle wing. Set this layer to Multiply blend mode.
For lips, create another layer and paint over them with autumn colors. Use Overlay blend mode again. Add highlights on the center of the lips with a lighter shade for dimension.
Create Flowing Fantasy Hair
Long, flowing hair enhances the fairy aesthetic. Find stock images of long hair that match your lighting.
Import the hair image and position it over your model. Use layer masks to blend it seamlessly. Paint black on the mask to hide unwanted parts, white to reveal.
Adjust the hair color to match your autumn theme. Use Hue/Saturation (Ctrl+U) with Colorize checked. Aim for rich auburn, copper, or golden tones that complement the scene.
Add multiple hair layers if needed. Fantasy art benefits from exaggerated, voluminous hair that catches the light.
Attach Magnificent Fairy Wings
Import your fairy wing stock image. Position it behind your model layer so the wings appear to grow from their back.
Wings rarely match the lighting perfectly straight away. Create a Curves adjustment layer clipped to the wings (Alt+click between layers). Adjust the RGB curve until the wings match your scene’s brightness.
Add a subtle glow around the wing edges. Create a new layer and paint soft, light colors along the wing outline using a large, soft brush. Set this to Screen blend mode at low opacity.
Use layer masks to blend the wing base into the model’s back. Paint black on the mask where wings meet skin for seamless integration.
Add Tree Heart Focal Point
Fantasy scenes benefit from interesting elements beyond the main subject. A carved heart in a tree adds narrative intrigue.
Import your tree bark or wood heart texture. Position it in the background—usually to one side, not directly behind the model.
Blend it into the scene using layer masks and adjusting the opacity. Add some glow or light effects emanating from the heart to make it magical.
Create a new layer and paint soft, warm light using a large brush set to Screen blend mode. This makes the heart look like it’s genuinely glowing.
Scatter Autumn Leaves Naturally
Falling leaves complete the autumn atmosphere. Use leaf brushes or individual leaf images.
Create several layers for leaves at different depths. Background leaves should be blurred and less saturated. Foreground leaves can be sharp and vibrant.
Add motion blur to some leaves (Filter > Blur > Motion Blur) to show them falling. Vary the angle and distance to create realistic movement.
Use different leaf colors—yellows, oranges, reds, and browns. Scatter them randomly throughout the scene. Nature isn’t uniform, so neither should your placement be.
Apply Lighting Effects
Lighting makes or breaks fantasy photo manipulations. Create a new layer above everything and fill it with black. Set this layer to Screen blend mode—the black disappears, but anything you paint shows as light.
Choose a large, soft brush with low opacity (around 10-20%). Paint warm, golden light in areas where light logically hits—the model’s face, shoulders, tops of wings, and foreground elements.
Create another layer and paint cooler, darker colors in shadow areas. Set this to Multiply blend mode at low opacity. This increases contrast and depth.
Add rim lighting by painting light colors along the model’s outline on a Screen blend mode layer. This separates the subject from the background beautifully.
Enhance Colors and Contrast
Almost done. Now unify everything with final color adjustments.
Create a Curves adjustment layer at the top of your layer stack. Adjust the RGB curve to increase overall contrast—pull the shadow end down slightly and the highlight end up slightly.
Add a Vibrance adjustment layer. Increase Vibrance by 10-20 to make colors pop without oversaturating skin tones. Vibrance affects muted colors more than already-saturated ones.
Consider adding a Color Lookup adjustment layer for a professional color grade. Try “Moonlight” or “Late Sunset” for autumn scenes. Reduce the opacity if the effect seems too strong.
Add Finishing Texture Overlays
Texture overlays add that final professional polish. Import a subtle texture image—something grainy or slightly scratched works well.
Place it above all other layers and set the blend mode to Overlay or Soft Light. Reduce opacity to around 10-20%. This adds just a hint of texture without overpowering your work.
Alternatively, go to Filter > Noise > Add Noise and add a tiny amount of grain (2-3%). This gives digital art a more organic, film-like quality.
Save Your Masterpiece
Flatten your image by going to Layer > Flatten Image. Then save two versions:
Save as PSD (File > Save As > Photoshop) to preserve all your layers. You’ll want this if you need to make changes later.
Also save as JPEG (File > Save As > JPEG) for sharing online. Set quality to 10 or 11 for maximum sharpness.
Your autumn fairy manipulation is complete. The techniques you learned here—selection methods, color grading, lighting effects, and blending modes—apply to any photo manipulation project.
Practice these skills on different concepts. Try creating winter ice queens, spring flower fairies, or summer sun goddesses. The process stays the same, just the colors and elements change.
Fantasy photo manipulation takes patience. Don’t expect perfection on your first attempt. Each project teaches you new tricks and improves your eye for detail.