Photoshop overwhelms newcomers with its maze of menus and hidden features. But seasoned designers know shortcuts that transform tedious tasks into quick clicks.
These 15 tips cut through the complexity. They work for photographers retouching portraits, graphic designers building layouts, and digital artists creating illustrations. Plus, most take just seconds to learn but save hours every week.
Let’s dive into the techniques professionals use daily.
Create Intricate Masks Without the Headache
Masking usually means tedious brushwork. But there’s a faster way using Curves layers and blend modes.
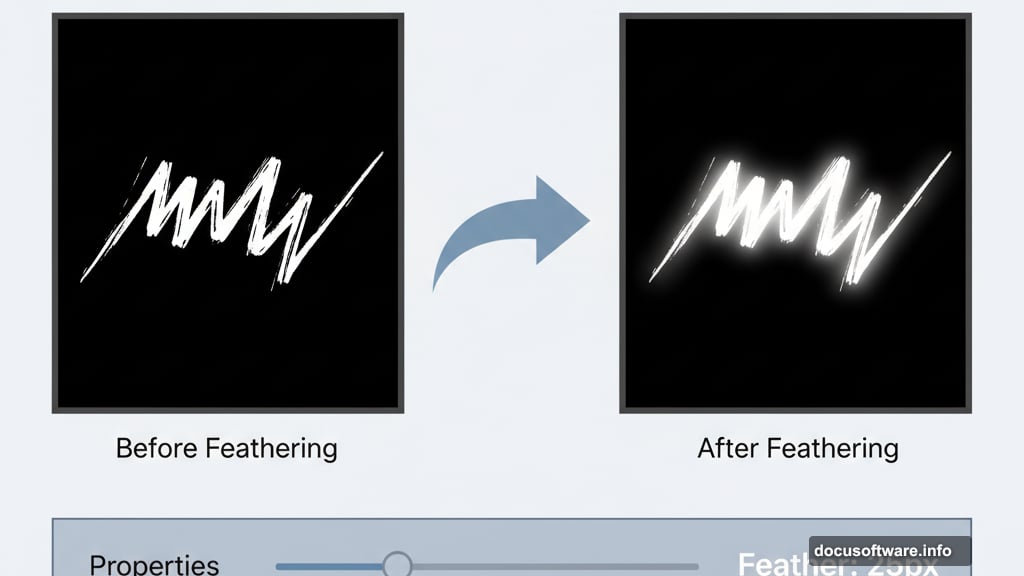
First, add a Screen blend mode Curves layer to brighten areas. Fill the mask with black. Then paint with a hard white brush where you want brightness. The harsh lines look terrible at first.
Here’s the magic. Open the Properties panel for that mask. Drag the Feather slider right. Those harsh lines blend smoothly into your image.
Need darker areas too? Add a Multiply blend mode Curves layer. Same process. Black mask, white brush, feather to blend.
Stack multiple Curves layers for complex lighting adjustments. Each one stays editable. So you can tweak the feathering or brush strokes anytime without starting over.
Rotate Your Canvas Instantly While Working
Ever wish you could tilt your digital canvas like paper on a desk? You can.
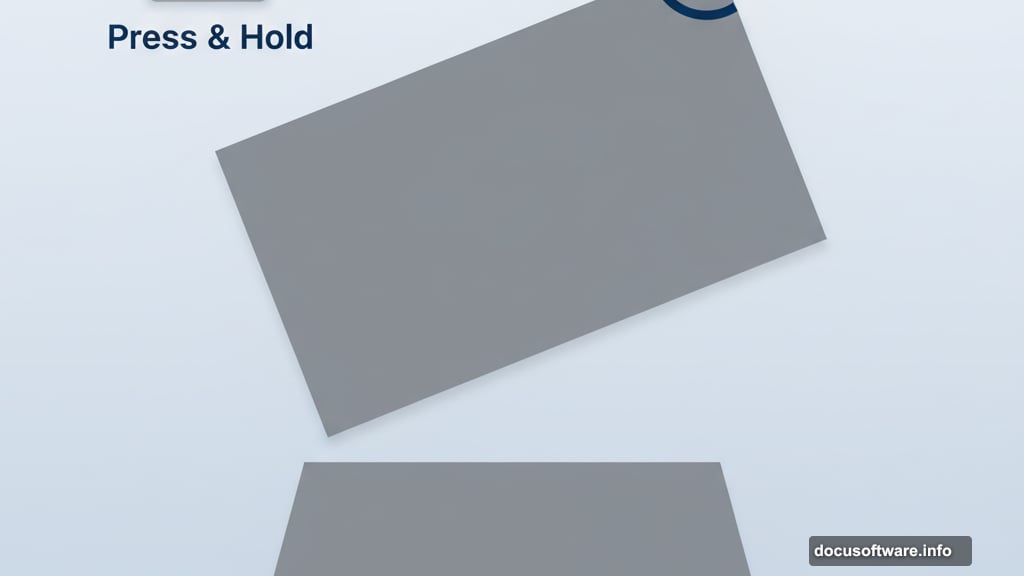
Press and hold the letter R. Your current tool switches to the Rotate tool. Spin your canvas to the perfect angle. Release R and you’re back to your original tool instantly.
This sticky hotkey works brilliantly for retouching. Rotate to match the natural movement of your hand. Then return to normal view without interrupting your workflow.
Actually, every tool in Photoshop has a sticky hotkey. Hold any tool’s keyboard shortcut and it activates temporarily. Release to return to your previous tool.
Control Opacity Like a Pro
Clicking the opacity slider wastes time. Designers who work fast use number keys instead.
Press 5 for 50% opacity. Press 5-5 quickly for 55%. Press 0 for 100%. It’s that simple.
Hold Shift while pressing numbers to adjust Fill opacity instead. Fill affects the pixels but not the layer effects like drop shadows.
But here’s the catch. When you have the Brush tool selected, those numbers change brush opacity, not layer opacity. Switch to the Move tool if you want to adjust the layer itself.
There’s one more trick. Click and drag the word “Opacity” in the Layers panel. It scrubs like a slider. Hold Shift while dragging to speed it up. Hold Alt (Windows) or Option (Mac) to slow it down for precise control.
Keep Adjustments Forever Editable
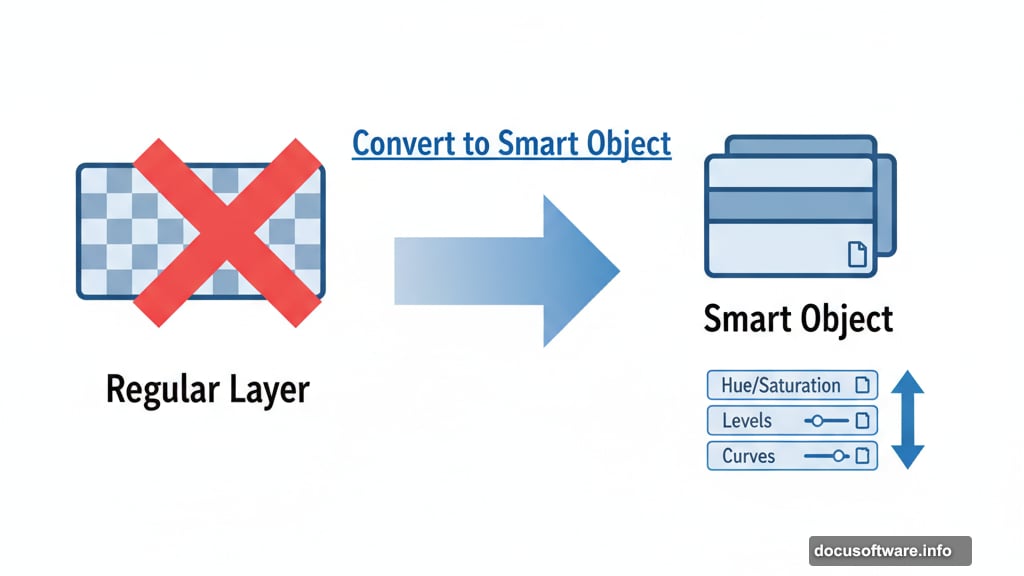
Normally, applying adjustments from the Image menu permanently changes pixels. Convert to a Smart Object first and everything stays editable.
Right-click any layer and choose Convert to Smart Object. Then apply adjustments like Hue/Saturation or Levels from the Image > Adjustments menu.
These adjustments attach to the Smart Object as editable filters. Double-click them in the Layers panel anytime to change settings. You can even adjust their blend modes and opacity separately.
This technique saves you from flattening adjustments or stacking dozens of adjustment layers. Plus, it keeps your Layers panel cleaner and more organized.
Merge Layers Without Destroying Originals
Need to combine layers for a quick export or effect? Don’t flatten your whole document.
Select multiple layers and press Cmd+Opt+E (Mac) or Ctrl+Alt+E (Windows). Photoshop merges just those selected layers to a brand new layer. Your originals stay intact below.
Want to merge everything visible? Create a new blank layer at the top. Make sure it’s selected. Then press Cmd+Shift+Opt+E (Mac) or Ctrl+Shift+Alt+E (Windows).
All visible layers merge into that blank layer. Hidden layers stay untouched. So you keep your editing flexibility while getting a flattened version for whatever you need.
Export Graphics the Right Way
Photoshop’s export options confuse people because there are several ways to do it. Here’s what works best for different situations.
For full images, go File > Export > Export As. Choose your format, quality level, and size all in one window. Way faster than Save for Web.
For single layers, right-click the layer and choose Export As. Photoshop exports just that layer with transparency if needed.
For multiple layers as separate files, select them all, right-click, and choose Export As. Each layer exports as its own file automatically.
For multiple layers as one file, group them first. Then right-click the group and Export As. The whole group exports as a single merged image.
Here’s a weird problem though. Exporting transparent graphics often trims the canvas to fit just the visible pixels. That breaks icons that need specific dimensions.
The fix? Go Image > Canvas Size before exporting. Set it to your exact needed size. Now when you export with transparency, Photoshop keeps the full canvas even if pixels don’t fill it.
This trick works perfectly for icon sets where every icon must be exactly 100×100 pixels with consistent spacing.
Rotate Your Clone Stamp for Better Retouching
The Clone Stamp tool usually copies pixels at the same angle you sampled them. But sometimes you need to rotate the cloned content to match curved surfaces.
Open the Clone Source panel by going Window > Clone Source. You’ll see a rotation input field.
Type any degree value to tilt your clone stamp brush. Now when you clone, the pixels rotate to match curves, angles, or tilted objects. This makes retouching hair, architectural details, or organic shapes dramatically easier.
The Healing Brush works the same way with this panel. So you get rotation control for both major retouching tools.
Do Math Right in the Input Fields
Photoshop’s input fields accept basic math operations. This saves time when you need to calculate dimensions or adjustments.
Say your image is 2000 pixels wide and you want to reduce it by 30%. Just type “2000 * 0.7” in the width field. Photoshop calculates and applies 1400 pixels automatically.
Adding 50 pixels to a canvas size? Type “+50” after the current value. Subtracting? Use “-50”. Dividing? Use “/2” to cut dimensions in half.
This works in nearly every input field throughout Photoshop. Canvas size, image size, brush size, layer effects—anywhere you type numbers, you can do math.
Target Specific Color Ranges with Precision
Hue/Saturation adjustments usually affect too much or too little of your image. But the color channel targeting makes them surgical.
Add a Hue/Saturation adjustment layer. Click the drop-down that says Master and choose a specific color like Reds, Yellows, or Cyans.
Now you only adjust that color range. But here’s the advanced part. Look at the color bars at the bottom of this adjustment panel. See those little sliders?
Drag those sliders to expand or shrink the exact range of colors affected. Drag them apart to target more colors. Drag them together for tighter control.
This lets you change a lavender flower to red without touching the green leaves. Or shift skin tones without affecting clothing colors. You get incredibly precise color adjustments with just a few slider moves.
Separate Tone from Color with Blend Modes
Adjustment layers usually change both brightness and color together. But you can split them apart using blend modes.
Add a Curves adjustment layer. Boost contrast and play with the RGB and individual color channels. It looks oversaturated and harsh.
Now change the blend mode to Luminosity. Suddenly you see only the tonal changes. The original colors stay pure while contrast improves dramatically.
Try Color blend mode instead. Now only colors shift while brightness stays the same. This technique gives you independent control over tone and color.
Photographers use Luminosity blend mode constantly for contrast adjustments that don’t oversaturate. Graphic designers use Color blend mode to shift palettes without changing value relationships.
Build Complex Masks with Blend If
Blend If sliders create masks based on brightness values. They work like magic for selecting light or dark areas automatically.
Add a Curves adjustment layer to brighten a rock face in a photo. Paint a rough mask to isolate the rock generally.
Double-click next to the layer name (not on it) to open Layer Style. Scroll down to Blend If sliders at the bottom.
Drag the bottom layer’s dark slider right. The adjustment disappears from shadows. Hold Alt (Windows) or Option (Mac) and drag to split the slider. This creates a gradual transition instead of a harsh cutoff.
Now your adjustment only affects midtones and highlights. It automatically avoids darkening shadows. No tedious masking required.
Stack another adjustment with a Color blend mode. Use Blend If again to constrain it to specific tonal ranges. You build incredibly complex, refined adjustments in seconds.
Convert Colored Objects to White Perfectly
Changing a colored object to white while keeping shadows and folds intact seems impossible. But there’s a technique.
Select the object using Color Range or Quick Selection. Add a Gradient Map adjustment layer. It automatically masks to your selection.
In the Gradient Map, create a gradient from dark gray to white. Adjust the gray until shadows look natural while highlights go pure white.
Now you have a white object with all its original texture and depth. Overlay a pattern by dragging it into your document. Set the pattern layer to Multiply blend mode and mask it to match your object.
The pattern shows only in the shadows and folds. Use Blend If sliders on the pattern layer to fine-tune where it appears.
This technique works brilliantly for changing fabric colors, creating mockups, or replacing textures while maintaining realistic lighting.
Embrace 16-Bit Mode for Smooth Gradients
Most people work in 8-bit color mode. But 16-bit mode gives you way more color information to work with.
Create a new document. Before clicking Create, change the dropdown from 8-bit to 16-bit. Make it large like 3840×2160 pixels.
Use the Gradient tool to create a smooth color gradient across the canvas. Add saturation and contrast adjustments. Zoom to 100%.
Now do the same thing in an 8-bit document. Compare them side by side. The 8-bit version shows visible color banding. The 16-bit version stays perfectly smooth even with extreme adjustments.
For final output files, 8-bit works fine. But working in 16-bit preserves quality through heavy editing. Convert to 8-bit only when you’re finished and ready to export.
Use Perceptual Gradients for Better Color
Photoshop offers three gradient calculation methods. Most people never change from the default, but they should.
Grab the Gradient tool and create a gradient from bright red to cyan. The Classic method creates a muddy middle. Linear does better but still looks dull.
Now try Perceptive gradient style. It’s in the gradient options bar at the top. This mode calculates color transitions mathematically to avoid muddy midtones.
The difference is dramatic. Perceptive gradients stay vibrant through the entire transition. Colors remain punchy instead of turning gray or brown in the middle.
Use Perceptive mode for any gradients with contrasting colors. Save Classic and Linear for subtle tone shifts where they work fine.
Paint Selections with Quick Mask Mode
Selecting complex shapes with the lasso feels clunky. Quick Mask mode lets you paint selections instead.
Press Q to enter Quick Mask mode. Your image gets a red overlay. Grab a large soft brush and paint over the area you want to select. The red disappears where you paint.
Press Q again to convert your painted area into a selection. Now add adjustment layers that automatically mask to your selection.
This technique works incredibly well for organic shapes like trees, clouds, or hair. Paint roughly with a big brush. Then refine edges with a smaller brush.
Quick Mask mode combines the precision of masking with the speed of selection tools. Plus, you can see exactly what you’re selecting as you paint.
Transform Your Photoshop Workflow Today
These 15 techniques separate casual users from professionals. They don’t require years of experience or expensive plugins. Just knowledge of where Photoshop hides its power.
Start with whichever tip solves your biggest frustration. Master it until it becomes muscle memory. Then add another technique to your toolkit.
Soon you’ll work faster and produce better results. Plus, you’ll understand Photoshop’s logic instead of fighting it. That’s when creative work becomes genuinely enjoyable instead of technically frustrating.