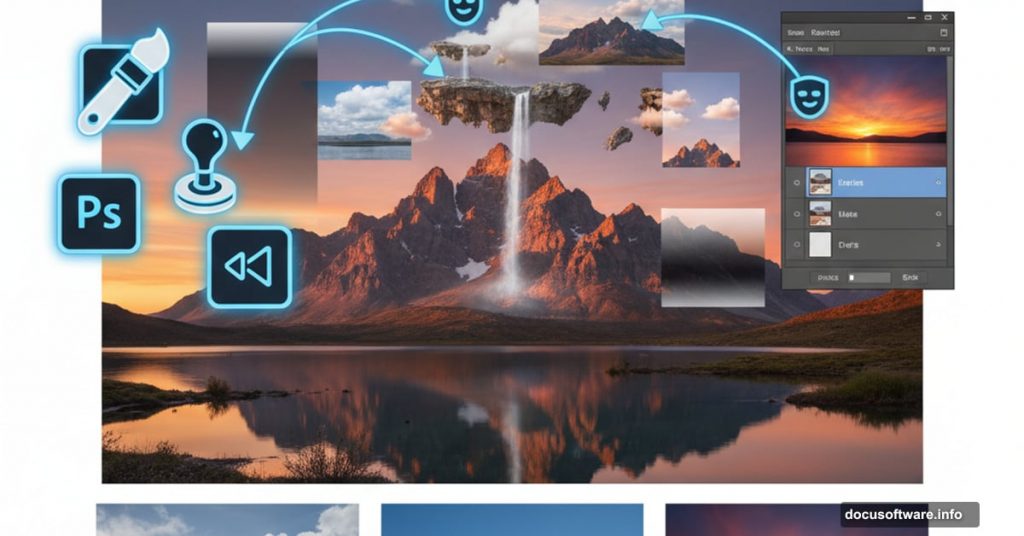
Ever wanted to create those jaw-dropping landscape composites you see on Instagram? The ones with impossible lighting and perfectly blended elements? They’re easier than you think.
This guide walks you through building a complete scenic manipulation in Adobe Photoshop. We’ll combine multiple landscape photos, add dramatic skies, paint realistic lighting, and blend everything seamlessly. Plus, you’ll learn the exact adjustment layers that make mediocre composites look professional.
No advanced skills required. Just patience and willingness to experiment.
Gather Your Source Images First
Before opening Photoshop, collect your materials. You’ll need several landscape photos with similar lighting conditions. Mismatched lighting kills composites faster than anything else.
For this project, grab these elements:
- Two or three landscape base images
- A dramatic sky photo
- Mountain images for depth
- Optional birds for scale
- Water scenes work great for reflections
Make sure all images share similar color temperatures. Mixing warm sunset shots with cool morning light creates obvious composites. Your eye catches these inconsistencies immediately, even if you can’t articulate why something looks wrong.
Build Your Base Scene
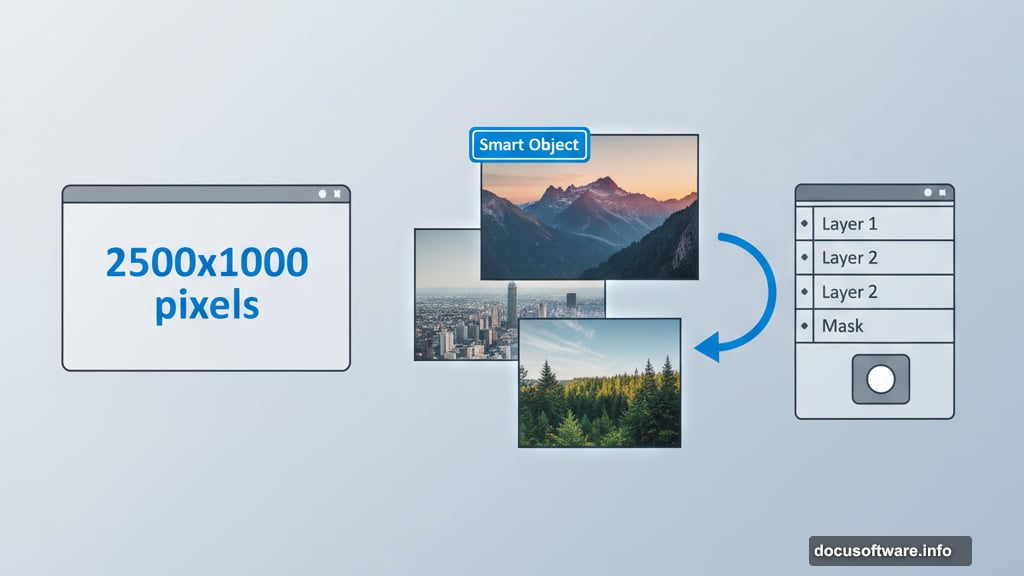
Create a new document at 2500×1000 pixels in Photoshop. This wide format works perfectly for landscape compositions. Fill the background with white temporarily.
Drag your primary landscape image onto the canvas using the Move Tool (V). This becomes your foundation. Convert it to a Smart Object right away by right-clicking the layer and selecting “Convert to Smart Object.”
Why Smart Objects matter? They preserve image quality when you resize or transform. Plus, you can apply filters non-destructively. Always use them for compositing work.
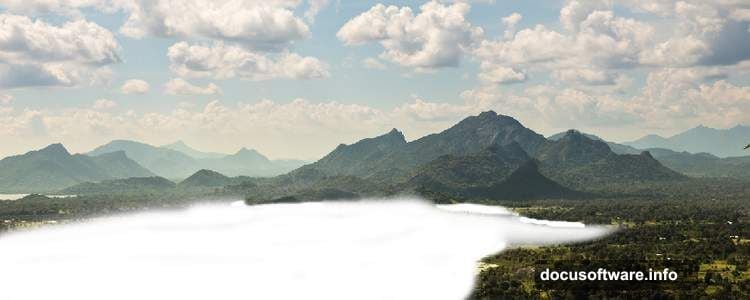
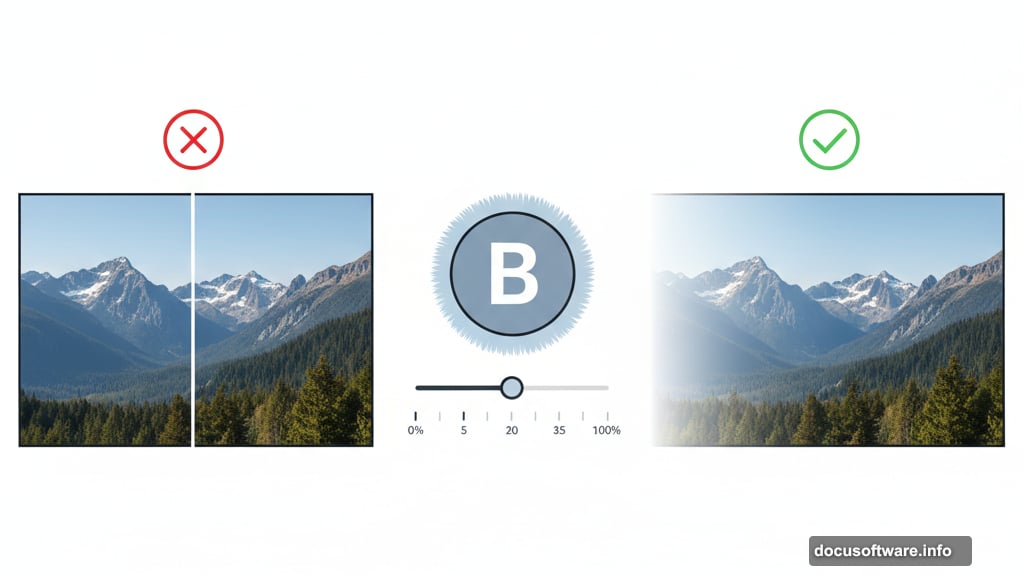
Blend Foreground Elements Seamlessly
Click the mask icon at the bottom of your Layers panel. This adds a layer mask to your landscape. Now grab the Brush Tool (B) and select a soft round brush with black selected.
Paint away unwanted areas on the left side of your foreground. The key here is feathering your edges. Hard edges scream “fake composite.” Soft transitions between elements look natural.
Use a large brush at low opacity. Build up your masking gradually with multiple passes. This gives you better control than trying to nail it in one stroke.
Clean Up Distracting Details
Create a new layer (Ctrl+Shift+N) and set it as a Clipping Mask. This constrains your edits to the layer below. Smart workflow keeps things organized.
Grab the Clone Stamp Tool (S) and remove any distracting shadows or elements. Focus on the middle section of your composition. These details pull attention away from your focal points.
Sample nearby areas by Alt-clicking, then paint over problem spots. Match textures carefully. Sloppy cloning stands out immediately under close inspection.
Color Grade Your Base Layer
Go to Layer > New Adjustment Layer > Color Balance. Set this as a Clipping Mask so it only affects your landscape layer. Adjust the Midtones slider to shift your colors toward your desired mood.
For cooler scenes, push toward cyan and blue. Warmer compositions need more yellow and red. Don’t go overboard here. Subtle shifts look professional, while extreme adjustments look cartoonish.
Next, add a Curves adjustment layer to increase contrast. On the layer mask, use a soft black brush to reduce the effect on mountain peaks. This preserves detail in bright areas.
Layer In Additional Landscape Elements
Drag your second landscape image into the document. Position this layer below your first landscape. Convert to Smart Object as before.
This layering technique builds depth in your composition. Foreground elements sit on top, background elements below. Simple but effective for creating dimension.
Create another new layer and change the blend mode to Overlay at 100%. Fill this layer with 50% gray by going to Edit > Fill > 50% Gray. Now grab the Dodge and Burn Tools (O).
Set your Range to Midtones and Exposure around 20%. Dodge brightens areas, Burn darkens them. Use these tools to enhance lighting on your lakeside or foreground areas. This adds three-dimensional depth that flat photos lack.
Fine-Tune Colors Across Elements
Add a Hue/Saturation adjustment layer (set as Clipping Mask). Target specific color channels like Yellows and Blues. This lets you adjust individual colors without affecting the entire image.
Reduce yellow saturation to cool down warm tones. Increase blue saturation for more dramatic skies. These targeted adjustments help different photos match each other.
Follow up with another Color Balance adjustment layer. Again, focus on the Midtones. Small tweaks here unify your various source images into one cohesive scene.
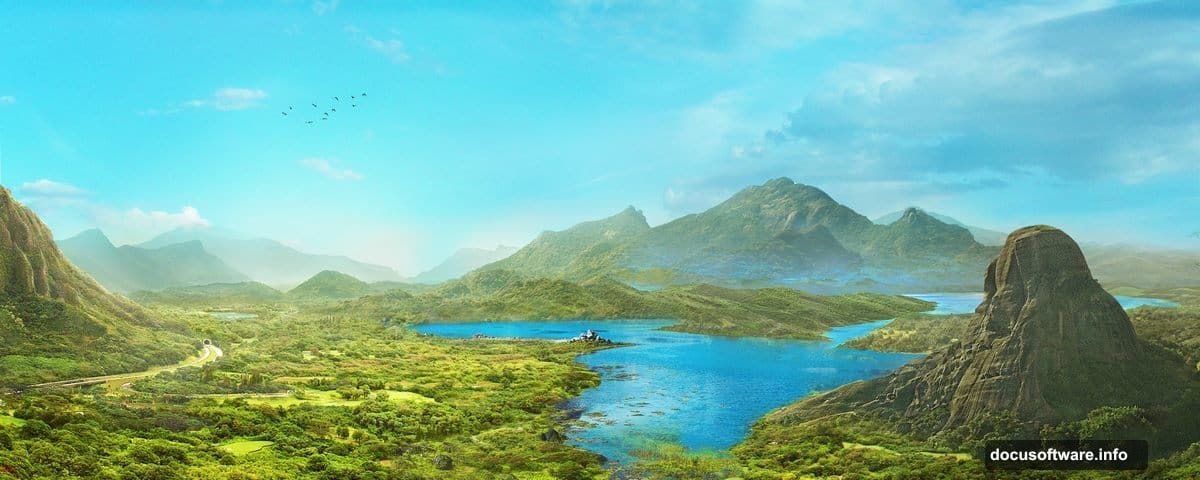
Build Atmospheric Depth
Add mountains in the background for scale. Place these layers behind your main landscapes. Convert to Smart Objects and mask edges carefully.
Mountains create depth through atmospheric perspective. Objects farther away appear lighter and less saturated. Mimic this effect by reducing contrast and adding slight blue tints to distant elements.
Use Curves adjustment layers to lighten distant mountains. On the layer mask, protect foreground areas from this lightening effect. This selective adjustment creates convincing distance.
Add Birds for Scale Reference
Import bird silhouettes into your scene. Keep these small and place them in the middle distance. Birds provide scale reference that helps viewers understand the size of your landscape elements.
Position birds in logical places. They don’t fly directly in front of mountains, for example. Small details like this separate amateur composites from professional-looking work.
Adjust bird opacity slightly so they blend into the atmospheric haze. Solid black silhouettes look pasted on. Subtle transparency integrates them naturally.
Paint Realistic Light and Mist
Create new layers set to Screen or Overlay blend modes. Use soft white brushes at low opacity to paint light rays or mist. Build these effects gradually with multiple passes.
Light comes from one direction. Keep this consistent across your entire composition. Mixed lighting directions destroy believability instantly.
Mist accumulates in valleys and over water. Paint it in these logical locations. Random mist placement looks fake. Study real landscape photos to understand where atmospheric effects naturally occur.
Final Color Grading Pass
Add two final adjustment layers that affect your entire composition. First, create a Curves adjustment layer to fine-tune overall contrast and brightness.
Push the curve slightly to create an S-shape. This adds punch to your midtones while preserving shadows and highlights. Subtle S-curves improve almost any image.
Follow with a Color Lookup adjustment layer. Browse the built-in presets to find one that matches your desired mood. These presets apply sophisticated color grades instantly. Don’t be afraid to reduce opacity if the effect seems too strong.
Why This Approach Works
This technique succeeds because it builds complexity gradually. Each layer adds one element. Each adjustment layer makes one specific improvement.
Trying to fix everything at once overwhelms you and produces messy results. Instead, break the process into discrete steps. Solve one problem, then move to the next.
Smart Objects preserve quality throughout. Adjustment layers with masks give you infinite flexibility. You can always go back and tweak earlier decisions without starting over.
The real magic happens in subtle adjustments. Big, obvious edits look amateurish. Dozens of small, targeted improvements create professional results. That’s the difference between a Photoshop composite and a believable scene.
Your first attempts won’t be perfect. That’s expected. Keep practicing these techniques on different source images. You’ll develop an eye for what works and what doesn’t. Soon you’ll create landscapes that make people ask “Where did you shoot this?”