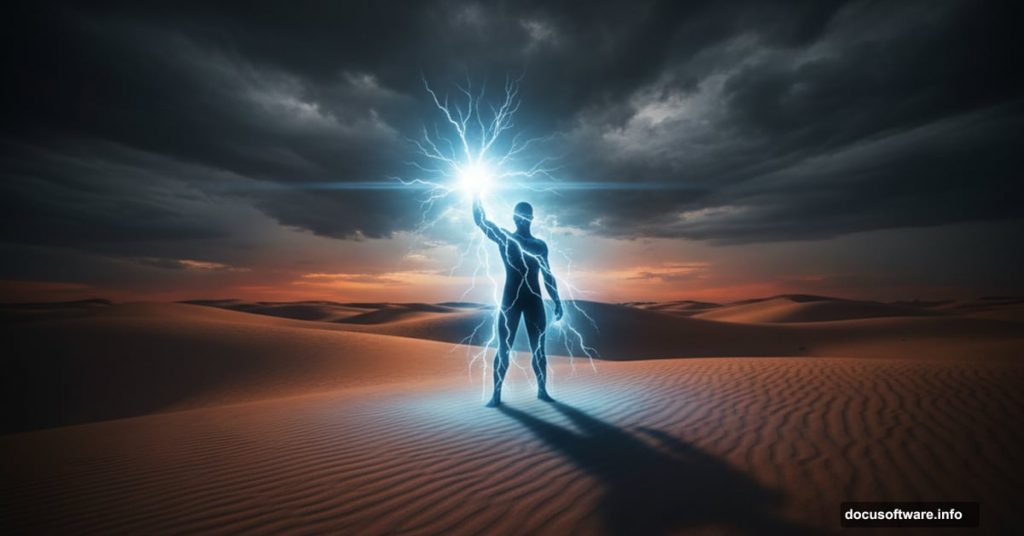
Want to create stunning photo manipulations that look impossible? This tutorial walks you through building a dramatic scene of a figure wielding supernatural light.
You’ll learn practical techniques that work across many projects. Blending multiple images seamlessly. Creating depth with selective blur. Building convincing lighting effects from scratch. Plus, these methods apply to any photo manipulation work you tackle next.
No magic required. Just Photoshop CS3 or newer and about an hour of focused work.
Gather Your Materials First
Before opening Photoshop, collect these elements. You’ll need stock photos of a man, desert landscape, dramatic sky, lightning bolts, and scattered rocks. Alternative images work fine if you maintain similar lighting and perspective.
Download everything to one folder. That saves time hunting for files mid-project. Trust me on this one.
Also, this tutorial assumes you know basic Photoshop navigation. Layer masks, adjustment layers, and transform tools should feel familiar. New to these concepts? Practice those fundamentals first, then come back.
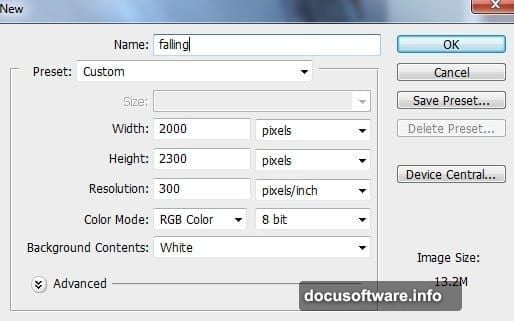
Build Your Canvas and Sky Foundation
Start with a new document at 2000 x 1333 pixels. Set resolution to 72 DPI with RGB color mode. White background works best here.
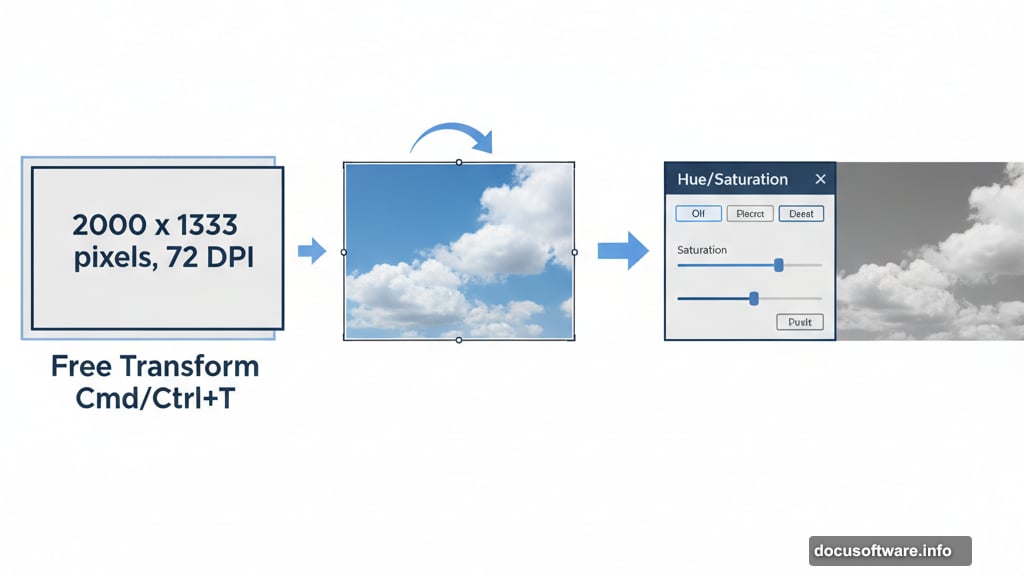
Next, drag your sky image onto the canvas using the Move Tool. Press Cmd/Ctrl+T to activate Free Transform. Rotate the sky until interesting cloud formations sit where you want them. Position matters more than perfection at this stage.
Now desaturate that sky color. Go to Layer > New Adjustment Layer > Hue/Saturation. Right-click the adjustment layer and choose Create Clipping Mask. Drag the Saturation slider left until the sky looks moody and dramatic.
Darken Those Sky Edges
Add another adjustment layer. This time choose Curves. Pull the curve down to darken everything.
But here’s the trick. You want darkness only on the edges, not the center. So grab a soft black brush and paint on the layer mask over the middle section. This creates natural vignetting that draws eyes toward your subject.
The contrast between dark edges and brighter center adds instant depth. Simple technique, powerful results.
Position Your Desert Landscapes
Drag the first desert image in. Transform it to fit the right side of your canvas. The horizon should align roughly with your sky’s horizon line.
Click the layer mask icon at the bottom of your Layers panel. Paint with a soft black brush along the hard edges. This blends the desert seamlessly into the background. No obvious seams allowed.
Duplicate this desert layer. Flip it horizontally through Edit > Transform > Flip Horizontal. Position the flipped version on the left side. Mask those edges too.
You’ve now created a symmetrical desert environment. The mirrored effect adds surreal quality without looking obviously fake.

Add Depth with Strategic Blur
Select both desert layers. Go to Filter > Blur > Gaussian Blur. Set radius to 3 pixels.
However, you don’t want uniform blur everywhere. On each layer’s filter mask, paint with black over the background areas. This removes blur from distant parts while keeping foreground slightly soft.
Why does this work? Your eyes naturally see distant objects sharper than close ones in vast landscapes. This selective blur mimics that optical reality. The scene instantly gains three-dimensional depth.
Clean Up Desert Uniformity
Create a new layer above your desert group. Grab the Clone Stamp tool by pressing S.
Sample from varied desert areas and clone over repetitive sections. This breaks up obvious patterns that scream “stock photo.” Spend five minutes here making rocks and sand look more natural.
Small details like this separate amateur work from professional results. Nobody notices when it’s done right. Everyone notices when it’s missing.
Group and Adjust Your Landscape
Select all desert layers plus your clone layer. Press Cmd/Ctrl+G to group them. Change the group’s blend mode from Pass Through to Normal 100%.
Add a Curves adjustment layer inside this group. Lift the curve to brighten background portions. This pushes the distant desert back in space while keeping foreground properly dark.
Your environment is nearly complete. Sky sets the mood. Deserts create the stage. Now you’re ready for the star performer.
Position Your Subject Model
Open your man image. Use selection tools to carefully cut him from his background. Pen Tool works best for clean edges, but Quick Selection suffices if you’re pressed for time.
Drag the cutout into your main document. Transform him to appropriate size. Consider perspective here. His feet should align with the desert floor naturally.
The model placement makes or breaks this composition. Position him slightly off-center. That creates more visual interest than dead-center placement.
Match Model to Environment Lighting
Your model probably doesn’t match the environment lighting yet. Fix this with adjustment layers using clipping masks.
Add a Curves adjustment layer clipped to the model. Adjust the curve until his overall brightness matches the desert lighting. Generally, you’ll darken him to match the moody atmosphere.

Then add a Color Balance adjustment layer, also clipped. Shift toward blue and cyan in the shadows and midtones. This matches the cool color temperature of your sky and deserts.
These adjustments integrate the model into the scene. He should look like he belongs there, not pasted on top.
Create Dramatic Rim Lighting
Make a new layer above your model. Set blend mode to Screen or Linear Dodge (Add). Grab a soft white brush at low opacity, around 20-30%.
Paint along the edges of the model where light would naturally hit him. Focus on his outline, especially the top of his head and shoulders. Build up the effect gradually with multiple brush strokes.
This rim lighting separates the subject from the background. It also suggests the supernatural light source you’ll add later. The effect sells the entire concept.
Add Environmental Elements
Drag in your rock images. Transform and position them throughout the foreground. Vary their sizes to create natural perspective. Larger rocks in front, smaller ones further back.
Apply the same adjustment techniques you used on the deserts. Curves to match brightness. Color Balance for temperature. Masking to blend edges.
Group these rock layers together. Keep your Layers panel organized. Future you will appreciate this when making revisions.

Build the Lightning Effect
Import your lightning bolt images. Position them behind the model, emanating from where his hand will be. Set their blend mode to Screen. This makes the black areas transparent while keeping the bright lightning visible.
Use layer masks to hide unwanted portions. The lightning should appear to originate from a specific point, not just float randomly.
Duplicate lightning layers if you want more intensity. Reduce opacity on duplicates for subtle variations. Real lightning never looks perfectly uniform.
Create the Light Orb
Make a new layer. Grab a soft white brush. Click once in the model’s hand area to create a bright spot. Increase brush size and click again, multiple times, building up a glowing orb.
Set this layer to Linear Dodge (Add) blend mode. Add a Gaussian Blur of 15-20 pixels. This creates a soft, glowing light source.
Duplicate this layer. Increase the blur radius on the duplicate. This builds up the glow effect, making the light source feel powerful and supernatural.
Add Particle Effects
Create another new layer. Switch to a small, hard white brush. Lower opacity to 10-15%. Click randomly around the light source to create tiny bright particles.
Make these particles denser near the light source, more sparse further away. This suggests energy radiating from the orb.
Set this layer to Linear Dodge (Add). Add slight Gaussian Blur, maybe 1-2 pixels. The particles should feel like they’re moving or floating.
Paint Environmental Light Spill
New layer, set to Soft Light blend mode. Grab a large, soft white brush at very low opacity, around 5-10%.
Paint on the model’s arm, face, and nearby rocks where light from the orb would naturally spill. Build this up slowly. The effect should be subtle but noticeable.
This light spill connects your light source to the environment. It’s the difference between “object placed in scene” and “light source actually illuminating scene.”
Add Final Atmospheric Haze
Create one more layer at the very top. Set it to Screen blend mode. Use a large, soft white brush at 5% opacity.
Paint lightly over the entire middle section of your image. This creates atmospheric haze that ties everything together. It also softens any remaining harsh edges between elements.
Don’t overdo this step. Just enough to unify the scene without making it look foggy or washed out.

Polish with Global Adjustments
Almost done. Add final adjustment layers above everything. Start with Curves. Create a gentle S-curve to boost contrast slightly.
Add a Color Lookup adjustment layer. Browse through the presets to find something that enhances your mood. Moonlight, Crisp Warm, or Crisp Winter often work well for dramatic scenes.
Finally, add a subtle Vignette. Create a Curves adjustment layer, darken everything, then mask out the center with a large soft brush. This draws final attention to your light-wielding subject.
Why This Technique Works
You’ve created a compelling fantasy scene by layering simple effects. Each element alone seems ordinary. Combined with careful blending and lighting, they create something impossible.
The key lies in consistent lighting and color across all elements. Every stock image got adjusted to match. Light sources got painted to affect their surroundings. Blur and haze added atmospheric depth.
These same principles apply to any photo manipulation project. Master them here, use them everywhere. Match lighting direction. Unify color temperature. Build depth through selective blur. Paint light spill that makes sense.
Your workflow matters too. Organized layers. Adjustment layers instead of destructive edits. Groups for related elements. These habits save hours during revisions.
This specific scene taught you lighting effects, depth creation, and seamless blending. Take these skills into your next project. Try different subjects, different environments, different light sources. The techniques remain the same. Only your imagination limits the results.