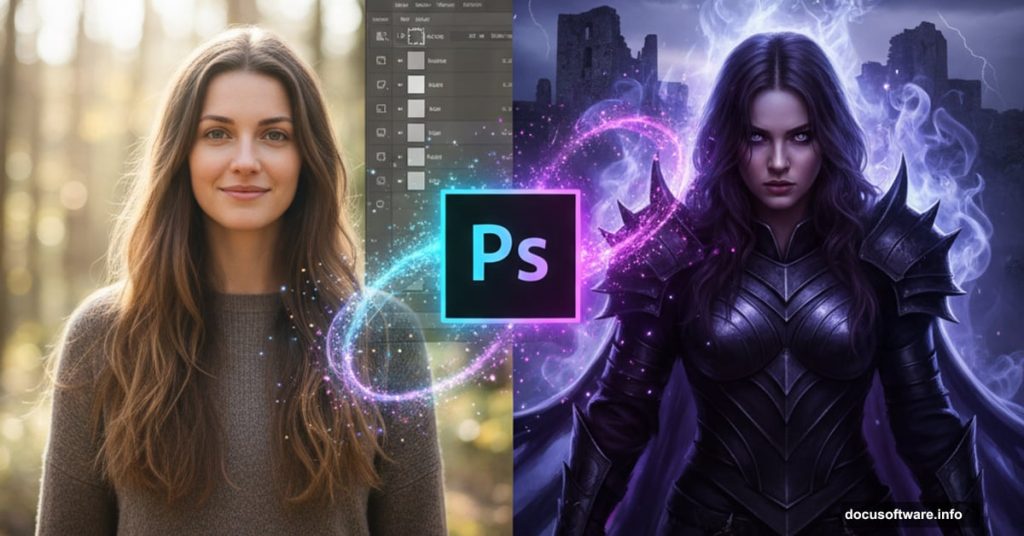
Want to transform ordinary photos into dramatic gothic scenes? This walkthrough shows exactly how to blend multiple images, control lighting, and create ghostly effects.
You’ll build a complete fantasy scene from scratch. Plus, you’ll learn techniques that work for any manipulation project. No advanced skills required—just Photoshop CS5 or newer and patience to follow along.
What You’ll Actually Learn
This isn’t just about copying steps. You’re picking up fundamental skills that apply to any photo manipulation work.
Core techniques covered:
- Color grading for dramatic mood shifts
- Natural shadow and highlight painting
- Blending multiple stock images seamlessly
- Creating ethereal glow effects
- Basic matte painting principles
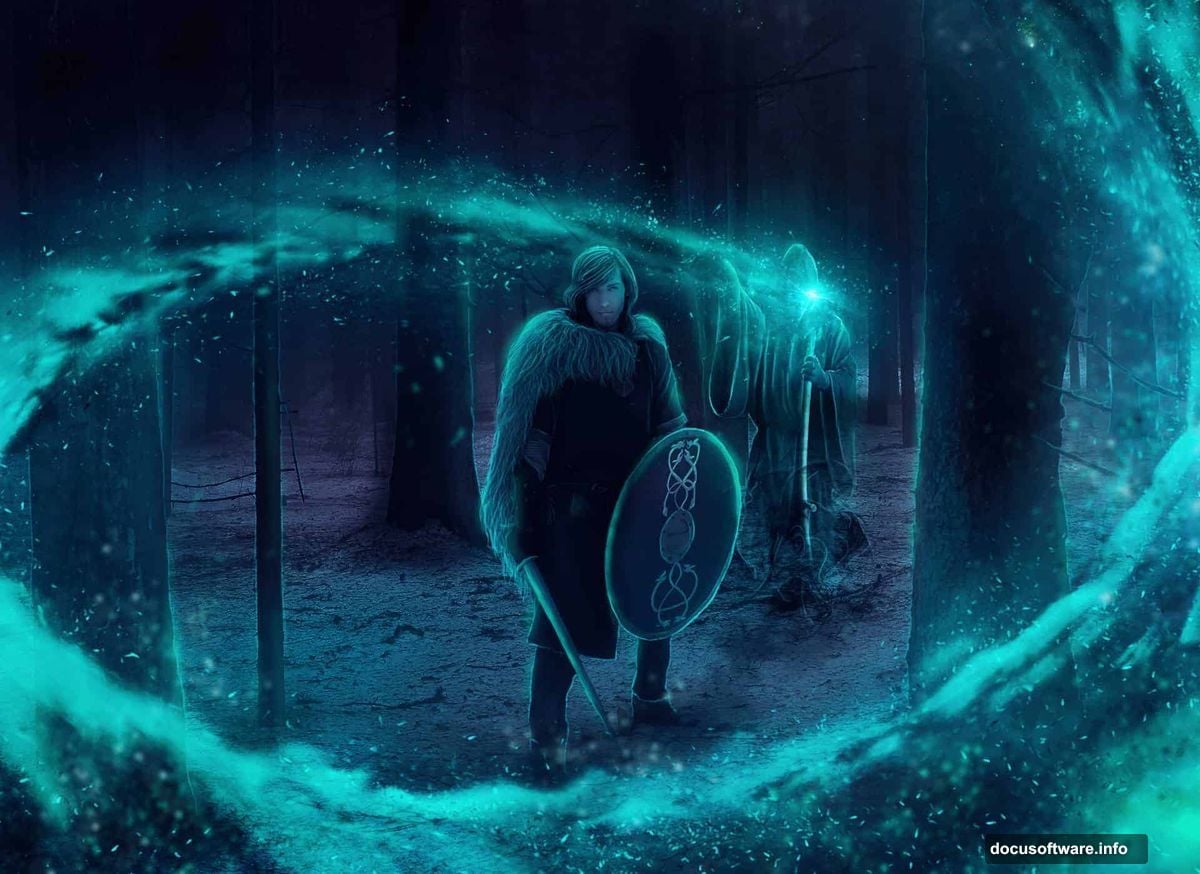
The project features a warrior figure with a ghostly presence behind him. But these same methods work whether you’re making fantasy art, book covers, or surreal portraits.
Tools You Need
Keep it simple. Here’s the complete list:
Required software: Photoshop CS5 or newer (CS6 and CC versions work great)
Helpful but optional: Graphics tablet for smoother brush work
Stock images needed:
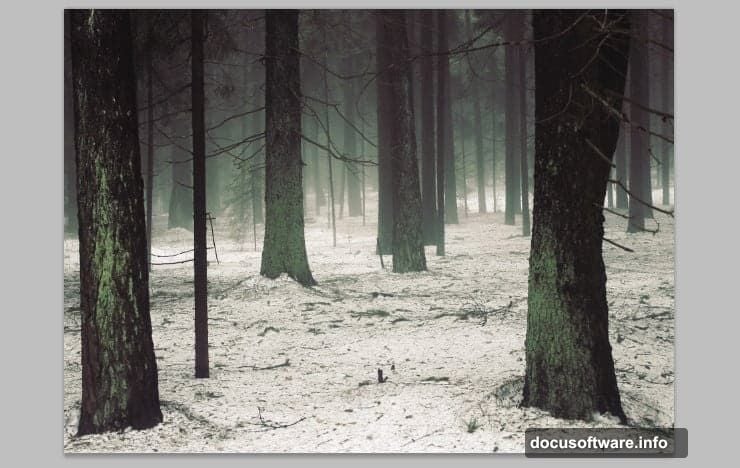
- Forest background photo
- Warrior or monk character
- Standing warrior figure
- Smoke effects (two different shots)
- Celestial textures for atmosphere
Most stock sites offer these image types. Search for “forest,” “medieval warrior,” and “smoke overlay” to find similar options.
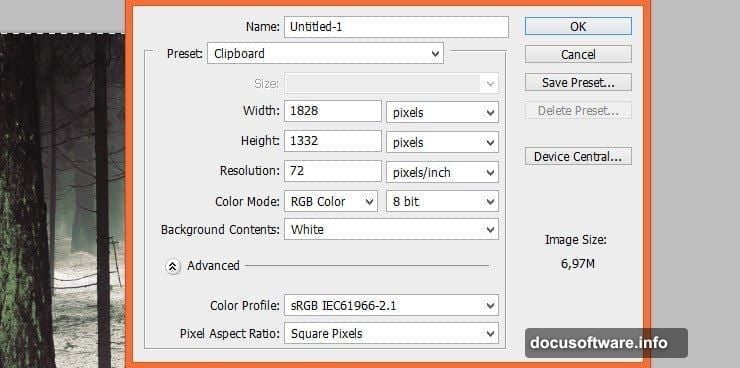
Setting Up Your Canvas
Start with the right dimensions. Create a new file at 1828×1332 pixels. This size gives you room to work without massive file sizes.
Drop your forest background into the center. Don’t worry about perfect placement yet. You’ll adjust everything as you build layers.
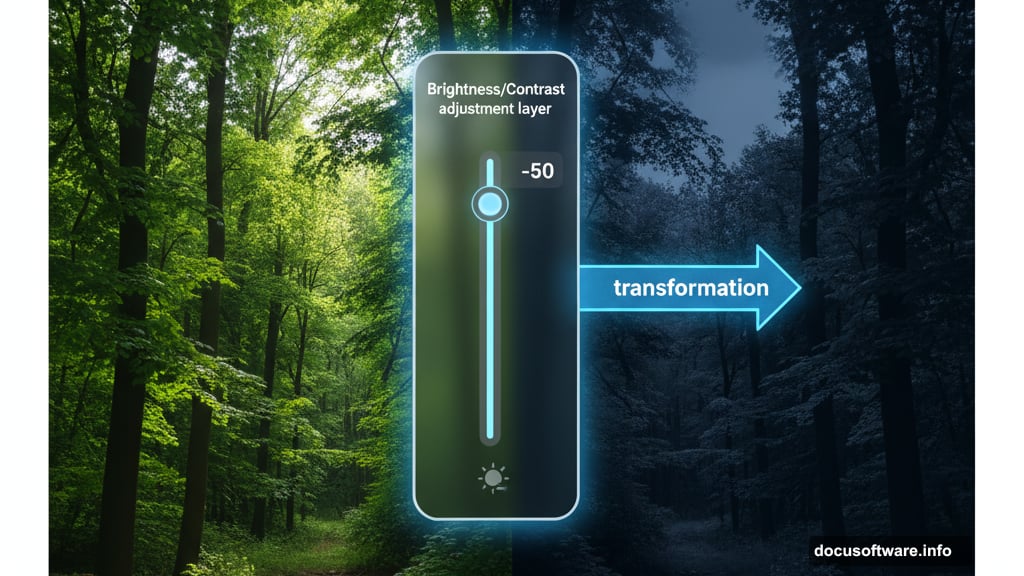
Turning Day Into Night
Daytime forest photos look cheerful. Gothic scenes need darkness and mystery.
Add a Brightness/Contrast adjustment layer. Drag the brightness slider left until the forest feels moody. Somewhere around -40 to -60 usually works. The contrast slider goes slightly right to maintain definition in the shadows.
This single adjustment transforms the entire mood. Suddenly your bright woodland becomes an ominous setting.
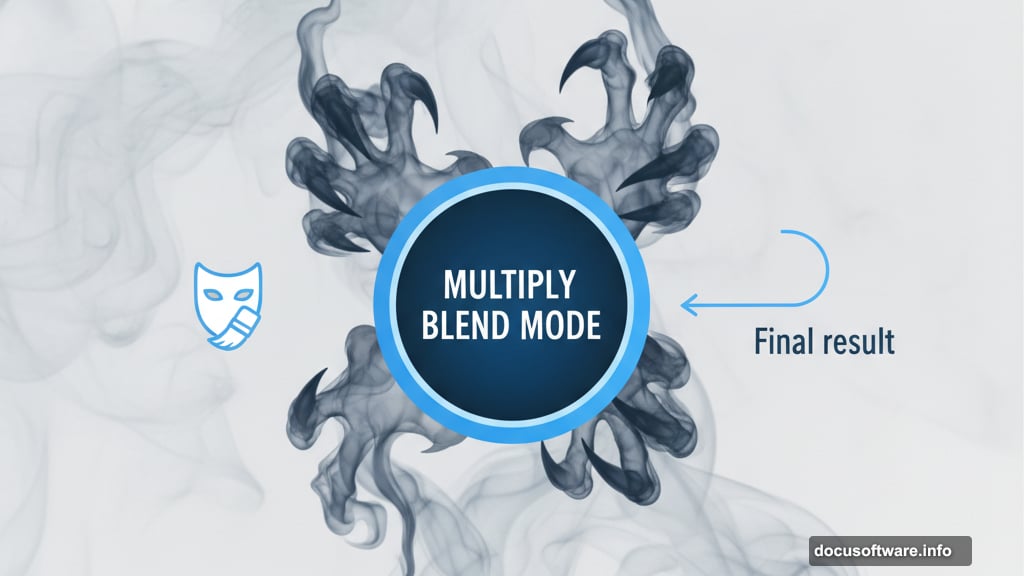
Building the Ghostly Figure
Here’s where smoke stocks become your best friend. Place the first smoke image behind where your main character will stand.
Three quick modifications:
- Flip it horizontally if needed
- Scale it to match your composition
- Add an Invert adjustment layer (with clipping mask)
Change the smoke layer’s blend mode to Multiply. Now only the darker parts remain visible. The light areas disappear, leaving wispy tendrils that look supernatural.
Mask the top edge with a soft brush. This connects the smoke to your dark figure smoothly. No harsh lines—just gradual fade.
Placing Your Main Character
Drop in your warrior or monk figure. Use a hard brush to carefully mask around the edges. The goal? Clean cutout without visible halos.

Switch to a softer, larger brush for the bottom of flowing robes or capes. This creates natural ground contact that doesn’t look pasted on.
Pro tip: Zoom in to 100% when masking edges around hair or detailed areas. Zoom out to check overall blend.
Matching the Character to Scene Lighting
Your character probably doesn’t match the dark forest lighting yet. Fix that with adjustment layers clipped to the figure.
Create a new layer above your character. Set it to Clipping Mask. Paint soft shadows on the face with a dark blue or purple. This instantly makes the figure feel more mysterious.
Still too bright? Add a Levels adjustment layer (also clipped). Drag the middle slider right to darken midtones. Push the highlights slider slightly left if the brightest areas need toning down.
Follow up with a Brightness/Contrast adjustment if needed. Small tweaks here make huge differences in believability.
Adding Atmospheric Depth
Gothic scenes need atmosphere. Literally. Smoke and fog create depth and mystery.
Place your second smoke stock between background and character layers. Transform it to fill empty spaces or wrap around elements.
Reduce opacity to 30-50%. Full strength looks fake. Subtle works better. Change blend mode to Screen if you want lighter, glowing smoke instead of dark wisps.

Mask areas where smoke shouldn’t appear. Keep it strongest in background regions. Less visible near your main subject.
Creating Ethereal Glows
Glows separate amateur work from professional results. Here’s the simple method that actually looks good.
Make a new layer. Set blend mode to Overlay or Soft Light. Pick a soft brush with very low opacity—around 10-15%. Choose pale blue, purple, or green.
Paint gentle strokes around your ghostly figure’s edges. Build up slowly. One strong stroke looks painted on. Ten subtle strokes look luminous.
Add glow behind the character too. This creates rim lighting that separates the figure from background. Just remember: less is more.
Painting Dynamic Lighting
Your scene needs directional light. Maybe moonlight from above. Perhaps an unseen fire source.
Create another new layer. Soft Light blend mode works great for this. Use a large, soft brush with warm yellow or cool blue.
Paint broad strokes where light would hit. The warrior’s shoulders. Top of the head. Front of robes. Don’t cover everything—just highlight planes that face your imaginary light source.
Add shadows on the opposite side. Same technique, but use dark purple or blue instead. This contrast makes your lighting feel three-dimensional.
Balancing Colors Across Elements
Now step back. Look at your whole composition. Do all pieces feel like they exist in the same world?
If something looks off, it’s usually color temperature. Add Hue/Saturation adjustment layers to individual elements. Shift hues slightly toward blue for cooler mood. Toward orange/red for warmer feel.
Match saturation levels too. Overly vibrant elements pop out unnaturally. Desaturate slightly until everything sits at similar intensity.
Use Color Balance adjustment for fine-tuning. Add blue to shadows. Add yellow to highlights. This mimics natural color shifts in real lighting.
Adding Final Texture Overlays
Celestial textures add the final polish. These create subtle color variations and texture that sells the fantasy mood.
Place texture images above your other layers. Set blend mode to Overlay, Soft Light, or Color Dodge. Reduce opacity until barely visible—maybe 15-30%.
Mask textures away from your main subject. Let them affect background and atmosphere more than foreground elements. This keeps focus where you want it.
Sharpening Your Final Image
Before saving, add strategic sharpening. Flatten a copy of all visible layers (Ctrl+Alt+Shift+E). This creates a merged layer without destroying your work.
Go to Filter > Sharpen > Unsharp Mask. Set Amount to 80-120%. Radius to 1-1.5 pixels. Threshold to 2-4 levels. These settings add punch without obvious halos.
Add a layer mask. Paint black over any areas that look oversharpened. Soft, atmospheric elements shouldn’t be crisp. Save sharpness for your main character and key details.
Common Mistakes to Skip
Problem: Harsh edges around cutout figures
Solution: Use layer masks, not eraser tool. Refine edges with a mix of hard and soft brushes. Add subtle glow or shadow around edges to blend better.
Problem: Lighting doesn’t match between elements
Solution: All light should come from consistent directions. If background shows sun from right, your character’s highlights must also come from right.
Problem: Colors look muddy
Solution: Too many adjustment layers fighting each other. Start over with color grading. Use fewer, more targeted adjustments.
Problem: Composition feels flat
Solution: Add atmospheric perspective. Background elements should be hazier, less saturated, and less sharp than foreground. Increase this effect for more depth.
Making It Your Own
This tutorial shows one specific scene. But these techniques work for countless projects.
Try different character types. Replace the warrior with a sorceress, assassin, or mythical creature. Keep the same lighting and atmosphere principles.
Change the setting. Swap the forest for ruins, cavern, or alien landscape. The smoke effects and color grading methods still apply.
Experiment with color schemes. Cool blues create melancholy mood. Warm oranges suggest danger or passion. Green tints add poison or sickness themes.
The symbol of warrior versus dark spirit? That’s yours to interpret. Maybe the shadow represents inner demons. Perhaps it’s a literal ghost hunting him. Let viewers find their own meaning.
Beyond This Project
Photo manipulation combines technical skill with artistic vision. You’ve learned the technical part today. The artistic part grows with practice.
Start collecting stock images that inspire you. Build a library organized by type—backgrounds, figures, textures, effects. Having resources ready speeds up future projects dramatically.
Study lighting in real life. Notice how shadows fall. Observe color shifts between light and shadow. Photography improves your manipulation work because you understand how reality actually looks.
Practice makes these techniques second nature. Your first attempts take hours. Eventually, you work intuitively without thinking through every step. Keep creating. Each project teaches something new.