Want to transform ordinary objects into gleaming metal masterpieces? This hands-on Photoshop tutorial breaks down the exact process for creating photo-realistic metallic surfaces with accurate reflections.
You’ll learn three essential techniques professional designers use daily. First, warping objects to match complex shapes. Second, dodging and burning to create dimensional depth. Third, adding convincing reflections that sell the metal illusion.
The best part? These skills transfer to any metallic effect you want to create later.
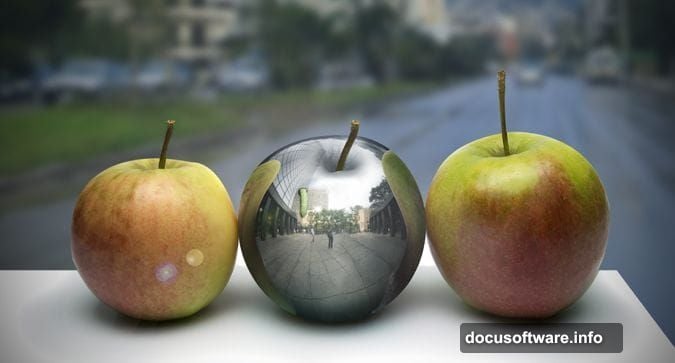
Gather Your Reference Images First
Before touching Photoshop, collect your source materials. You’ll need a chrome sphere for the base metal texture. Plus, apple photos for the shape reference.
Finding decent chrome ball images takes effort. Most stock photos include distracting backgrounds or imperfections. Look for spheres with clean, even reflections across the surface.
The tutorial author recommends specific resources. But honestly? Any high-resolution chrome sphere works if the lighting looks natural.
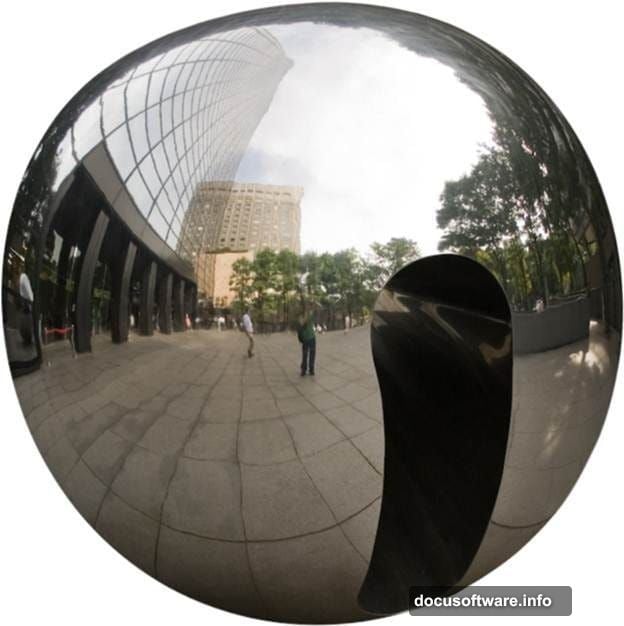
Fix Symmetry Issues in Your Metal Base
Chrome spheres rarely photograph perfectly. Background elements, camera reflections, or physical defects always sneak into the shot.
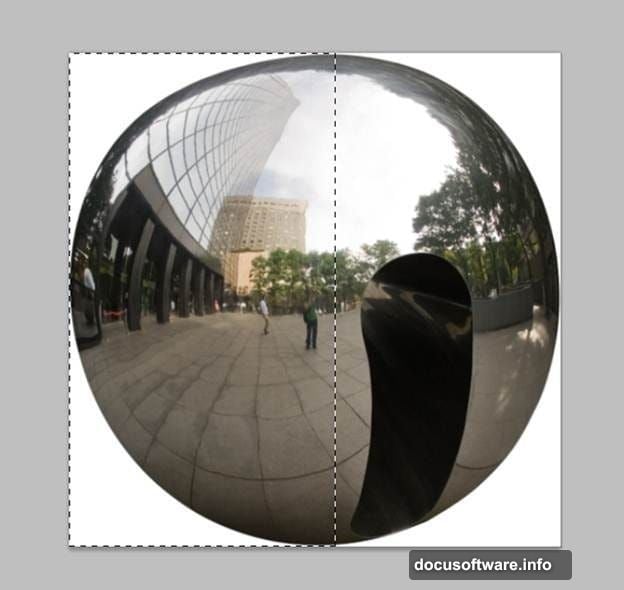
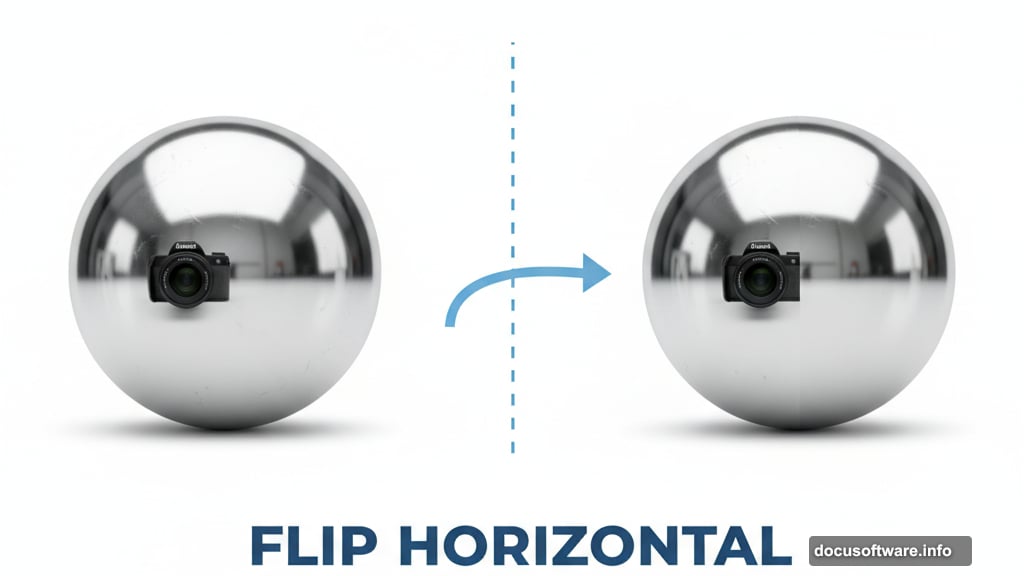
Here’s a clever fix that works on any symmetrical object. Select the good half of your sphere. Copy it to a new layer. Then flip it horizontally to replace the damaged side.
This technique saves hours of tedious retouching. Plus, it maintains perfect symmetry that manual fixes never achieve. Designers use this same trick for faces, architectural elements, and product photography.
The key? Use layer masks and clipping masks to blend seamlessly. Don’t just paste the flipped half on top. Clip it to the original layer so edges align automatically.
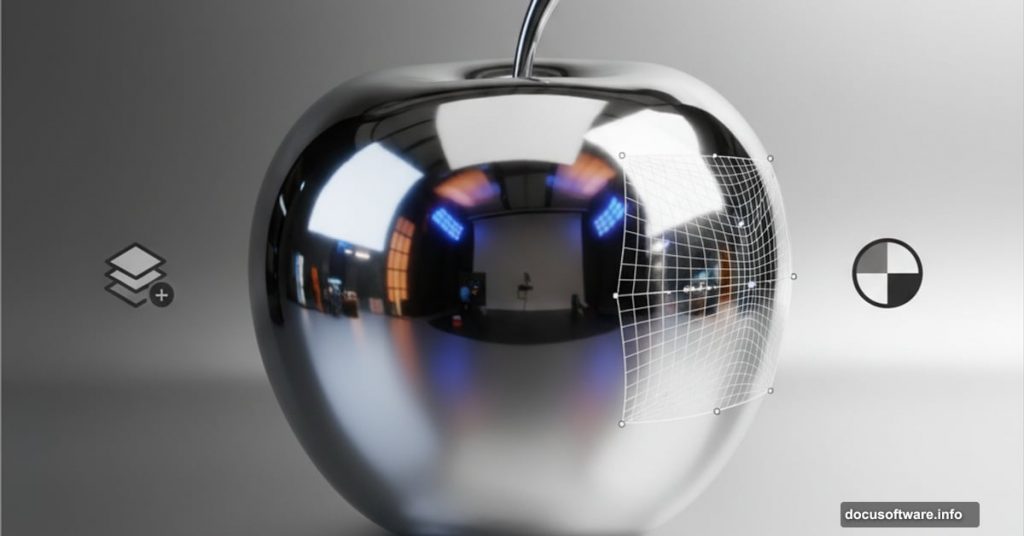
Warp Metal Texture Onto Organic Shapes
Mapping flat metal onto a curved apple requires precise warping. The Transform tools handle this better than most people realize.
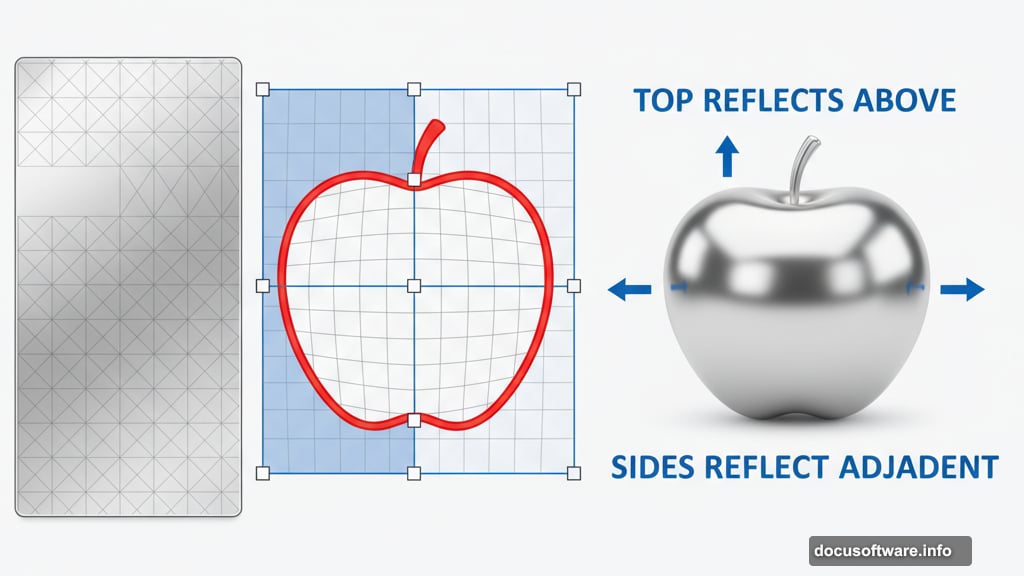
Start with the Warp function under Edit > Transform. Grab the corner and edge handles to pull your chrome texture around the apple’s curves. Take your time here because rushed warping looks obviously fake.
Watch the reflection flow. Metal surfaces reflect their environment directionally. So the top of your apple should show whatever sits above it in your scene. The sides reflect horizontally adjacent elements.
This directional reflection makes or breaks realistic metal effects. Get it wrong and viewers immediately spot the fake.
Build Dimension Through Dodge and Burn
Flat-looking metal screams amateur work. Professional metal effects need dimensional depth from highlight and shadow control.
Create a new layer set to Overlay blend mode. Use a soft white brush at low opacity for dodging. Paint highlights where light hits the curved surface directly.
Then switch to black for burning. Darken the transition zones where curves turn away from light. Build these tones gradually across multiple passes.
The Overlay blend mode preserves underlying detail while adding tonal depth. So you enhance the existing texture rather than painting over it.
Add Environmental Reflections Strategically
Bare metal in a vacuum looks wrong. Real chrome reflects everything nearby. Your apple needs contextual reflections to feel real.
Select elements from your scene to reflect in the metal. City buildings work great for outdoor scenes. Indoor shots need windows, lights, or furniture reflections.
Warp these reflection elements to follow the apple’s curves. Then reduce opacity significantly. Metal reflections appear much subtler than people expect.
Layer multiple reflection sources at varying opacities. This creates the complex, multi-layered reflections actual chrome surfaces display.
Refine Edge Transitions Carefully
Edges make or break the illusion. Where your metal apple meets the background needs careful attention.
Zoom to 200% and inspect every edge pixel. Use a small, soft eraser at low opacity to feather harsh transitions. But don’t over-blend everything into mush.
Metal edges stay relatively sharp compared to organic materials. Find the balance between clean separation and natural integration.
Add subtle glow or reflection spill into the background. Light bounces off chrome onto nearby surfaces. This small detail sells the effect completely.
Match Lighting Across All Elements
Nothing ruins composite realism faster than inconsistent lighting. Your metal apple, background, and reflection sources must share the same light direction and color temperature.
Check your light source angle on every layer. Highlights should align consistently. If background light comes from the left, your apple highlights must match.
Color temperature matters equally. Cool daylight creates bluish metal reflections. Warm indoor lighting shifts everything toward yellow-orange. Adjust curves or color balance to unify the palette.
Most beginners skip this step. Then they wonder why their technically perfect composites look fake.
Apply Technique to Other Metal Objects
The same workflow creates any metallic object. Chrome logos, steel text, metal textures for product renders.
Swap the apple shape for anything else. The metal texture warping, dodge and burn principles, and reflection layering all transfer directly.
Start simple with geometric shapes. Spheres and cubes teach the basics best. Then progress to complex organic forms as your skills develop.
Save your layer structure as a template. Future projects go much faster when you’re not rebuilding from scratch.
Common Mistakes That Break the Effect
Beginners consistently make three errors. First, overexposed highlights that blow out to pure white. Real metal keeps some detail even in bright spots.
Second, insufficient contrast in the midtones. Flat metal lacks dimension. Push your dodge and burn further than feels comfortable initially.
Third, reflection scale mismatch. Huge reflections on small objects look ridiculous. Size your reflected elements appropriately for the metal surface area.
These subtle issues separate amateur work from professional results. Fix them and your metal effects jump several quality levels immediately.
Why These Skills Matter Long-Term
Metallic effects appear constantly in design work. Product mockups need them. UI elements use them. Motion graphics rely on them heavily.
Master these techniques once and you’ll use them for years. Every project requiring metal, chrome, or reflective surfaces needs this exact skillset.
Plus, the underlying principles apply beyond metal. Understanding reflection, lighting interaction, and surface properties improves all your composite work.
The initial learning investment pays dividends across your entire design career. That’s why mastering fundamentals like this matters more than chasing trendy effects.
Post Title: Create Chrome Metal Apple in Photoshop: Complete Guide
Meta Description: Want to transform ordinary objects into gleaming metal masterpieces? This hands-on [Photoshop](https://www.adobe.com/products/photoshop.html) tutorial breaks down the exact