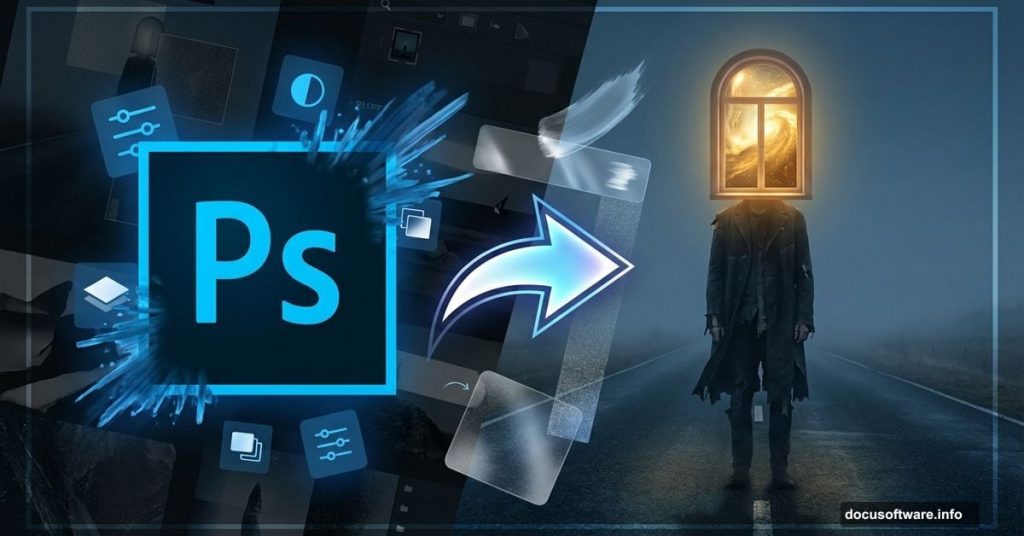
Creating surreal imagery in Photoshop sounds intimidating. But the process breaks down into manageable steps anyone can follow.
This tutorial walks through building an eerie, dreamlike scene featuring a mysterious window-headed figure on a desolate road. You’ll learn practical techniques for blending multiple images, controlling light and shadow, and adding atmospheric textures. Plus, we’ll cover creating convincing depth of field and moody black-and-white tones.
The best part? These skills transfer to any photo manipulation project you tackle next.
What You’ll Need Before Starting
First, gather your resources. You’ll need several stock images to build this composition:
Essential Images:
- Desolate road photograph
- Lake or landscape for background
- Window image for the figure’s head
- Cliff or rocky terrain
- Man in suit (full body shot)
- Person on swing
- Metal texture
- Paper texture
Most stock photo sites offer these image types. Search for dramatic, moody shots that match the surreal aesthetic. Moreover, make sure images are high resolution—at least 2000 pixels on the longest side works best.
Setting Up Your Canvas
Let’s create the foundation for this project. Open Photoshop and start a new document with these specifications:
- Width: 3000 pixels
- Height: 3000 pixels
- Resolution: 300 pixels per inch
- Color Mode: RGB, 8-bit
- Background: Transparent
Why these dimensions? A square canvas gives flexibility for final cropping. Plus, 3000 pixels provides enough resolution for detailed work without bogging down your computer. The high pixel count also ensures your final image looks sharp at various sizes.
Building the Road Foundation
Now we’ll create the foreground element that anchors the entire scene.
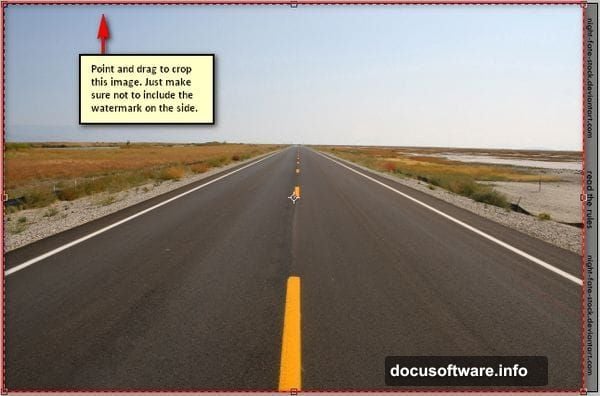
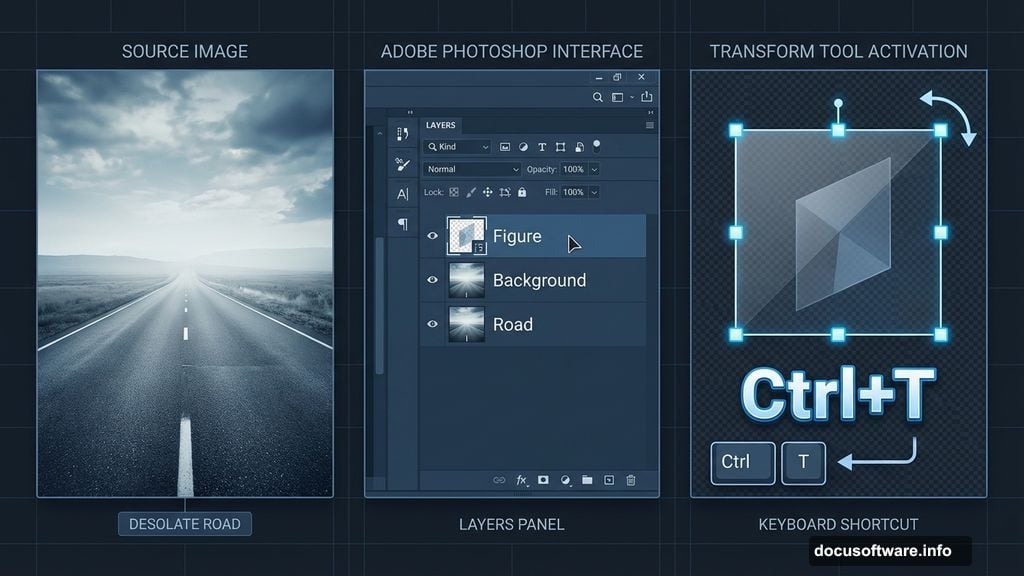
Open your road image. First, remove any watermarks by activating the Crop tool (press C). Drag the crop boundaries to eliminate unwanted elements. Then click the checkmark to apply.
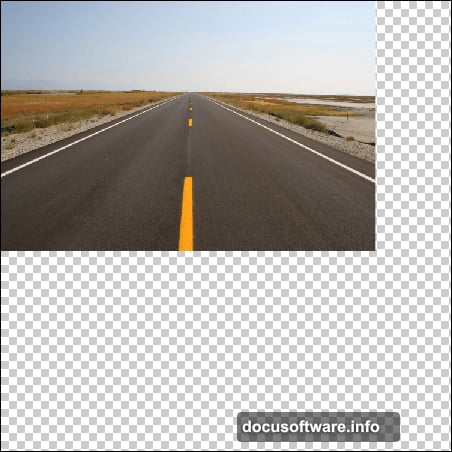
Next, drag this cropped road onto your main canvas using the Move tool (press V). Position it toward the bottom of the canvas. Don’t worry about perfect placement yet—we’ll refine that next.
Rename this layer to “road” by double-clicking the layer name. Good layer organization saves massive headaches later.
Rotating and Resizing the Road
Here’s where we shape the road to fit our composition.
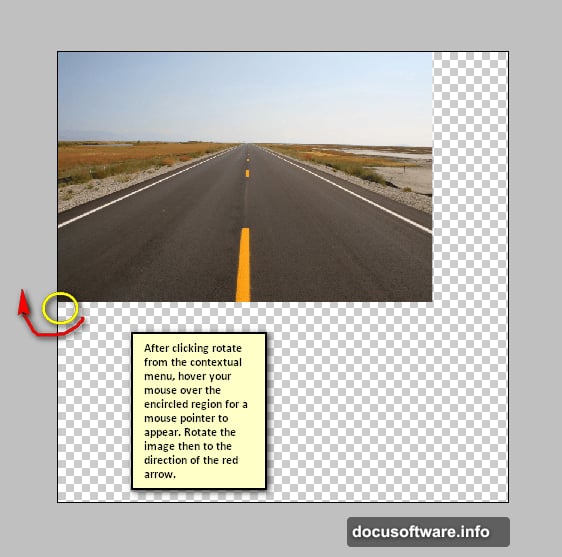
Activate the Transform tool by pressing Ctrl/Cmd + T. Right-click inside the bounding box and select “Rotate” from the menu. This lets you angle the road for better perspective.
The road probably won’t fill the canvas evenly. So grab the corner handles and drag outward to scale it up. Fill the entire canvas edge to edge. Hold Shift while dragging to maintain proportions.
Pro tip: Don’t stress about the uneven edges right now. We’ll blend and mask those areas as we add more elements.
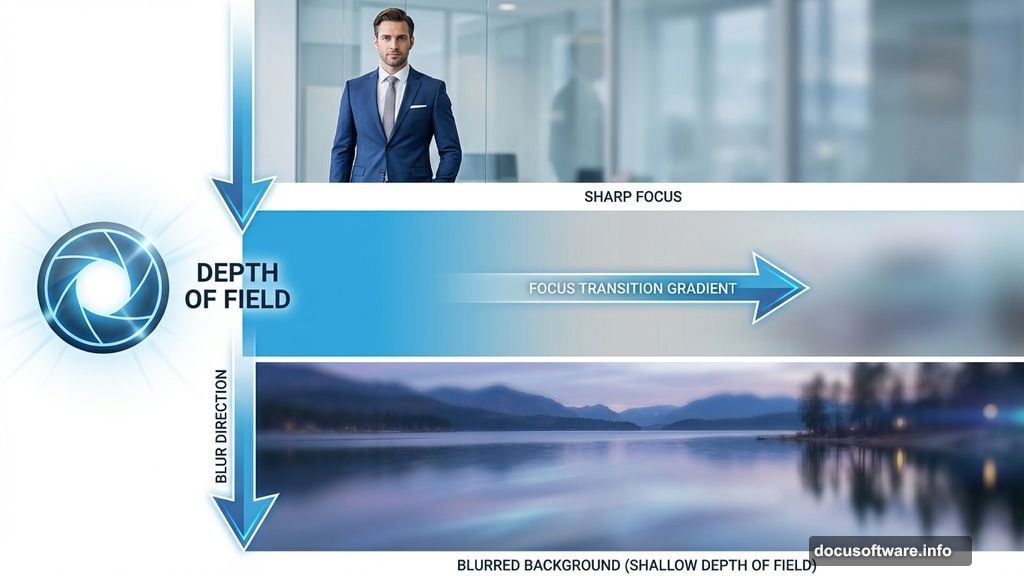
Creating Convincing Depth of Field
Depth of field separates amateur composites from professional-looking work. Fortunately, Photoshop makes this effect manageable.
Duplicate your road layer by pressing Ctrl/Cmd + J. Then navigate to Filter > Blur Gallery > Field Blur. This opens an interface with pins you can place on your image.
Place one pin on the foreground area you want sharp. Set its blur value to 0. Then place another pin on the distant road and increase the blur value to 15-25 pixels. The blur gradually increases between pins, mimicking a camera’s natural depth of field.
Why this matters: Your eye expects distant objects to appear softer. Adding this blur immediately makes the composite feel more photographic and less “cut and paste.”
Blending Background Elements
Time to add atmospheric depth behind the road.
Open your lake or landscape image. Drag it onto your main canvas and position it above the road layer. Scale it to fill the upper portion of your composition.
Now add a layer mask by clicking the mask icon at the bottom of the Layers panel. Grab the Gradient tool (press G) and set it to black-to-transparent. Drag from the bottom of the background image upward. This creates a smooth fade where the background meets the road.
Key technique: Use soft brushes on layer masks to paint away harsh edges. Set your brush to 20-30% opacity and gradually build up the mask. This gives you precise control over blending.
Constructing the Window-Headed Figure
This is the surreal centerpiece that makes the image memorable.
Open your suited figure image. Use the Pen tool (press P) to carefully trace around the body, excluding the head. Take your time here—clean selections make or break photo composites.
Once you’ve created the path, right-click and choose “Make Selection.” Set feather radius to 1 pixel. Then press Ctrl/Cmd + J to copy the selection to a new layer.
Drag this headless figure onto your main canvas. Scale and position it standing on the road. Make sure the perspective and lighting match the road’s direction.
Adding the Window Head
Open your window image. Select just the window frame using your preferred selection method—Quick Selection tool works well for this.
Copy the window selection and paste it onto your main canvas. Position it where the figure’s head should be. Scale it to match the body proportions.
Creating the illusion: Add a layer mask to the window layer. Paint black on the mask where the window overlaps the body to reveal the suit collar. This makes the window appear to sit naturally on the shoulders.
Lighting and Shadow Integration
Nothing screams “fake composite” louder than mismatched lighting.
Create a new layer above your figure. Set its blend mode to Multiply. Use a soft brush with low opacity (15-20%) to paint shadows on the figure’s right side. Sample colors from the road to ensure the shadow tone matches.
For highlights, create another layer set to Screen blend mode. Paint subtle highlights on the left side where light hits the figure. This establishes a consistent light source throughout the scene.
Important: Keep shadow and highlight layers separate. This gives you control to adjust intensity later without starting over.
Adding Atmospheric Textures
Textures add age, mood, and visual interest to surreal compositions.
Open your paper texture. Drag it onto your canvas above all other layers. Set its blend mode to Multiply or Overlay (experiment to see which looks better). Reduce opacity to 30-40%.
Do the same with your metal texture on a separate layer. Try different blend modes—Soft Light often works beautifully. Position and scale textures so interesting details fall on key areas of your composition.
Layer masks are your friend here. Use them to control where textures appear strongest. Maybe you want heavy texture on the sky but minimal texture on the figure.
Creating the Swing Element
This adds narrative intrigue to the scene.
Open your swing image. Extract the person and swing using selection tools. Copy this to your main canvas.
Position the swing element in the background, perhaps on a distant cliff. Scale it down significantly—forced perspective makes it appear far away. Apply Field Blur with a higher blur value (around 20 pixels) to push it into the distance.
Story tip: The swing’s placement affects your image’s emotional impact. A swing with someone on it suggests loneliness or nostalgia. An empty swing amplifies the eerie atmosphere.
Refining Edge Details
Zoom in and examine where different elements meet. Harsh edges destroy the illusion.
Select each element layer and add a slight Gaussian Blur (Filter > Blur > Gaussian Blur) at 0.3-0.5 pixels. This softens edges just enough to look natural without appearing blurry.
For areas where elements overlap, use a soft eraser at low opacity to feather transitions. Take your time on the figure’s feet where they meet the road—this contact point needs to look grounded and believable.
Adjusting Overall Color and Tone
Now we’ll unify all elements with consistent color grading.
Create a Curves adjustment layer above all other layers. Drag the center of the RGB curve slightly downward to darken midtones. This immediately adds moodiness.
Create a Hue/Saturation adjustment layer. Reduce saturation to -30 or -40. Desaturating creates that haunting, dreamlike quality.
For the black-and-white conversion, add a Black & White adjustment layer. Don’t just click the preset—adjust individual color sliders. Push yellows darker and blues lighter for dramatic contrast.
Adding Vignette and Final Polish
A subtle vignette draws attention to your composition’s center.
Create a new layer at the top of your stack. Fill it with white (Edit > Fill). Then go to Filter > Lens Correction. In the Custom tab, move the Vignette Amount slider to -50 or so. Adjust Midpoint to control how far the darkening spreads.
Set this layer to Multiply blend mode and reduce opacity to 40-50%. This creates a gentle darkening around the edges without looking heavy-handed.
Final adjustments: Add a Levels adjustment layer. Drag the white point slider left slightly to brighten highlights. Drag the black point right to deepen shadows. This increases overall contrast and makes the image pop.
Sharpening for Output
Before saving, apply final sharpening.
Flatten your image or create a merged copy on top (Ctrl/Cmd + Alt/Opt + Shift + E). Go to Filter > Sharpen > Smart Sharpen. Use these settings:
- Amount: 80-120%
- Radius: 1.0-1.5 pixels
- Reduce Noise: 10%
Zoom to 100% while adjusting to see the effect clearly. Too much sharpening creates halos—back off if edges start glowing.
Save and Export
Save your master file as a PSD to preserve all layers. Then create versions for different uses.
For web sharing, go to File > Export > Save for Web. Choose JPEG at 80-90% quality. This balances file size and image quality nicely.
For printing, save as a high-quality JPEG or TIFF at full resolution. Make sure your color space is set to sRGB for consistent colors across devices.
Your surreal photo manipulation is complete. These techniques work for endless creative projects—abstract scenes, movie poster designs, book covers, or personal art pieces. The key is practicing each skill individually before combining them.
Experiment with different stock images and blend modes. Try varying the light direction or color grading. Each adjustment teaches you more about how elements interact in Photoshop. Most importantly, don’t get discouraged if your first attempts don’t match your vision. Photo manipulation is a skill that improves dramatically with repetition.