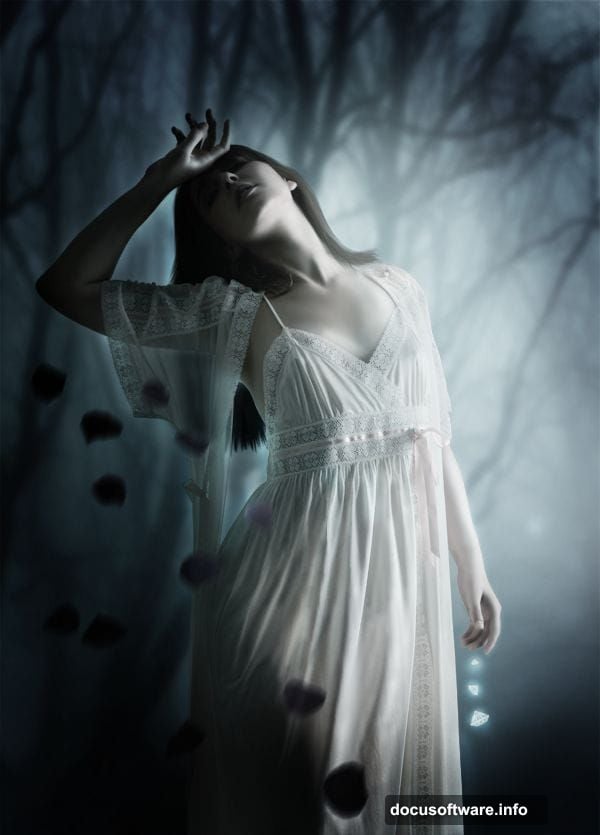
Photoshop photo manipulation sounds intimidating. But creating a soft, ethereal portrait with floating petals takes less time than you’d think.
This tutorial walks through building an emotional blue-tone scene. You’ll learn dodging, burning, and blur techniques that work across different projects. Plus, the method uses just a few stock images and basic tools.
Gather Your Resources First
Before opening Photoshop, download these elements. You’ll need a forest background, a portrait subject, petal overlays, and diamond sparkle brushes. Most stock sites offer similar alternatives if specific links don’t work.
The beauty of photo manipulation lies in flexibility. So if you can’t find exact matches, choose images with similar lighting and color tones. That consistency matters more than perfect stock photos.
Build Your Background Layer
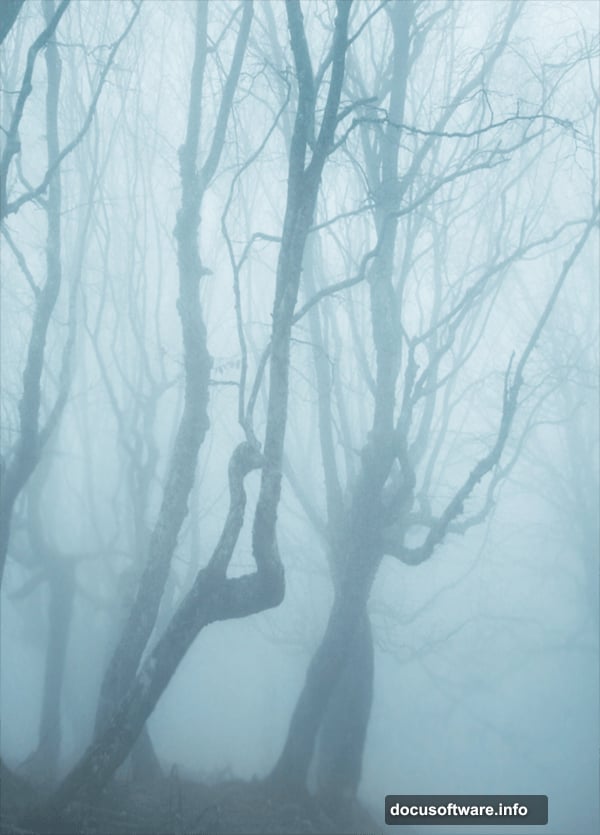
Start by opening your forest background image. Crop it to focus on the most interesting section. Then duplicate that layer twice.
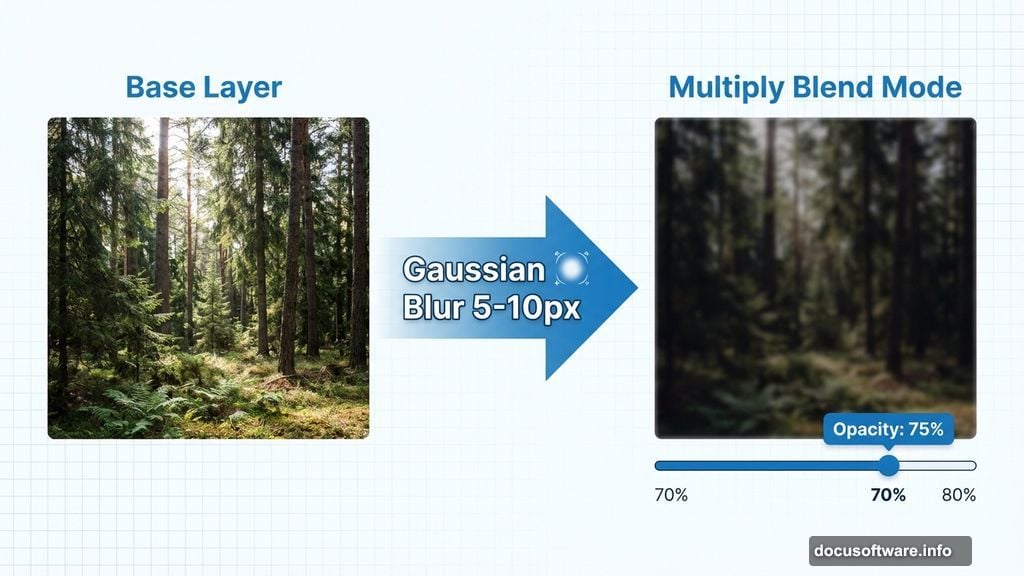
Apply Gaussian Blur to the first duplicate. The amount varies based on image resolution, but typically 5-10 pixels works well. This blur pushes the background back visually, making your subject pop forward.
Next, set the blurred layer’s blend mode to Multiply. This darkens the scene and adds depth. Adjust opacity if the effect feels too heavy. Sometimes 70-80% looks better than full strength.
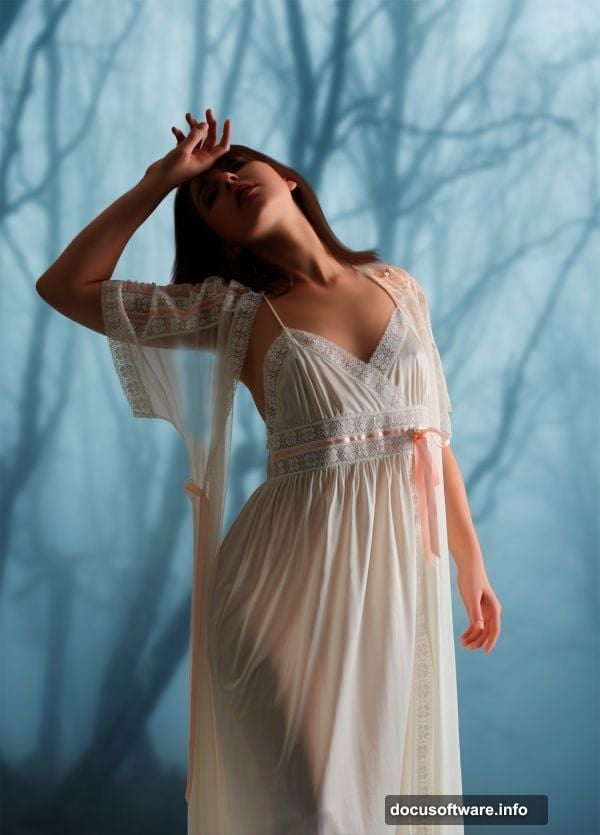
Extract and Position Your Subject
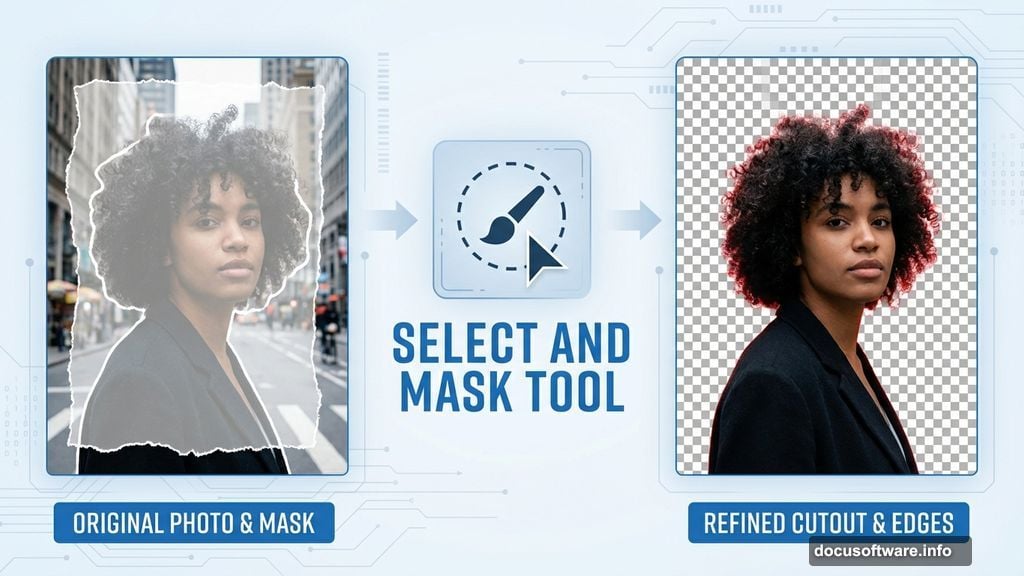
Open your portrait image and remove the background. Take time with this step. Clean edges make or break the final result.
Create a new layer above your background stack. Place your extracted subject there. Position her where the composition feels balanced.
Hair refinement matters here. Photoshop’s Select and Mask tool helps tremendously with flyaway strands. But honestly, that’s a whole separate tutorial. For now, focus on getting clean overall edges.
Add Natural Hair Blending
Create a layer between your subject and background. Paint additional hair strands using a moderately hard brush. Match the color and flow of existing hair.

Alternatively, use hair strand stock images. Place them on this layer and blend the edges. The key is making additions look natural, not pasted on.
Use the Smudge tool on areas where hair meets the dress or body. This softens transitions and prevents that cut-out appearance that screams “fake.”
Layer in Falling Petals
Create a new layer above everything. Import your petal images here. Arrange them throughout the scene, varying sizes and rotations. Randomness looks more natural than perfect placement.
The petals probably look too bright initially. Add a Hue/Saturation adjustment layer clipped to the petals layer. Reduce Lightness by -30 to match the scene’s overall tone.
Now add motion. Apply Motion Blur to the petals layer. The amount depends on your image size and desired effect. Start around 20-30 pixels and adjust from there. This creates that dreamy falling sensation.
Add Magical Sparkle Elements
Create another layer above the petals. Using white diamond brushes, paint sparkles throughout the scene. They’ll look too subtle at first.
Duplicate this sparkle layer three times. Then merge all four layers together. This intensifies the effect without looking artificial. The layered approach gives depth that single-layer sparkles lack.
Apply Color Grading
Here’s where the emotional tone really emerges. Add a Color Balance adjustment layer affecting all layers. Push midtones toward blue and cyan. Add slight blue to highlights too.
Create a Curves adjustment layer. Pull down the midtones slightly while lifting shadows a bit. This creates that soft, dreamy contrast that defines emotional portraits.
Finally, add a subtle blue Photo Filter adjustment layer. Set opacity around 20-30%. This unifies all elements with consistent color treatment.
Fine-Tune With Dodge and Burn
Create a new layer set to Overlay blend mode. Fill it with 50% gray. Now you can dodge and burn non-destructively.
Use a soft brush at low opacity (10-20%). Paint white to dodge (lighten) areas you want to emphasize. Paint black to burn (darken) areas that should recede.
Focus dodging on the subject’s face, hair highlights, and key petal areas. Burn around the edges and less important background elements. This technique adds dimension and guides the viewer’s eye.
Add Final Sharpening
Flatten a copy of your entire image. Apply Unsharp Mask with modest settings. Something like Amount: 70%, Radius: 1.5, Threshold: 3 works as a starting point.
Don’t over-sharpen. The dreamy aesthetic requires some softness. You want to enhance details without destroying the ethereal mood you’ve built.
Why This Technique Works
Photo manipulation succeeds when all elements feel cohesive. The blur, color grading, and lighting adjustments make disparate stock images look like they belong together.
Moreover, the dodge and burn technique adds polish that separates professional-looking work from amateur attempts. Those subtle tonal shifts create depth and dimension that flat composites lack.
The process takes practice. Your first attempt won’t look perfect. But each manipulation teaches you about light, color, and composition. So keep experimenting with different stock images and techniques.
These skills transfer to other projects too. Understanding blur for depth works in product photography. Color grading applies to portrait retouching. Dodge and burn improves virtually every image type.