Ever wanted to blend multiple photos into something that looks impossible? That’s exactly what photo manipulation lets you do.
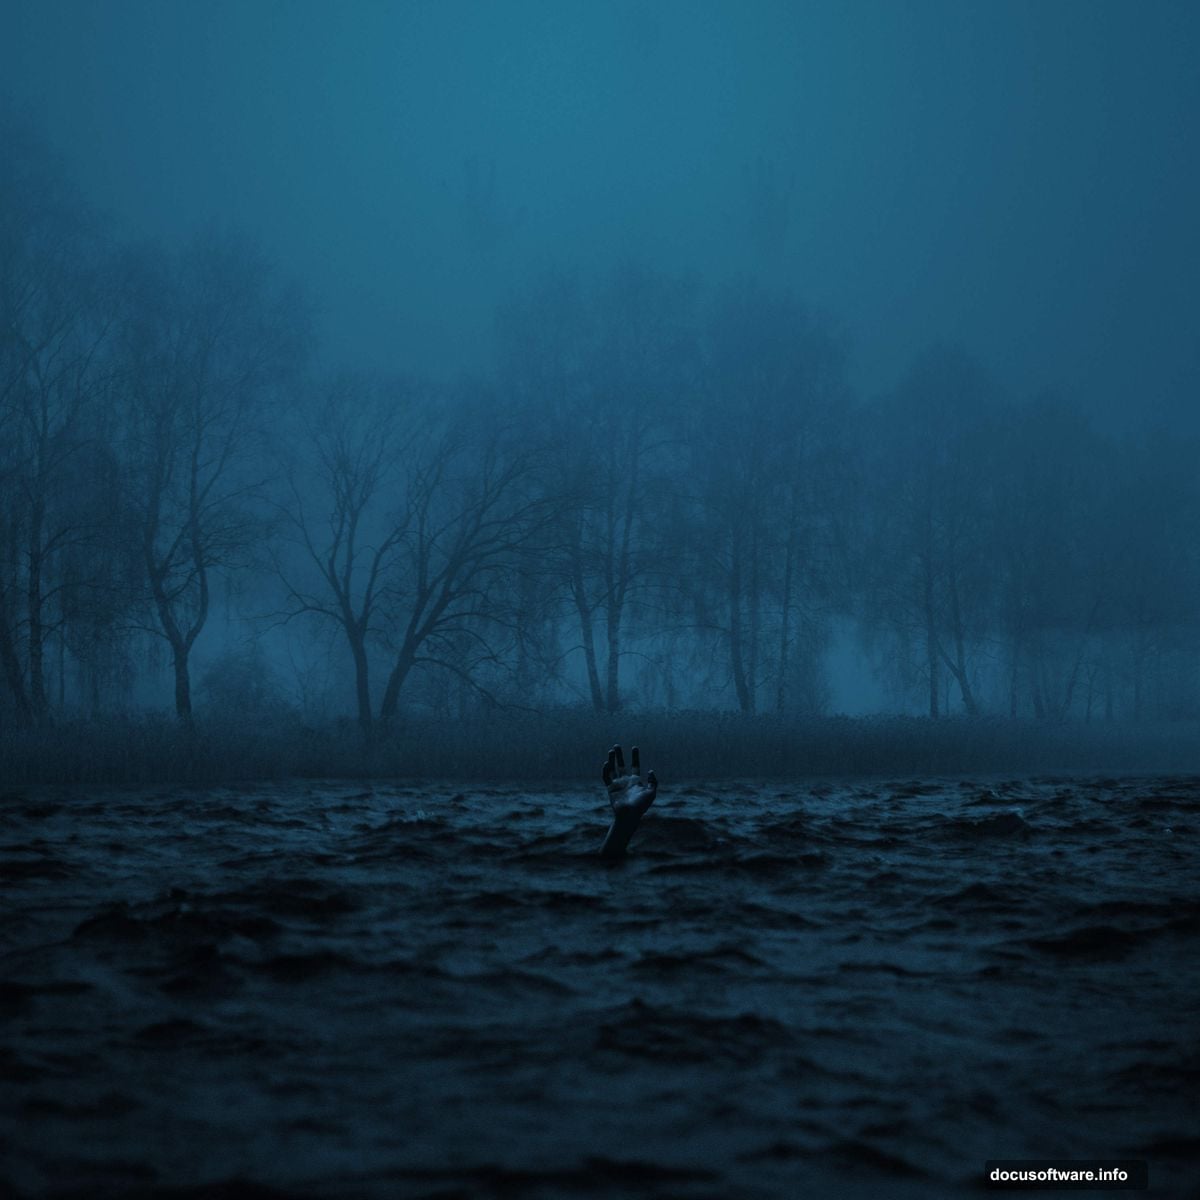
This tutorial walks through creating an eerie lakeside scene. We’ll combine water textures, blend backgrounds, and add atmospheric effects. Plus, you’ll learn techniques that work for any photo manipulation project.
The best part? You don’t need to be a Photoshop expert. Just follow each step carefully.
Set Up Your Canvas Correctly
Start with the right foundation. Otherwise, you’ll fight resolution problems later.
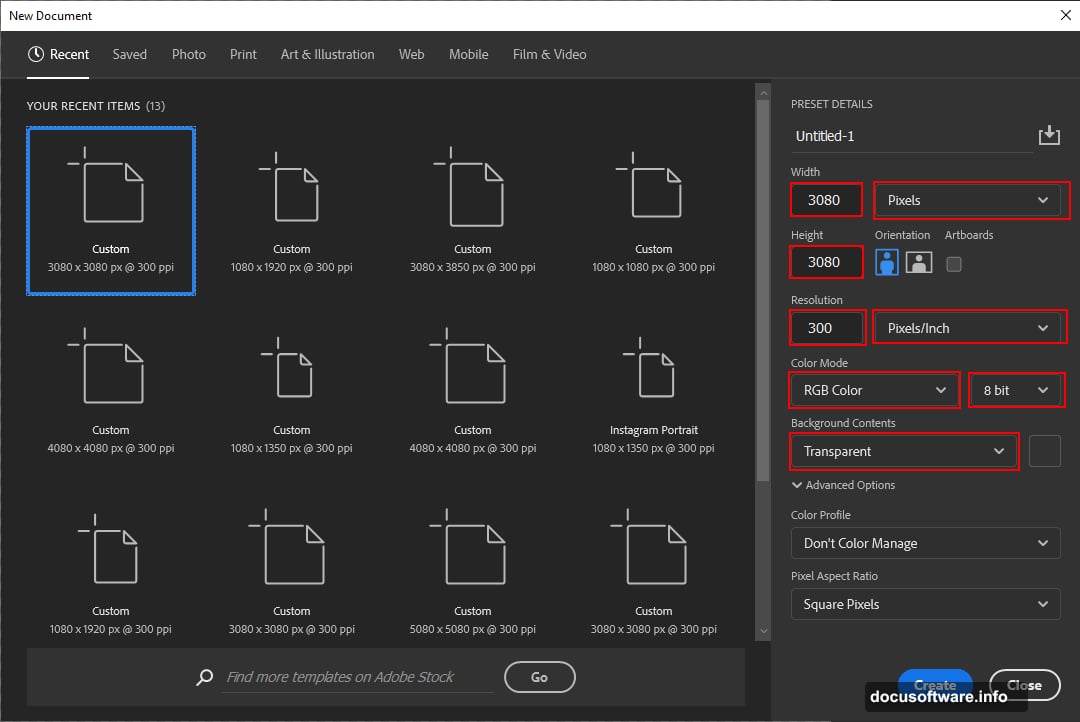
Create a new file in Photoshop. Go to File > New and input these settings:
- Width: 3080px
- Height: 3080px
- Resolution: 300px
- Color Mode: RGB Color 8 bit
- Background: Transparent
Why these dimensions? They give you enough resolution for print quality while staying manageable for editing. Plus, the square format works great for social media.
Remember to keep your background transparent. That flexibility helps when you start layering images.
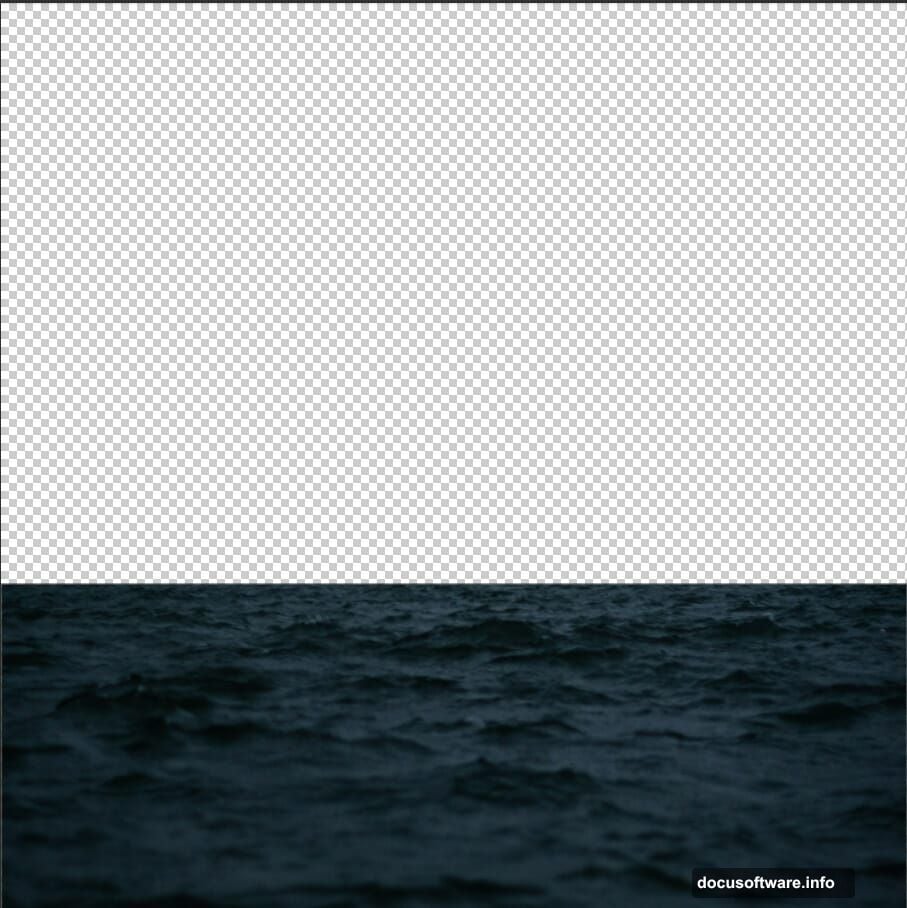
Place and Blend the Ocean Background
Now comes the fun part. We’re building the base layer.
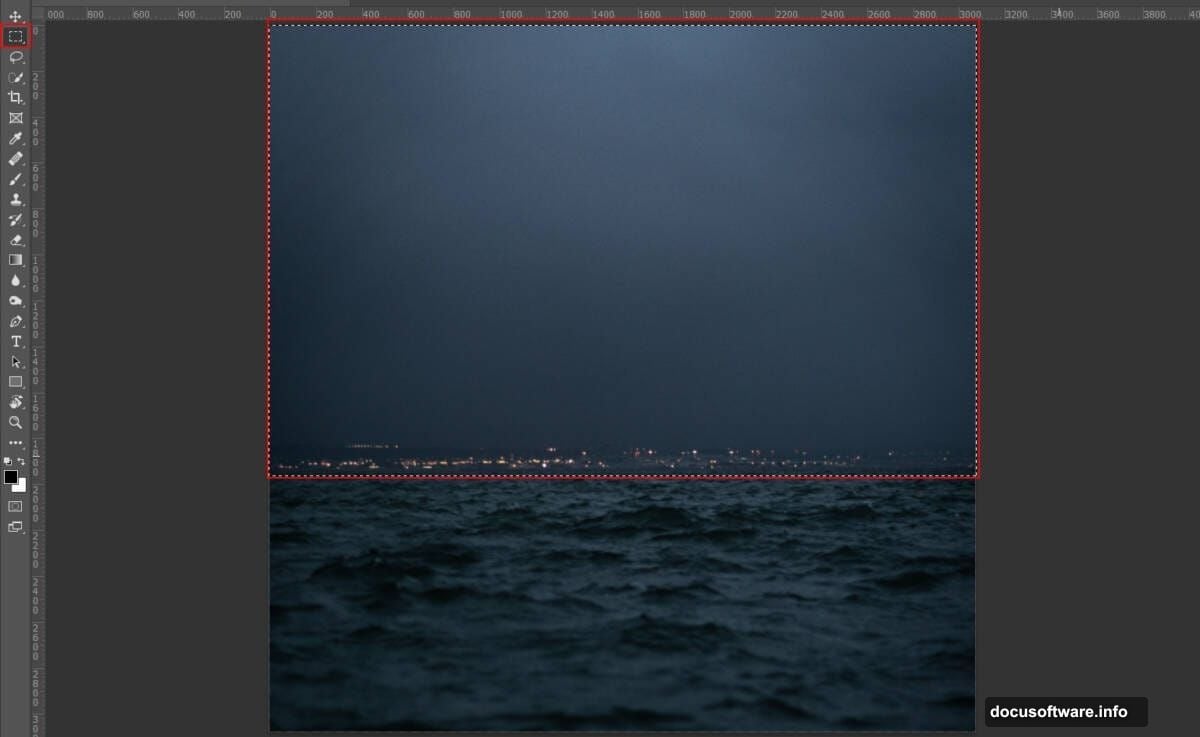
Go to File > Place and select your ocean image. Position it using the Transform tool (Ctrl/Cmd + T). Hold Alt + Shift while resizing to maintain proportions. In Photoshop CC, just hold Alt.
Next, create a layer mask. Select the Rectangular Marquee Tool (M). Then select the sky portion you want to remove. Press Alt + Delete to crop it out.
Here’s a crucial tip: Make sure your layer mask is selected first. Your foreground and background colors should be set to default black and white. Otherwise, the mask won’t work properly.
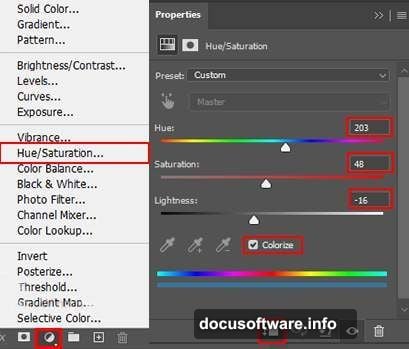
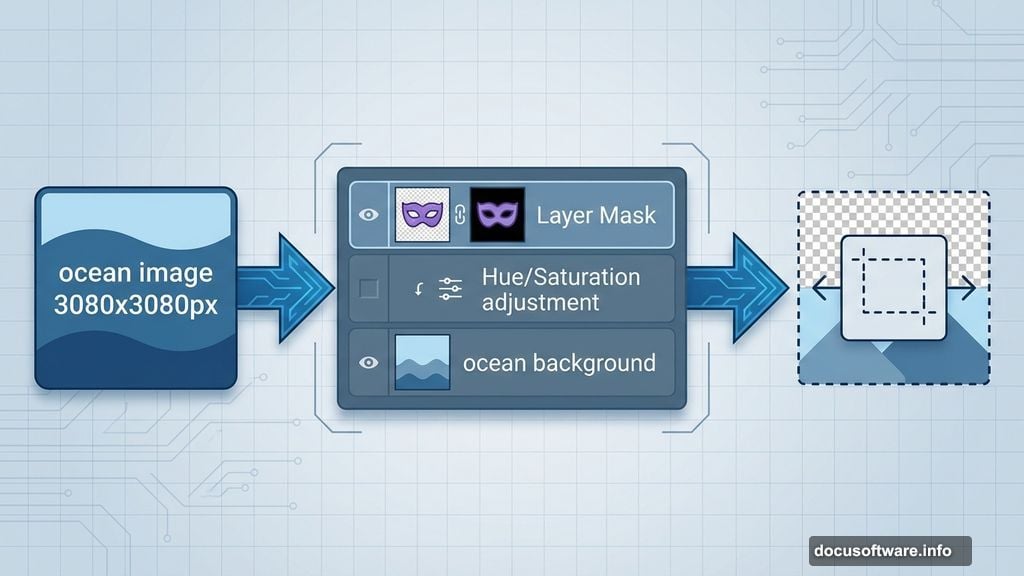
Adjust the Ocean Colors
Time to make that ocean match your vision. Add a Hue/Saturation adjustment layer.
This lets you shift colors without destroying your original image. Plus, you can tweak it anytime later. That’s the beauty of adjustment layers.
Drag the Hue slider to change the overall color tone. Move the Saturation slider to make colors more or less intense. And adjust Lightness if your ocean looks too dark or bright.
Experiment freely. You can always reset if something looks wrong.
Layer the Lake Image
We need water in the foreground too. Repeat the same placement process.
Go to File > Place and select your lake image. Position it with Transform (Ctrl/Cmd + T). Hold Alt + Shift while resizing to keep proportions locked.
Create a layer mask again. Use the Rectangular Marquee Tool (M) to select birds and unwanted water areas. Press Alt + Delete to remove them.
This creates that seamless blend between ocean and lake. The trick is making sure the waterlines match up naturally.
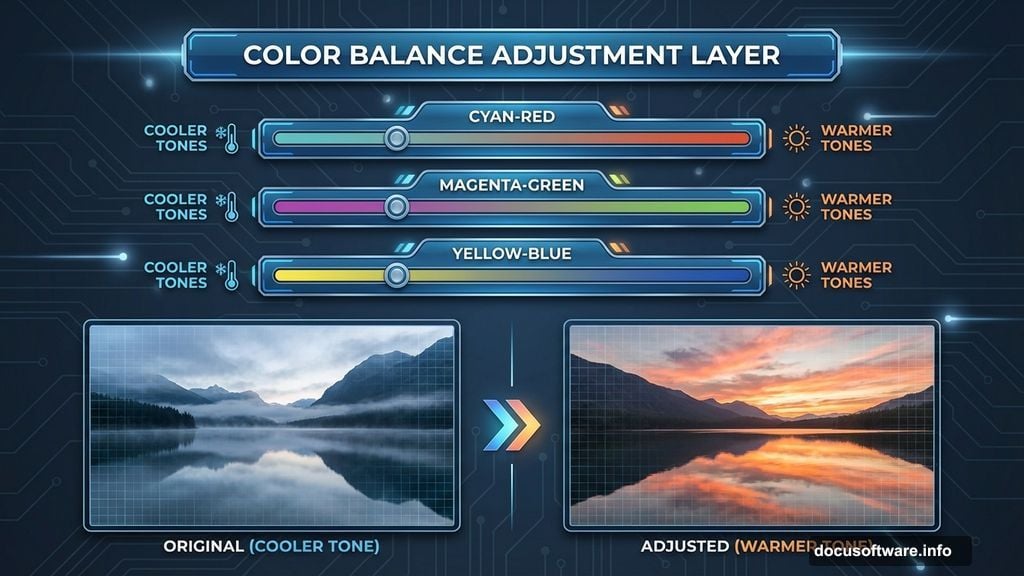
Balance the Lake Colors
Now your lake needs color correction. Add a Color Balance adjustment layer.
This tool gives you precise control over color temperature. Shift the sliders toward warmer tones for sunset vibes. Or push them cooler for that eerie, mystical feel.
Focus on the midtones first. Then adjust shadows and highlights separately. This creates depth instead of flat, uniform coloring.
Most importantly, match the lake colors to your ocean background. They should look like they exist in the same world.
Fine-Tune with Hue and Saturation
Add another Hue/Saturation adjustment layer for the lake. Yes, another one.
Why? Because different elements need different adjustments. The ocean and lake catch light differently. So they need separate color tweaks.
This time, focus on making the lake blend seamlessly with the ocean. Look for color mismatches along the horizon line. Then adjust until they disappear.
Small changes make big differences here. Don’t overdo it.
Add Depth with Curves
Curves give you powerful control over lighting. Add a Curves adjustment layer now.
This tool seems intimidating at first. But it’s actually simple. The bottom-left corner controls shadows. The top-right corner controls highlights. The middle controls midtones.
Click anywhere on the curve line and drag. Drag up to brighten. Drag down to darken. Create an S-curve for classic contrast.
For mystical scenes, try darkening shadows slightly. Then brighten highlights just a bit. This creates that dreamy, otherworldly atmosphere.
Isolate the Hand Using Pen Tool
Time to add the main subject. Open your hand image in Photoshop.
Select the Pen Tool (P). This takes practice but gives you the cleanest selections. Start clicking around the hand’s outline to create anchor points.
The Pen Tool creates straight lines between points. For curves, click and drag to create direction handles. These let you control the curve’s shape.
Once you’ve traced the entire hand, close the path by clicking the starting point. Right-click and choose “Make Selection.” Then create a layer mask to isolate the hand.
This technique works for any object you want to extract cleanly.
Position the Hand Dramatically
Place your isolated hand into the main scene. Use the Transform tool (Ctrl/Cmd + T) to resize and position it.
Think about composition here. Where does the hand look most dramatic? Rising from the water? Reaching toward the sky?
Try different positions before committing. Sometimes the most unexpected placement creates the strongest impact.
Also adjust the hand’s opacity slightly if it looks too sharp against the background. Subtle transparency helps blend elements naturally.
Add Atmospheric Mist
Mystical scenes need atmosphere. That’s where mist comes in.
Download cloud or mist brushes if you don’t have them already. Create a new layer above your other elements. Select a soft mist brush and set white as your foreground color.
Paint mist strategically. Add it near the water’s surface. Layer it behind the hand to create depth. Use it to soften harsh edges between elements.
Lower the layer opacity to make the mist look natural. Somewhere between 30-50% usually works best. Too opaque looks fake.
Apply Camera Raw Filter for Final Polish
Almost done. Now we add the final magical touch.
Go to Filter > Camera Raw Filter. This opens a powerful editing panel. Start by adjusting the basic settings.
Increase Clarity slightly for sharper details. Add a touch of Vibrance to make colors pop. Reduce Highlights if anything looks blown out. Lift Shadows to reveal hidden details.
Then move to the Color Grading panel. Add teal tones to shadows for that mystical underwater feel. Push highlights toward warm oranges or cool blues depending on your mood.
Finally, add a subtle vignette. This darkens the edges and draws the viewer’s eye to the center of your scene.
Essential Photo Manipulation Techniques
These steps teach core skills you’ll use repeatedly. Let’s recap the most important ones.
Layer masks let you hide parts of images non-destructively. Master this and you’ll work faster. Adjustment layers give you endless color control without damaging originals. Use them generously.
The Pen Tool takes practice but rewards you with clean selections. It’s worth learning properly. And blending modes help layers interact naturally. Experiment with different modes to see what works.
Most importantly, work non-destructively. Keep original layers intact. Use adjustment layers instead of direct edits. This lets you revise anything later without starting over.
Common Photo Manipulation Mistakes
Avoid these pitfalls that kill believability.
First, mismatched lighting destroys the illusion. Make sure all elements appear lit from the same direction. Add shadows where they should naturally fall.
Second, color temperature inconsistencies scream “fake.” If your background looks warm, your added elements should too. Use Color Balance to match temperatures.
Third, resolution mismatches create obvious composites. Don’t mix low-res elements with high-res backgrounds. They’ll never blend convincingly.
Finally, over-editing makes images look processed. Less is often more. Stop before you think you should.
Why This Project Builds Real Skills
Photo manipulation isn’t just about making cool art. It teaches fundamental Photoshop skills.
You learn precise selection techniques. You master color correction and matching. You understand how lighting creates believability. And you develop an eye for composition.
These skills transfer to product photography, portrait retouching, and digital art. They’re not just for fantasy scenes. Professional photographers and designers use these exact techniques daily.
Plus, creating impossible images pushes your creativity. You start seeing potential combinations everywhere. That creative vision becomes valuable across all design work.
Start experimenting today. Your first attempts won’t be perfect. But each project teaches you something new. And that mystical lake scene? It’s just the beginning of what you can create.