
Photo manipulation is where Photoshop really shines. But most tutorials skip the crucial techniques that make surreal images feel believable.
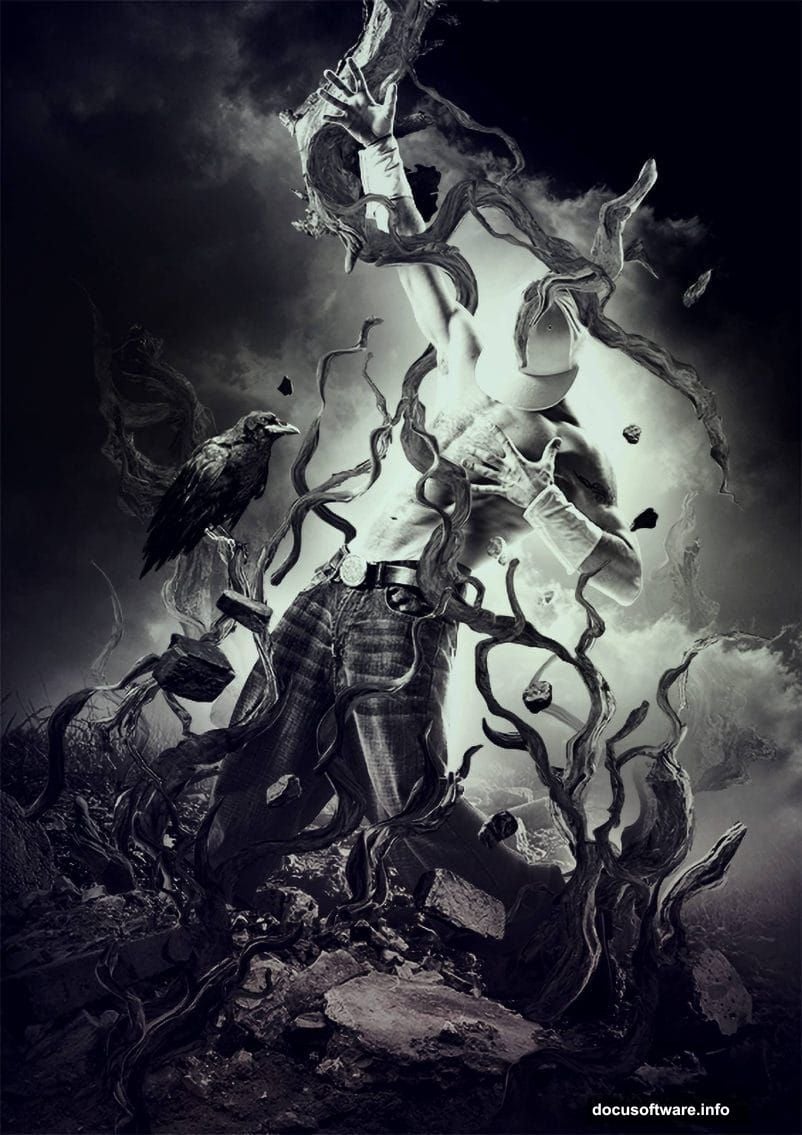
This guide shows you how to create a floating dancer surrounded by levitating branches and crumbling bricks. More importantly, you’ll learn the blending mode tricks and Shadow/Highlights adjustments that make fantasy look real.
The secret? Layer blending modes combined with strategic masking. These two techniques transform disconnected stock photos into cohesive artwork.
What You’ll Need
Before starting, grab these resources. The tutorial provides most assets in a downloadable pack. However, you’ll need a dancer photo separately.
Stock image sites offer thousands of dancer poses. Look for images shot against clean backgrounds with dramatic lighting. The original tutorial uses a modern dancer from ShutterStock, but any dynamic pose works.
You’ll also need water backgrounds, ground textures, and various natural elements. The tutorial pack includes specific files, but feel free to substitute your own textures for unique results.
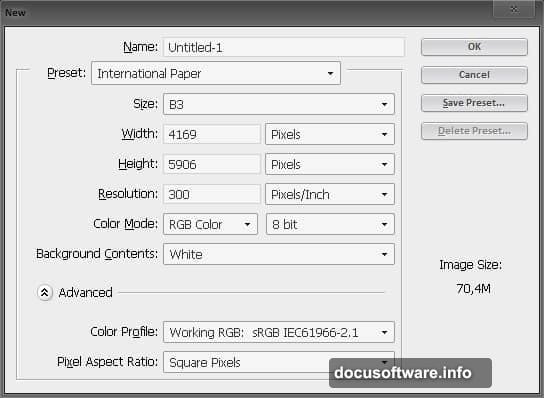
Set Up Your Canvas
Start with a new document at your preferred size. Fill the background layer with medium gray (#A1A1A1) using the Paint Bucket tool.
Next, add a gradient map adjustment layer. Go to Layer > New Adjustment Layer > Gradient Map. Choose black to white for the gradient.
Why start with gray and a gradient map? This creates a neutral base that helps you match tones across different stock photos later. Plus, adjusting the gradient map affects the entire image’s mood without redoing individual layers.
Build the Ground Foundation
Add your first ground texture layer. Scale it using Free Transform (Ctrl/Cmd+T) to fit your composition.
Here’s where smart objects become essential. Right-click your ground layer and select “Convert to Smart Object.” This lets you apply adjustments non-destructively.
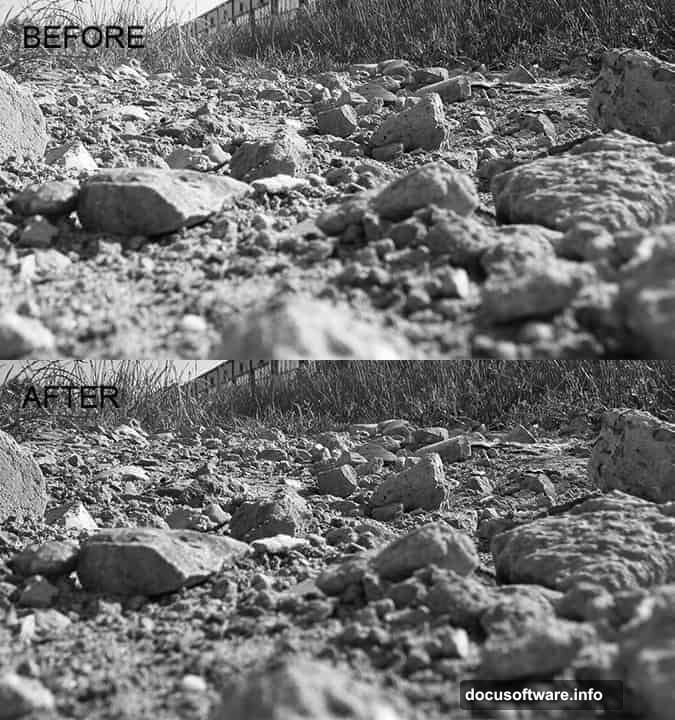
Now apply Shadow/Highlights adjustment. Go to Image > Adjustments > Shadows/Highlights. Increase the shadow details to bring out texture in darker areas. This makes flat textures look three-dimensional.
The Shadow/Highlights tool often gets overlooked. But it’s crucial for blending multiple photos. It reveals hidden detail and creates depth that makes composites believable.
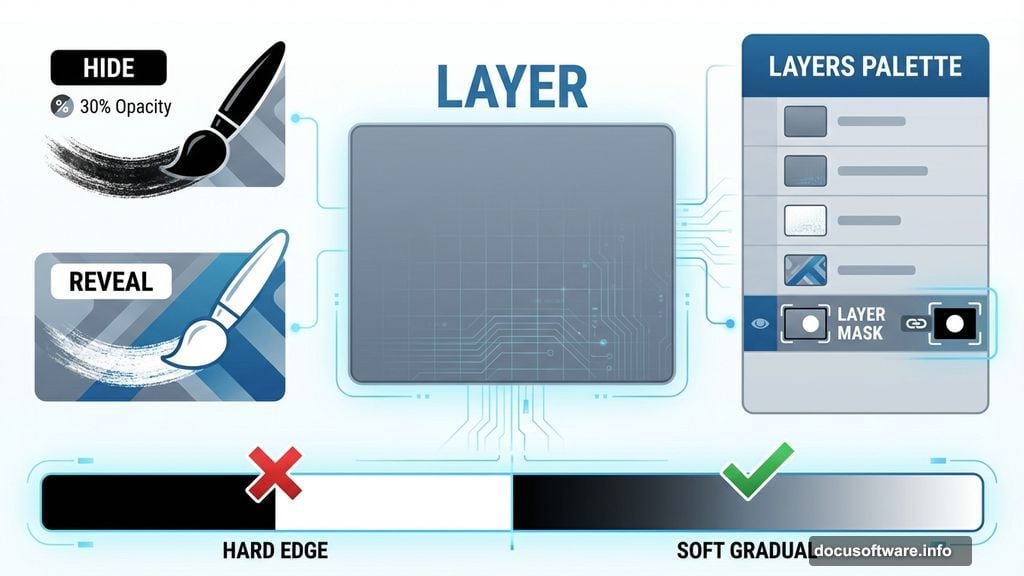
Master Layer Masking
Add a layer mask to your ground layer. Click the “Add layer mask” icon at the bottom of the Layers palette.
Select a soft brush and paint with black on the mask. This hides unwanted areas while keeping everything non-destructive. You can always paint with white to reveal hidden parts again.
Work with low opacity (30-50%) for gradual blending. Hard edges scream “bad Photoshop job.” Soft, gradual transitions look natural.
Because one ground layer won’t cover everything, add a second ground texture. Repeat the same process: convert to smart object, apply Shadow/Highlights, add layer mask, and blend edges.
Multiple layers with subtle blending beat one heavily manipulated layer every time.
Add Atmospheric Elements
Clouds create drama and help unify different elements. Add cloud layers using the same technique as the ground.
Convert each cloud layer to a smart object first. Then add layer masks and paint away harsh edges. Remember to work with low brush opacity for natural-looking clouds.
Add another gradient map adjustment layer at the top of your stack. Duplicate your first gradient map layer (Ctrl/Cmd+J) and drag it to the top. This ensures consistent tones across all elements.
Gradient maps work like magic for unifying disparate stock photos. They force everything into the same tonal range, making unrelated images look like they belong together.

The Liquify Tool for Organic Movement
Here’s where things get interesting. To make branches appear to float and bend naturally, use the Liquify tool.
Open your branch or twig image. Go to Filter > Liquify. Use the Forward Warp tool to push and pull the branches into curved, dynamic shapes.
The Liquify tool turns stiff, straight twigs into flowing, magical elements. Push gently and work gradually. Extreme distortions look fake.
After liquifying, add the bent branches to your main composition. Use layer masks to blend them seamlessly with other elements.
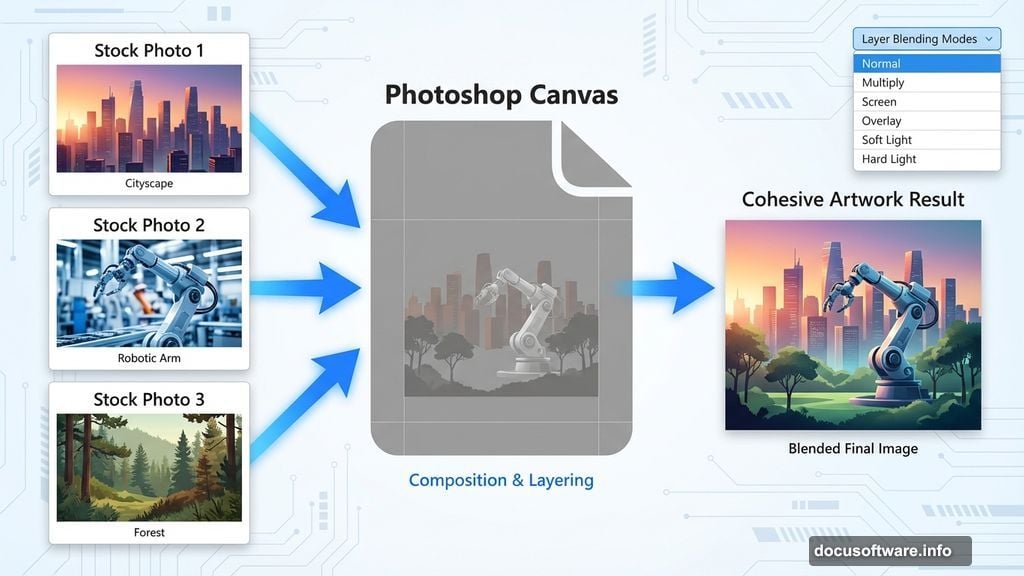
Blending Modes for Ethereal Effects
Blending modes determine how layers interact. Instead of simply stacking layers, blending modes create transparency, luminosity, and atmospheric effects.
Experiment with Screen, Overlay, and Soft Light modes for floating elements. Screen mode works great for lightening clouds and creating glow effects. Overlay adds contrast while maintaining luminosity.
Change blending modes using the dropdown menu at the top of the Layers palette. Try different modes and see what works. There’s no single “correct” blending mode for every situation.
For the dancer, use Normal blending mode but adjust opacity if needed. The dancer should remain the focal point while other elements fade into supporting roles.
Shadow/Highlights for Dimension
Every added element needs Shadow/Highlights adjustment. This single technique separates amateur composites from professional work.
Convert each layer to a smart object before applying Shadow/Highlights. This keeps adjustments editable. If something looks wrong later, you can tweak the settings without starting over.
Increase shadow detail to reveal texture. Decrease highlight intensity to prevent blown-out bright areas. The goal is revealing detail while maintaining overall tonal balance.
Shadow/Highlights adjustment makes flat stock photos look three-dimensional. It’s the difference between elements looking pasted on versus integrated into the scene.
Add Flying Debris
Levitating bricks, roots, and stones create motion and energy. Add these elements individually, each on its own layer.
Convert each to smart objects and apply Shadow/Highlights adjustment. Then use layer masks to blend edges. Finally, experiment with blending modes to create transparency and atmospheric haze.
Position debris carefully. Too much creates chaos. Too little feels empty. Aim for dynamic balance where the eye has places to rest between active areas.
Some debris should overlap the dancer while other pieces stay behind. This creates depth and makes the dancer feel embedded in the environment rather than floating on top.
Common Mistakes to Avoid
Hard edges ruin photo manipulation. Always use soft brushes with low opacity for masking. Gradual transitions look natural.
Skipping smart objects means destructive editing. You’ll regret it when you need to adjust something later but can’t without starting over.
Ignoring Shadow/Highlights makes composites look flat. Every element needs dimension. This adjustment reveals texture and creates believable depth.
Using too many blending modes creates confusion. Stick with one or two blending modes that enhance your specific elements. More isn’t better.
Final Polish
After building your composition, step back and evaluate overall balance. Are highlights too bright? Are shadows too dark? Does the eye flow naturally through the image?
Add final adjustment layers at the top of your layer stack. Curves or Levels adjustments fine-tune overall contrast. Hue/Saturation tweaks color harmony.
Sharpen strategically. Add a merged layer at the top (Ctrl/Cmd+Alt+Shift+E) and apply Unsharp Mask or Smart Sharpen. Then add a layer mask and sharpen only important areas like the dancer.
Selective sharpening directs attention to focal points while keeping backgrounds softer. This creates depth and professional polish.
Why This Technique Works
Photo manipulation succeeds when disparate elements look like they belong together. Layer blending modes, Shadow/Highlights adjustments, and careful masking achieve this integration.
Smart objects keep everything flexible. You can experiment, make mistakes, and change direction without destroying your work. Non-destructive editing is professional editing.
The Liquify tool adds organic movement that static stock photos lack. Subtle distortions make rigid elements feel alive and magical.
This isn’t just about following steps. It’s about understanding how layers interact, how light behaves, and how masking creates seamless transitions. Master these concepts and you’ll create stunning photo manipulations beyond this tutorial.
Experiment with your own stock images and textures. The techniques stay the same even when the subject matter changes. That’s the beauty of understanding process over memorizing steps.