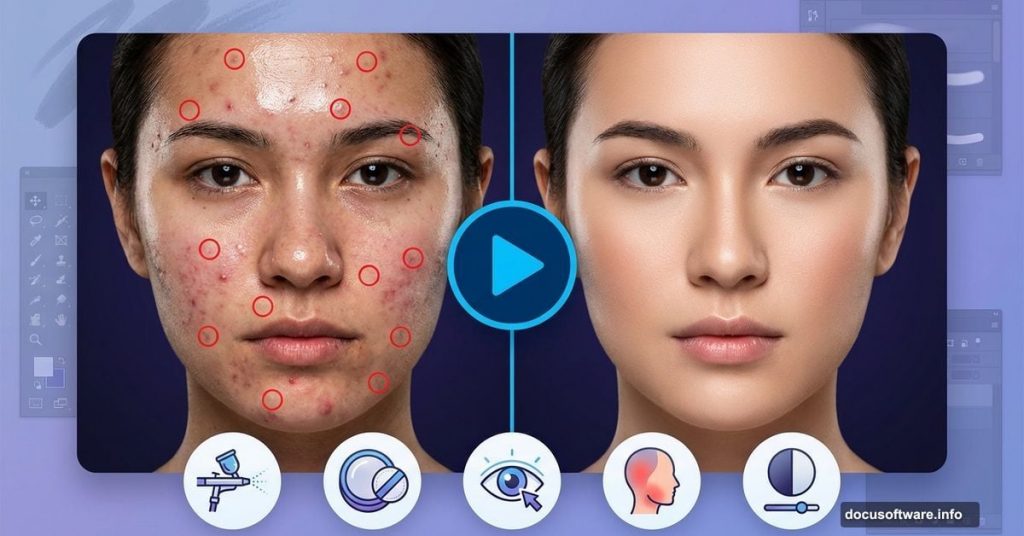
Skin retouching eats up hours. One blemish leads to another, and suddenly you’re pixel-peeping instead of creating.
SparkleStock just released five Photoshop actions that cut this workflow down to seconds. Play the action, paint over problem areas, and watch skin transform while keeping natural texture intact. Plus, they’re completely free.
Let’s break down what each action does and why they matter for portrait work.
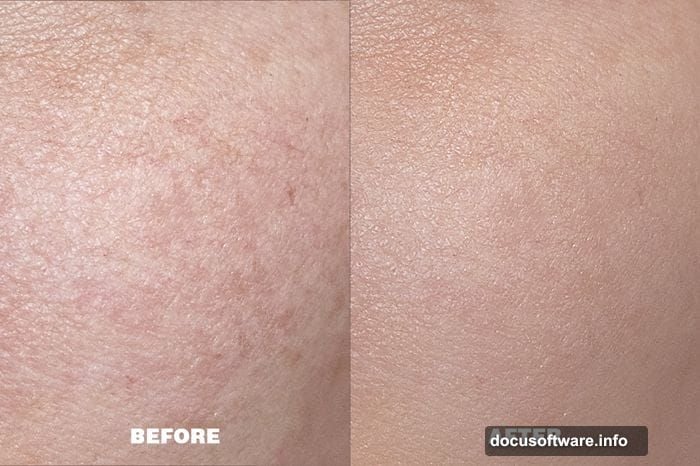
Skin Airbrushing Without the Plastic Look
Most automatic skin smoothing destroys pores and texture. You end up with that weird plastic mannequin effect nobody wants.
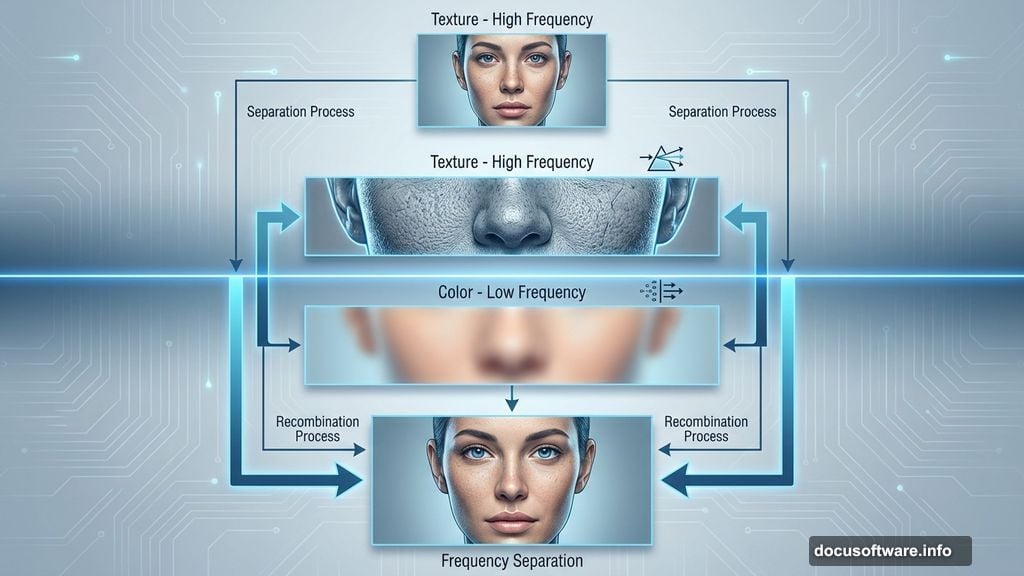
This airbrushing action takes a different approach. It smooths skin tone without obliterating details. The secret? It separates color information from texture using frequency separation techniques behind the scenes.

So you get that polished magazine look while keeping skin looking like actual skin. Just play the action and brush over the areas you want to smooth. The algorithm handles the technical stuff.
Mattifier Kills Unwanted Shine
Studio lights create hot spots on foreheads and noses. Even professional makeup can’t eliminate all shine under bright lights.
The mattifier action reduces these shiny areas without darkening skin tone. It specifically targets highlight areas that read as oily rather than glowing.
This works especially well for corporate headshots and professional portraits. Nobody wants their LinkedIn photo screaming “I’m nervous and sweating.”
Eye Brightening That Actually Looks Natural
Red, tired eyes kill otherwise perfect portraits. Traditional eye brightening often looks fake because it just cranks up brightness without addressing the underlying color cast.
SparkleStock’s brighten eyes action handles both issues simultaneously. It reduces redness in the whites while increasing overall brightness. The result looks like your subject got eight hours of sleep instead of four.
Paint over the eye area and watch the transformation. The action preserves iris color and detail while only affecting the whites.
Redness Reducer Fixes Skin Tone Issues
Some people have naturally ruddy complexions. Others get flushed under hot studio lights. Either way, excessive redness draws attention away from facial features.
The redness reducer action targets warm tones specifically. It cools down overly pink or red areas without affecting overall skin color.
This proves particularly useful for outdoor portraits shot in direct sunlight. That harsh light often brings out red undertones that look fine in person but photograph unflattering.
Contrast Boost Without Clipping
Adding contrast normally means crushing blacks and blowing out highlights. You gain punch but lose detail in shadows and bright areas.
The clipping-free contrast action increases separation between tones without pushing anything to pure black or pure white. Shadows stay detailed. Highlights maintain texture.
So portraits gain depth and dimension while preserving all the information in the file. This matters tremendously for commercial work where clients might request edits later.
How These Actions Actually Work
Each action generates adjustment layers with masks. Play the action, then paint white on the mask where you want the effect applied.
The beauty of this approach? Total control. Paint with a soft brush at low opacity to build up effects gradually. Made a mistake? Paint black to remove the effect from specific areas.
Plus, all layers stay editable. Adjust opacity sliders to fine-tune intensity. Modify underlying adjustments if you want different results. Nothing gets permanently baked into your image.
Free Version vs Pro Version
The free pack includes five essential actions covering the most common retouching needs. For most portrait photographers, these five actions handle 80% of typical retouching work.
The pro version expands to 20 actions with specialized tools. It adds ultra mattifier for extreme shine, sharp airbrushing for detailed work, and freckle removal for specific client requests.
It also includes teeth whitening, lip enhancer, and high-pass contrast actions. These target specific facial features rather than overall skin tone.
Installation Takes Seconds
Download the ATN file. Open Photoshop’s Actions panel from Window > Actions. Drag the file directly onto the panel.
All five actions appear instantly. No restart required. Click any action and hit play to test it on your current image.
SparkleStock includes video demos showing exactly how to use each action. The technique works identically across all five: play action, paint mask, adjust opacity if needed.

Real-World Portrait Workflow
Start with skin airbrushing to even out texture. Then apply mattifier to problem shine areas. Brighten eyes next for that alert, energetic look.
Use redness reducer sparingly on cheeks and nose. Finish with clipping-free contrast to add depth and dimension.
The entire process takes 2-3 minutes versus 15-20 minutes doing everything manually. That time savings adds up quickly when you’re editing wedding galleries or corporate headshot sessions.
Compatible With Modern Photoshop
These actions work with Photoshop CC 2018 and newer versions. They use standard adjustment layers rather than deprecated features, so future compatibility looks solid.
Some users reported initial confusion with ZXP installation. Skip that entirely and just use the ATN file. It’s simpler and works identically.
When Automation Beats Manual Work
Portrait retouching involves repeating the same edits across dozens or hundreds of images. Frequency separation, selective sharpening, color correction—you’re basically performing identical operations with minor variations.
Actions eliminate the repetitive setup work. You still control where effects apply and how strong they appear. But you skip the tedious layer creation and filter configuration that takes up most of the time.
That’s the sweet spot: automated setup, manual refinement. You maintain creative control while cutting production time by 75%.
These five free actions deliver professional results without the professional price tag. Download them, test them on your next portrait session, and watch your editing workflow accelerate.