
Want to create mind-bending photo manipulations that stop people mid-scroll? This step-by-step guide shows you how to build a surreal scene featuring a woman carrying a house on her back.
No advanced skills required. Just Photoshop, some stock images, and about an hour of your time. Plus, you’ll learn techniques that work for dozens of other surreal compositions.
Let’s jump in.
What You’ll Need Before Starting
First, grab your source images. You’ll need a lake background, a model photo, a house image, dead branches, a crow, and some falling leaves. Most stock photo sites have these.
Also, make sure you’re working in Adobe Photoshop CC or later. Older versions work too, but some filter names might differ slightly.
One more thing. Save your work frequently. Photoshop crashes happen, especially with heavy manipulation projects. So hit Ctrl+S every few minutes.
Setting Up Your Canvas and Background
Create a new document at 2674×2000 pixels. Fill it with white for now.

Open your lake image. Then drag it onto your white canvas using the Move Tool (press V). The image probably won’t fit perfectly at first. So grab the Free Transform Tool by hitting Ctrl+T and resize until the lake fills your canvas.
Here’s where it gets interesting. We want those background trees soft and dreamy, not sharp and distracting.
Making Background Trees Fade Away
Activate the Lasso Tool by pressing L. Select just the trees area in your background. Set the feather radius to 80 pixels for smooth edges.
Hit Ctrl+J to duplicate your selection onto a new layer. Right-click that layer and convert it to a Smart Object. This lets you edit non-destructively later if needed.
Now go to Filter > Blur > Gaussian Blur. Set the radius to 12 pixels. Watch those trees turn hazy and atmospheric. That’s the look we want.
But we’re not done with those trees yet. Create a new Curves adjustment layer and set it as a Clipping Mask. Tweak the lightness and color slightly. This adds depth and makes the blur look more natural.
Adjusting Overall Color Balance
Create a Color Balance adjustment layer on top of everything. Focus on the Midtones settings. Shift the colors toward cooler tones if your lake looks too warm, or vice versa.

This step matters more than you’d think. It establishes the mood for your entire composition. Plus, it makes all your later additions blend more naturally.
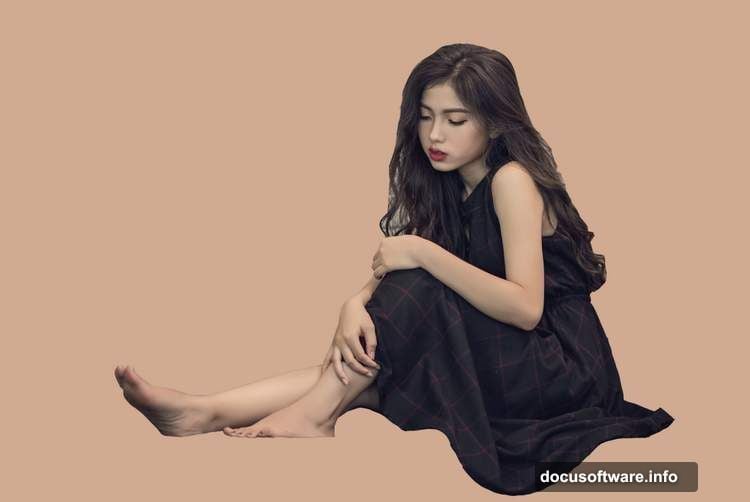
Preparing Your Model Layer
Cut out your model from her original background. Use whatever selection method you prefer – Pen Tool, Select and Mask, or even Magic Wand if the background is simple.
Duplicate the extracted model onto a new layer. Between the background and model layers, add a Color Fill layer. This helps you spot any rough edges in your extraction.
Here’s the tricky part. The model’s dress needs to match the ground’s perspective. So go to Filter > Liquify. Use the Forward Warp Tool (press W) and gently pull the bottom of the dress upward. This creates the illusion she’s standing naturally on that shoreline.
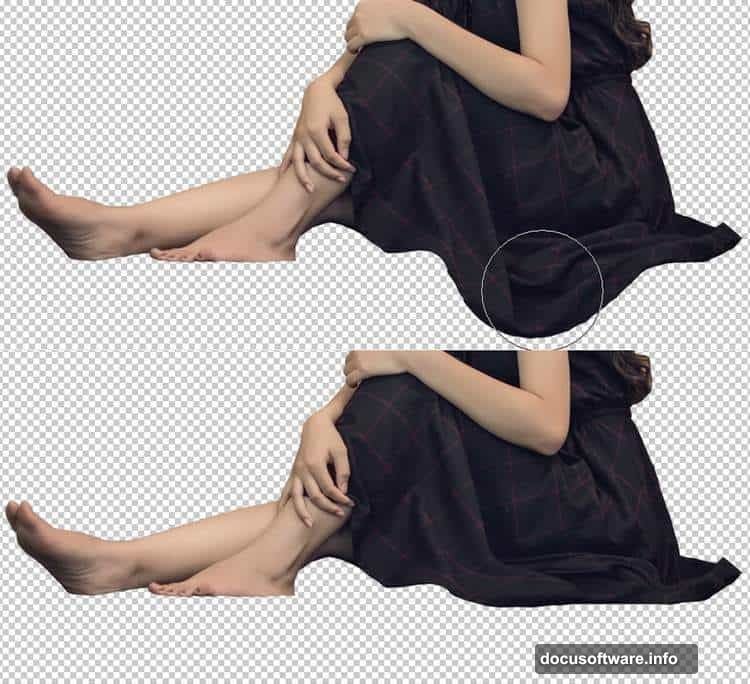
Fixing Unwanted Details
Click the mask icon at the bottom of your Layers panel. This adds a mask to your model layer.
Grab a hard round brush. Set the color to black. Then paint over any stray hairs, dress fragments, or other bits that don’t belong. Black hides, white reveals. Remember that.
Pay special attention to where the dress meets the ground. Those edges need to be clean for the illusion to work.

Adding a Realistic Foot
Open your foot reference image. Take the right foot and add it to replace the model’s left foot. Flip it horizontally by going to Edit > Transform > Flip Horizontal.
Hit Ctrl+T to rotate the foot slightly. It needs to match the angle of the leg above it. Take your time here. Bad perspective ruins photo manipulations faster than anything else.
Add a mask to the foot layer. Use a soft black brush to blend where the foot meets the existing leg. Feather those edges until you can’t tell where one ends and the other begins.
Color Matching the Foot
Create a Hue/Saturation adjustment layer. Set it as a Clipping Mask so it only affects the foot layer.
Desaturate the foot slightly. Match the color tone to the rest of the model’s skin. Every screen displays colors differently, so trust your eye more than specific numbers.
Building the House Element
Open your house image. This part requires careful extraction because houses have lots of edges and details.
Use the Pen Tool for the cleanest selection. Yes, it’s slower than magic selection tools. But the results look professional instead of amateur.
Position the house on the model’s back. Scale it down until the proportions look believable. A full-sized house would crush a person, obviously. But a miniature house carried like a backpack? That’s surreal but readable.
Adding Dead Branches for Drama
Import your dead branch images. Arrange them coming out of or around the house. This adds visual interest and reinforces the surreal, slightly dark mood.
Each branch needs its own layer. That way you can adjust positions individually later. Plus, you might want to delete or hide branches that don’t work.
Use layer masks to blend where branches overlap the house or model. Soft brushes work best for organic elements like branches.
Placing the Crow Accent
Add your crow image. Position it perched on the house or a branch. Crows symbolize mystery and transformation, which fits the surreal theme perfectly.
The crow probably needs color adjustment to match your scene’s lighting. Create a Curves adjustment layer clipped to the crow. Darken it slightly if your scene is dim, or lighten it for brighter compositions.
Scattering Falling Leaves
Import your leaf images. Scatter them around the composition, especially near the house and branches. This adds movement and completes the autumnal, melancholy atmosphere.
Vary the leaf sizes. Objects farther from the viewer should be smaller. Rotate each leaf differently too. Nothing in nature falls in perfect alignment.
Consider adding motion blur to some leaves. Go to Filter > Blur > Motion Blur. Set the angle to match a downward trajectory. This makes the falling effect more convincing.
Final Color Grading
Create a master Curves adjustment layer above everything. This is your final color grade that ties the whole composition together.
Adjust the RGB curve for overall contrast. Then fine-tune the individual Red, Green, and Blue channels. Small adjustments in the blue channel especially can shift the entire mood from warm to cool.
Add a Color Lookup adjustment layer if you want. These apply cinematic color grades with one click. The “Moonlight” or “Late Sunset” LUTs work beautifully for surreal compositions.

The Details That Make It Work
Good photo manipulation lives in the details. So zoom in and check every edge where elements meet. Add subtle shadows where the house rests on the model’s shoulders. Paint in highlights where light would naturally hit.
Look at your lighting direction. Is it consistent across all elements? If your background shows late afternoon sun from the right, your house and model need shadows falling left.
Temperature matters too. Warm and cool tones should make sense together. A blazing orange sunset doesn’t work with ice-cold blue shadows unless you’re deliberately creating contrast.
Common Mistakes to Avoid
Don’t over-blur your background. Yes, depth of field matters. But if everything behind your subject turns to mush, it looks fake.
Watch your resolution too. Mixing a 72 DPI image with 300 DPI source files creates obvious quality differences. Keep all elements at similar resolutions.
Also, resist the urge to add every filter Photoshop offers. Beginners often stack ten effects when two would work better. Less is usually more.
Why This Technique Matters

Surreal photo manipulation teaches you fundamental Photoshop skills that apply everywhere. Masking, color matching, perspective correction, lighting consistency – these matter whether you’re creating fantasy art or touching up product photos.
Plus, surreal work gets noticed. Social media algorithms favor eye-catching visuals. A well-executed surreal piece generates more engagement than another sunset photo.
This specific composition works because it’s strange but understandable. Everyone recognizes a house and a person. But putting them together in impossible ways creates visual tension that holds attention.
Taking It Further
Once you’ve mastered this tutorial, experiment with variations. Replace the house with other objects. Try a castle, a tree, a boat, anything that creates interesting symbolism.
Change the environment too. Put your figure in a desert, on a mountain peak, or in an urban landscape. Different backgrounds completely change the mood.
Consider adding more elements. Birds flying from windows. Smoke rising from chimneys. Light glowing from inside the house. Each addition tells more story.
The techniques here form a foundation. Build on them. Break rules intentionally once you understand why those rules exist.
Your first attempt won’t be perfect. That’s fine. Save it, then try again tomorrow. Compare your second version to the first. You’ll spot immediate improvements. That’s progress.