
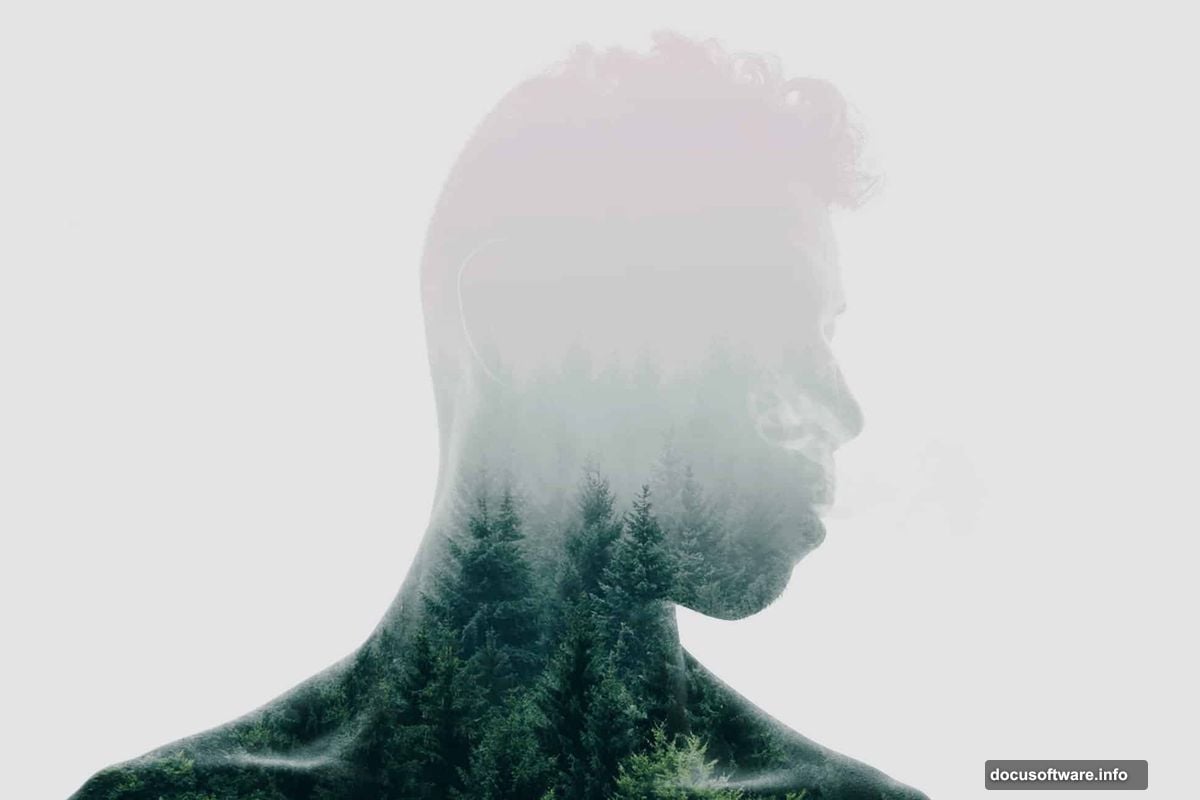
Double exposure photography looks complex. But in Photoshop, you can nail this dramatic effect in under 10 minutes.
This technique blends two images into one artistic piece. Think silhouettes filled with forests, cityscapes, or abstract textures. Plus, you don’t need advanced skills. Just follow these five steps and you’ll create eye-catching compositions that stand out.
Let’s break down exactly how to build this effect from scratch.
Pick Your Base Photo First
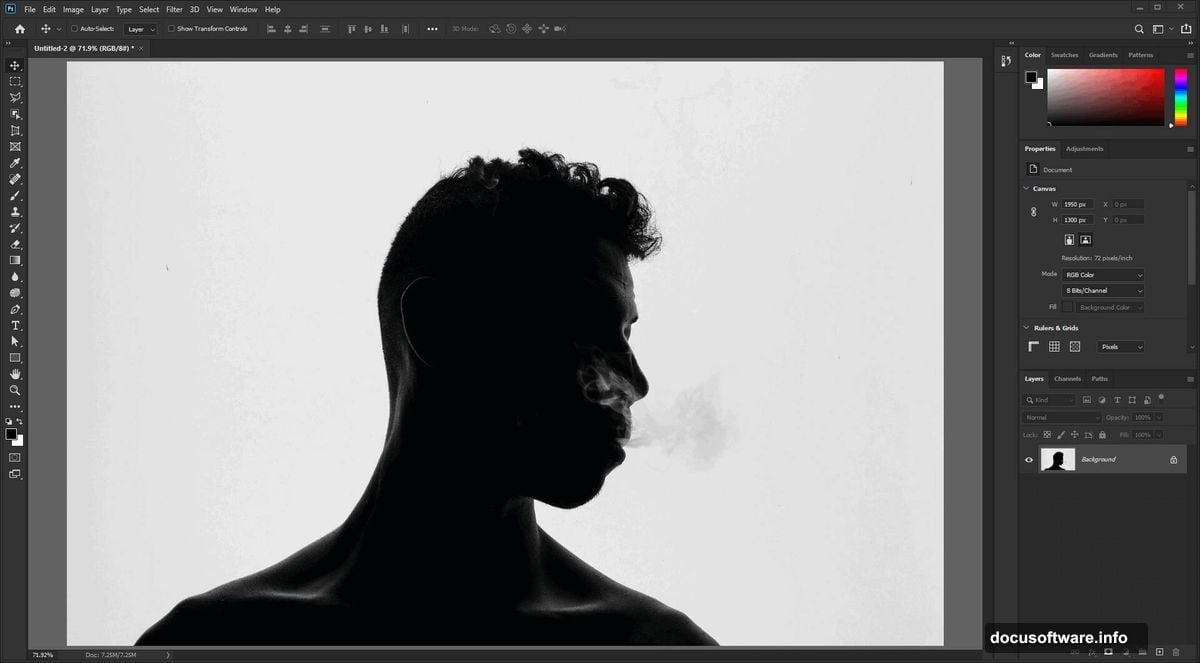
Start with a backlit portrait or silhouette. The key? Dark foreground, bright background.
Why does this matter? That contrast makes cutting out your subject incredibly easy. Your background should be nearly white. Meanwhile, your subject needs to appear as a dark shape against that brightness.
So if you’re shooting your own photos, position your subject between the camera and a strong light source. Window light works perfectly. Moreover, outdoor shots during golden hour deliver ideal conditions for this technique.
Can’t find the perfect backlit shot? You can still make this work with normal photos. But you’ll need extra adjustments to darken your subject and brighten the background. That adds time and complexity to the process.
Screen Mode Does the Heavy Lifting
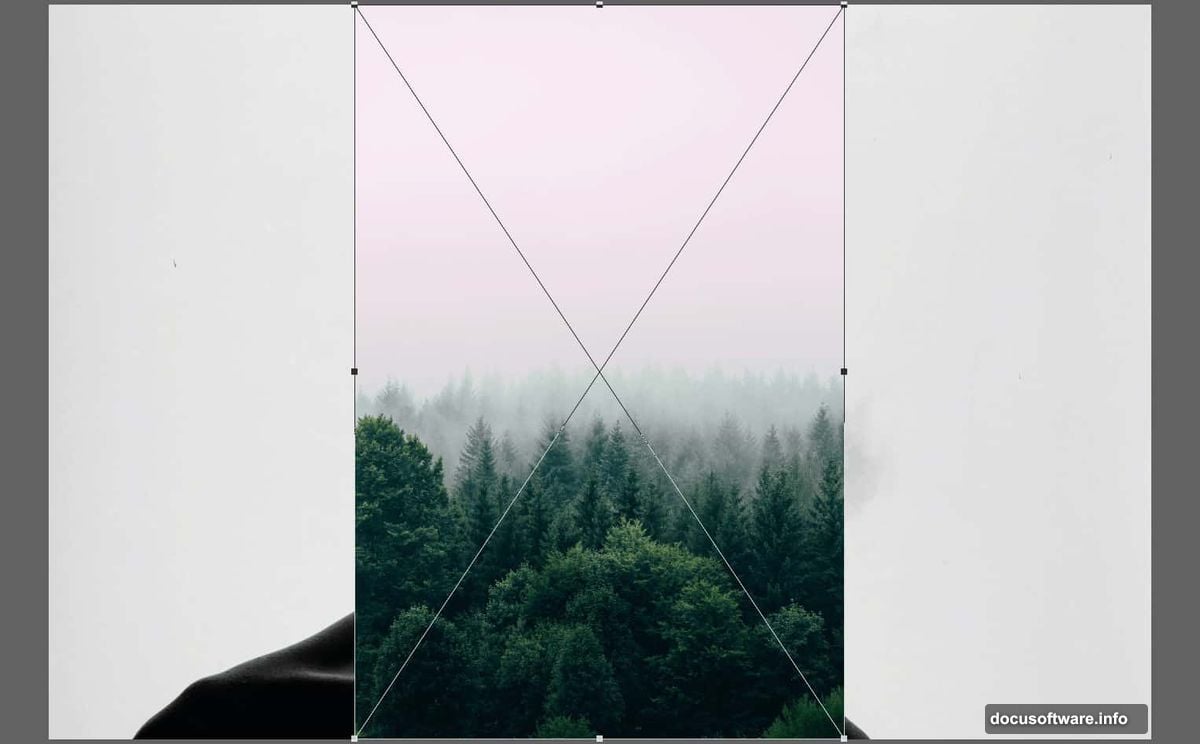
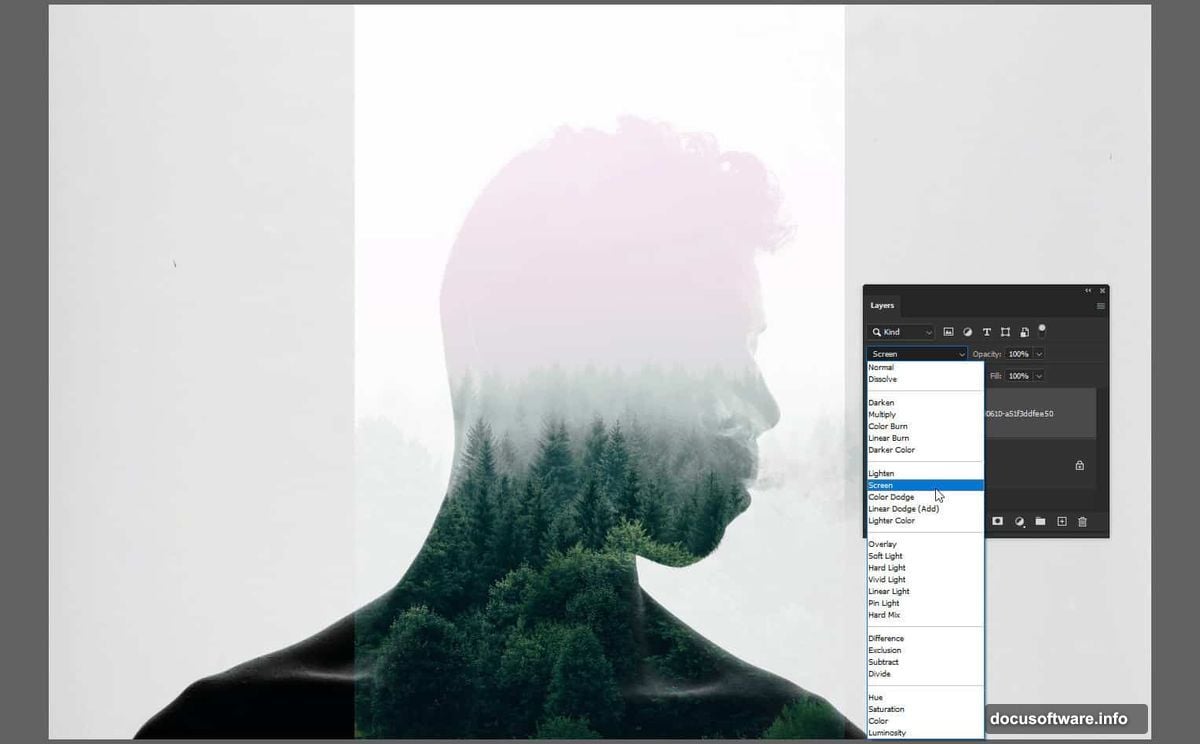
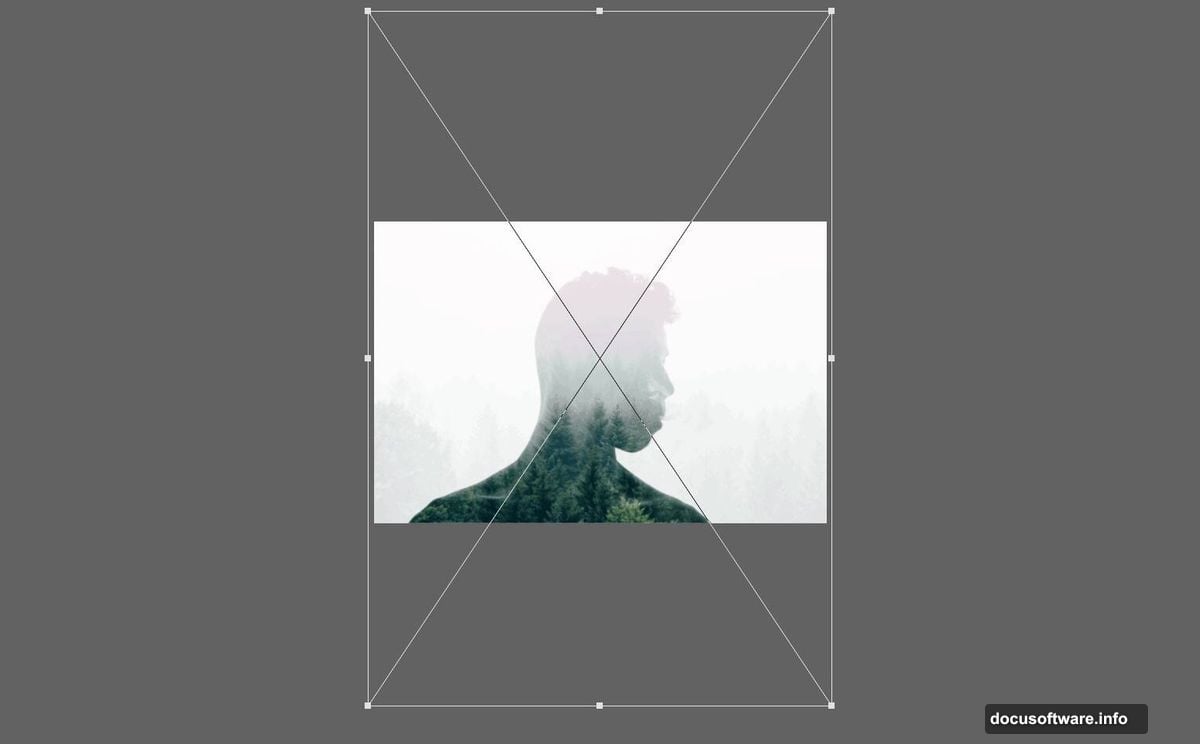
Open your silhouette photo in Photoshop. Then drag your texture image directly into the document. Before transforming anything, change the blending mode to Screen.
This blending mode is your secret weapon. Screen mode hides dark areas and reveals bright areas. So when you place a forest texture over your dark silhouette, the texture only shows where your subject appears dark.
Now scale and position your texture. Press Enter when it looks right. Need to adjust it again later? Just hit Ctrl/Cmd+T to reopen the Transform tool.
Here’s a pro tip: Convert your silhouette layer to a Smart Object before making adjustments. Right-click the layer and select Convert to Smart Object. This lets you edit settings later without permanently changing your original image.
Levels Create the Perfect Silhouette
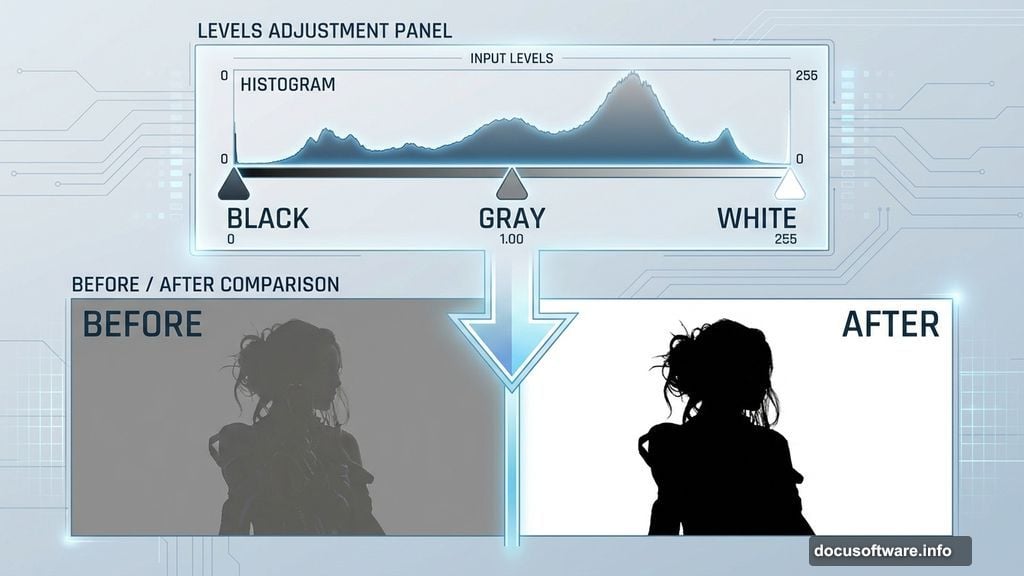
Time to refine your silhouette. Select your bottom layer and press Ctrl/Cmd+L to open Levels.
In the histogram, you’ll see three sliders below the graph. Drag the white slider left until your background turns pure white. This step removes any gray areas and creates clean separation.
The black slider increases contrast. For most backlit photos, you won’t need to touch it. But the middle gray slider? That’s where you control your silhouette’s opacity.
Drag the gray slider left to make your silhouette more visible. Shift it right to make the effect more subtle. There’s no perfect setting here. Just adjust until the blend between your subject and texture looks natural.
Curves Add Professional Color Grading
Almost there. But your image probably looks flat. Let’s fix that with Curves.
Go to Window > Adjustments and click the Curves icon. This adds a new adjustment layer at the top of your layer stack. In the Properties panel, you’ll see a diagonal line on a graph.
First, grab the top-right point. Drag it down slightly to turn your whites into light grays. This creates a filmic look and prevents blown-out highlights.
Next, click the middle of the line to add a control point. Then add another point about 1/4 from the left side. Drag this lower point down to boost contrast. The steeper your curve, the more dramatic your contrast becomes.
Play with these points until your image has depth and dimension. Most double exposures benefit from strong contrast. So don’t be afraid to make bold adjustments.
Fine-Tune Your Texture Placement
Your double exposure is basically done. But small refinements make huge differences.
Check your texture positioning again. Does it align with your subject’s features? For portraits, placing interesting texture elements near the eyes draws attention naturally. Similarly, positioning horizon lines near your subject’s shoulders often looks more intentional.
You can also mask out areas where the texture shouldn’t appear. Add a layer mask to your texture layer. Then paint with black to hide texture in specific spots. This gives you surgical control over the final blend.
Some artists prefer subtle double exposures. Others go bold with high-contrast textures. There’s no wrong approach. Test different textures and blending options until something clicks.
When Your Source Photo Isn’t Backlit
Not every photo starts with perfect contrast. So what happens when your subject isn’t already dark against a bright background?
You’ll need to create that separation manually. Select your subject layer and open Levels again. This time, drag the black slider right to darken your subject. Then drag the white slider left to brighten the background.
This process takes more trial and error. You might need to combine Levels with Curves to get clean separation. For complex backgrounds, consider using the Pen Tool or Select Subject feature to isolate your subject first.
Alternatively, reshoot your photo with proper backlighting. Five minutes of setup saves 20 minutes of editing. Position your subject near a window or shoot outdoors during sunrise or sunset. Your camera’s silhouette mode (if available) can also help capture the right exposure in-camera.

Texture Selection Changes Everything
Your choice of texture defines the mood. Forests create organic, natural feels. Cities add urban energy. Abstract patterns lean artistic and modern.
But texture resolution matters. Low-quality images produce muddy results. So stick with high-resolution photos. Free sources like Unsplash and Pexels offer thousands of options.
Also consider color. Warm-toned textures (oranges, yellows) feel nostalgic. Cool tones (blues, teals) seem modern and moody. You can adjust colors later with Hue/Saturation adjustments. Yet starting with the right palette saves time.
One more thing: texture complexity affects readability. Busy textures can overwhelm your silhouette. Simple textures with clear lines often work better, especially for beginners.
Why Smart Objects Matter Here
Converting to Smart Objects seems like an extra step. But it’s worth it.
Smart Objects preserve your original image data. So when you apply Levels or other adjustments, Photoshop remembers the settings without permanently changing pixels. Need to tweak your silhouette darkness later? Just double-click the Levels adjustment in the Layers panel.
This flexibility becomes crucial when you’re experimenting. You might try three different textures before finding the perfect one. Smart Objects let you swap textures and adjust settings without starting over each time.
To convert any layer, right-click it and choose Convert to Smart Object. Do this before making any destructive edits. Your future self will thank you.
The double exposure effect opens creative doors once you nail the basics. Start simple with clean silhouettes and straightforward textures. Then push boundaries as you get comfortable with the technique.