Creating abstract portrait art sounds intimidating. But the disintegration effect that makes faces look like they’re dissolving into particles? That’s actually easier than you think.
I’ve watched countless designers struggle with this technique. They overcomplicate it. So let me show you the straightforward approach that actually works.
What Makes This Effect Work
The disintegration look combines three key elements. First, you need clean extraction of your subject. Second, strategic texture application creates the breaking-apart illusion. Third, lighting effects sell the entire concept.
Most tutorials skip the foundational steps. Then you’re left wondering why your result looks amateur. We won’t do that here.
Plus, this technique works in Photoshop CS3 and newer versions. So no excuses about outdated software.
Getting Your Subject Ready
Start with a high-quality portrait photo. Background doesn’t matter much since we’ll remove it anyway. But lighting matters tremendously.
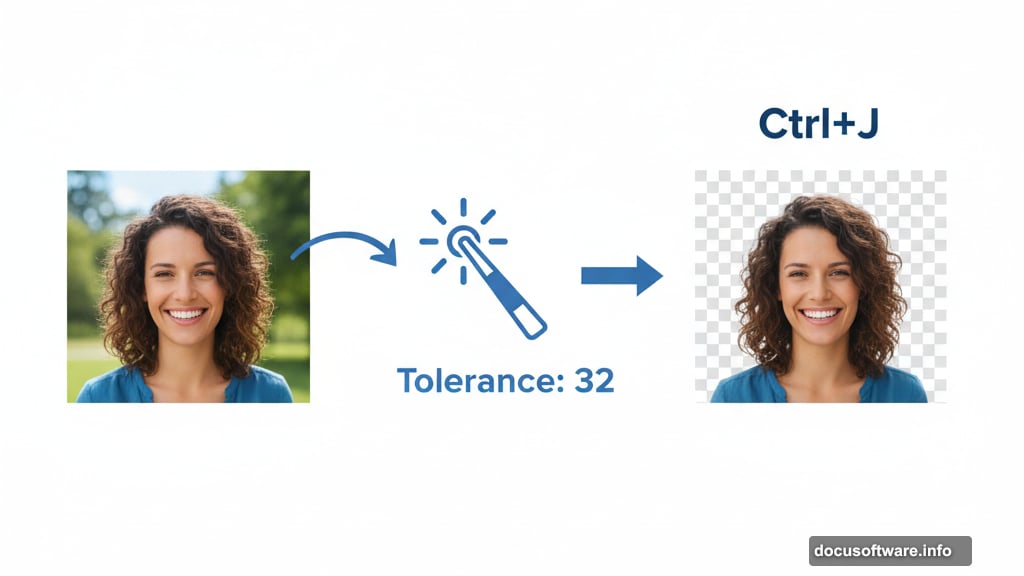
Open your image in Photoshop. Grab the Magic Wand tool and set tolerance to 32. Click the background to select it. Then hit Shift+Ctrl+I to inverse the selection.
Now press Ctrl+J to duplicate just your subject onto a new layer. Hide the original background layer. You’ve just created your working base.
Adjusting Skin Tones for Drama
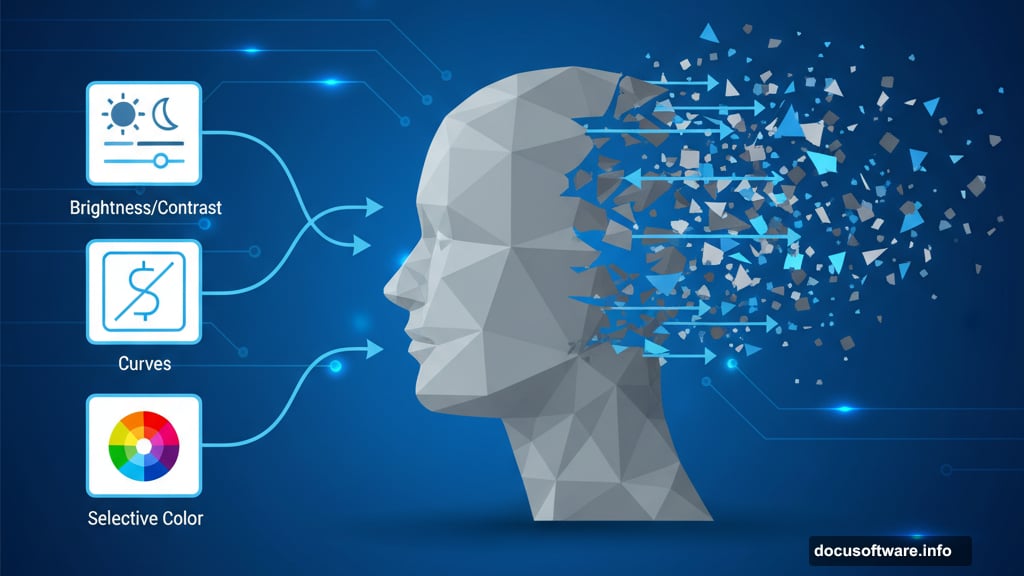
Here’s where most people stop too soon. The default photo tones rarely work for abstract art. So we’ll enhance them.
Create a Brightness/Contrast adjustment layer. Bump up the contrast slightly while keeping brightness neutral. This adds definition to facial features.
Next, add a Curves adjustment layer. Create a subtle S-curve to deepen shadows and brighten highlights. Don’t go overboard. Subtle adjustments compound beautifully.
Finally, use Selective Color adjustment to refine specific color ranges. Focus on the reds and yellows that dominate skin tones. Small tweaks here create massive impact on the final mood.
Merge these adjustment layers with your subject layer by selecting them all and hitting Ctrl+E. Name this merged layer something memorable like “girl_base.”
Building Your Canvas
Create a new document sized for your final artwork. Standard web dimensions work great: 1200×1600 pixels at 72 DPI gives you flexibility.
Drag your prepared subject into this new canvas. Convert it to a Smart Object immediately. This protects your work and allows non-destructive editing later.
Use Free Transform (Ctrl+T) to scale and position your subject. Leave some breathing room around the edges. You’ll need that space for the disintegration effect to expand into.

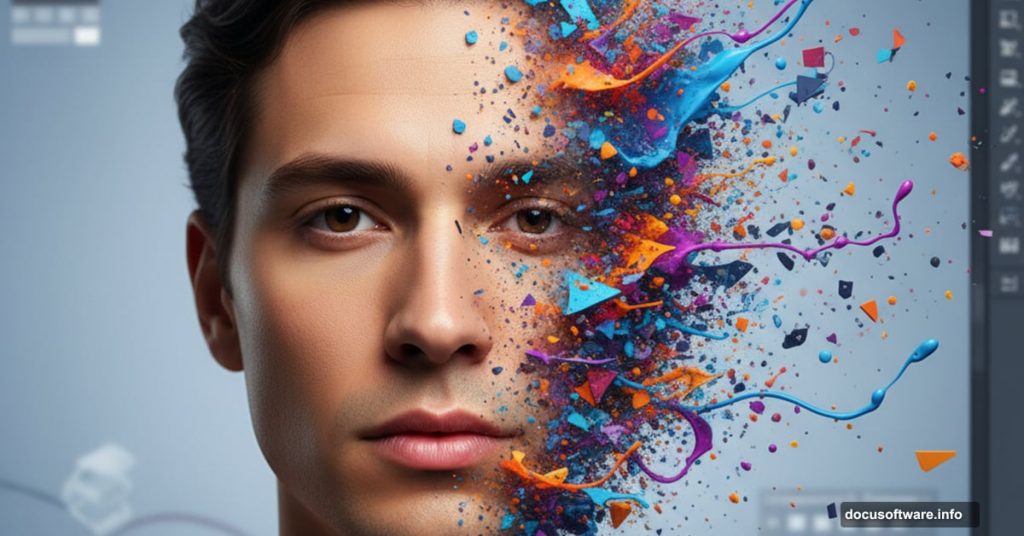
Creating the Disintegration Effect
This is the money shot. The technique that makes everything click.
You’ll paint texture directly onto your subject using specialized brushes. But not just any brushes. Particle and splatter brushes create the fragmenting appearance. Many free brush packs online contain perfect options.
Load your chosen brushes into Photoshop. Create a new layer above your subject. Set this layer’s blend mode to Normal for now.
Select a particle brush. Choose a medium gray color. Now here’s the trick: paint along the edges of your subject where you want disintegration to occur. Vary brush size and opacity as you work.
The irregular, organic nature of good particle brushes does most of the heavy work. You’re just guiding where the effect appears. Focus on areas like hair edges, shoulders, and one side of the face.
Don’t overdo it. Too much disintegration looks messy rather than artistic. Strategic placement creates drama. Random splatter everywhere just looks unfinished.

Adding Depth With Lighting
Flat lighting kills abstract portraits. So we’ll add dimensional lighting that makes everything pop.
Create a new layer set to Soft Light blend mode. Use a soft white brush at low opacity to paint highlights on one side of your subject. This establishes your light source direction.
Create another layer set to Multiply blend mode. Paint dark blue or purple tones on the opposite side. This creates shadows that complement your highlights.
The interplay between these lighting layers adds serious depth. Your flat photo suddenly has three-dimensional presence.
Color Grading for Mood
Abstract portraits need strong color direction. Wishy-washy colors produce wishy-washy results.

Add a Color Balance adjustment layer. Push the midtones toward cooler blues and cyans. This creates that modern, digital aesthetic most abstract portraits demand.
Follow up with a Hue/Saturation adjustment. Slightly desaturate the overall image. Then selectively boost saturation in key areas like the eyes or lips. This selective approach draws viewer attention exactly where you want it.
Finally, add a Gradient Map adjustment layer. Choose a complementary color scheme. Dark blue to bright orange works beautifully. Set this layer to 20-30% opacity. It unifies all your colors under one cohesive palette.
Fine-Tuning the Details
Zoom in and check your work. Look for areas where the disintegration effect feels unnatural or forced. Erase or paint over these trouble spots.
Pay special attention to the transition between solid subject and fragmenting particles. This boundary needs to feel organic. Sharp, hard edges here ruin the illusion.
Add tiny highlights to individual particles using a small, hard brush. This makes them feel three-dimensional rather than flat. Just a few strategic highlights make huge differences.
Common Mistakes to Avoid
Don’t use the Liquify filter to create distortion. It looks amateur compared to proper particle effects. Plus, it’s harder to control.
Avoid going too heavy on textures early in the process. Build up gradually. You can always add more. Removing excess texture wastes time and damages your work.
Skip the temptation to use every adjustment layer available. Three or four well-chosen adjustments beat a dozen poorly executed ones.
Making It Your Own
This technique is a foundation, not a formula. Experiment with different particle brushes to find your signature style. Try unusual color schemes that break conventional rules.
Consider adding additional elements like geometric shapes or light streaks. These extras push your work from good to memorable. Just maintain visual balance. Too many competing elements creates chaos.
Some artists incorporate double exposure effects. Others add typography. The disintegration base works with countless creative additions.
Why This Approach Works
The method I’ve shown you prioritizes control at every step. You’re building the effect piece by piece rather than applying some one-click filter that looks like everyone else’s work.
Smart Objects preserve your original images. Adjustment layers keep your workflow flexible. Separate layers for different effects let you fine-tune endlessly without starting over.
This isn’t the fastest approach. But it’s the one that produces professional results. The extra 30 minutes you spend now saves you from mediocre work that needs redoing later.
Master these fundamentals first. Then speed comes naturally through repetition and familiarity with your tools.