
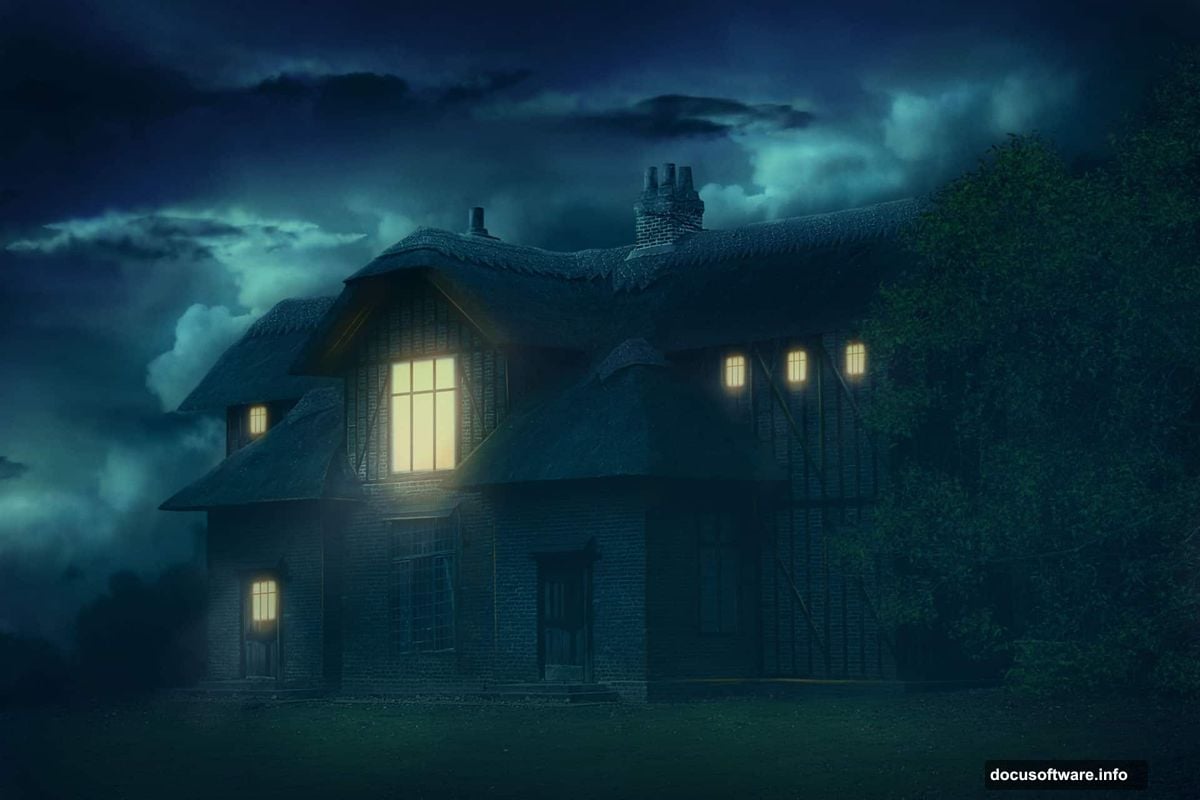
Ever look at a plain house photo and wish it could tell a darker story? Sometimes the most dramatic transformations start with the most ordinary images.
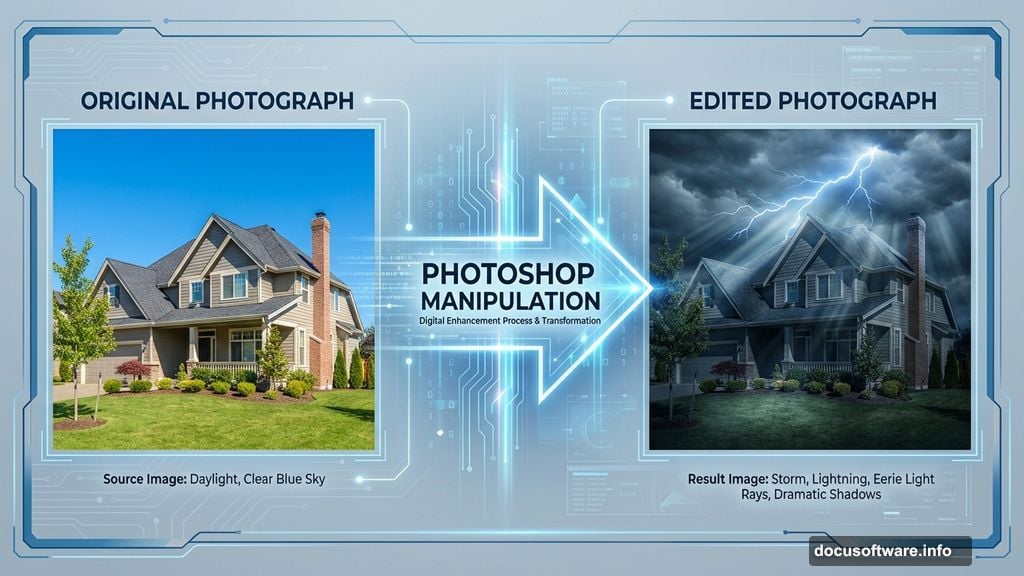
This tutorial walks you through creating a moody, atmospheric scene from a basic house photograph. You’ll add stormy skies, dramatic lightning, and eerie light rays that transform a sunny daytime shot into something straight out of a thriller movie.
Plus, you’ll learn essential photo manipulation techniques that work for any project. Let’s dive in.
What You’ll Learn
This tutorial covers core Photoshop manipulation skills you’ll use repeatedly. Here’s what we’re tackling:
Essential techniques:
- Layer masking for seamless blending
- Custom brush work for natural effects
- Filter applications for atmosphere
- Color adjustments for mood control
- Lighting effects that sell the illusion
What you need:
- Adobe Photoshop CS3 or higher
- Basic familiarity with layers and tools
- About 60-90 minutes of focused time
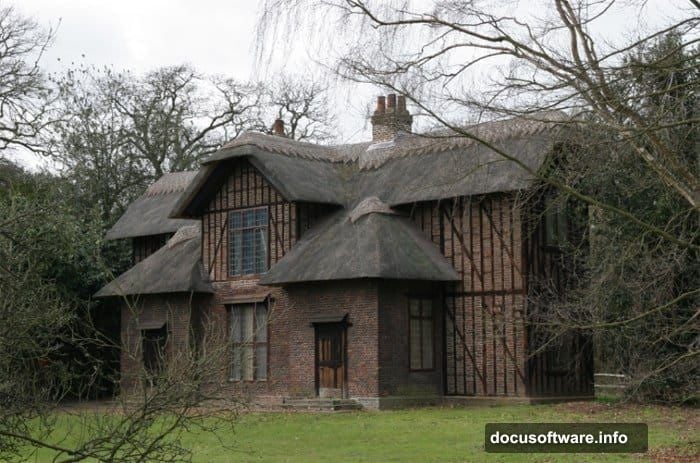
The tutorial uses free stock images for the house and clouds. So you can follow along without spending money on assets.
Start With Smart Document Prep
First, open your house image in Photoshop. This becomes your background layer automatically.
Quick setup steps:
Duplicate the background layer immediately (Ctrl+J or Cmd+J). Name this duplicate “house” so you can track it later. This preserves your original image in case you need to backtrack.
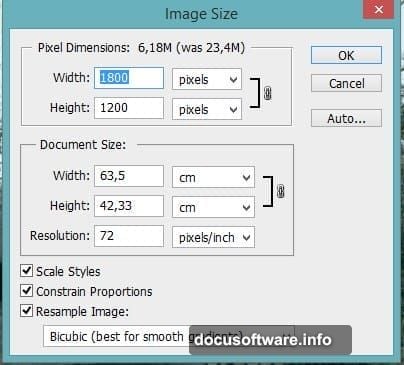
Then resize the document to something manageable. Go to Image > Image Size and set dimensions that work for your system. Smaller sizes process faster while you learn. You can always scale up later for final output.
Pro tip: Keep your original background layer locked. That safety net has saved countless hours of rework.
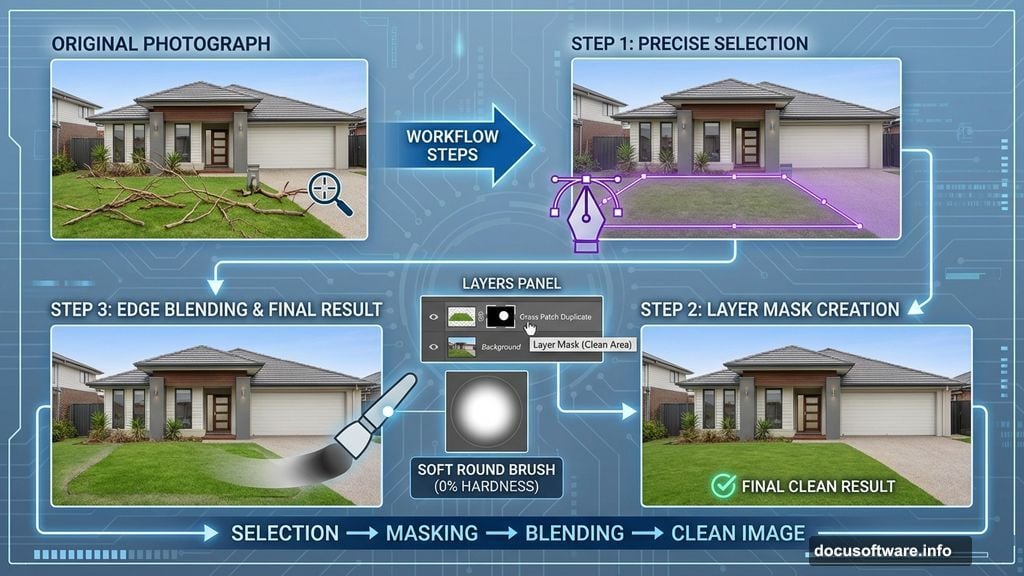
Clean Up Distracting Elements
Real photos contain distractions that ruin your final composition. In this case, twigs in front of the house break the atmospheric mood.
Here’s how to remove them cleverly:
The cutout method:
Select a clean section of lawn using the Pen Tool (P). Choose an area without obvious features or patterns. This becomes your “patch” for covering unwanted elements.
Once selected, duplicate it to a new layer (Ctrl+J). Now you have a clean grass section on its own layer.
Add a layer mask (Layer > Layer Mask > Reveal All). Use a soft round brush at 0% hardness with low opacity to blend the edges. Paint along the edges where the cutout meets the original image. This erases the hard lines that scream “photoshopped.”
Multiply your solution:
Duplicate your grass patch layer again. Move this copy to cover different problem areas. Mask the edges just like before. You can reuse the same patch multiple times if you vary the angle and opacity slightly.
This technique beats the Clone Stamp tool for large areas. It gives you more control and creates more natural-looking results.
Build Your Stormy Sky
The sky makes or breaks atmospheric scenes. A sunny blue sky kills any gloomy mood instantly.
Import dramatic clouds:
Open your cloud stock image as a new layer. Position it above your house layer in the layer stack. This placement matters for proper masking later.
Use the Transform tool (Ctrl+T) to scale and position the clouds. Make them fill the entire sky area with room to spare at the edges. Oversizing prevents gaps when you blend.
Blend naturally:
Add a layer mask to your cloud layer. Use a soft brush to mask the bottom edge where clouds meet the horizon. Paint gradually to create a natural fade. Real clouds don’t have hard edges against landscapes.
Adjust the cloud layer’s opacity if needed. Sometimes 100% looks too heavy. Dropping to 85-90% can feel more natural. Trust your eye here.
Create Dramatic Lightning Effects
Lightning sells the stormy atmosphere. But fake-looking lightning ruins the illusion completely.
Build convincing bolts:
Create a new layer above your clouds. Name it “lightning” for easy reference. Set the layer blend mode to Screen. This makes your lightning automatically blend with darker backgrounds.
Use the Lasso Tool (L) to draw a jagged, irregular selection roughly shaped like lightning. Don’t make it perfectly vertical. Real lightning branches and zigzags unpredictably.
Fill the selection with white (Alt+Backspace or Option+Delete). Then deselect (Ctrl+D).
Add realistic glow:
Go to Filter > Blur > Gaussian Blur. Set the radius around 3.7 pixels. This softens the lightning and creates a natural glow. Lightning in photos always has a diffused edge from the intense light.
Duplicate your lightning layer if you want multiple bolts. Transform each duplicate (Ctrl+T) to change the angle and position. Vary the opacity between 70-90% to make some bolts appear more distant.
Lower opacity lightning appears farther away. This depth trick makes your scene feel three-dimensional instead of flat.
Paint Light Rays for Atmosphere
Subtle light rays add mysterious depth to gloomy scenes. They suggest hidden light sources and create visual interest.

Create the ray effect:
Make a new layer above your lightning. Name it “light rays” and set the blend mode to Screen again.
Select a soft round brush with 0% hardness. Set the foreground color to a pale yellow-white. Lower the brush opacity to around 20-30%.
Paint long, gentle strokes from your light source outward. In this scene, paint rays emanating from the lightning or from behind the clouds. Make the strokes follow logical light paths.
Layer the effect:
Add multiple light rays at different angles. Vary the opacity between strokes. Some rays should be barely visible while others catch the eye.
Less is more here. Overdoing light rays makes everything look fake. Aim for subtle hints that viewers notice subconsciously rather than obviously.
Adjust Colors for Unified Mood
Color adjustments tie all your elements together. Mismatched colors between layers scream “composite.”
Global color harmony:
Create a new adjustment layer: Layer > New Adjustment Layer > Color Balance. This affects all layers below it in the stack.
Push the shadows toward blue and cyan. This creates the cold, ominous feeling of stormy weather. Move the slider gradually and watch your image transform.

For midtones, add a touch of yellow to warm the lightning areas slightly. This contrast between cool shadows and warm highlights adds depth.
Fine-tune with curves:
Add a Curves adjustment layer (Layer > New Adjustment Layer > Curves). Pull down the middle of the curve slightly to darken midtones. This increases overall drama and contrast.
Avoid crushing your blacks completely. You still want detail in shadow areas. A completely black house looks wrong.
Add Subtle Texture and Grain
Perfect digital smoothness looks fake. Real photographs have grain and texture, especially in low-light stormy scenes.
Natural film grain:
Create a new layer at the very top of your layer stack. Fill it with 50% gray (Edit > Fill > 50% Gray). Set this layer’s blend mode to Overlay.
Go to Filter > Noise > Add Noise. Set the amount around 3-5%. Choose Gaussian distribution and check Monochromatic. This adds subtle texture across your entire image.
Adjust the layer opacity down to 20-30%. You want just a hint of grain. Too much makes the image look noisy rather than atmospheric.
Selective sharpening:
Flatten a copy of all your layers (Ctrl+Alt+Shift+E or Cmd+Option+Shift+E). This creates a merged version while preserving your layer stack below.
Apply Filter > Sharpen > Unsharp Mask to this flattened layer. Set Amount to 80%, Radius to 1.0, and Threshold to 0. This sharpens details without creating obvious halos.
Mask the sharpening layer to remove the effect from the sky. Sharpen only the house and foreground. Oversharpened clouds look artificial.
Final Polish for Professional Results
Small final touches separate amateur work from professional compositions.
Edge vignetting:
Create a new layer above everything. Use a large, soft black brush at low opacity. Paint gently around the edges of your canvas. This draws the eye toward the center and adds cinematic drama.
Keep the vignette subtle. Viewers shouldn’t consciously notice it. They should just feel naturally drawn to look at the house.
Saturation control:
Add a Hue/Saturation adjustment layer at the top of your stack. Lower the saturation by 10-15 points. Stormy scenes have muted colors. Overly saturated images feel wrong for this mood.
But don’t go completely desaturated. Some color keeps the scene feeling real rather than stylized.
Common Mistakes to Avoid
Every technique has pitfalls that trip up beginners. Watch out for these:
Harsh mask edges: Always use soft brushes for masking. Hard edges instantly reveal your compositing work.
Inconsistent lighting: Your added elements must match the lighting direction of the base photo. Lightning from the left should cast light on the left side of objects.
Overdone effects: When lightning, rays, and colors feel too intense, dial everything back by 20%. Your eye adapts as you work and loses objectivity.
Neglecting shadows: Added elements need matching shadows. A lightning bolt that doesn’t illuminate the ground below it looks wrong.
Take This Technique Further
Once you master this gloomy house scene, you can apply these techniques to countless projects.
Try these variations:
Create foggy morning scenes using the same masking and blending techniques. Swap storm clouds for fog layers.
Build sunset compositions by changing color balance toward oranges and reds instead of blues.
Add rain effects using custom brushes and motion blur. Layer them with reduced opacity for realism.
The skills you practiced here—masking, blending, color grading, and light effects—form the foundation of all photo manipulation work. Master them once, use them forever.
Your ability to transform ordinary photos into extraordinary scenes just leveled up. Now go create something dark and beautiful.