
Want to create a dramatic medieval photo manipulation? This tutorial walks you through building a moody night scene featuring a woman on horseback.
You’ll learn practical techniques for blending landscapes, managing light sources, and creating atmospheric depth. Plus, we’ll tackle the tricky parts like matching color temperatures and building convincing shadows. No fancy plugins required.
Gather Your Source Images First
Before opening Photoshop, collect these essential elements. Quality source images make everything easier later.
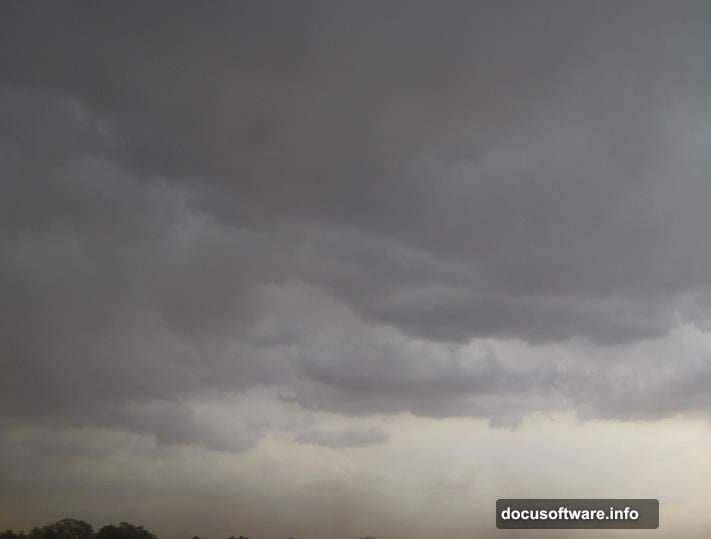
You’ll need a dramatic sky with clouds. Then grab landscape photos showing mountains or hills. Also find rock formations for foreground interest. A stone bridge adds medieval character.
Don’t forget the moon image and your main subject. Finally, grab a bare tree for silhouette details. Make sure all images have similar lighting conditions to start.
Build Your Base Night Sky
Create a new document at 1800×1361 pixels. Fill the canvas with white as your starting point.

Open your sky image and select just the sky portion using the Rectangular Marquee Tool. Drag this selection onto your main canvas. Then convert this layer to a Smart Object for non-destructive editing.
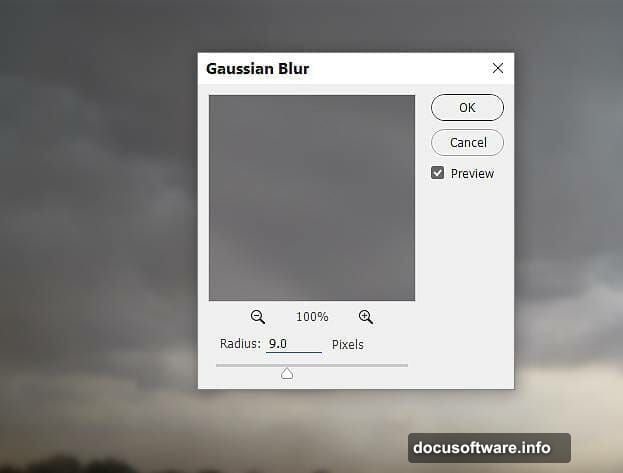
Now apply a Gaussian Blur filter at 9 pixels radius. This creates that soft, dreamy quality night skies have. The blur also helps blend elements more naturally later.
Shape the Lighting With Curves
Add a Curves adjustment layer and set it as a Clipping Mask. Drag the curve upward to brighten the sky. This creates your primary light source from above.
Next, create another Curves adjustment layer. This time, drag the curve down to darken things. But here’s the trick: paint with a soft black brush on the layer mask at the top of the sky.
This technique keeps the upper sky bright while darkening the bottom. It creates natural atmospheric gradient you see in real night scenes. The contrast makes your composition more dynamic.
Add Color Temperature Control
Create a Color Balance adjustment layer. Focus on the Midtones settings first.
Push the sliders toward cooler tones. Add more cyan and blue to match moonlight color temperature. Avoid going too extreme or the scene looks artificial.
Real moonlight has a subtle blue-green quality. Your adjustments should enhance this natural characteristic without overpowering it.
Blend Your Landscape Foundation
Open your landscape image and drag it onto the main canvas. Position it at the bottom third of your composition.
Click the mask icon at the bottom of the Layers panel. Use a soft black brush to paint away hard edges. Also remove any water features that don’t fit your scene.
The goal is seamless integration. Nobody should see where one image ends and another begins. Take your time with this step.
Darken the Mountains Appropriately
Add a Curves adjustment layer set as Clipping Mask. Pull the curve down to reduce overall brightness on the landscape.
But mountains in the middle distance need special treatment. Lower your brush opacity to about 10 percent. Then gently paint on the layer mask to reduce darkness on those middle peaks.
This creates depth through atmospheric perspective. Distant objects appear lighter and hazier than foreground elements. It’s a fundamental principle of landscape painting that applies here.
Desaturate for Night Realism
Create a Hue/Saturation adjustment layer. Drop the Saturation value down to -73.
Night scenes have significantly less color saturation than daylight. Our eyes can’t perceive much color in low light conditions. So removing color saturation makes the scene feel more authentic.
However, don’t remove all color. Complete desaturation looks more like black and white photography than a night scene. Keep some subtle color for realism.
Add Foreground Rock Elements
Open your rock images and isolate them using the Magnetic Lasso Tool. Select interesting rock formations that add depth to your foreground.

Place the left rock on the right side of your canvas. Then use Free Transform to adjust the size and angle. Flip it horizontally through Edit menu options.
This placement creates visual interest in the foreground. It also establishes a sense of scale for your main subject later. Foreground elements anchor the viewer’s eye before leading them deeper into the scene.
Position the Stone Bridge
Import your bridge image and place it in the middle distance. The bridge should span across your landscape naturally.
Use layer masks to blend the bridge edges with surrounding terrain. Paint away any parts that don’t connect logically with the landscape. Add shadows underneath the bridge using a dark brush on a new layer.
Bridges provide strong compositional lines. They lead the viewer’s eye through the scene toward your focal point. Plus, they reinforce the medieval atmosphere you’re building.
Place Your Moon Light Source
Add the moon image to the upper portion of your sky. Position it off-center for more dynamic composition.

Set this layer’s blend mode to Screen. This removes the black background while keeping the bright moon visible. Lower the opacity if the moon appears too bright.
Create a soft glow around the moon using a large, soft white brush on a new layer. Set this glow layer to Overlay or Soft Light blend mode. This simulates atmospheric scattering around the moon.
The moon establishes your primary light direction. Everything else needs shadows and highlights consistent with this light source. Keep this in mind as you continue.
Add Your Medieval Rider
Place your model on horseback into the scene. Position them prominently but not dead center.
Use layer masks to blend the bottom of the horse with the ground. Add shadows underneath using a soft black brush at low opacity. Build up the shadow gradually for realistic depth.
Match the model’s lighting to your moon direction. Add rim lighting on one side using dodge and burn techniques. Darken the shadow side appropriately.
The figure should feel like she belongs in this environment. Color temperature, lighting direction, and shadow density all need to match the scene you built.
Integrate the Silhouette Tree
Import your tree image and position it in the foreground or middle ground. Trees work great as silhouettes in night scenes.
Desaturate the tree completely and darken it significantly. Trees against night skies appear almost black. Use Curves adjustment to crush the blacks.
Add subtle rim lighting on one edge of the tree branches. This suggests moonlight catching the edges. Just a hint makes the difference between flat and dimensional.
Trees add vertical interest and frame your composition. They also reinforce the natural, outdoor setting of your medieval scene.
Fine-Tune Overall Color Harmony
Create a Color Lookup adjustment layer at the top of your layer stack. Experiment with different presets that enhance the night atmosphere.
Add a selective color adjustment if specific elements need color correction. For instance, any remaining warm tones might need shifting toward cooler values.
Consider adding a slight vignette using a Curves adjustment layer. Darken the corners to draw attention toward your central subject. Paint the effect onto the layer mask with a large, soft brush.

Polish With Final Details
Check your entire composition for consistency. Do all shadows point in the same direction? Does the color temperature feel unified?
Add atmospheric haze between different depth layers. Use a soft blue brush on new layers set to low opacity. Paint subtle fog or mist to separate foreground from background.
Sharpen your main subject slightly using Smart Sharpen filter. But keep background elements softer to maintain depth. This selective sharpening guides the viewer’s eye to your focal point.
Save Your Atmospheric Masterpiece
This type of photo manipulation requires patience and attention to lighting details. But the results create compelling, story-driven images.
The key principles apply beyond medieval scenes too. Understanding light direction, atmospheric perspective, and color temperature helps any composite work. So practice these techniques until they become second nature.
Your night scene should transport viewers into another time and place. That’s the magic of photo manipulation when done thoughtfully.