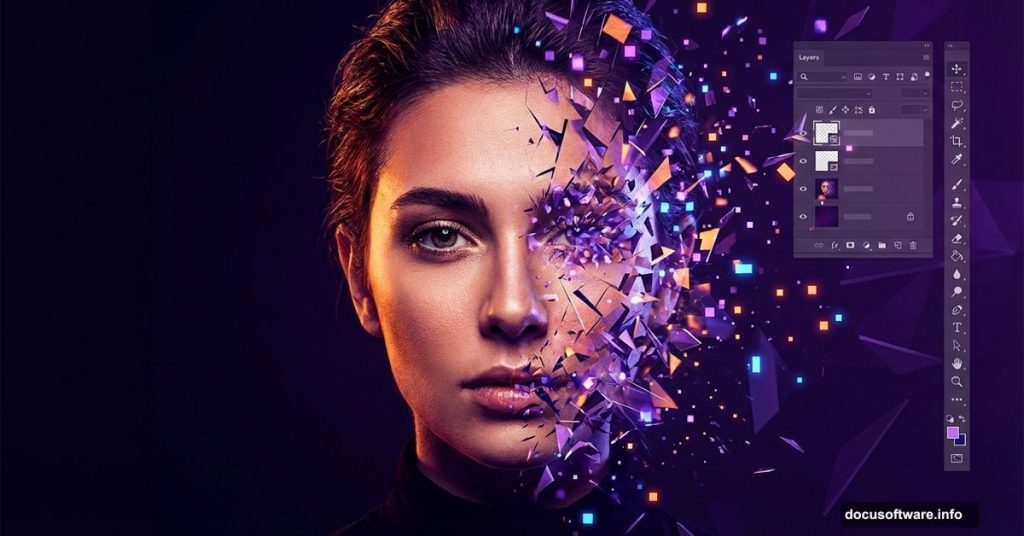
Photoshop portrait effects can transform ordinary photos into stunning abstract art. But most tutorials overcomplicate the process with unnecessary steps.
This disintegration effect tutorial strips away the confusion. You’ll learn practical techniques for creating eye-catching portrait manipulations that actually work. Plus, we’ll cover layer adjustments, smart objects, and color correction that professional designers use daily.
Let’s break down how to build this abstract portrait effect from scratch.
Set Up Your Portrait Canvas First
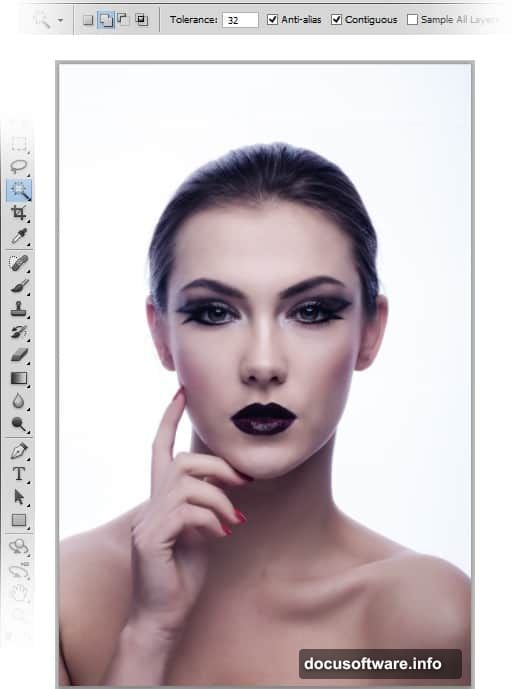
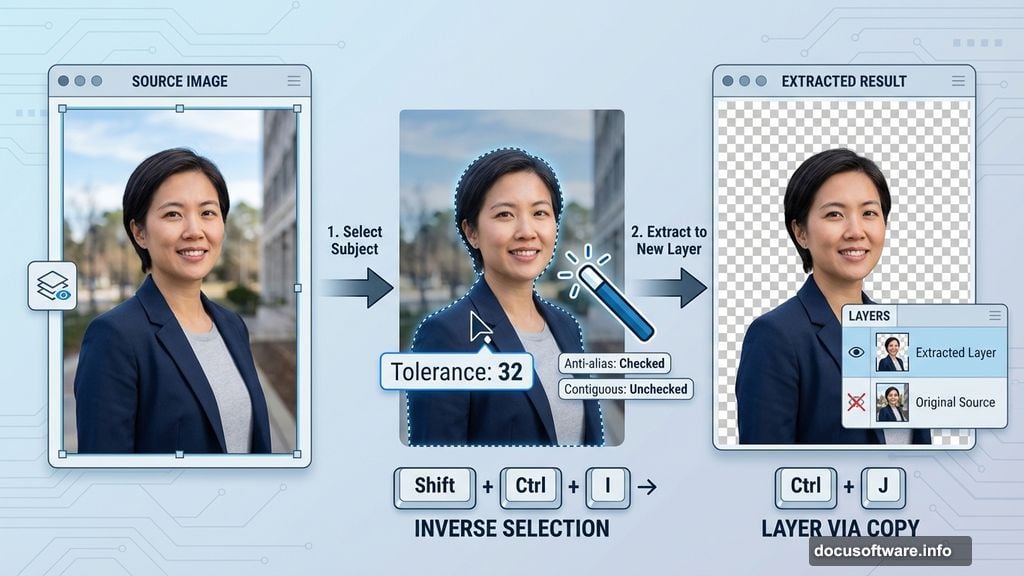
Before diving into effects, you need clean extraction. Open your portrait photo in Photoshop and grab the Magic Wand tool (W) from the toolbar.
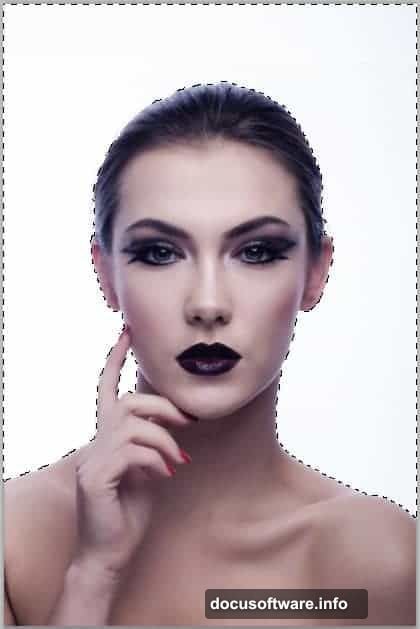
Set tolerance to 32 for accurate background selection. Click the background to select it, then inverse your selection with Shift+Ctrl+I. Hit Ctrl+J to duplicate just the subject onto a new layer.
Now hide your original layer by clicking the eye icon. This non-destructive workflow lets you experiment without losing your source image.
Color Correction Makes Everything Pop
Raw photos rarely have ideal color balance. So layer adjustments become crucial for professional results.
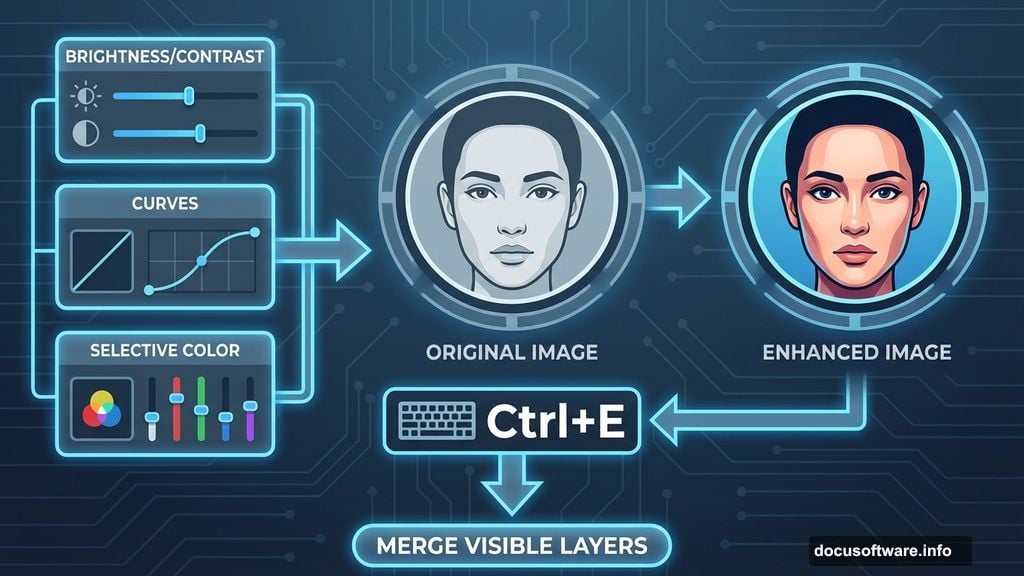
Add three adjustment layers while working on your extracted portrait. First, go to Layer > New Adjustment Layer > Brightness/Contrast. Boost contrast slightly to add depth to facial features.
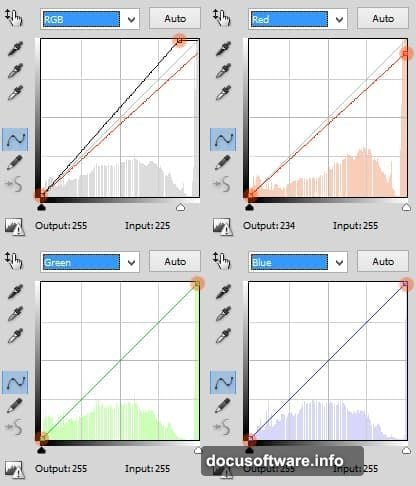
Next, add a Curves adjustment layer. Lift the midtones to brighten skin without blowing out highlights. Finally, use Selective Color to fine-tune individual color channels.
Merge these adjustment layers with your portrait by selecting them all and hitting Ctrl+E. This creates a single working layer with perfect color balance baked in.
Create Your Main Canvas
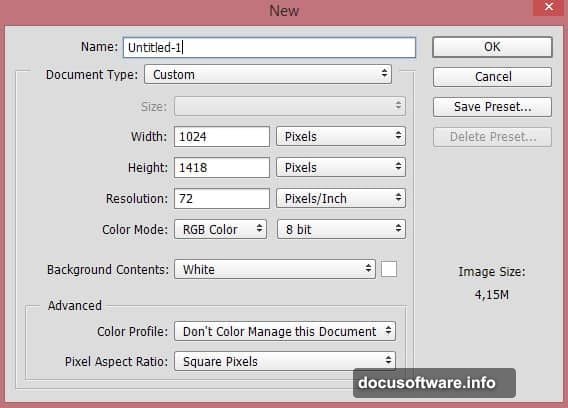
Portrait effects need proper canvas dimensions. Hit Ctrl+N to create a new document. Set your canvas size based on final output needs—larger for print, smaller for web.
Convert your color-corrected portrait to a smart object before importing. Go to Layer > Smart Objects > Convert to Smart Object. This preserves quality when scaling and lets you edit effects non-destructively.
Use Free Transform (Ctrl+T) to position and scale your portrait. Center it on the canvas or place it according to compositional rules. Remember the rule of thirds for dynamic placement.
Build the Disintegration Effect Base
The disintegration effect requires careful brush work. Create a new layer above your portrait for painting displaced fragments.
Select a hard-edged brush and paint over areas you want to fragment. Focus on edges first—hair, shoulders, and face contours work best for dramatic effect. Vary your brush size throughout for organic randomness.
Don’t paint over crucial facial features initially. Eyes, nose, and mouth should remain intact in early stages. You’ll add subtle disintegration there later for cohesive results.
Add Texture for Realistic Fragments
Flat painted shapes look artificial. So texture becomes essential for believable disintegration.
Import texture images—concrete, paper, or abstract patterns work well. Place textures above your painted fragments and set blend modes to Multiply or Overlay. This adds depth without covering your work.
Use layer masks to control where textures appear. Paint black on the mask to hide texture, white to reveal it. This selective application creates varied fragment surfaces that catch light differently.
Layer Blend Modes Create Depth
Blend modes transform how layers interact. Experiment with different modes on your fragment layers to find interesting combinations.
Multiply darkens and adds shadow. Screen lightens and creates glow effects. Overlay intensifies contrast while maintaining midtones. Each mode produces different results based on underlying colors.
Stack multiple fragment layers with varied blend modes. This creates complex depth that single-layer effects can’t match. Lower opacity on some layers for subtle variation throughout your composition.
Smart Filters Keep Everything Editable
Apply effects as smart filters whenever possible. This maintains editability throughout your workflow.
Since you converted your portrait to a smart object earlier, filters automatically become smart filters. Go to Filter menu and choose effects like Gaussian Blur or Motion Blur. These appear as editable layers beneath your smart object.
Double-click any smart filter to adjust settings later. This flexibility lets you refine effects after seeing the complete composition. No need to redo work because settings weren’t quite right initially.
Color Grading Unifies the Scene
Individual elements need cohesive color treatment. Color grading ties everything together into a unified artistic vision.
Add a Color Balance adjustment layer above all other layers. Push shadows toward cool tones (blue/cyan) and highlights toward warm tones (yellow/red). This creates dimensional color that feels professionally produced.
Use a Curves adjustment layer for final contrast control. Add an S-curve to boost overall contrast, or flatten the curve for matte effects. Subtle adjustments here make dramatic differences in final output.
Lightning Effects Add Dynamic Energy
Abstract portraits benefit from light effects. Lightning adds movement and visual interest to static compositions.
Create a new layer and paint white streaks with a soft brush. Keep strokes loose and gestural for natural electricity. Set this layer to Screen blend mode so white appears to glow.
Apply Outer Glow layer styles to lightning layers. Add blue or cyan tint to the glow for cool electric energy. Adjust spread and size until lightning integrates naturally with your portrait.
Fine Details Separate Good from Great
Professional work shows attention to small details. Zoom in and refine edges, clean up stray pixels, and perfect subtle transitions.
Use the Spot Healing Brush (J) to remove unwanted artifacts. Clone Stamp tool works for larger corrections that need specific source points. These cleanup passes take time but elevate final quality significantly.
Add subtle shadows where fragments appear to lift away from the portrait. Use soft brushes on low opacity layers set to Multiply. This creates dimensional separation that sells the disintegration illusion.
Export Settings Matter for Quality
Your beautiful portrait deserves proper export settings. Save a master PSD file with all layers intact for future edits.
For final output, flatten the image or save as JPEG/PNG depending on needs. Use Save for Web (Shift+Ctrl+Alt+S) for optimized web images. Choose quality level 80-90 for best balance between file size and visual quality.
Print projects need higher resolution. Keep working resolution at 300 DPI minimum for crisp printed output. Convert color mode to CMYK if your printer requires it.
Common Mistakes to Avoid
Most beginners overwork their effects. Less often creates more impact than cramming every technique into one image.
Don’t paint disintegration fragments too uniformly. Real objects break irregularly, with varied sizes and directional scatter. Study reference images of actual breaking objects for realistic inspiration.
Skip the temptation to max out all adjustment sliders. Subtle adjustments compound into dramatic results. Extreme settings typically create artificial-looking images that scream amateur work.
The Real Skill in Portrait Effects
Portrait manipulation isn’t about following steps mechanically. It’s about understanding how visual elements work together to create compelling compositions.
Practice these techniques on multiple portraits. Try different fragment patterns, color schemes, and lighting approaches. Your unique style emerges through experimentation, not rigid tutorial adherence.
These Photoshop skills translate beyond abstract portraits. The same layer management, color correction, and blending techniques apply to countless design projects. Master them here and you’ll approach all future work with stronger foundational knowledge.
Your next portrait awaits. Time to make something stunning.