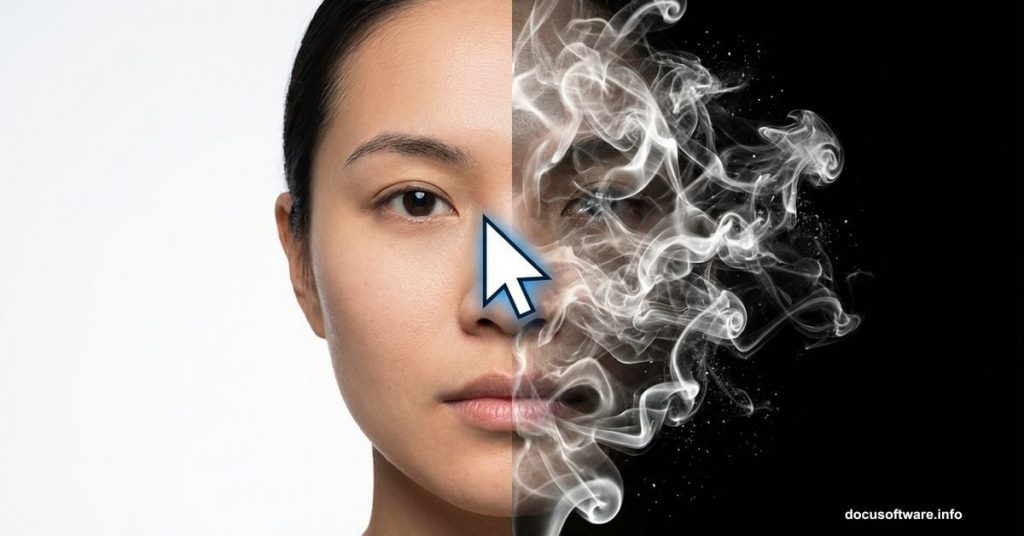
That smoke art portrait effect looks impossible to recreate. Swirling wisps replacing facial features. Dramatic contrast. Professional-level results.
But here’s the truth. You don’t need advanced Photoshop skills or expensive plugins. Just a basic understanding of filters and the right brush set. I’ll walk you through the exact process that transforms ordinary portraits into ethereal smoke art.
This technique takes 1-2 hours the first time. After that? You’ll create these effects in 30 minutes.
What You’ll Need Before Starting
Grab these essentials before opening Photoshop.
First, download a high-quality portrait photo with clean background separation. Studio shots work best. The model should face forward with clear facial features.

Second, install Real Smoke Photoshop Brushes. These brushes simulate natural smoke movement. Generic cloud brushes won’t cut it here.
Third, make sure you’re running Photoshop CS or newer. Older versions lack critical filter controls.
Plus, set aside uninterrupted time. Rushing this effect shows in the final result.
Extract Your Subject Cleanly
Background removal makes or breaks this effect.
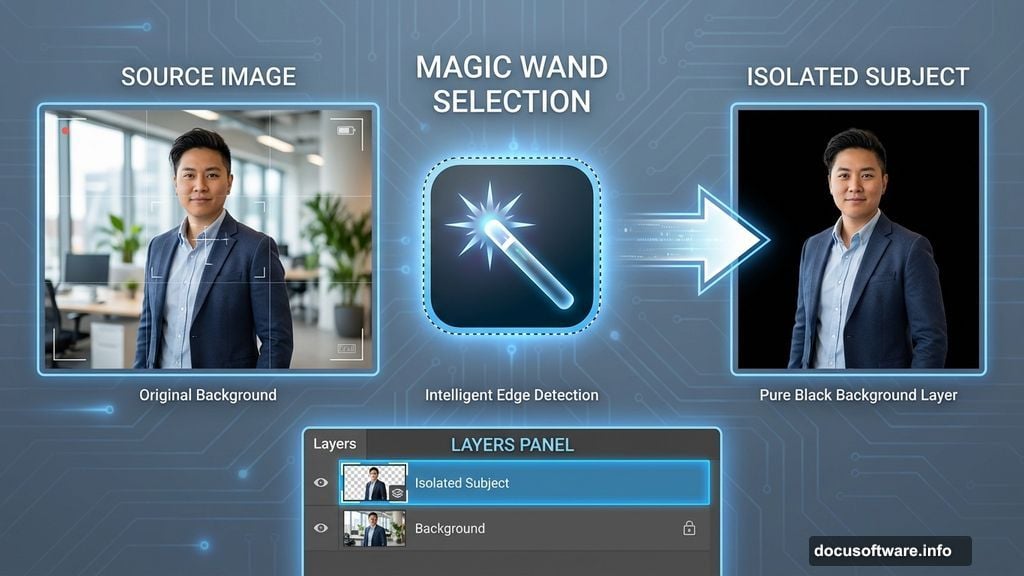
Open your portrait in Photoshop. Select the Magic Wand tool from the toolbar. Click anywhere on the background to select it.
Now invert that selection. Hit Ctrl+I (or Cmd+I on Mac). This switches focus from background to subject.
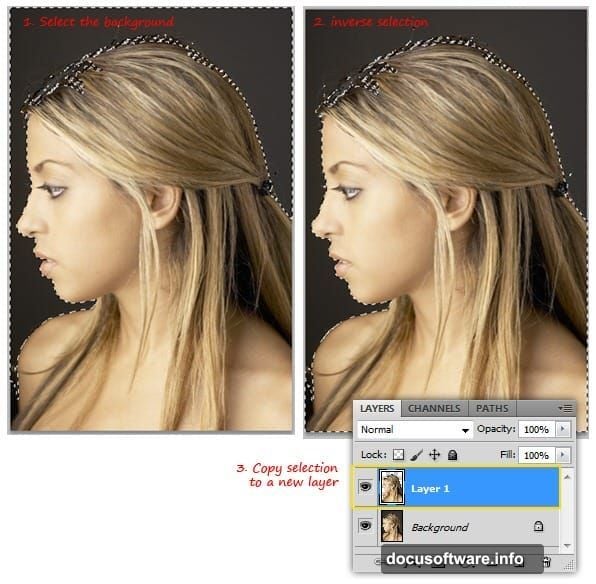
Duplicate just the selected area by pressing Ctrl+J. A new layer appears in your Layers panel. That’s your isolated subject.
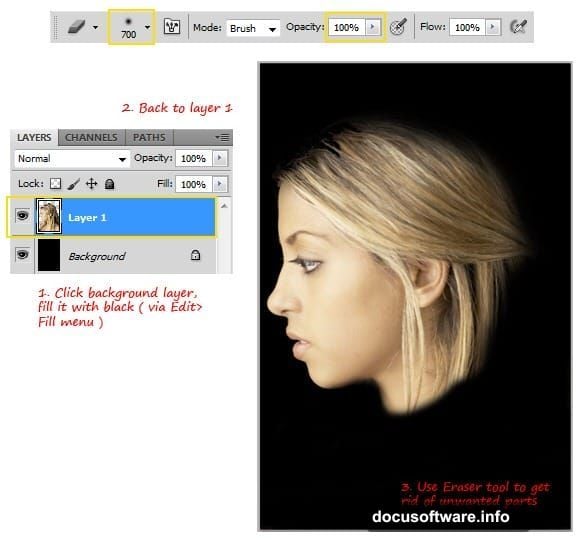
However, don’t delete the background layer yet. Click it and fill with pure black using the Paint Bucket tool. This creates the dark foundation smoke art demands.
Focus on the Head Only
The full body distracts from facial smoke details.
Switch back to your duplicated subject layer. Grab the Eraser tool with a soft round brush at 100% opacity.
Carefully erase everything below the neck. Take your time around hair edges. Sloppy erasing shows through smoke effects later.
Resize the head smaller using the Transform tool (Ctrl+T). Center it on your black canvas. Leave breathing room on all sides for smoke to extend outward.
Then apply the Median filter. Go to Filter > Noise > Median. Adjust the Radius between 5-7 pixels. This softens harsh edges while preserving facial structure.
Create Your Smoke Guide Lines
Here’s where things get interesting.
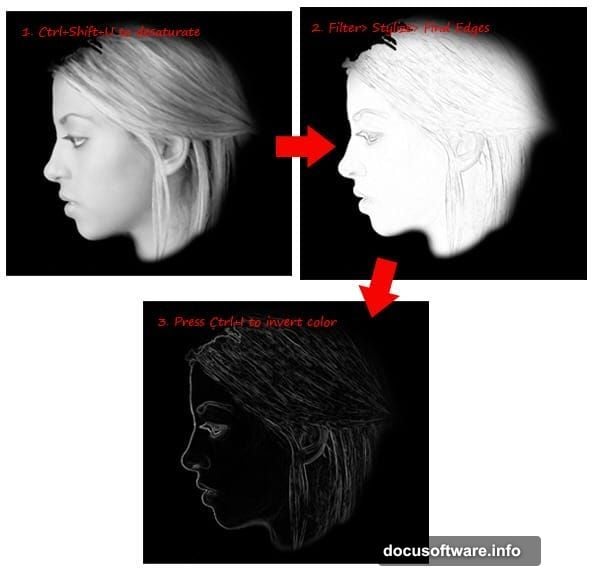
Desaturate the head layer completely. Press Ctrl+Shift+U to remove all color. You need pure grayscale for the next step.
Apply the Find Edges filter. Navigate to Filter > Stylize > Find Edges. Photoshop traces your subject’s contours with black lines on white background.
But smoke art needs the opposite. Invert the colors by pressing Ctrl+I. Those lines now glow white against black. Perfect.

These white lines become your roadmap for smoke placement. They show where facial features naturally flow.
Blur and Enhance Contrast
Raw edge detection looks too harsh.
Apply Gaussian Blur next. Select Filter > Blur > Gaussian Blur. Set Radius to 6 pixels. This creates soft, diffused guide lines instead of sharp edges.
Clean up stray marks in the neck and hair areas using the Eraser tool. Focus on zones where smoke shouldn’t originate.
Now increase contrast dramatically. Press Ctrl+L to open Levels. Drag the shadow slider right to deepen blacks. Push the highlight slider left to brighten whites. The midtones slider adjusts overall brightness.
Your goal? Strong separation between light and dark areas. This contrast defines where smoke appears dense versus transparent.
Apply Smoke Brushes Strategically
This step transforms guide lines into flowing smoke.
Create a new layer above your guide layer. Select a smoke brush from your downloaded set. Start with medium-sized brushes around 500-800 pixels.
Follow the white guide lines with brush strokes. Don’t paint randomly. Trace facial contours, letting smoke naturally extend outward from features.
Vary brush size constantly. Smaller brushes add fine detail around eyes and mouth. Larger brushes create billowing smoke in open areas.
Also adjust opacity between 30-70% for different smoke densities. Lower opacity creates see-through wisps. Higher opacity builds solid smoke masses.
Layer multiple brush strokes. Don’t try achieving the effect with one pass. Build up smoke gradually across 3-4 separate layers.
Fine-Tune the Final Effect
Almost done. Time for polish.
Toggle your guide layer visibility off. See how smoke looks without white lines showing through.
Add a subtle outer glow to smoke edges. Right-click your smoke layer and select Blending Options. Enable Outer Glow with white color at 10-15% opacity.
Then merge your smoke layers together. Select all smoke layers while holding Shift. Right-click and choose Merge Layers.

Finally, adjust overall brightness and contrast one last time using Curves (Ctrl+M). Subtle S-curve adjustments add depth.
Why This Technique Actually Works
Traditional smoke photography requires expensive setups and perfect timing. You need smoke machines, precise lighting, and countless failed shots.
This Photoshop method gives you complete control. Undo mistakes instantly. Adjust smoke flow anywhere. Perfect the effect without time pressure.
Plus, you can apply this to any portrait. Old photos. Client work. Creative personal projects.
The guide line technique ensures smoke follows natural facial geometry. That’s what separates amateur attempts from professional results. Random smoke placement looks chaotic. Guided smoke placement looks intentional.
So grab that portrait you’ve been saving. Download those smoke brushes. Spend an hour mastering this effect. Your portfolio will thank you.