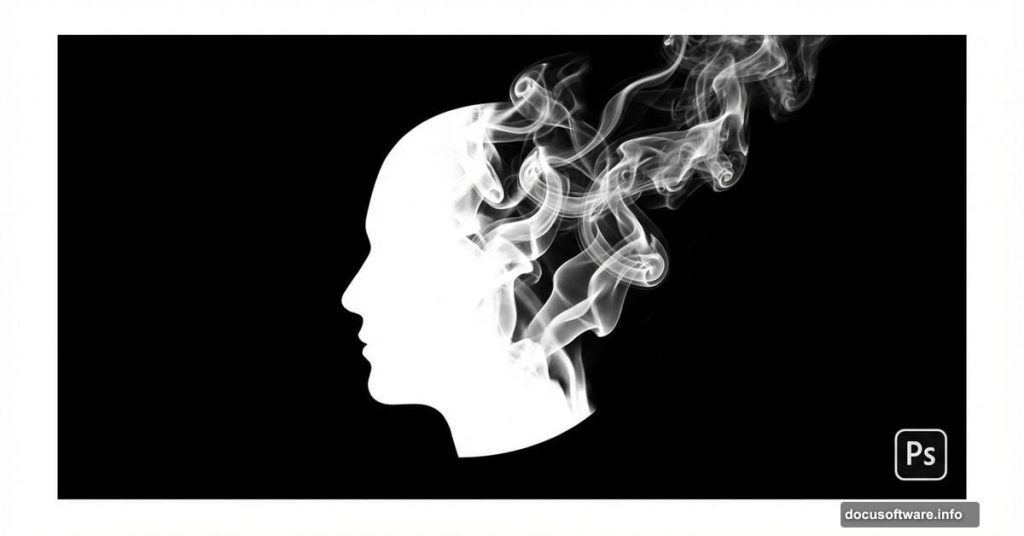
Smoke art portraits look impossible to create. But here’s the secret: they’re surprisingly simple once you know the trick.
I tested this technique after seeing smoke portraits everywhere online. Turns out you don’t need advanced skills or expensive plugins. Just Photoshop, a decent portrait photo, and some specialized smoke brushes.
The whole process takes about an hour. And the results look professional enough to impress clients or boost your portfolio. Let’s break down exactly how it works.
What You’ll Need Before Starting
First, gather your tools. You’ll need Adobe Photoshop CS or newer. The technique works on both Windows and Mac.
For the portrait, pick a photo with clean lighting and a simple background. High-contrast images work best because they create stronger guide lines for the smoke effect.
You’ll also need real smoke brushes. These make the difference between amateur and professional results. Generic Photoshop brushes won’t cut it for this effect.
Plus, set aside 1-2 hours for your first attempt. Once you master the workflow, you can knock these out in 30 minutes.
Step 1: Extract Your Subject Cleanly
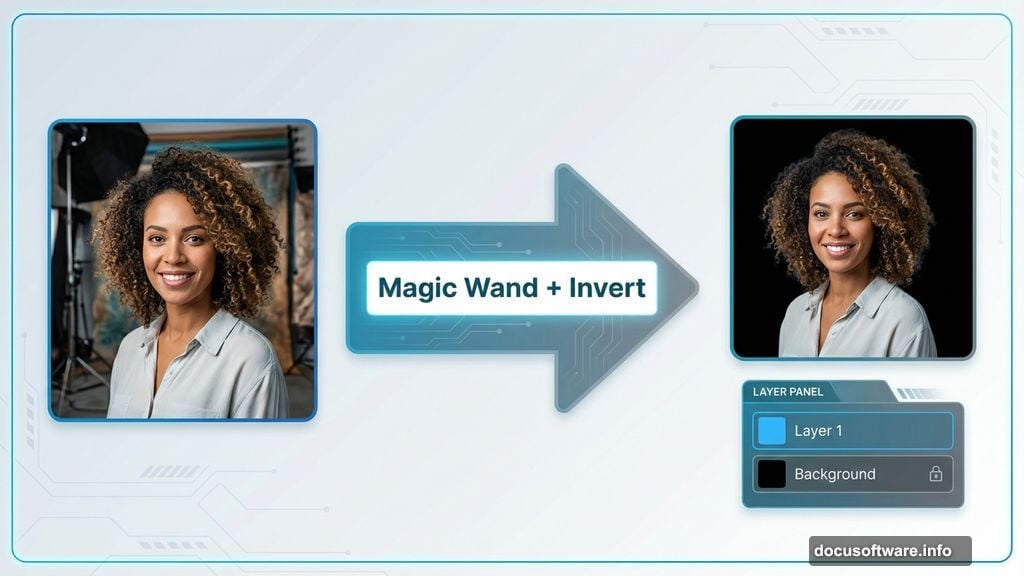
Open your portrait in Photoshop. Use the Magic Wand tool to select the background. Then invert the selection by pressing Ctrl+I (or Cmd+I on Mac).
Duplicate the selected area with Ctrl+J. This creates a new layer with just your subject. Now you have a clean extraction to work with.
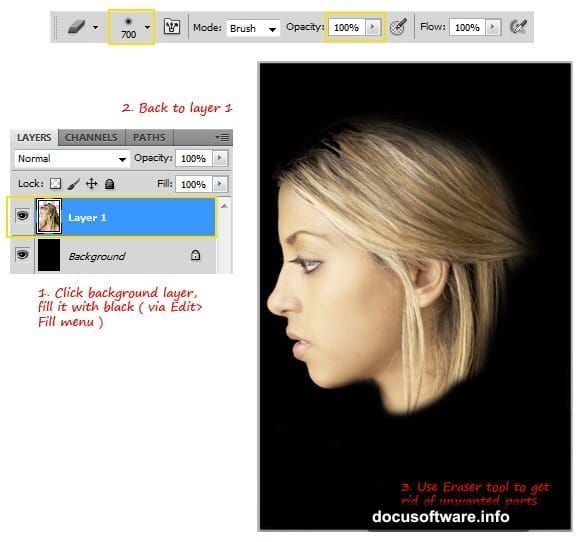
Click the background layer and fill it with pure black. This provides the dark canvas that makes smoke effects pop visually.
Switch back to Layer 1. Grab the Eraser tool with a soft round brush at 100% opacity. Carefully erase everything except the head. Take your time here because clean edges matter for the final result.
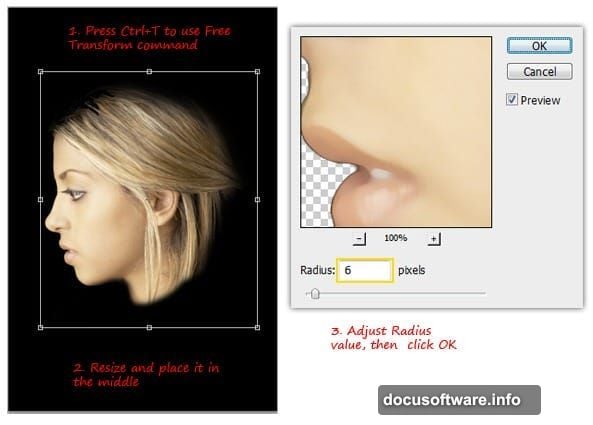
Resize the head smaller and center it on the canvas. The composition works best when the subject doesn’t dominate the entire frame.
Soften the Image for Better Smoke Flow
Now apply the Median filter to soften harsh details. Go to Filter > Noise > Median. Set the radius between 5-7 pixels.
This step smooths the image while preserving important edge information. Too much softening ruins the guide lines. Too little leaves distracting texture.
The goal is creating a clean base for the smoke effect without losing facial structure.
Create Guide Lines from Edge Detection
Desaturate your layer completely. Press Ctrl+Shift+U to remove all color. Smoke effects work better in black and white anyway.
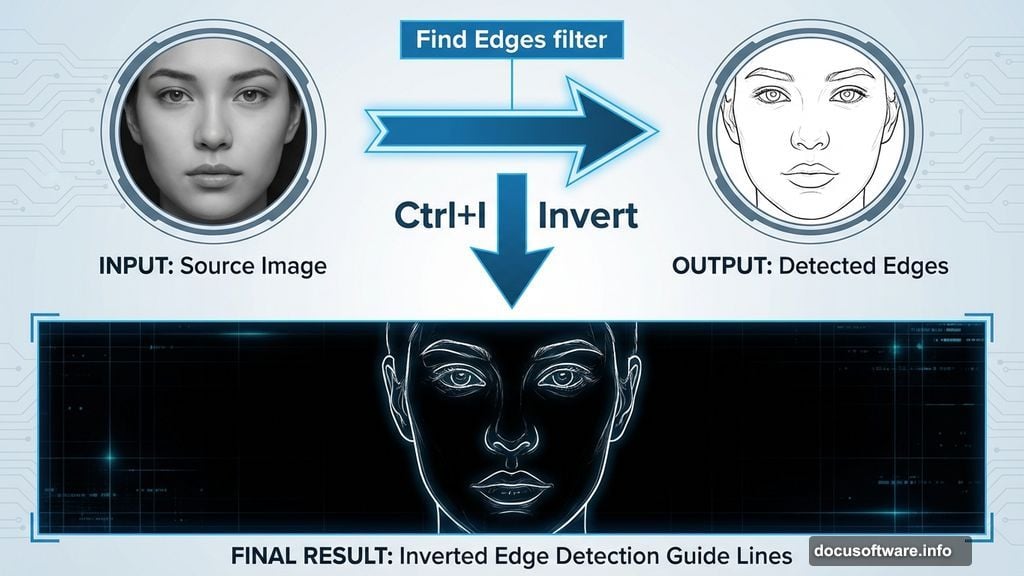
Next, apply Find Edges from Filter > Stylize > Find Edges. This creates sketched lines following the contours of the face. But the lines appear black on white, which we need to reverse.
Invert the colors by pressing Ctrl+I. Now you have white lines on black. These lines become your roadmap for placing smoke brushes later.
The effect looks rough at this stage. That’s normal. We’ll refine it in the next step.
Blur and Adjust for Smoother Lines
Apply Gaussian Blur to soften the guide lines. Go to Filter > Blur > Gaussian Blur. Set the radius around 6 pixels.
This removes sharp edges and creates natural flow for the smoke placement. The lines should feel organic, not mechanical.
Grab the Eraser tool again. Remove any unwanted lines in the neck and hair areas. These distract from the main portrait effect.
Now press Ctrl+L to open Levels. Increase the contrast by adjusting the shadow and highlight sliders. Push blacks darker and whites brighter.
The goal is strong, clear guide lines that show exactly where to place smoke brushes. Weak contrast makes the next steps much harder.
Load Your Smoke Brushes
Here’s where the magic happens. Load your real smoke brush set into Photoshop. Quality brushes make this effect work.
Generic cloud or fog brushes won’t give you authentic smoke. Real smoke has specific characteristics: wispy tendrils, natural dissipation, organic flow patterns.
The best smoke brushes capture these qualities. They’re worth investing in or downloading from reputable sources.
Once loaded, you’ll have dozens of smoke variations to choose from. Each brush creates different smoke shapes and densities.
Paint Smoke Following Your Guide Lines
Create a new layer above your guide lines. This keeps the smoke separate and editable.
Select a smoke brush and adjust the size. Start painting smoke along the white guide lines. Follow the contours of the face naturally.
Vary your brush sizes throughout. Large brushes for broad areas, small brushes for fine details. This creates depth and realism.
The white guide lines show you exactly where smoke should flow. Stay close to these lines but don’t trace them perfectly. Some variation looks more organic.
Keep painting until the entire portrait transforms into smoke. Some areas should appear denser than others. This contrast adds visual interest.
Refine and Add Final Details
Step back and evaluate your smoke portrait. Look for areas that need more density or better flow.
Add lighter smoke wisps around the edges. These create the dissipating effect that makes smoke look real rather than painted.
Adjust layer opacity if needed. Sometimes reducing opacity slightly makes the effect more subtle and sophisticated.
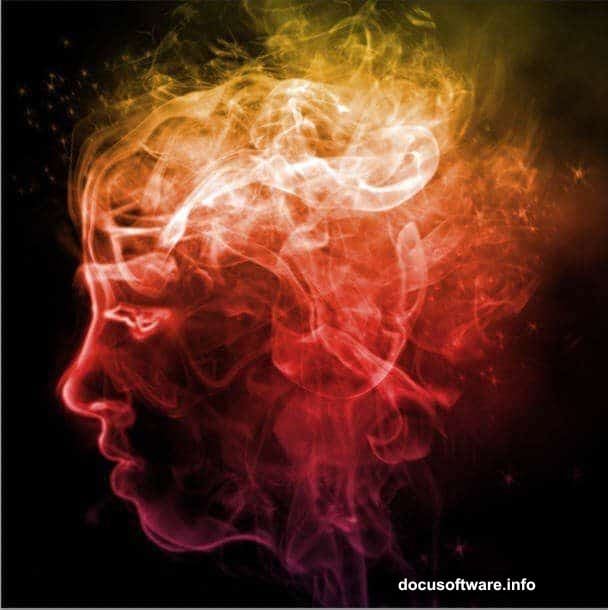
You can also add color tints using adjustment layers. Blues and purples often work well for smoke effects. But classic black and white remains the strongest choice.
Finally, erase any smoke that extends too far beyond the composition. Clean edges frame the portrait better.
Why This Technique Works So Well
The Find Edges command does the heavy lifting. It identifies facial contours automatically, saving hours of manual planning.
Real smoke brushes provide authentic texture. No amount of manual painting replicates actual smoke characteristics.
Plus, the guide line approach removes guesswork. You know exactly where smoke should flow for natural results.
This technique also stays flexible. Different portraits need different amounts of smoke density. The layer-based workflow lets you adjust until it looks right.
Common Mistakes That Ruin Smoke Portraits
Too much detail in the guide lines creates messy results. That’s why we blur and adjust levels carefully.
Using low-quality brushes instantly reveals amateur work. Invest in proper smoke brushes from the start.
Painting smoke randomly without following guide lines looks chaotic. The lines exist for a reason—use them.
Also, many people skip the contrast adjustment in Levels. Weak guide lines make smoke placement confusing and inconsistent.
Finally, overworking the effect kills the magic. Know when to stop. Too much smoke obscures the portrait completely.
Alternative Portrait Options
Not every portrait works equally well. High-contrast portraits with defined features produce the strongest results.
Profile shots often work better than straight-on angles. The contours create more interesting smoke flow patterns.
Dramatic lighting helps too. Flat lighting produces weak guide lines that don’t direct smoke placement effectively.
If your first attempt doesn’t wow you, try a different portrait. The source photo matters more than most people realize.
Taking It Further
Once you master basic smoke portraits, experiment with variations. Try partial smoke effects where only half the face dissolves.
Color-graded smoke can match brand aesthetics or creative themes. Split-toning adds sophistication to the effect.
You can also combine smoke portraits with other techniques. Double exposures work particularly well with smoke effects.
The core technique stays the same. But creative applications multiply once you understand the fundamentals.
Real-World Applications
Smoke portraits work great for music industry projects. Album covers, promotional posters, and artist branding all benefit from this dramatic effect.
Editorial photography also uses smoke effects frequently. Magazine features about transformation, change, or mystery pair naturally with dissolving portraits.
Plus, the technique impresses clients. It looks far more complex than it actually is. That perception gap translates to higher perceived value.
Even personal projects benefit. Your portfolio stands out when it includes striking effects like smoke portraits.
This effect took me about 90 minutes the first time. Now I can create one in under 40 minutes. The workflow becomes automatic with practice.
The Find Edges trick remains my favorite Photoshop shortcut. It transforms hours of manual work into seconds of automated processing. That efficiency makes complex effects accessible to intermediate users.
Start with a strong portrait and quality brushes. Follow the guide lines carefully. And don’t overwork the effect. Those three principles will get you 90% of the way there.