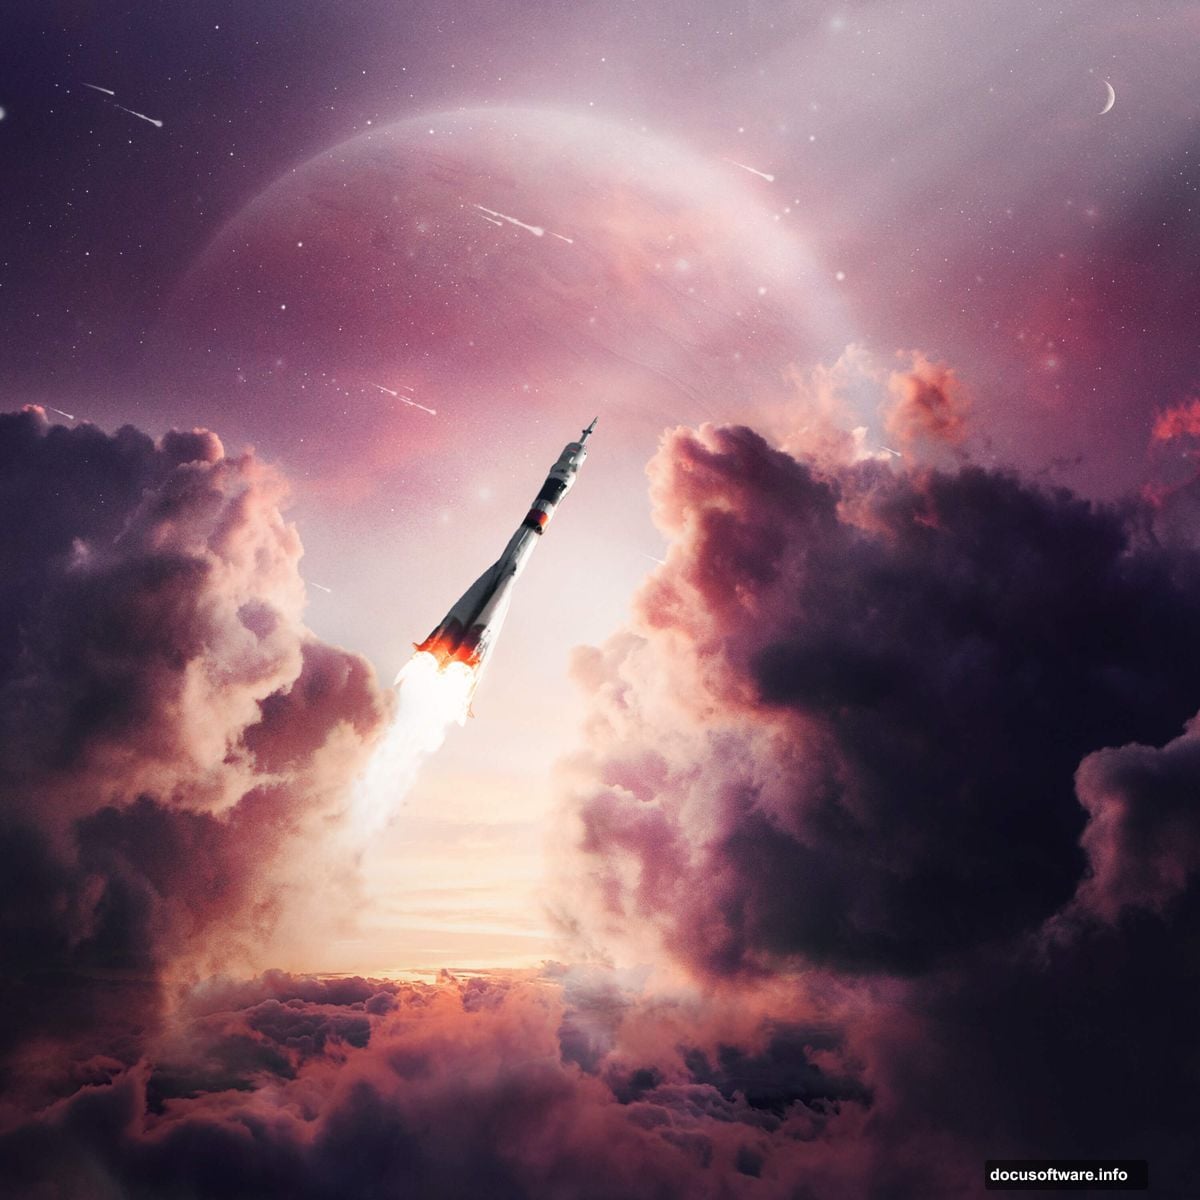
Ever wondered how artists create those breathtaking space scenes that blend reality with imagination? You know the ones. They show dramatic cloudscapes opening up to reveal stars, planets, and cosmic wonders.
Today, we’re building exactly that. This tutorial walks you through creating a “Reaching Space Through the Clouds” photo manipulation. Plus, you’ll learn professional blending techniques that work for any composite project.
No advanced skills required. Just follow along step by step.
What You’ll Need Before Starting
First, gather your resources. This project uses several stock images and custom brushes.
Required images:
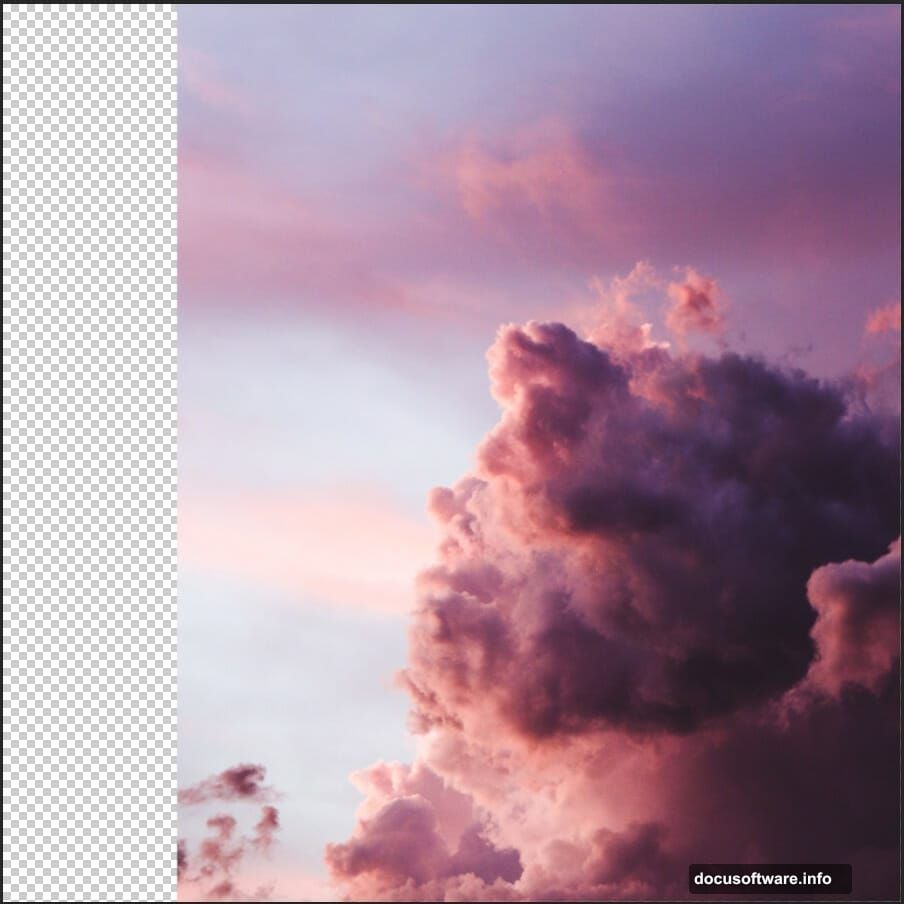
- Two different cloud photos for depth
- Sunset or dramatic sky image
- Moon photograph
- Space rocket image
- Planet with visible surface details
- Star field background
- Comet and ray brushes (downloadable)
Most of these come from free stock sites. Or you can shoot your own clouds on a dramatic day. The key is having high-resolution images that won’t pixelate when scaled.
Software requirements:
- Photoshop CC or CS6
- At least 4GB RAM for smooth performance
- Basic familiarity with layer masks
Got everything ready? Let’s dive in.
Set Up Your Canvas for Success
Start by creating a proper workspace. Canvas size matters more than you think.
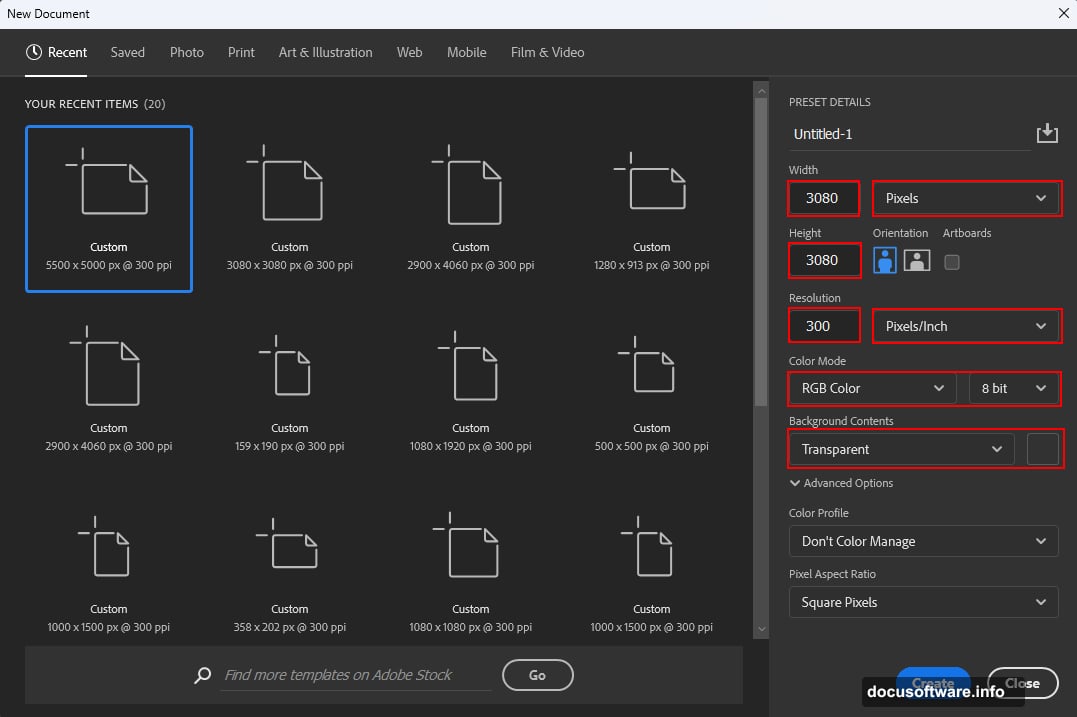
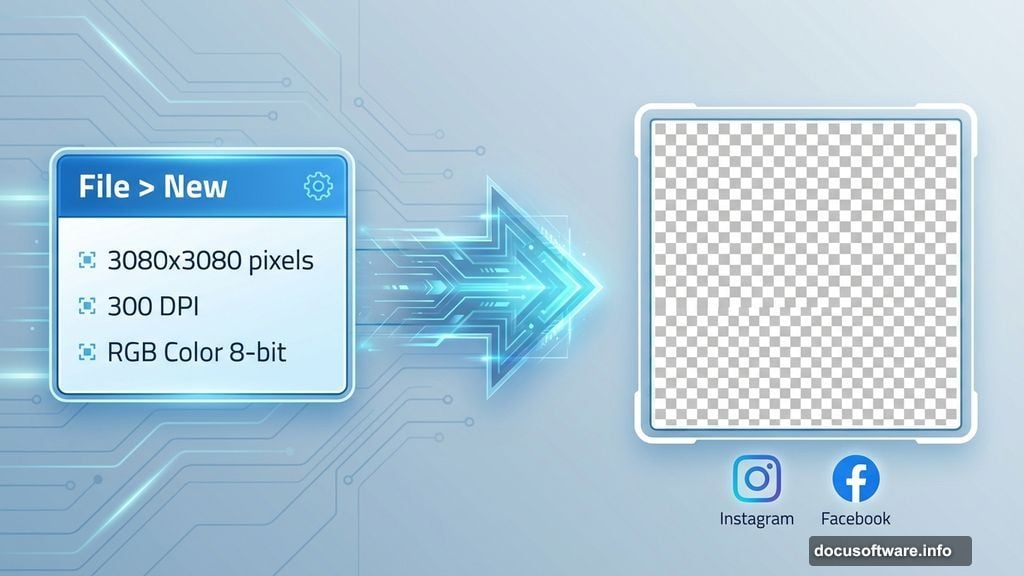
Open Photoshop and hit File > New. Then enter these exact settings:
- Width: 3080 pixels
- Height: 3080 pixels
- Resolution: 300 DPI
- Color Mode: RGB Color 8-bit
- Background: Transparent
Why these dimensions? Square format works perfectly for social media. Plus, 3080 pixels gives you room to crop without losing quality. Meanwhile, 300 DPI ensures your final image looks crisp even when printed.
That transparent background lets you see how elements blend together. No distracting white canvas getting in the way.
Build Your Cloud Foundation
Now comes the fun part. We’re layering clouds to create depth and atmosphere.
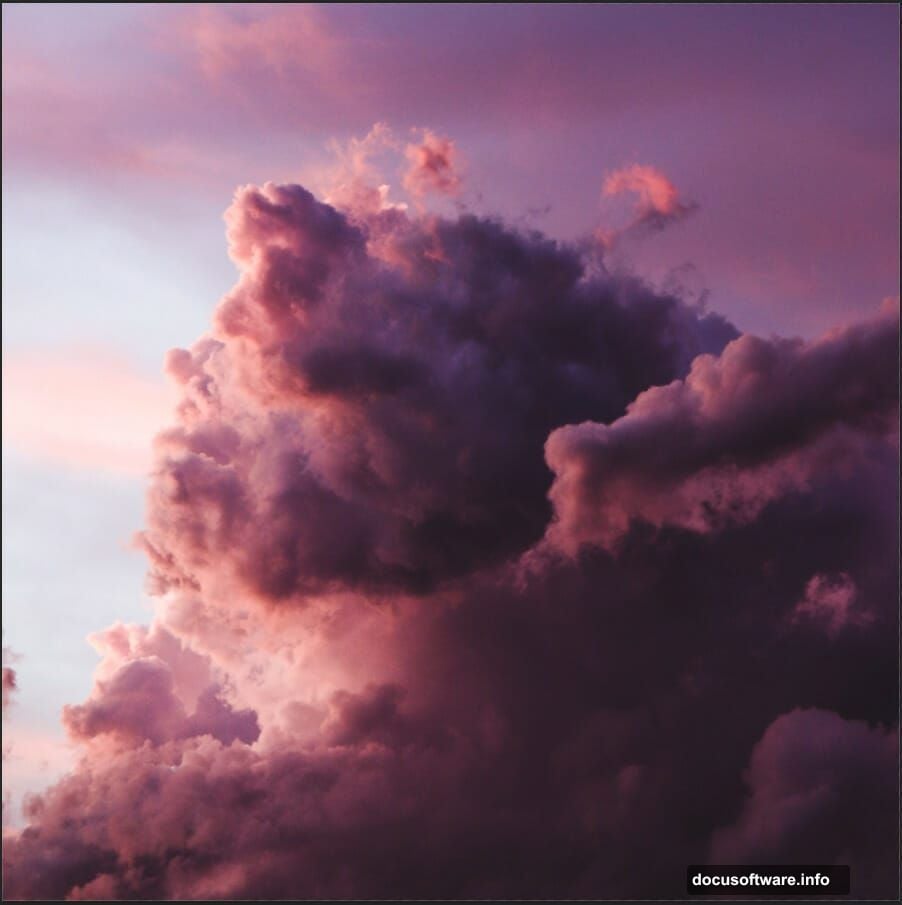
Add the first cloud layer:
Go to File > Place and select your first cloud image. Photoshop drops it in as a Smart Object. Good. That means you can resize without quality loss.
Press Ctrl/Cmd + T to activate Free Transform. Then hold Alt + Shift while dragging a corner handle. This scales the image proportionally from the center. In Photoshop CC, just holding Alt works fine.
Position your clouds to cover roughly the bottom two-thirds of the canvas. You want dramatic, billowing formations that suggest depth. Once happy with the placement, right-click and choose “Rasterize Layer.”
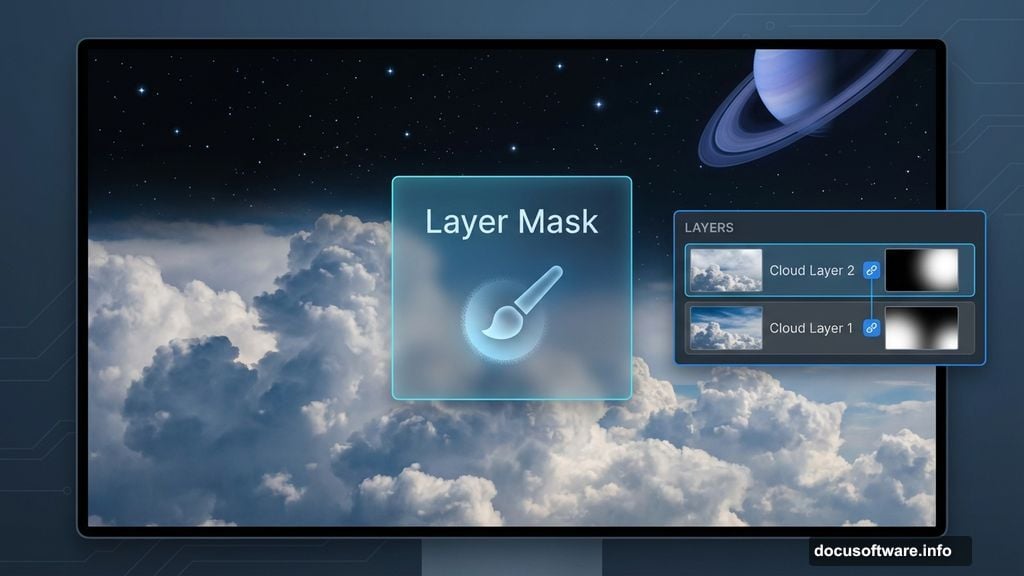
Layer the second cloud set:
Repeat the process with your second cloud photo. But this time, position it differently. Maybe higher up or angled to create visual interest.
Here’s where layer masks shine. Add a mask to this second cloud layer by clicking the mask icon at the bottom of the Layers panel. Then grab a soft round brush (B) and paint with black to hide parts of the sky you don’t want.
Vary your brush opacity between 30-60% for natural blending. Hard edges look fake. Soft, gradual transitions sell the illusion.
The goal? Create a sense that clouds are at different distances. Some closer, some farther away. That’s what makes flat images feel three-dimensional.
Add Your Celestial Elements
Time to bring in the space components. This is where your scene transforms from earthly to cosmic.
Place the planet:
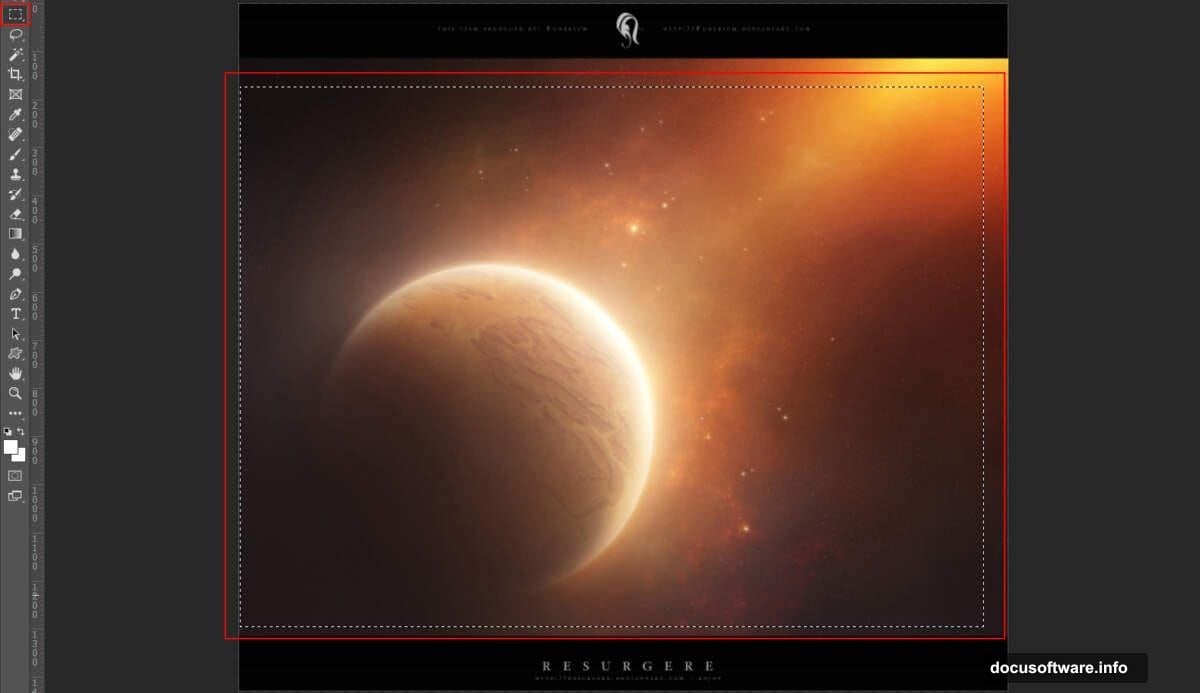
Open your planet image in Photoshop. Use the Rectangular Marquee Tool (M) to select just the planet itself. Skip any surrounding space or stars for now.
Copy (Ctrl/Cmd + C) and paste (Ctrl/Cmd + V) into your main composition. The planet appears on a new layer. Perfect.
Transform it to the right size using Ctrl/Cmd + T. Hold Alt + Shift while resizing to maintain proportions. Position the planet peeking through your cloud layers. Maybe partially hidden by clouds for more drama.
Now add a layer mask. Paint away any visible stars or space background from the original photo. We want only the planet sphere itself.
Change the blend mode:
Click the blend mode dropdown at the top of the Layers panel. Change from “Normal” to “Soft Light.” Watch what happens.
The planet suddenly looks like it’s emitting light through the atmosphere. Its colors blend naturally with your clouds instead of sitting on top like a sticker. That’s the magic of blend modes.
Too intense? Lower the layer opacity to 70-80%. You want the effect noticeable but not overwhelming.
Add the star field:
Open your star field image. Select the entire image with Ctrl/Cmd + A, then copy and paste into your composition.
Resize to fill your canvas using Free Transform. Position the stars in the upper portion where space shows through your clouds.
This layer probably needs a mask too. Use a soft brush to fade stars where they meet your clouds. The transition should feel natural, not like someone pasted clip art.
Consider changing this layer’s blend mode to Screen or Lighten. Both make the black space disappear while keeping bright stars visible. Experiment to see which looks better with your specific images.
Fine-Tune With Adjustment Layers
Your scene is taking shape. But it probably looks like separate images stacked together. Let’s fix that.
Unify the color palette:
Click the adjustment layer icon at the bottom of the Layers panel. Choose “Color Balance” from the menu.
Adjust the midtones slider toward blue and cyan. Just slightly. This gives everything a cohesive, ethereal atmosphere. Space scenes benefit from cooler tones.
Then try adding a “Curves” adjustment layer. Create a gentle S-curve by clicking once in the shadows and dragging down slightly, then clicking in the highlights and dragging up a bit. This adds contrast that makes your scene pop.
Target specific areas:
Here’s a pro technique. Adjustment layers affect everything below them by default. But you can target specific areas using layer masks.
Add a Hue/Saturation adjustment. Increase saturation by 10-15 to make colors more vivid. Then fill the adjustment layer’s mask with black (Alt + Backspace). This hides the effect completely.
Now paint with white on the mask only where you want extra saturation. Maybe on the planet. Or on the most dramatic cloud formations. This selective adjustment creates visual interest without oversaturating the entire image.
Add Dynamic Light Effects
Static scenes bore viewers. Movement and light create energy.
Load your comet brushes:
Download the comet brush pack mentioned in the resources. Then in Photoshop, click the Brush Tool (B) and open the brush preset picker. Click the gear icon and choose “Load Brushes.”
Navigate to your downloaded comet brushes and load them. They now appear in your brush library.
Create a new layer above your clouds. Choose a comet brush and click once to stamp it into your scene. Use Free Transform to rotate and scale the comet to look natural.
Position it as if streaking across the sky between your clouds and space. Maybe angle it toward your planet for visual flow.
Lower the opacity to 60-70%. Comets glow softly, not with harsh brightness. Plus, the semi-transparency helps it blend with surrounding elements.
Paint in light rays:
Load your ray brushes using the same method. Create another new layer.
Pick a warm yellow or orange color. Something that matches your sunset tones. Then stamp a ray brush through a gap in your clouds.
This suggests sunlight or cosmic energy breaking through the atmosphere. Position rays strategically to guide the viewer’s eye through your composition.
Change the layer blend mode to Screen. This makes the rays appear as light rather than painted color. Lower opacity if they feel too strong. Aim for subtle drama, not overwhelming effects.
Polish With Camera Raw Filter
Almost done. Time for the final professional touch that pulls everything together.
Flatten and filter:
First, create a merged copy of all your layers. Press Ctrl/Cmd + Alt/Option + Shift + E. This creates a new layer containing everything you’ve built so far.
With this merged layer selected, go to Filter > Camera Raw Filter. This opens Adobe Camera Raw’s powerful adjustment interface.
Adjust these sliders for impact:
Start with the Basic panel. Increase Clarity by +20 to +30. This enhances mid-tone contrast and makes details pop.
Then boost Vibrance by +10 to +15. Vibrance intelligently increases color intensity without oversaturating skin tones or already-vibrant areas. Perfect for space scenes.
Next, move to the Detail panel. Increase Sharpening to around 70. Apply masking to protect smooth areas like your sky gradients. Hold Alt while dragging the Masking slider to see which areas get sharpened.
Create atmospheric haze:
Here’s a cool trick. In the Effects panel, add Split Toning. Choose a warm orange-yellow for highlights (around 40-50 on the hue slider) and a cool blue for shadows (around 220-230).
Set saturation low, maybe 10-15 for each. This creates subtle color grading that mimics atmospheric perspective. Distant objects appear cooler, closer ones warmer.
Finally, add a touch of vignette. Under Effects, drag the Vignette slider to -10 or -15. This darkens the corners slightly, drawing attention toward your center composition.
Common Mistakes to Avoid
Even following this tutorial, certain pitfalls trip up beginners. Watch out for these.
Over-blending everything:
New compositors often blur and soften so much that images lose definition. Your clouds need some sharp edges. Your planet should show surface detail. Not everything should look dreamy and soft.
Use layer masks with varying brush hardness. Sometimes a 50% hard brush creates better transitions than always using 0% hardness.
Ignoring light direction:
If your planet shows light coming from the left but your clouds are lit from the right, the scene feels wrong. Viewers can’t articulate why, but their brains reject the inconsistency.
Check your source images. Make sure light hits everything from roughly the same direction. Or use adjustment layers to correct the lighting on individual elements.
Forgetting to add depth:
Flat composites happen when every element shares the same contrast and sharpness. Objects farther away should be less sharp and lower contrast.
Add a slight Gaussian Blur to your star field. Maybe reduce contrast on distant clouds. This atmospheric perspective makes your scene feel three-dimensional.
Overusing effects:
That comet brush looks cool. But stamping five comets across your sky looks like a desktop wallpaper from 2005. Less is more.
Choose one or two dramatic effects and execute them well. Better to have one perfect light ray than ten mediocre ones.
Take It Further
You’ve built a solid foundation. Now customize it.
Try adding a rocket or spacecraft instead of just a planet. Position it emerging from clouds, engines glowing. That adds narrative to your scene.
Or experiment with different times of day. A sunset palette creates warmth and hope. Meanwhile, deep blue twilight tones suggest mystery and vastness.
Consider adding a small human figure on a cliff or hilltop, gazing up at your cosmic scene. This gives viewers a point of connection. Someone experiencing the wonder they feel looking at your image.
The techniques here apply to countless other composites. Master layer masks and blend modes, and you can combine any elements convincingly.